Chapter 3: What Gear is Important

Understanding the Camera’s Capabilities and Limitations
Lenses
Flash units
Tripods
Monopods
Shutter Releases and Remotes
Timers
Already a daunting task, photographing in low light can be made so much more difficult without the right gear. You must consider the camera’s ability to shoot in low light with low noise, and whether it has the ability to keep the shutter open for extended periods of times. You have to consider the ability of your lenses, what the range of apertures are, and whether you will be able to zoom in an out and what effect that may have on the available apertures.
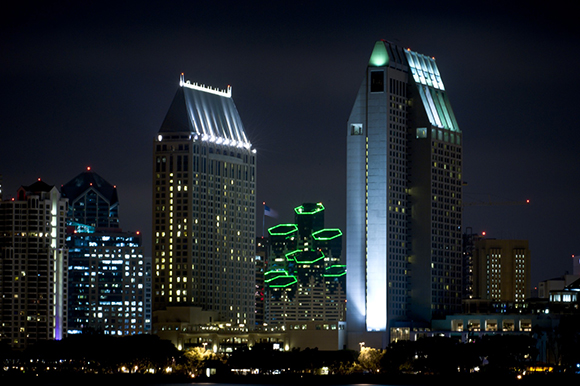
When it comes to shooting in low light, especially when using long shutter speeds, you need to keep your camera rock steady, so you have to have a tripod or, at the very least, a monopod. Another very useful piece of equipment you must consider is a cable-release remote control that allows you to trigger the shutter release of your camera without actually touching the camera. There are also some remotes that allow you to keep the shutter open for extended periods of time when using the Bulb feature of your camera. These tools make it possible to capture images that need longer exposure times than the camera can do without them. For example, in Figure 3-1 I needed to keep the camera steady for 50 seconds to get the correct exposure of the San Diego skyline, something that couldn’t be done without a tripod and using the bulb mode because the longest exposure without the bulb mode on my camera is only 30 seconds.
3-1
ABOUT THIS PHOTO The San Diego skyline looks beautiful when photographed from Coronado Island. Taken at 50 seconds, f/22, and ISO 200.
Understanding the Camera’s Capabilities and Limitations
Any camera can be used for night or low-light photography, but there are some features that can make the task easier. The first is the ability to produce image files that contain low digital noise at higher ISO settings. In Chapter 2, I explained that you could increase the ISO to make the camera sensor seem more sensitive to light, which allows you to photograph in lower-light situations. The downside to the increased ISO setting is the increase in digital noise. The good news for photographers who want to shoot in low light using high ISOs is that camera manufacturers have really improved the capabilities of their cameras, and while there is still noise present, it is greatly reduced compared to cameras that are only a few years old.

Boosting the ISO is only one way that digital noise is created in your image; the sensor heating up when using very long shutter speeds can also create digital noise. Although that cannot be helped, I talk about how you can reduce exposure times in order to avoid overheating your camera sensor for certain types of long exposure subjects in Chapter 7.
The type of low-light photography that can really benefit from the advances in the low-noise, high-ISO capability of newer cameras is when you need to use higher shutter speeds to freeze the action in low light. This includes weddings, concerts, and indoor or nighttime sporting events.
For more information on capturing great shots in these low-light situations, see Chapters 5 and 6.
The high ISO and digital noise problem
It’s important to know how much noise is created when you use higher ISO settings and what you can do about it. Because this chapter is all about gear, the first thing to do is to see what range of ISO settings is available on your camera. The usual range of ISO settings is between 100 and 6400, and some cameras, like the Nikon D3S, go all the way to 102,400. Now that doesn’t mean that the there is low noise at these higher settings; quite the contrary — there is a lot of noise but not as much as was produced by cameras manufactured five years ago.
The real question you need to ask yourself about your camera (or one you are planning to buy) is what the usable ISO range is; this is the range of ISO settings that produce images with acceptable noise. I have found that I can push the ISO to 3200 and higher and still get results that I am happy with, like the image in Figure 3-2.

3-2
ABOUT THIS PHOTO To get the photo of David Hinds, best known as the lead singer of the band Steel Pulse, I needed to use a high ISO of 3200. This was the only way to get the proper exposure with the very low lighting on the stage. Taken at 1/160 second, f/2.8, and ISO 3200.

If I am photographing a concert and I know the images are going to be used on the Internet and might be printed at a small size, then I am willing to use a much higher ISO than if the images were meant to be printed in a higher resolution or size.
Bulb mode and long shutter speeds
When camera manufacturers talk about the shutter speed of their cameras, they usually focus on the fastest possible speed that the camera has available. For example, the Nikon D700, which I use a lot, has a top shutter speed of 1/8000 second, which is really fast. The Canon EOS T3 has a top shutter speed of 1/4000 second, which is still plenty fast to freeze the action on even a very fast-moving subject. However, when it comes to shooting using very long shutter speeds, both of these cameras — in fact, most cameras — can be set to a speed of 30 seconds. While 30 seconds might seem like an eternity when taking a photograph, what do you do if you need a longer shutter speed, such as 90 seconds? This is where the bulb (often called B) setting on your camera comes into play. The bulb setting keeps the shutter open as long as the shutter release button is pressed (either the one on the camera or the one on a cable release or remote). Some cameras have a two-press bulb mode where the first time you press the shutter release the shutter opens, and the second time you press it, the shutter closes.

You need to check your camera’s manual for any limitations on the length of time the shutter can be kept open on your camera. The usual limit is 30 seconds unless you use the bulb mode.
The bulb setting is only available when shooting in manual mode. Check your camera manual for how to access the bulb mode.
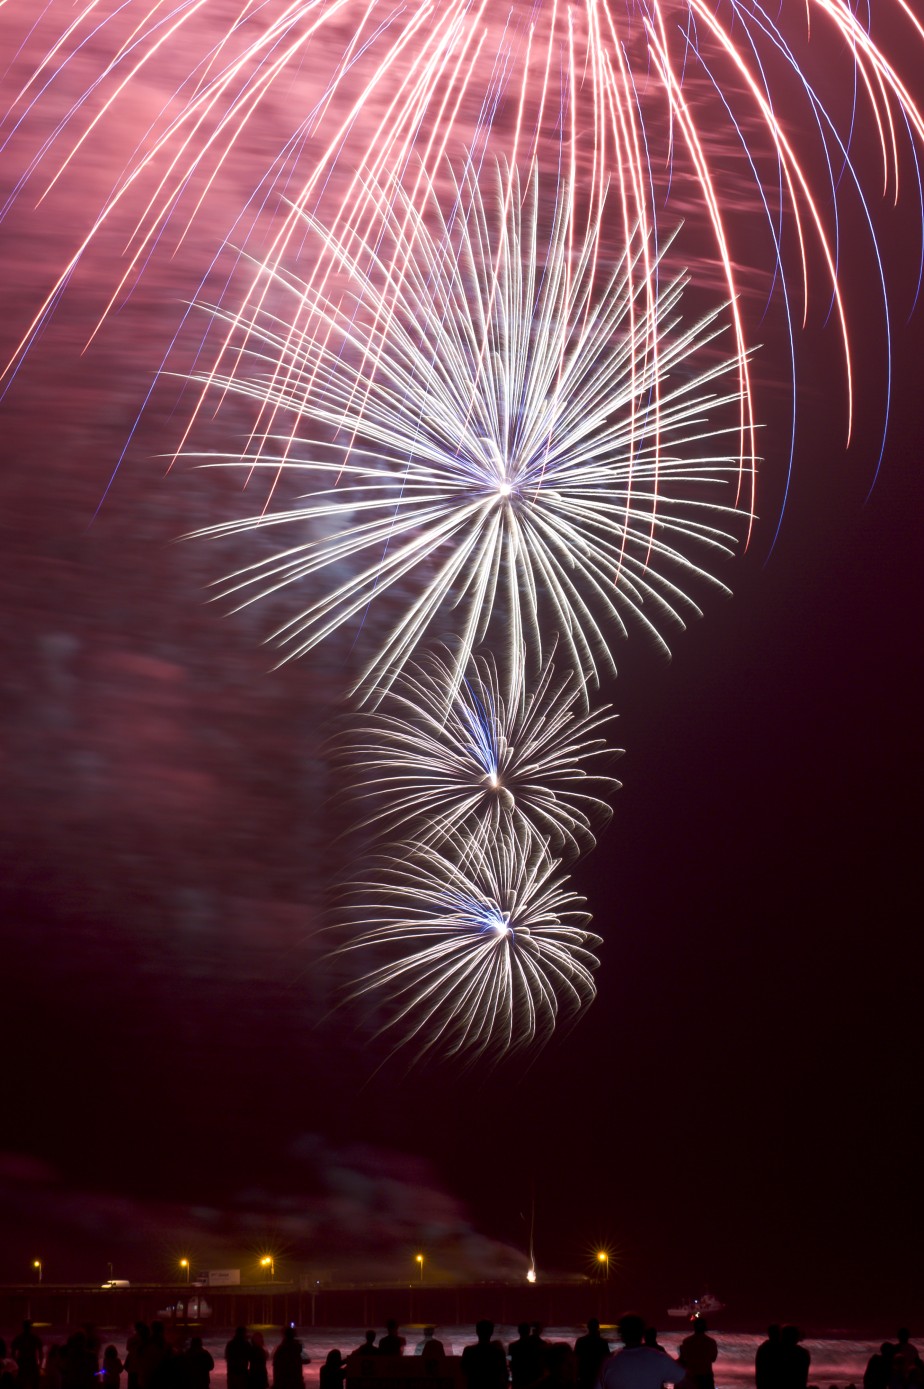
If you are wondering when you might use a shutter speed longer than 30 seconds, think about fireworks, star trails, and light painting. I used the Bulb mode and a cable release to photograph the fireworks in Figure 3-3 instead of a set shutter speed because it made it much easier to time the fireworks. I just held the shutter release button on the cable release when the fireworks explosions started and released it when I saw the explosions had finished.
3-3
ABOUT THIS PHOTO This was taken using a Nikon D700 set on Bulb mode, allowing me to watch the fireworks and decide when to start the exposure and when to end it. The long exposure also allowed me to capture some of the movement in the smoke as the wind blew it to the left. Taken at 6.3 seconds, f/16, and ISO 200.
Lenses
One of the big advantages of using a digital Single Lens Reflex (dSLR) camera is that you can change the lens that is attached to the camera, which gives you an unlimited choice of focal lengths. The lens choice is critical when you are planning on photographing fast-moving subjects in low light. You want to choose lenses with a wide maximum aperture. You must pay attention to what happens to that aperture when using zoom lenses that have variable apertures because as the lens changes focal length, the widest aperture changes as well.
You might also consider a lens that has vibration reduction, as this technology can help you get a sharp image when used correctly. All these factors go into choosing the right lens for the job.
Focal length
The focal length of a lens is the distance between the center of the lens and the sensor; it is usually shown in millimeters. That’s really accurate but doesn’t tell the whole story. The focal length measurement can be used to determine how much of the scene in front of the lens is captured and what effect it has on the subject. The focal length can be translated into a measurement called the angle of view, which describes the amount of the scene in front of the lens that is captured. The shorter the focal length the wider the angle of view, the longer the focal length the smaller the angle of view. For example, in Figure 3-4 I used a 17mm focal length to capture as much of the stage as I could from where I was standing, while in Figure 3-5 I used the longer focal length to only capture a small part of the scene, in this case a close-up of Bob Weir, the leader of the band. The longer the focal length, the less of the scene in front of the lens is recorded and the smaller the angle of view. So a lens with a focal length of 35mm captures more of the scene than a lens with a focal length of 200mm. Lenses with short focal lengths are considered wide-angle lenses, while those with long focal lengths are considered to be telephoto lenses.

3-4
ABOUT THIS PHOTO I used a 17-55mm lens at the 22mm focal length which allowed me to capture four members of the band in a single shot. Taken at 1/80 second, f/4.0, and ISO 400.

3-5
ABOUT THIS PHOTO I used an 80-200mm lens at the 200mm focal length to really get in close for this shot of Bob Weir, former guitaist for the Grateful Dead. Taken at 1/160 second, f/2.8, and ISO 500.
Lenses can be divided into two categories: those with a single focal length (called prime lenses) and those that have a range of focal lengths (called zoom lenses). Prime and zoom lenses both have strengths and weaknesses.
The advantages of prime lenses are that they can have a wider maximum aperture than a zoom lens, can be cheaper than their zoom equivalent, and can be smaller and lighter than zoom lenses. The disadvantage of using a prime lens is that it only has one focal length, so to change the focal length, you either have to change the lens or physically move.
When it comes to zoom lenses, the main advantage is that you can change focal lengths without having to change lenses, and that makes it easy to change the composition of the image without having to move. The downside of zoom lenses is that they are larger and heavier than prime lenses.
So which type of lens is right for you? That depends on two things: your photography needs and your budget. As I mentioned before, prime lenses can be much cheaper than zoom lenses, especially zoom lenses with a wide maximum aperture. For example, the Nikon 50mm f/1.8D lens sells for $135, while a 17-55mm f/2.8G IF-ED lens sells for $1,540. That’s a huge price difference, especially when you take into account that the 50mm prime lens has a wider maximum aperture than the 17-55mm zoom lens. Of course, not all primes are cheaper than their zoom equivalent lenses. For example, the Nikon 200mm f/2 prime lens costs $6,000, while the Nikon 70-200mm f/2.8 zoom lens costs $2,400. (I know that is still a lot of money.) If you need to have the widest opening possible, then you will have to use a prime lens because the one real advantage is that they can have much wider apertures than the zoom lenses. For example, in Figure 3-6 I wanted to get a photograph of Jackie Greene’s guitar before he took the stage, and, because the light was really low, I needed a lens with a very wide maximum aperture to get the most light possible. I used an 85mm f/1.4 lens combined with an ISO of 3200 to get the shot.

3-6
ABOUT THIS PHOTO Because of the very low light on stage, I used an 85mm f/1.4 lens to get this shot. While the lens could open all the way up to f/1.4, I needed to use it at f/2.0 since the depth of field at f/1.4 would have been too shallow. The f/2.0 aperture is still wider than any of the zoom lenses available. Taken at 1/160 second, f/2.0, and ISO 3200.
One advantage that zoom lenses have over prime lenses, when it comes to photographing at night, is that you can create some very cool effects by zooming in or out while the shutter is open. For example, when photographing lights, a zoom lens can create great light trail effects, as shown in Figure 3-7.

3-7
ABOUT THIS PHOTO By zooming out while taking the image, the light trails seem to stretch from the edges to the cityscape. Taken at 15 seconds, f/9.0, and ISO 100.
More on creating light trails with zoom lenses can be found in Chapter 8.
Maximum aperture
The maximum aperture of the lens tells you how big the biggest opening is. The bigger the opening, the more light can reach the sensor. In low-light situations where you need to have a fast shutter speed to freeze the action, the more light that can reach the sensor through the lens, the better. When you look at a lens, you see that it has some descriptive numbers engraved or printed on the lens barrel. These should include the focal length and the maximum aperture, as shown in Figure 3-8.

3-8
ABOUT THIS PHOTO The information plate on the 300mm f/4.0 lens showing the focal length and the maximum aperture.
Constant- and variable-aperture lenses
There are two different types of zoom lenses: those that have a constant maximum aperture and those that have a variable maximum aperture. Lenses that have a variable maximum aperture are those where the widest aperture available changes, depending on the focal length. When the lens is at the shortest focal length, it has the widest aperture; as the focal length gets longer, the aperture gets smaller. These lenses are very popular because they are much cheaper, smaller, and lighter than equivalent lenses that have a constant aperture. The downside to these lenses is that as you zoom out, you have to change the shutter speed or ISO settings because the aperture setting is changing automatically.
Consider a 17-55mm f/2.8 lens. It has a range of focal lengths from 17mm to 55mm and a maximum aperture of f/2.8 at all of these focal lengths. So no matter what focal length you are using, the maximum aperture available is f/2.8. An 18-55mm f/3.5-5.6 lens, on the other hand, might be much less expensive than its f/2.8 counterpart, but there is a really big difference in the size of the maximum aperture. The 18-55mm lens has a range of maximum apertures that goes from f/3.5 to f/5.6 depending on the focal length. At the shortest focal length, 18mm, the maximum aperture is f/3.5, and as you change the focal length, the maximum aperture changes. By the time the focal length is at 55mm, the maximum aperture is f/5.6. This change is more than a full stop of light, so at the longest focal length, there is less than half the amount of light reaching the sensor as there is at the shortest focal length. So when you use one of these lenses you need to adjust the shutter speed and or the aperture when using the longest focal length compared to the shortest focal length.
One lens I use for all my outdoor shooting is the 80-400mm f/4.5-5.6 lens, shown in Figure 3-9. This lens is great for long exposures, and the wide range of focal lengths makes it very versatile; however, this lens isn’t great for shooting sports or events in low light because at the 400mm focal length the widest aperture available is f/5.6 which isn’t very wide when shooting in low light.

3-9
ABOUT THIS PHOTO The description on the lens shows that the maximum aperture is 1:4.5-5.6 or f/4.5-f/5.6, meaning that at 80mm the widest aperture is f/4.5 while at 400mm the maximum aperture is f/5.6.
There is nothing wrong with variable-aperture lenses, and many times they can be just as sharp as any other lens. The smaller size and weight make them much easier to carry around, but it is important to know what their limitations are, especially when shooting in low light. The lenses are great for those situations where you can use longer shutter speeds and smaller apertures, but they don’t do so well in situations where you need to use faster speeds to freeze the action.
Vibration reduction and image stabilization
Camera and lens manufacturers have developed technologies that help reduce image blur that comes from camera shake. Camera shake is caused by the small camera movements that can happen when using a long lens and slower shutter speed, photographing from an unsteady position, or using a shutter speed that is too long to hand-hold the camera steady. Each camera and lens manufacturer has a slightly different method with a different name.
The types of vibration reduction and image stabilization can be broken down into two categories: in the lens and in the camera. The lens-based system has the stabilization technology built into the lens, and the control to turn the system on or off is on the lens itself, while the camera-based system has the technology built into the camera body and works with any lens attached to the camera. For example, Nikon and Canon use a lens-based system, while Sony uses a camera body-based system.
The vibration reduction systems work best when photographing static scenes with little subject movement; they originally were meant to be used when handholding a camera and not when the camera is mounted on a tripod. Some of the newer vibration reduction technology has now been designed for use with the camera mounted on a tripod and may have a special tripod setting. It’s best to check the manuals for your camera and lenses. As you can see in Figures 3-10 and 3-11, where the same sign was photographed at 1/8 second in both images, a slow shutter speed is nearly impossible to hold steady. In Figure 3-10 the vibration reduction feature was turned off and in Figure 3-11 it was turned on. You can see that there is a difference in how sharp the two images are compared to each other.

3-10
ABOUT THIS PHOTO The House of Blues sign makes a nice example of the differences in using and not using the vibration reduction technology that is in my Nikkor 70-200mm f/2.8 lens. This photo was shot without using the vibration reduction technology at 1/8 second, f/6.3, and ISO 500.

3-11
ABOUT THIS PHOTO The House of Blues sign again but this time the photo was shot using the vibration reduction technology at 1/8 second, f/6.3, and ISO 500.
There are also times when this technology should not be used because there is a brief lag time between pressing the shutter button and the actual image being captured. This is because it takes a moment for the vibration reduction or image stabilization feature to read the movement in the scene and counteract it. This slight lag can cause problems when photographing moving subjects because the subject can change position by the time the shutter is actually released. If possible, it is always better to use a tripod to keep the camera steady.
Flash units
One of the easiest ways to deal with a low-light situation is to just add some light of your own. That’s where the flash comes into play. Using the flash allows you to add a little or a lot of light to a scene that might be too dark to photograph any other way. Most dSLR cameras come with a built-in flash (top-end pro cameras do not), but the light produced from that little pop-up flash isn’t very flattering, and many times you are probably better off not using it at all. The larger, more powerful and adjustable flash units are a better solution since they allow you to not only add light to a scene but control the direction and the intensity. Camera and flash technology has advanced to the point where you can now easily use a dedicated flash unit on or off your camera. You can even expand and use multiple flashes as well.
Using a single flash
The easiest way to use a dedicated flash unit is to just slide it onto the hot shoe (sometimes called the accessory shoe) on the top of your camera, turn it on, and start taking photographs. Because the camera and the flash are meant to be used together, the information from the camera is sent to the flash controlling the flash output, and the information from the flash is sent to the camera, allowing the camera to know that a flash is being used. This makes the flash behave as if it were the built-in flash but with better results. One of the immediate results is the increase in distance between the flash and the lens. This alone helps to reduce any red-eye when photographing people because the light is not as easily reflected back from the back of the eye through the pupil, which causes red-eye. The real advantage to the dedicated flash unit on the camera is the ability to adjust the angle of the flash head. Many of the flash units can not only angle the flash head up, but they can also rotate the flash head so it points at an angle, as shown in Figure 3-12.

3-12
ABOUT THIS PHOTO The Nikon SB-900 can be angled from straight forward to straight up, and the flash head can also be rotated left or right.
The other advantage to the dedicated flash unit is that you can use a small diffusion dome on it that will make the small, harsh light more diffused and softer. If the flash didn’t come with a diffusion dome, then you can buy one made by Sto-Fen at any good camera shop. There are also a lot of third-party light-modifying tools available from companies such as Gary Fong, LumiQuest, and Honl. These just attach to the head of the flash and can really change the light that is produced. They work both when the flash is attached to the camera and when it is used off camera.
The easiest way to produce a more flattering light when using a flash on the camera is to angle the flash head at a nearby surface to bounce the flash back at the subject. A nice white ceiling or wall does this really well and turns a small, hard flash into a large, soft light source. The difference is noticeable, as shown in Figures 3-13 and 3-14.

3-13
ABOUT THIS PHOTO This photo was taken with the flash pointed forward, and while it isn’t a bad photo, you can see the harsh shadows right behind the puppy’s chin. Taken at 1/30 second, f/5.0, and ISO 200.

3-14
ABOUT THIS PHOTO This photo, taken just after Figure 3-11, had the flash aimed up at the white ceiling; this bounced the light, making it much softer and eliminating the hard shadow behind the puppy. Taken at 1/30 second, f/5.0, and ISO 200.
Off-camera flash
Using an accessory flash off camera can make a dramatic improvement in a photo because you can place the flash exactly where you want the light and you are not limited to the position on top of the camera.
Most accessory flash units come with a small stand that allows the flash to stand upright. These little stands have a threaded mounting hole in the bottom and can usually be attached to a tripod or a light stand using a mounting screw. There are also a wide range of flash holders that make it easy to position the flash just about anywhere. One of the most useful is the Manfrotto 175F Justin Clamp, which when attached to the flash allows the flash to be clamped to nearly anything. For example, I have used this clamp to attach the flash to a bookshelf, a table edge, and even the back of a chair. Once the flash is in position, you must trigger it from the camera. Currently, there are three different methods:
• Remote Triggers. Remote triggers are where one unit attaches to the flash and the other attaches to the camera. Then when you press the shutter release button, the flash gets a signal from the camera and fires. This method works really well, but you do have to buy extra gear, including a set of Radio Poppers or Pocket Wizards. I used a Pocket Wizard to fire the off-camera Nikon SB900 Flash through a light-modifying umbrella in Figure 3-15 to create a softer, bigger light source from the side instead of from the camera direction.
3-15
ABOUT THIS PHOTO The flash was fired by using a set of Pocket Wizards, one on the camera hot shoe and the other attached to the flash with a cable. When the shutter release button was pressed, the flash fired. The umbrella was to help turn the small flash unit into a softer, bigger light source. Shot at 1/25 second, f/5.6, and ISO 200.
• Built-in trigger. The ability to use this method depends on what camera and flash system you are using. This system allows the camera to trigger the external flashes by either using the built-in flash or a flash unit mounted on the camera. The advantage to this type of system is that the camera and the flash units are communicating with each other and can adjust the amount of light produced by the flash depending on the scene. This type of triggering is usually line-of-sight triggering meaning that the off-camera flashes need to actually see the on-camera flash to work.
• Slave trigger. The third method depends on the type of flash you have, and whether it can be set to fire when using a slave trigger. A slave trigger just fires the flash when it sees another flash fire. This can be an external slave trigger, or it can be built right into the flash. Check your flash’s manual to find out if it has this capability. This type of technology is also line-of-sight as the slave flash unit needs to see the main flash to fire.
Using multiple flashes
Using multiple flashes is just as easy as using one off-camera flash, except you now have multiple light sources. If you are triggering the external flash units with a remote trigger such as a Pocket Wizard or Radio Popper, then you need a unit for each of the flashes that you want to trigger.
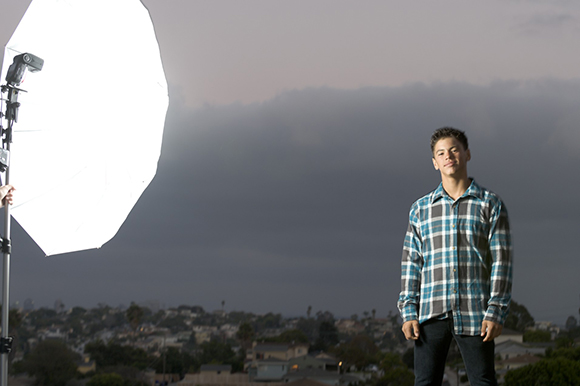
If the method you use to trigger the external flashes is a line-of-site solution like the Nikon CLS or Canon system, then you need to make sure that the sensor on the flash that needs to see the light from the master flash is visible. I used two off-camera Nikon flash units to light the portrait of Nicole in Figure 3-16. I wanted to have a main light to the left of the camera and a less powerful light to the right of the camera to even out the light.

3-16
ABOUT THIS PHOTO I shot this portrait of Nicole after the sun set, and because the natural light wasn’t helping, I used two flashes — one on either side of the camera — to add the light I wanted. Taken at 1/50 second, f/7.1, and ISO 200.
Tripods
In night and low-light photography, one of the most important accessories you can have is a tripod. It is impossible to hold your camera absolutely steady when using long shutter speeds. The longer the shutter is open, the greater the chance that the camera will move during the exposure, and the resulting photo will be out of focus or, at the very least, a little blurred. To counteract this camera movement, the camera needs to be locked into a tripod to keep it steady during the exposure.
There are many tripods available today in a wide variety of materials, weights, heights, and price points. Tripods are actually made up of two different parts: the tripod legs and the tripod head. Some of the less expensive tripods come as one piece, but the more advanced tripods come as separate pieces, which means you can mix and match the legs and the heads to make your perfect tripod. You must consider the weight that the tripod you choose can support — will it be enough for your camera and the largest lens you work with? For example, I need a solid tripod to hold my camera, and the model shown in Figure 3-17 is a great combination of weight and stability. It is light enough to carry easily and still holds my camera steady.

3-17
ABOUT THIS PHOTO A tripod is only useful if you are willing to carry it with you. This tripod is not so heavy that I never want to carry it to the shooting location and it is still steady enough for my camera and lens.
Tripod legs
Picking out the perfect tripod should be a very personal experience. What is perfect for me might not be the same for you, but there are some things to keep in mind when choosing a new tripod.
Not all tripods are created equally, and it is often a case where you get what you pay for. If you are serious about taking long-exposure photographs with the shutter open for seconds or minutes at a time, then you need a very steady tripod. There are a variety of tripod materials, all of which can affect weight, price, and stability.
The first thing to consider is the type of material that your tripod legs are made out of:
• Wood. Wood is an excellent material for tripod legs because the wood has a natural ability to dampen any vibrations, which keeps the camera very steady. You can still buy wooden tripod legs, but they are not very common anymore. The downside to wooden tripod legs is that they are very heavy and expensive.
• Aluminum. Aluminum is an inexpensive alternative to wood and is very common in tripod leg construction. Using aluminum allows manufacturers to create a lightweight, stable, and durable tripod. One downside to aluminum legs is that they can be very cold to the touch when shooting in cold climates.
• Carbon-fiber. Carbon-fiber tripod legs are made from layers of carbon fibers, creating legs that are lighter than wood and aluminum and can be as stable as, or even more stable than, wooden legs. The downside to these tripod legs is that they can be very expensive.
• Other materials. Some manufacturers are now creating tripod legs using newer and more exotic materials such as basalt and titanium. The goal is to create tripod legs that are lightweight and stable and in some cases less expensive than the carbon-fiber legs. Tripod legs using these materials can range in price from the very affordable to the very expensive. One of the real advantages of the basalt tripod legs is that they are light and very durable and can weigh as little as 5 pounds for a full size tripod.
When it comes to Manfrotto tripods, it can be difficult to tell the difference between the aluminum and carbon-fiber legs because they can look the same; check the model number. The X in the model number means aluminum, while a CX stands for carbon-fiber construction.
Here are some other important considerations:
• Height. The maximum height of the tripod without taking the center column into account should be comfortable for you to use. If the tripod isn’t tall enough, then you will be crouched over in very uncomfortable shooting positions, which can hinder you from getting great compositions.
• Weight. Because you will likely need to carry your tripod around with you when shooting at least part of the time, weight is an important consideration. You need to be honest with yourself about how much weight you are willing to carry with you, because if the tripod is too heavy, then you are not likely to use it as often as you should.
• Leg-locking mechanism. One of the great things about tripod legs is that they collapse and extend so that they can be stored and transported easily. There are two different types of mechanisms used to lock the legs in place: locking levers and twist locks. Make sure that the locking mechanisms work and will keep the tripod legs locked into place on any tripod you consider.
• Feet. Many people don’t look too closely at the tripod feet, but they are important, especially if you want to use your tripod in certain areas when the feet can either be helpful or hurtful. For example, some tripods come with spiked tripod feet, which are great on rocky or sandy surfaces, while others come with rubber feet that work great on smooth surfaces. Other tripods have feet where the rubber feet can be screwed off or retracted allowing the spiked feet to be used. When I am shooting on the beach and the tripod is on the sand, I use the spiked feet and I make sure that the tripod is firmly pushed into the sand to make it as stable as possible.
Tripod heads
The tripod head is the part that actually holds the camera steady and allows you to fine-tune the camera placement. You can usually purchase it separately from the tripod legs. Because each type of tripod head works a little differently, it pays to look at them and determine which one works the best for how you shoot. The three most common types of tripod heads are as follows:
• Ball head. The ball head is basically a ball that connects to your camera and that can move in any direction. It has a locking mechanism that allows you to lock the ball exactly where you want it. The ball head allows you to adjust and lock the camera into place with one control, making it very easy to rapidly change the position of the camera. The bigger your camera-and-lens combination, the bigger the ball head you need to support the weight.
• Three-way pan head. This is the more traditional tripod head, with separate controls for each of the three axes. You can adjust the horizontal and the vertical, and switch between landscape and portrait orientation, with each of the adjustments having its own controls. The advantage to this type of tripod is that you can adjust each of the controls without changing the others. So, for example, if you just want the camera to be moved up or down, then all you have to do is adjust that control without having the camera move on any of the other axes. This is not as easy to do with a ball head.
• Smooth panning head. This is used more for video than still photography, but because many of the dSLR cameras now shoot video, this tripod is becoming more popular for people who want to get the most bang for their tripod-purchasing money.
Many times it is a good idea to weigh the tripod down, which adds to its stability. A couple of small sandbags, specially made for the job and available at good camera stores, do wonders.
Extras
Many tripods and tripod heads come with some cool extras. These extras can be important, depending on what you use them for, and you should consider whether your photography might benefit from one of them before investing. Here are a few of the more common ones:
• Bubble level. Many tripods and tripod heads have built-in bubble levels, giving you a quick way to make sure that everything is level. When working at night or in low light, you will need a small flashlight to check the levels.
You can also get a bubble level that fits in the camera’s hot shoe which will show you whether the camera is level even if the tripod is not.
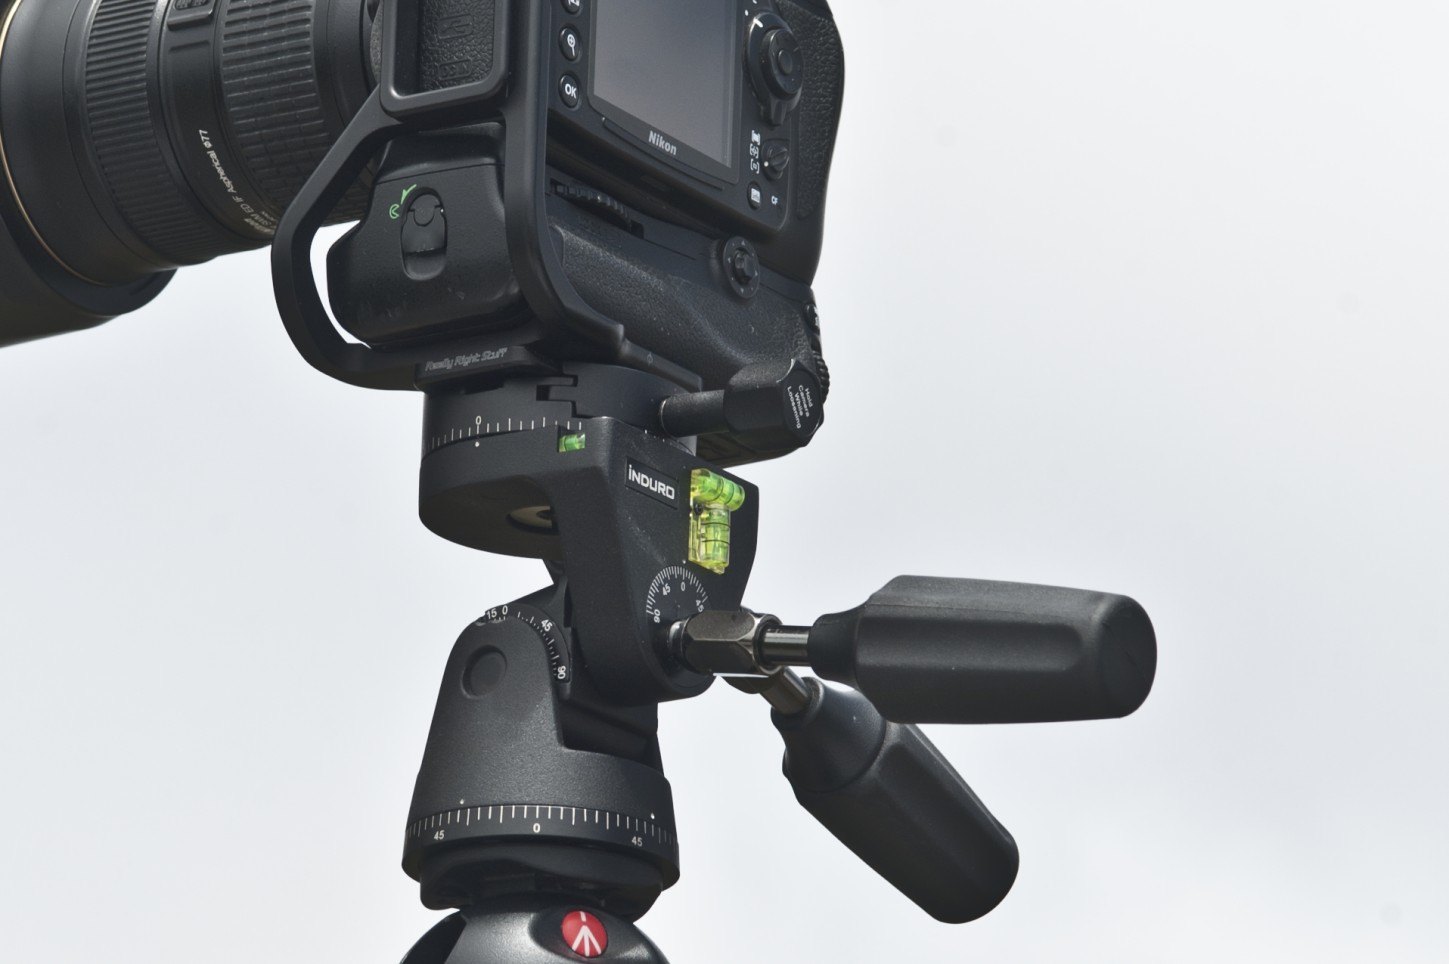
• Quick release plate. A quick release plate allows the camera to be mounted and removed from the tripod quickly and securely. The plate screws into the tripod mounting hole on the bottom of the camera (or lens collar) and then the plate is attached to the tripod head with some sort of quick release mechanism. Different manufacturers use different types of plates; usually they can’t be mixed. There are some industry standards, such as the Arca Swiss-type release clamps. I use an L bracket from Really Right Stuff that fits in an Arca Swiss clamp on my tripod, which allows me to easily mount the camera in either a horizontal or vertical orientation. In addition to making it easy to attach the camera to the tripod, having a quick release plate on each camera means that you can switch cameras easily. The Induro tripod head shown in Figure 3-18 uses the Arca Swiss quick release system.
3-18
ABOUT THIS PHOTO One tripod head that I use is made by Induro, and I love all the extras, including a set of built-in levels and the angle grid, which allows me to set it exactly the way I want to.
• Center-column weight hook. Some tripods have a hook that comes out of the bottom of the center column, which allows you to hang a weight from the tripod to give it extra support. This can really help to keep the tripod rock steady, especially if it is windy out.
Monopods
A monopod is basically a stick that you can attach to your camera to help steady it. It usually looks like one leg of a tripod and screws directly into the tripod screw of the camera or lens. Monopods are often used by sports and event photographers to help support and steady those very long (and heavy) lenses they use. Monopods can be an invaluable tool for shooting in low light, especially in areas where tripods are not allowed, because they allow you to steady the camera while using shutter speeds that would cause blurring if the camera was handheld.
Picking out a monopod is very similar to picking out a tripod, and you will find that monopods are made and sold by the same companies that make tripods. Here are some things to take into account when buying a monopod:
• Height. Is the monopod tall enough to use comfortably? Because the monopod is designed to be used to support a camera at the eye height of the photographer, make sure that the monopod you pick is tall enough for you.
• Strength. Monopods are designed to support cameras and long, heavy lenses, but make sure that the model you pick can support your camera now and any gear you plan on buying in the near future.
• Weight. Monopods are much lighter than tripods but can still add a fair amount of weight to your camera bag. If the monopod is too heavy, then you are not likely to carry it with you, and so you won’t use it.
• Material. Just like tripods, monopods come in a variety of materials that can affect the weight and price.
I use a monopod when shooting with long lenses, 300mm or more, because it adds a level of stability that I don’t get when handholding the same lenses, even in bright light.
Shutter Releases and Remotes
Shutter releases and remote controls allow you to trigger the shutter release on the camera without physically pushing down on the shutter release button with your finger. This is important when you want to get the sharpest possible image, especially when using long shutter speeds. When you press down on the shutter release button, it is possible and likely that the pressure of your finger will cause small vibrations to move the camera, which can cause the image to be slightly blurred. The simplest of the shutter releases and remotes just have a button that, when pressed, triggers the camera’s shutter release. Some remotes allow you to lock the button in place so that when used with the camera’s bulb mode, the shutter will stay open as long as the remote button is locked. The Nikon MC-36, shown in Figure 3-19, has a shutter release button that can be locked open just by sliding the lock up when pressing the button.
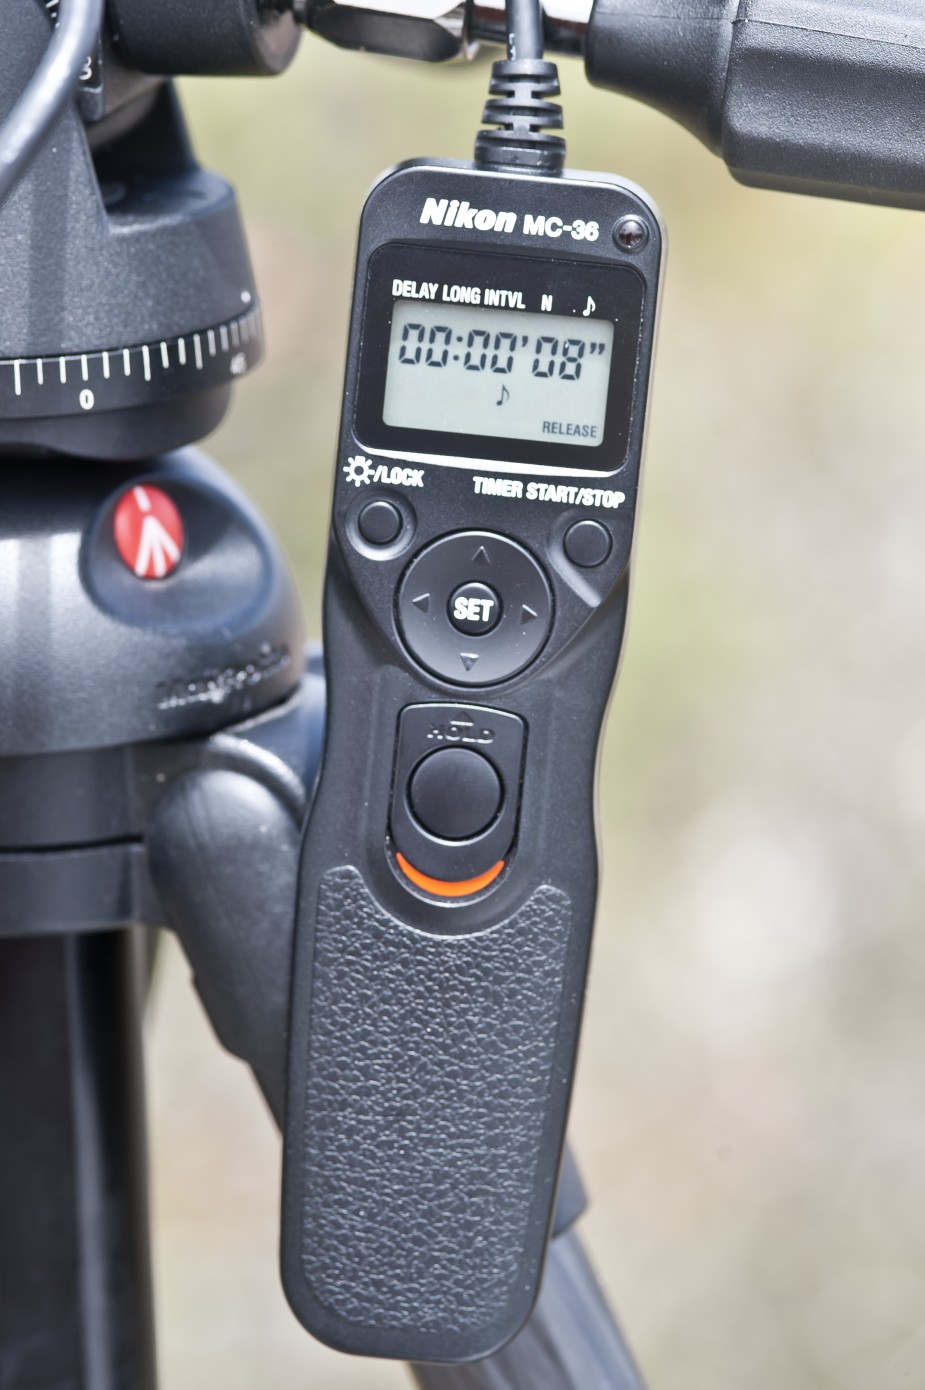
3-19
ABOUT THIS PHOTO The Nikon MC-36 is a remote trigger that can keep the shutter locked open.
The difference between a shutter release (also called a cable release) and a remote is that a shutter release is usually attached to the camera physically while the remote is a wireless trigger. For example, the Nikon ML-L3 remote has a single button that you can press to trigger the shutter release on a wide range of Nikon cameras. This single-function remote retails for about $20. Even though this remote only has one button, it does lock the shutter open when you set the camera to bulb mode. Press the button once to open the shutter, and press it again to close the shutter. The Canon RC-6 Wireless remote triggers the shutter on a host of Canon cameras. This remote has a single button and works by line of site from the remote to the front of the camera, so when the camera is mounted on a tripod and you are trying to trigger the shutter release from behind the camera, you might have to adjust where you aim the remote to get it to work.
The simplest Nikon shutter release is the MC-DC-2 Remote release cord, which is compatible with the newer consumer-level cameras. It is just a simple button that can be locked open; when you press the button, it triggers the camera. If you are a Canon user, check out the Canon Remote Switch RS60 E3, which brings the single button remote to the Canon line of cameras.
Regardless of what type of camera you have, you should check your camera manual to find out which remote triggers are compatible before purchasing one.
Timers
Chances are your camera has a built-in timer that can trigger the shutter release a few seconds after you press the shutter release button. This was created so that you could set the camera down, press the shutter release button, and run back to get in your own photo. It also offers the advantage that, by using the timer, the camera doesn’t have anything touching it before the shutter is moved, which reduces the small vibrations that can be caused by your finger pressing the shutter release button. Check your camera manual for the self-timer directions.
Another type of timer you can get for your camera can be part of the shutter release remote. This type of timer can lock the shutter open for a predetermined length of time. You can also set it to go off after a certain length of time or to take a series of exposures over a length of time. This timer is indispensible for extremely long exposures and critical for time-lapse exposures. The type of timer that can be set to go off for predetermined amounts of time over a period of time is called an intervalometer; some cameras have this built in. Check your camera manual to see if you have this built in or need to buy it as an extra.
These types of shutter releases are referred to as intervalometers because they can set the camera to fire at predetermined intervals.
Assignment
Use the bulb mode to get a very long exposure
It is fun to experiment with very long shutter speeds, which is when the bulb mode is your best option, especially when combined with a shutter release cable. The assignment for this chapter is to use the bulb mode to take a very long exposure — try for one over the usual 30 second limit on the camera and don’t forget to upload your results to the website.
For this assignment, I set up my camera and tripod on the sea wall facing the cove inlet that I wanted to photograph. I used a wide-angle lens to get both the skyline and the cove entrance in the frame. I started by setting the ISO to the lowest setting available on the camera (ISO 100) and the aperture at the smallest opening available on the lens (f/22) to get the deepest depth of field. Using this combination to get a proper exposure, I made an educated guess that I would likely need a shutter speed of 10 seconds or more. So, I started at 10 seconds, which was not nearly enough time. I added 10 seconds and tried again until I reached 40 seconds. It still wasn’t quite what I wanted, so I adjusted the shutter speed in 1-second increments. I took several shots between 40 and 45 seconds to make sure I was happy with the results. My favorite was at 41 seconds — I really liked the way the water looked soft, but there was still detail in the rocks, cliff, and seawall.


Remember to visit www.pwassignments.com after you complete the assignment and share your favorite photo! It’s a community of enthusiastic photographers and a great place to view what other readers have created. You can also post comments and read encouraging suggestions and feedback.
