In this case study we will create a very simple calculator application. This application will give the user the ability to add, subtract, multiply, and divide whole or decimal numbers.
We will not go through how to set up the application or the UI design in this section. We will leave that up to you, the reader. This will let you design the UI as you want to and also allow you to build the application as an iOS or an OS X application. You could even build it as a Linux-based application since Swift is now open source.
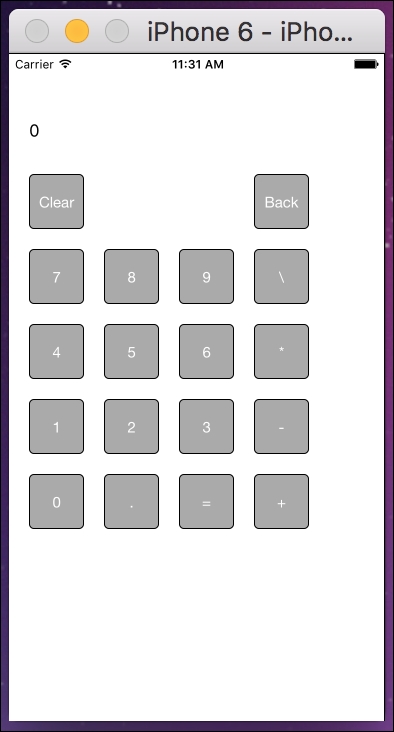
You can download my iOS calculator application with the code bundle for this book. My design looks like the following screenshot:
Now let's look at the requirements.
Here are the requirements for our application:
- The calculator needs the ability to add, subtract, multiply, and divide
- We need the ability to clear the current calculation
- We need the ability to clear the last number pressed
- We need to be able to display the value of the current calculation
- We need buttons for the numbers 0 through 9
- We need a button for a decimal point
Before reading further, based on these requirements see what type of design you come up with. Once you have worked out your design, continue reading and compare your design with the one we present.
The underlying philosophy behind our design is going to be making it easy to add new features in the future. We may be starting off with a basic calculator but eventually we will probably want to add additional features such as sine, cosine, tangent, or other scientific functions. Just like the SQLite.swift case study, there is a design pattern that can help us. The pattern we will use for this calculator example is the command pattern.
In order to understand how to design our commands, we need to understand how our calculator should work. The following steps should achieve this:
- The calculator current value is
0. - The user presses the [2] button: The number
2should be displayed. - The user presses the [5] button: The display should now read
25. - The user presses the [+] button: Since 25 (what is being displayed) is the first number in the calculation, we set the current value for the calculation to
25and clear the display. - The user presses the [5] button: The display should now read
5. - The user presses the [=] button: The calculator will add the number that is displayed to its current value for the calculation since the last command key that was pressed was the addition key. The calculator will set this new value as its current value and then display it. The display now reads
30.
What these steps show us is that, each time the user presses a number button, we update the display. Whenever the user presses a command button (addition, subtraction, multiplication, division, or equals) we need to perform the function from the last command key that was pressed on the calculator's current value with the number that is currently being displayed.
So let's look at how we would write our command structures. We will need to start by creating a protocol that all command types must conform to. The following code shows what our command protocol looks like:
protocol CommandProtocol {
    func execute(firstValue: Double, secondValue:Double) -> Double
}
This protocol defines a method named execute. This method will take two values of the Double type, perform some function on those two numbers, and then return a new value of the Double type. This method is designed to encapsulate the logic needed to perform the mathematical function represented by the command type and return the results.
Now let's look at our addition, subtraction, multiplication, and division types that will conform to the command protocol that we just defined.
struct AddCommand: CommandProtocol {
    func execute(firstValue: Double, secondValue: Double) -> Double {
        return firstValue + secondValue
    }
}

struct SubCommand: CommandProtocol {
    func execute(firstValue: Double, secondValue: Double) -> Double {
        return firstValue - secondValue
    }
}

struct MultiplyCommand: CommandProtocol {
    func execute(firstValue: Double, secondValue: Double) -> Double {
        return firstValue * secondValue
    }
}

struct DivideCommand: CommandProtocol {
    func execute(firstValue: Double, secondValue: Double) -> Double {
        return firstValue / secondValue
    }
}
Each of these command types conforms to the CommandProtocol protocol by implementing the execute() method. The execute() method performs the appropriate function on the two values that are passed in and then returns the results.
Now let's create our Calculator type, which will use the command types to perform our calculations:
struct Calculator {
    var currentValue: Double = 0.0
    var lastCommand: CommandProtocol?

    mutating func clear() {
        currentValue = 0.0
    }

    mutating func commandEntered(newNumber: Double,
nextCommand: CommandProtocol?) {
        if let lastCommand = self.lastCommand {
            self.currentValue = lastCommand.execute(currentValue,
secondValue: newNumber)
        } else {
            self.currentValue = newNumber
        }
        lastCommand = nextCommand
    }
}
Our Calculator type has two properties. The first property is of the Double type and is named currentValue. This property will keep track of the current value of our calculation. The second property is an optional of the CommandProtocol type and is named lastCommand. This property will store the last command submitted to the calculator.
We have two methods in our Calculator structure. The first method, named clear(), simply sets the currentValue property to 0. The second method, named commandEntered(), accepts two arguments. The first argument of the Double type is named newNumber and the second argument of the CommandProtocol type is nextCommand.
The commandEntered method starts off by checking to see if the lastCommand property contains an instance of a type that conforms to the CommandProtocol. If it does contain an instance we will call the execute() method of the instance. The execute() method will perform some functionality and then return a new value. This new value will then be set as the current value for the calculator. The calculator does not know, or care, exactly what function the execute() method will perform; all it knows is that it needs to call that method. This is how the command pattern is designed to work.
Now let's see how we would use the Calculator class by looking at how we use it in the iOS example that comes with the downloaded code for this book. In the example we use instances of the UIbutton class for each of the buttons on our calculator. In the UIButton class, we have a property named tag that we can use to assign a unique number to each of our buttons that identifies the button that was tapped. In our example, the following tags are assigned to each button:
Tag   Button
 0    Equals Button
 1    Addition Button
 2    Subtraction Button
 3    Multiplication Button
 4    Division Button
 5    Clear Button
The method that handles the touch events for the command buttons look like this:
@IBAction func commandButtonTapped(sender: UIButton) {
    if let text = display.text, num = Double(text) {
        var clearDisplay = true
        switch sender.tag {
        case 0:
            calculator.commandEntered(num, nextCommand: nil)
            display.text = "\(calculator.currentValue)"
            clearDisplay = false
        case 1:
            calculator.commandEntered(num, nextCommand: AddCommand())
        case 2:
            calculator.commandEntered(num, nextCommand: SubCommand())
        case 3:
        calculator.commandEntered(num, nextCommand: MultiplyCommand())
        case 4:
          calculator.commandEntered(num, nextCommand: DivideCommand())
        case 5:
            calculator.clear()
        default:
             break
        }
        if clearDisplay {
            display.text = "0"
        }
    }
}
Within the CommandButtonTapped() method, we use a switch statement to pick the button that was tapped. We then call the commandEntered() method of the Calculator instance and pass it the current number that is being displayed (entered by the user) and an instance of the appropriate command type.
When we need to add additional functionality to our calculator, all we need to do is to create additional types that conform to the CommandProtocol protocol that encapsulates the logic for this new functionality. We are then able to pass instances of these new types to our calculator. The ability to easily add new functionality to our applications is what makes the command pattern so powerful.