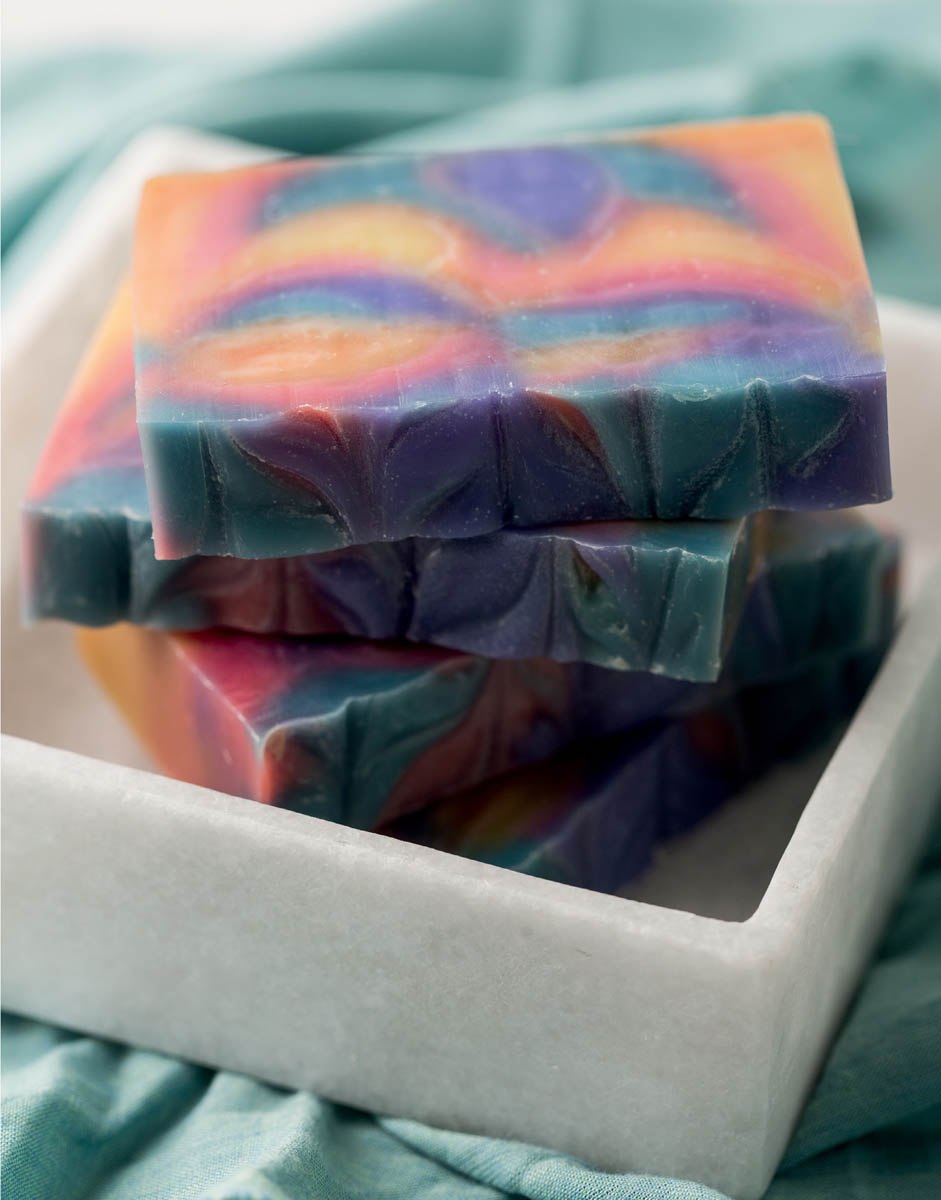
Tie-Dye Soap
This technique produces a fun tie-dye appearance with bright, contrasting colors that pop in the final design. Castor oil adds to the lathering ability of the bar, while the dream team of palm, coconut, and canola oils come together to create a great balance between texture and hardness. A slow-moving recipe and fragrance oil are key to this technique.
Approximately 20 bars
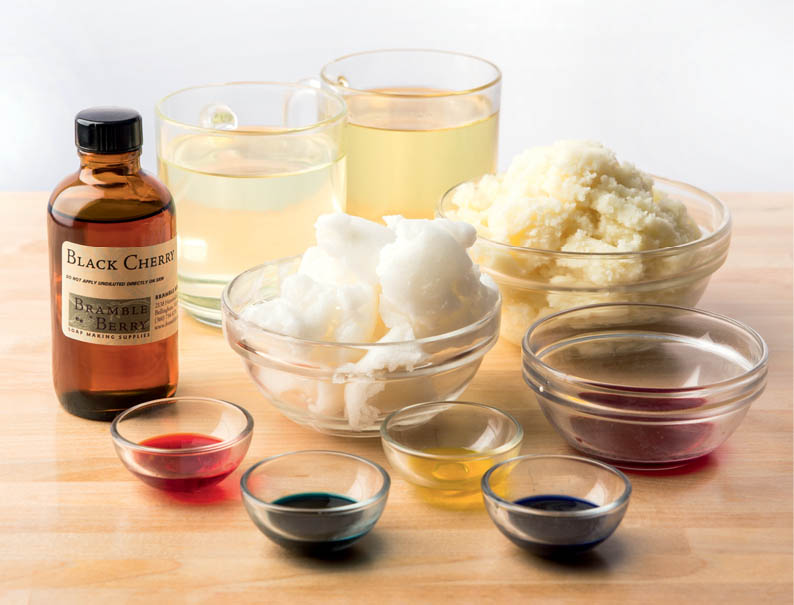
Ingredients & Equipment
Lye-Water Amounts
- 8.3 ounces sodium hydroxide (lye)
- 19.1 ounces distilled water
Base Ingredient Amounts
- 19.1 ounces palm oil
- 18.0 ounces coconut oil (76°F)
- 1.2 ounces castor oil
- 19.7 ounces canola oil
Colorants
- 12 mL diluted Tropical Pink LabColor
- 12 mL diluted Canary LabColor
- 15 mL diluted Tangerine LabColor
- 18 mL diluted Blue Mix LabColor
- 15 mL diluted Royal Blue LabColor
(See Working with LabColors, page 44.)
Fragrance
- 4.0 ounces Black Cherry Fragrance Oil
Equipment
- Standard equipment (see list on page 21)
- 5-pound wood log mold
Soap Safely!
- Work in a well-ventilated area. Do not breathe any fumes!
- Wear long sleeves, long pants, and closed-toe shoes.
- Don safety goggles (regular glasses are not sufficient protection) and rubber gloves during the entire soapmaking process.
- Keep children and pets away from your workspace.
Instructions
Prepare the Mold
Insert the liners that come with the mold. If you are an extra clean soaper, you can line the mold with freezer paper (shiny side out) prior to putting the liners in place.
Make the Soap Mixture
- 1. Add the lye to the water (never the other way around), stir gently, and set aside until clear.
- 2. Melt the palm oil in its original container, mix it thoroughly, and measure into a bowl large enough to hold all the oils and the lye-water with room for mixing. Melt and measure the coconut oil and add it to the bowl. Add the castor and canola oils.
- 3. When the oils and the lye-water are both below 120°F, add the lye-water to the oils, pouring it over a spatula or the shaft of the stick blender to minimize air bubbles. Tap the stick blender a couple of times against the bottom of the bowl to release any air trapped in the blades. Do not turn on the stick blender until it is fully immersed. Stick-blend until light trace (the consistency of a melted milkshake) is achieved, 1 to 2 minutes.
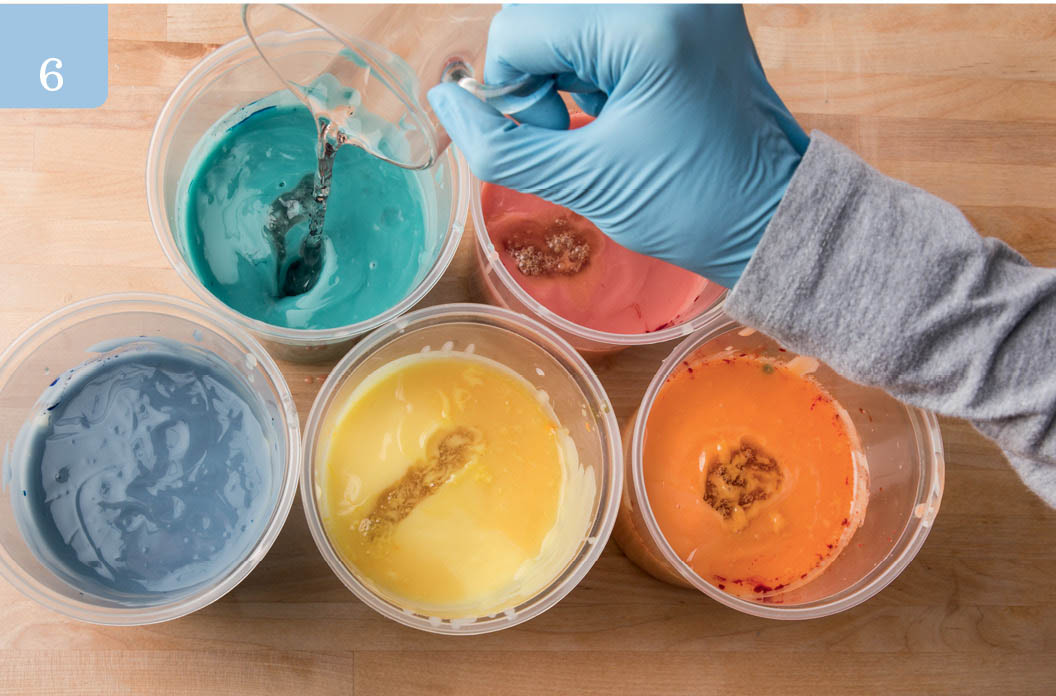
- 4. Split the soap into 5 batches, about 2 cups each.
- 5. Color each batch with one of the diluted LabColors. Use a whisk or spoon to mix in the colors so as not to accelerate trace too much.
- 6. Add 0.8 ounce of the Black Cherry fragrance oil to each of the colored batches. Continue to use a whisk or spoon to mix in the fragrance oil.
Pour and Swirl
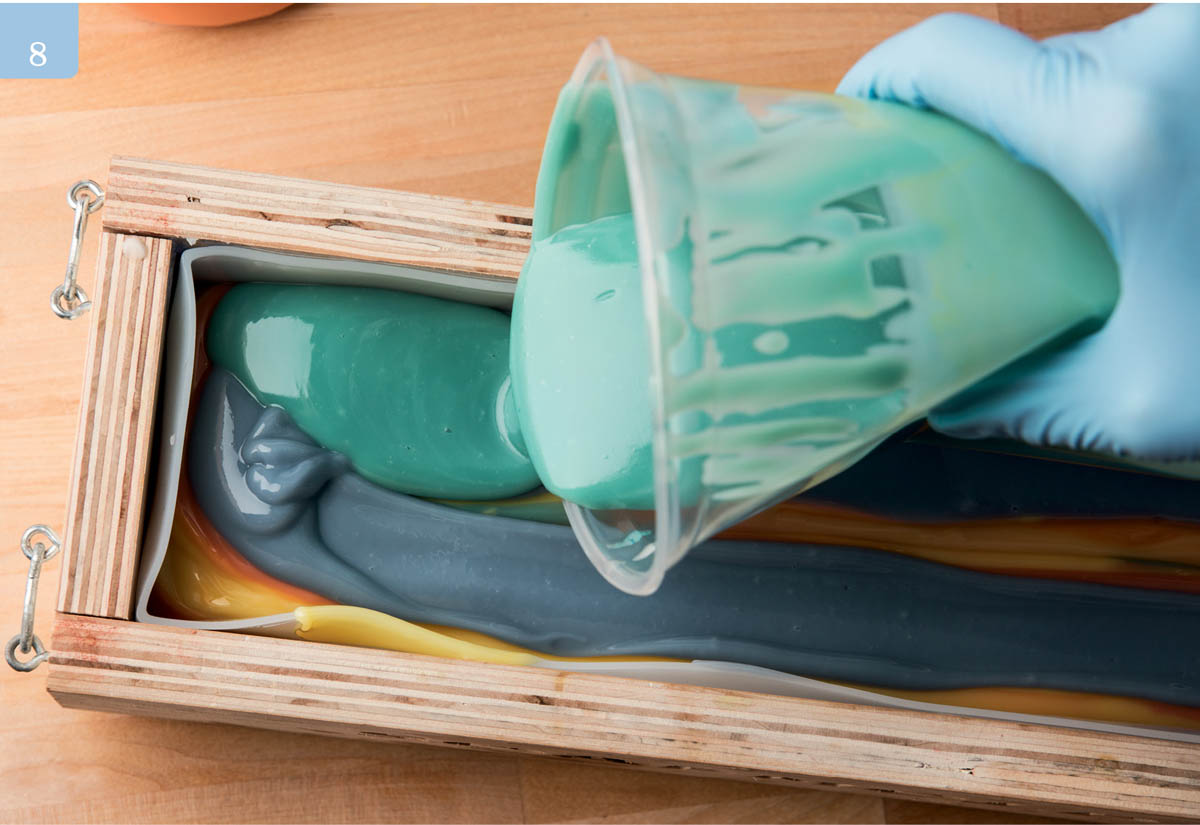
- 7. For the first round, pour each colored batch in a straight line down the length of the mold, in an order that produces the most visual interest and contrast.
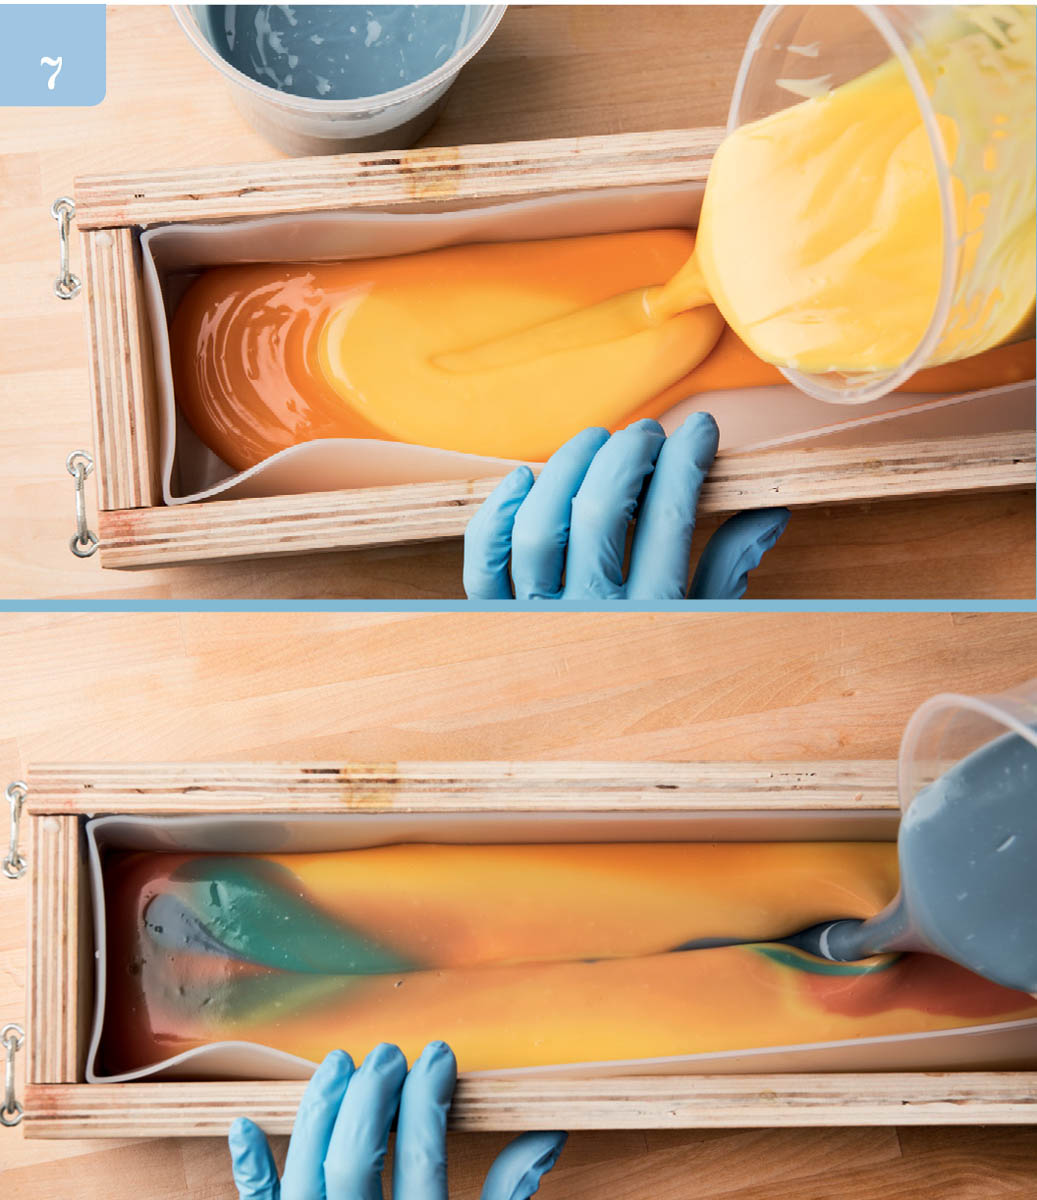
- 8. Staying as close as possible to the original pouring order, switch from a straight line to a U-shape in the pouring style. Starting at one end of the mold, go down the length of the mold, curve the pour around, and come back up. For subsequent pours, try to layer the same colors on top of each other. Pour close to the surface to reduce soap breakthrough.
Tip: The middle layers are less likely to show any mistakes in pouring. Use these layers to practice as you work toward perfection in the topmost layer.
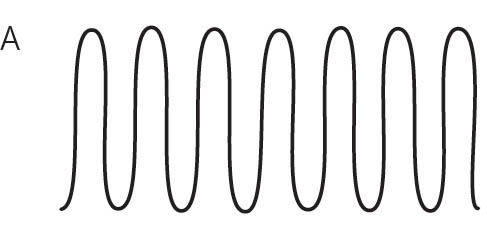
- 9. With the mold sitting lengthwise, insert a swirl tool (such as a chopstick or spatula) into the top left corner of the soap in the mold, pressing until the swirl tool is submerged about 1 inch. Drag the tool perpendicular to the stripes created by the soap, making S-curves until you reach the other edge of the mold (A). Remove the swirl tool and clean off any excess soap.
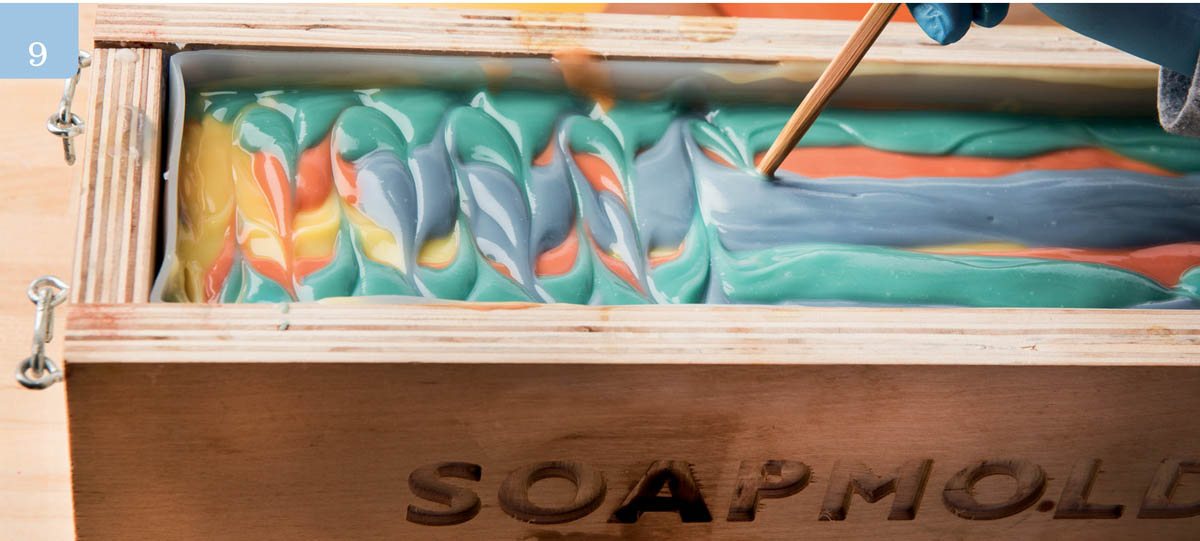
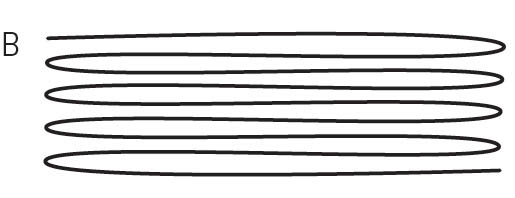
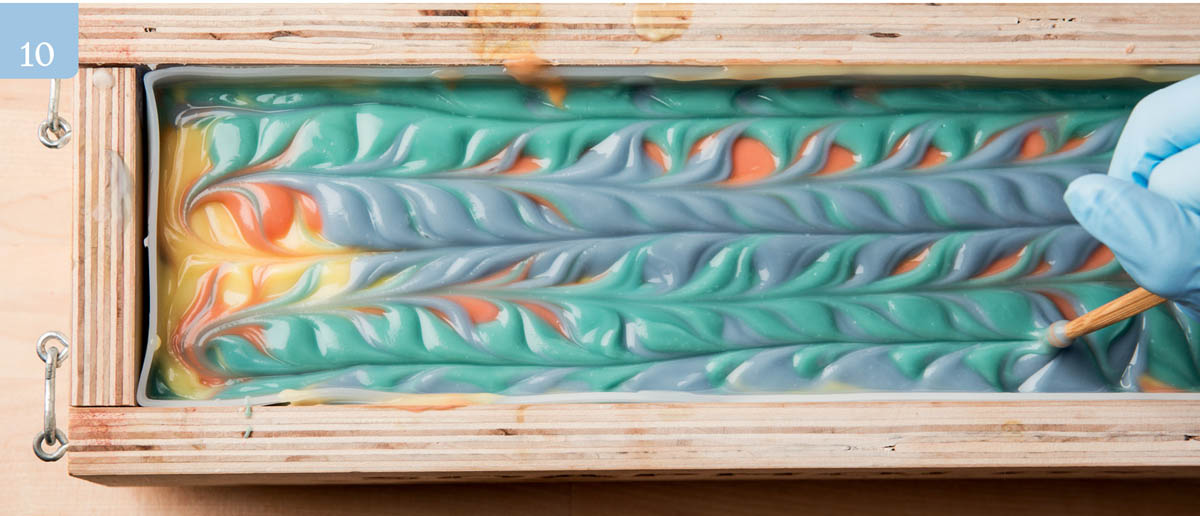
- 10. Insert the swirl tool back into the soap at the top left corner, but this time drag the tool along the length of the mold, perpendicular to the first round of draglines (B). Make S-curves until you reach the other end of the mold.
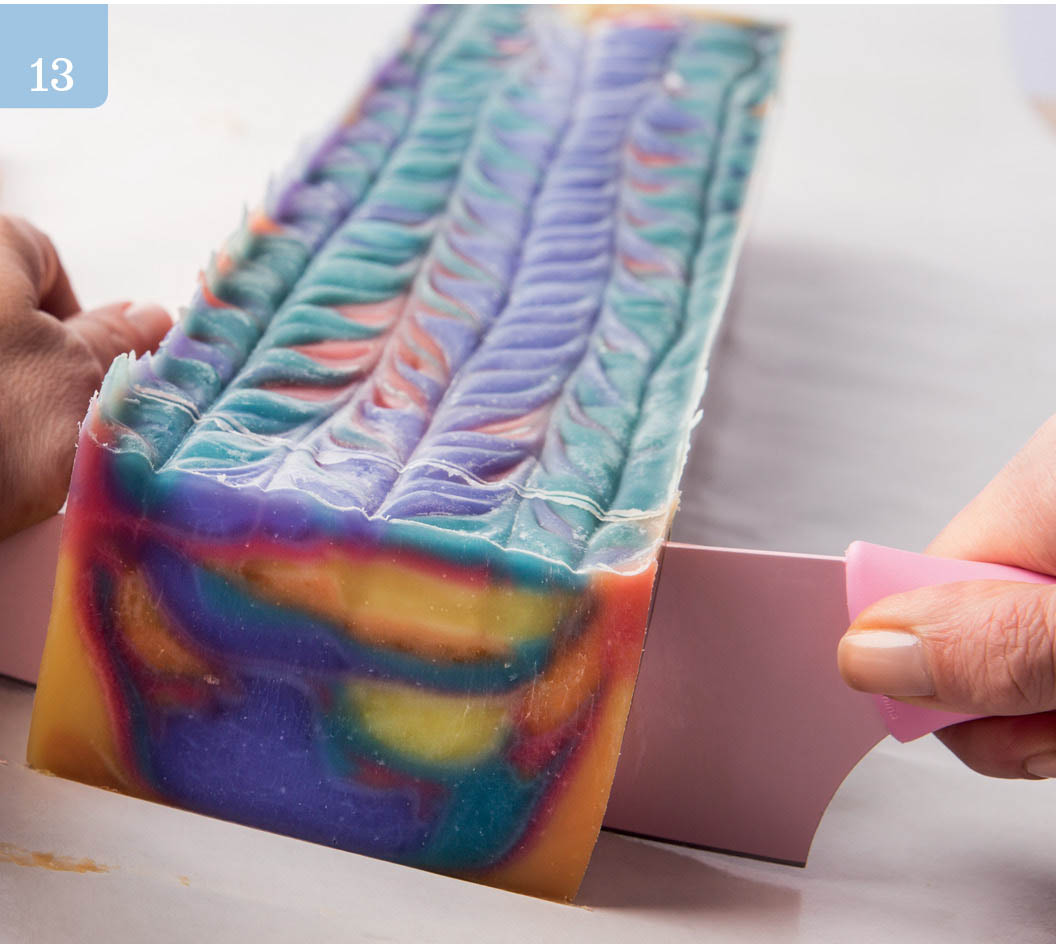
Final Steps
- 11. Spray with 91% isopropyl rubbing alcohol two or three times over a 90-minute period to help decrease soda ash.
- 12. Insulate the entire mold by wrapping it in a large towel and set it aside for at least 24 hours at room temperature before unmolding. Note: These colors get brighter when they go through a hot gel phase, so if you have a heating pad, turn it on low and place the insulated soap on top of it for 30 minutes before leaving it to set up. Unmold within 3 to 4 days.
- 13. Cut the soap into bars and allow to cure in a well-ventilated area for 4 to 6 weeks, turning the bars over every few days to ensure that they cure evenly.