Instead of one continuous space, a patio is divided into two separate living areas, each attractively bordered by garden.
Instead of one continuous space, a patio is divided into two separate living areas, each attractively bordered by garden.
The word “streamlined” is more likely to bring to mind an image of a sleek, powerful sports car or a living room decorated with minimalist, ultramodern furniture than a suburban backyard. But the word can also apply to garden design. Streamlined, for our purposes, simply means designing efficiently and effectively.
A backyard is efficient when you have organized it to hold distinct spaces for all the essential garden elements you identified during the initial planning phase. Since space is at a premium in small or average-sized backyards, taking advantage of every square inch is crucial to creating an outdoor area you will be able to use well and often.
A garden is effective when it lures you in. Even when all the functional elements have been included in the design, if a backyard is not a pleasure to spend time in or comfortable to navigate, if pleasing focal points or views are not created or enhanced, then the design is not an effective one. Maintenance also plays a role. Choosing plants and hardscape materials that are attractive, durable, and not overly fussy frees more time for simply enjoying being in the garden without feeling like outstanding chores must be tackled.
Designing a garden usually happens in phases. Once you have the basic layout established, the next step is to refine it, and that means optimizing each element. Even if you are only looking to make upgrades to a few portions of your garden, the guidelines for patios, pathways, and stairs outlined below will help you make sure the new design is as functional as possible.
Because decks and patios are the centerpiece of most backyards, efficiency and effectiveness are crucial to choosing the location of these elements and determining their shape and size. The most important consideration sounds simple, but it’s worth thinking through: make sure the feature is large enough. This goes beyond blocking out space to accommodate typical elements like tables and barbecues. You must also plan for enough space around these items so they can be comfortably enjoyed. With dining tables, a general rule of thumb is to leave at least 2 feet of clearance around the perimeter. In fact, it is not uncommon to see furniture arranged with about this much space in design magazine photos — this can be misleading, however, as gardens are often staged to optimize a photographic angle. Unless you are very short on space, I recommend stretching beyond this to a minimum clearance of 4 feet. This leaves enough room for chairs to be comfortably pushed back from the table, a particularly important consideration if the patio’s edge is uneven or higher than the surrounding area. Dining and socializing outdoors should be comfortable for guests — extra space ensures they aren’t constantly in fear of tipping a chair off the patio’s edge or bumping a neighbor. Keep in mind that a patio or deck adjacent to the back door must also function as a pass-through corridor to and from the garden, even when the patio itself is not in use. Extra clearance means you will be able to navigate easily. This is less of a consideration for smaller, secondary patios, which don’t generally see a large volume of traffic.
Your design must address practical and aesthetic considerations as well. If you’ll be using the patio during the day, protection from the sun is an important factor. For small backyards, privacy screening from neighbors is probably a key consideration. A pergola can partially accomplish both of these goals, as can planting for privacy and protection, whether as a stand-alone solution or in addition to a shade structure. Choosing attractive and functional plants for these pragmatic purposes is an opportunity to add another layer of beauty to the garden. Small screening trees and large shrubs, however, should be spaced slightly away from the perimeter of a patio border rather than right up next to the edge. This will avoid making the patio feel crowded and will also preserve prime growing space for smaller perennials and shrubs.
The plants you choose for garden beds adjacent to the patio have the potential to be more than just problem solvers. An important but often overlooked aspect of space planning is creating views and interesting details that catch the eye, and plants can play a starring role. Think about it — when dining out, isn’t it nicer to be ushered to a table with a view of a nighttime skyline rather than the sign to the restrooms? Likewise, situating plants and other focal points like water or art features where they can be seen and enjoyed from the patio will greatly increase your enjoyment of the garden. No matter how small your space, there are ways to avoid situating a patio where seating faces utilitarian features like trash cans or compost bins.
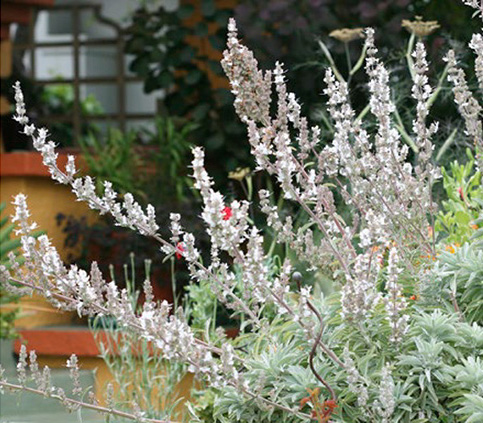
Determining when you will use the patio the most can help with plant choices. If you expect to use your patio in the early evenings, consider plants popular in moonlight gardens — specifically, those that seem to glow with the fading light of day. Plants with silver or chartreuse-colored leaves or those with light-colored flowers are good choices.
| Plant | USDA zones | Description |
|
‘Gold Strike’ lily-of-the-Nile (Agapanthus ‘Gold Strike’) |
6–10 | This compact, clumping evergreen boasts strappy foliage striped in bright shades of green and gold. Cheerful blue flowers on 2-foot stems appear in midsummer. |
|
night-blooming jasmine (Cestrum nocturnum) |
9–10 | With its narrow profile, this shrub makes an excellent specimen plant for narrow spaces in warmer climates. The petite, greenish white flowers reflect back the light, but the real attraction is the intoxicating fragrance they bring to an evening garden. |
(Brunnera macrophylla ‘Jack Frost’) |
3–9 | Silvery, heart-shaped leaves with delicate green veining and margins allow this deciduous perennial to sparkle in low light. Small, pale blue flowers rise above the foliage in spring. |
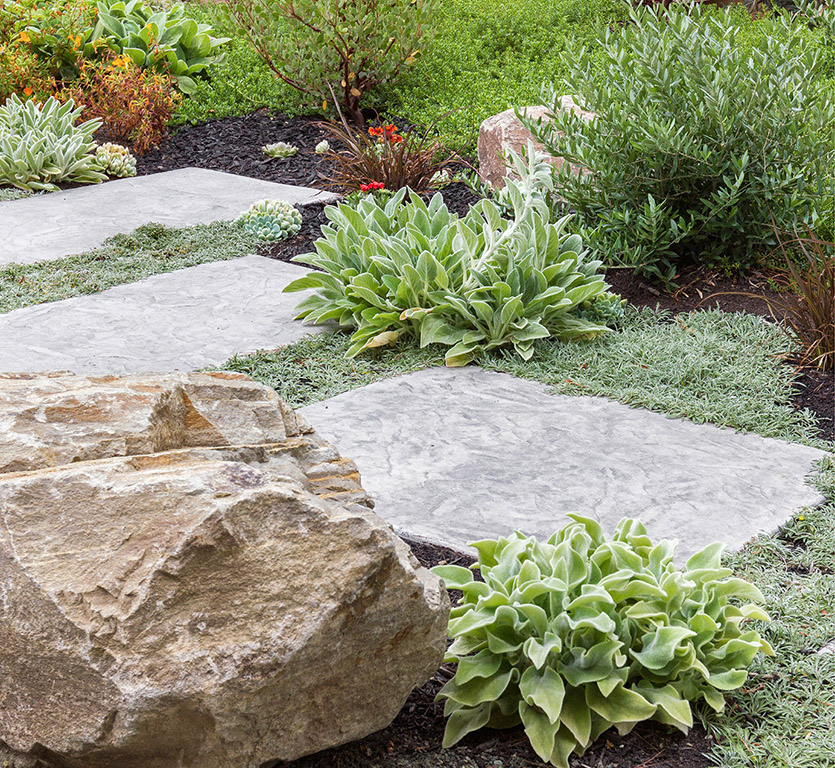
Stachys ‘Bello Grigio’) |
4–9 | Bright silver leaves make this plant a knockout in a moonlight garden. You’ll be tempted to pet its fuzzy leaves every time you walk by. Plant for the brilliant foliage; it does not readily flower. |
|
‘Limelight’ licorice plant (Helichrysum petiolare ‘Limelight’) |
9–11 | ‘Limelight’ licorice plant’s unusually bright chartreuse leaves not only add subtle glow to moonlit gardens but also contrast attractively with dark green or burgundy-colored plants. Plant in part sun for best color. |
(Salvia apiana) |
8–11 | White sage delivers on both foliage and flower color. Large, sword-shaped, silver-white leaves adorn stiffly upright woody stems. Small white blooms that are a magnet for bees appear in spring. |
The material and width you choose for pathways through the garden need to be appropriate to the overall space. Garden pathways are generally grouped into two categories: primary and secondary. Primary pathways are those that lead to an important destination, such as an entrance to the house, a swimming pool, or any other area that will attract a high level of traffic. A primary path should be a minimum of 4 feet wide, which is enough room for two people to walk comfortably side by side. Because people generally pay less attention to where they’re stepping when traveling a path they use on a regular basis, choose materials that will remain flat and even to avoid a tripping hazard. Concrete, mortared flagstone, or tightly laid bricks or pavers are all good choices. Stepping-stone pathways that have wide spaces between them filled with sand or gravel are not recommended, as they will wear unevenly, particularly in climates with significant rainfall.
Secondary paths that meander through the garden and are used less frequently do not need excessive width. Natural materials provide attractive contrast to surrounding greenery.
Secondary pathways are those that lead to lesser-used elements like side benches or fire pits, or meander through planting beds. Because these pathways don’t see as much foot traffic, a narrower width of 2.5 to 3 feet is usually adequate. The exception is secondary pathways that will be used to move equipment around for day-to-day garden chores, such as lawnmowers or wheelbarrows. In these instances, ensure the path is at least 3 feet wide and is paved with a material that easily accommodates sturdy, wheeled equipment.
Incorporating a pathway in an ultra-restricted space like a side yard can be tricky, as there is a natural assumption that the path should be especially narrow to avoid overwhelming the space. Surprisingly, the opposite is true. Making a path too narrow can unintentionally create the impression of a child-sized space, which in turn will make the whole area feel smaller.
Beyond being practical, pathways can add significantly to the charm and attractiveness of a backyard. It’s important to understand that movement and circulation can have very different functions when you are outside versus inside. Indoors, the purpose of hallways, stairs, and other open areas is to get quickly and easily from Point A to Point B. The opposite is true in a garden, where the experience of getting from one area to another can be as important as the final destination. Faster and more direct isn’t necessarily better; paths that meander remind you to stop and smell flowers or admire a specimen tree from a different vantage point. Avoid pathways that are a straight shot. Instead, incorporate gentle curves or add an angular jog to a straight path to subtly encourage travelers to slow down and enjoy the garden. Remember that the garden’s visitors include you — investing time to transform simple garden elements into interactive experiences turns your backyard into an irresistible destination.
Saltillo tiles contrast with landings paved with gold fines, making steps highly visible and easy to navigate.
Outdoor stairs have their own set of rules, too, distinct from an indoor staircase. In fact, there is a specific formula for determining optimum stairway dimensions so people can move up and down in a comfortable and predictable way. The height of the rise (the vertical height of the step, R) and the tread (the horizontal width of the step, T) should be 2R + T = 24 to 27 inches. Indoors, it is common to pair a 6-inch riser with a 12-inch tread; plugged into the formula, this would equate to 2(6 inches) + 12 inches = 24 inches. While this technically falls within the desired range, in a backyard, one of the goals is to foster a sense that the movement is slower and more contemplative, or just different than movement indoors. Smaller treads with steeper risers have a cramped, utilitarian feel, making them less comfortable to walk on. People using them subconsciously want to hurry up. These treads also physically accommodate less of a walker’s sole, which means the user must pay close attention and look down at the steps instead of looking around the garden.
The ideal range for garden treads is 14 to 16 inches. This is wide enough to create a gracious effect and encourage a slower pace, but not so wide that it interrupts someone’s normal stride. My personal favorite is a 5.5-inch rise and a 15-inch tread.
Because of the tendency to pay less attention to stairs outside, it is important to keep stairways safe. You must put some kind of visual indicator on the edge of each step, to avoid creating a tripping hazard. This can be done by adding a finish that extends over the stair, such as a bullnose finish (which creates a shadow and a change in pattern), by including a border in a different color or material, or even by adding a border of the same material but in a different pattern. This is especially important if you have only one step, as it can be particularly easy to overlook or gauge. Apart from safety, embellishing a staircase in a thoughtful or unexpected way transforms it into a memorable and unique garden feature, rather than just a utilitarian element.
A successful garden is built foremost on a foundation of solid design principles, but I admit to a secret fondness for furniture, products, and gadgets that do more than one thing, whether that’s a jar of coconut oil that conditions your hair and flavors your popcorn, or a footstool that serves as additional seating when needed. Outdoors, including built elements, furnishings, or even plants that do double duty is an excellent way to squeeze every bit of enjoyment out of small spaces.
Raised beds flanked by stairs add an attractive level change to the garden, as well as spaces to perch.
A stucco retaining wall capped with 8-inch-wide bullnose bricks does double duty by providing extra garden seating.
Understanding how a backyard will truly be used helps create a garden that is both beautiful and functional. An important part of space planning is determining how many people a garden needs to accommodate. For day-to-day use, this is simple. Just count the number of members in your family, and you’re done. But what about when company comes? Once you’ve created your backyard oasis, you’ll want to ensure there is enough space to entertain friends and extended family. It isn’t always practical or even aesthetically pleasing to create a large dining or conversation area that is meant to hold eight or ten guests when usually it’s just you and your spouse. So how do you create flexible space?
That’s where double-duty design comes in. By incorporating clever hardscape elements and accessories in advance that can act as temporary seating areas or dining spots, it is possible to create a garden that is the right size for everyday living, but can also accommodate larger groups on special occasions.
One of the most attractive and practical ways to add flexible seating is via retaining walls. These are often added to gardens that are sloped or very hilly to hold back soil, but they also create more level living space. By adding structure to patios or planted areas, retaining walls also help define and delineate areas of the garden. Beyond that, if thoughtfully constructed, they can do double duty as seating.
There are two critical elements to a successful seat wall: height and material. The most comfortable height for a seat wall is 18 inches, which is the typical height of a dining or other indoor chair. If you can, situate your seat wall in an area of the garden where the soil of a slope can be carved as close to that height as possible. Soil can be moved around fairly easily, which means if there’s a slope to your yard at all, it’s probably possible to build up the soil to the desired height. Alternatively, a tiered series of walls can be incorporated if the slope is very steep.
Material choice is also crucial. Materials that work well are not only sturdy and durable enough to retain soil without bowing or sagging, but are also wide enough at the top for comfortable seating. This width can be from 6 to 12 inches. Not all materials commonly used to build retaining walls will work well if the goal is also to provide seating. Because their surface is uneven and cannot be capped, dry-stacked stone walls do not easily double as seating options. If the construction of the fence is very basic, wood is also not an optimal choice. While wood retaining walls are inexpensive, because of the way they are constructed, their posts are necessarily exposed, giving the impression that the back of the wall is facing forward. This can be addressed by facing the front of the wall with decorative wooden planks, thereby hiding the posts. You can also employ wood fences in areas that are less visible, where they can be camouflaged with either trailing plants spilling over the top or mounding plants planted in front. (However, this makes them impractical to sit on.)
Your material choice should be guided by whatever hardscapes are already part of the backyard, as well as your garden’s overall style. For a contemporary look, poured-in-place concrete makes an elegant, modern statement. A wall like this can be molded into almost any shape — straight or curved. A range of colors can be added to concrete, and it is easily customized for different heights, widths, and thicknesses, creating a finished look that is sleek and contemporary.
Another common material for building retaining walls is cinderblock. When stacked and mortared, the individual bricks create a durable wall that can be faced with a variety of materials and finished with a decorative cap. A stucco finish is a popular choice for Mediterranean-style homes and also an excellent option to tie the landscape to the residence if your home’s exterior is faced with stucco. A stucco finish also allows for decorative accents such as tiles to be incorporated into the wall’s facade.
Completing a cinderblock wall with a stone veneer is another attractive option that complements a wide range of design styles, from traditional to rustic. Cost and construction options vary. The most affordable veneers are panels constructed with man-made materials like polyurethane that are designed to mimic the look of natural stone or brick. Cultured stone panels in a stacked or random pattern are an excellent choice for a veneer that is relatively easy to attach, and they can look and feel virtually identical to quarried or field stone. Walls can also be faced with natural materials such as brick, stone, or tile, although these are generally more expensive.
While the wall itself may be narrow, the wall cap should be wide enough to comfortably perch on. The minimum recommended width is 6 inches, but for a typical 6-inch-wide wall, an 8- to 10-inch cap is preferable. Not only is a wider seat more comfortable, but having a cap that overlaps by an inch or two is an attractive way to finish a wall. I often top stucco walls with 8-inch bull-nosed bricks in a darker, coordinating color. The smooth, neutral-colored finish of concrete tiles is another attractive choice to balance the multi-hued, textural look of stone walls.
If you want to enjoy the presence and practicality a seat wall provides but your backyard is flat, just adopt the concept by creating a garden wall. The difference between the two types of wall is simply that a garden wall is installed for purely aesthetic reasons. Since it is not actually holding back soil, it is generally less expensive to construct and does not need to be as thick or sturdy, but otherwise follows the same design principles as a retaining wall.
Often viewed as purely utilitarian, vegetable beds tend to be relegated to side yards or the outer reaches of a garden. They don’t need to be banished or hidden from sight, however. The key is to make them both functional and attractive by following the same principles used when designing a garden wall. A common height for most raised beds is 12 inches, but by increasing the height to 18 inches and adding a ledge or cap that is about 6 inches wide, not only will you create additional seating space, but typical chores like weeding and harvesting will be much more comfortable since you can sit on the edge of the box rather than having to kneel on the ground. Also — guests love to see what is growing! Why not make it simple for them by making beds easy to reach and comfortable to sit on?
This is a place where inexpensive wood can shine. Wood beds that are unfinished will weather to a dull gray, so consider staining them to create a look more akin to built-in furniture. The finish that a coat of stain or paint provides will tie raised beds into the rest of the garden as well.
If your backyard is small or oddly shaped, remember there’s no reason vegetable boxes must be the standard 4-by-6-foot rectangle. Beds that are long and narrow may fit more easily into tighter spaces, and small squares can be a better choice for defining space in modest gardens. If you are fortunate enough to have a large yard, keep in mind that a series of smaller beds can be a more effective visual choice than one or two massive ones. Not only can excessively large beds overwhelm the space, it is also difficult to plant or harvest from a raised bed that is more than 4 feet wide. If the bed can only be accessed from one side, limit the width to between 2 and 3 feet.
Additional seating can also be added in sneakier ways. In fact, when not in use, some seating might not look anything at all like a chair or bench. Landscape rock nestled in a garden is a charming way to add a textural contrast to plants, and is particularly effective in the context of a more natural or rustic-looking design. When placing decorative rock close to a patio or play area, include at least one stone feature that is large and flat enough to serve as a seat. Lower and more interesting than a standard chair, seat rocks are particularly attractive to children, so consider positioning one near a play area. Situating a seat rock close to a small pond or water feature invites kids and grown-ups alike to get close and enjoy the sight and sound of moving water.
If your garden includes steps, expect that at some point someone will use them as seating. To encourage people to sit on them, consider making the tread 18 inches deep; this works best if you only have a few steps since this is wider than is comfortable for a walking cadence. A larger stair like this adds a gracious note to a garden, while also creating enough space both for seating and for guests to set down glasses or plates.
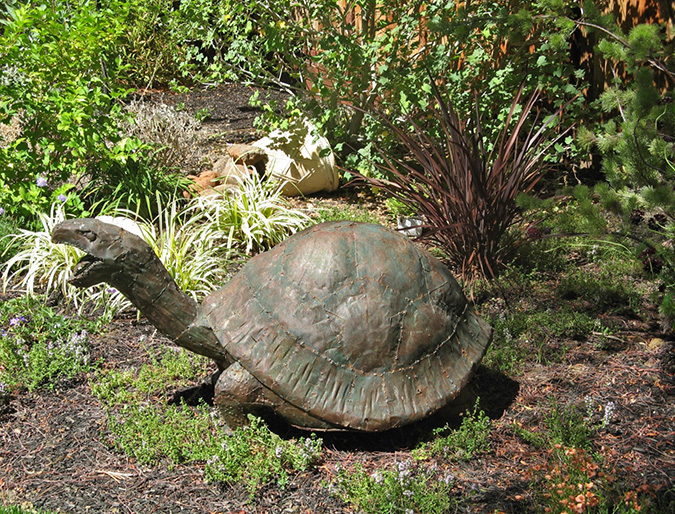
Artwork and accessories you choose for the garden can create seating opportunities as well. Look for carved wooden pieces or ceramic statuary with flat areas that can double as footstools, small benches, or side tables.
The glossy pages of home and garden magazines provide great inspiration, but editorial styling can also lead to unrealistic expectations. The perfection we see in print is almost always impossible to maintain in a typical backyard, where family members, pets, and seasonal plant changes mean a certain level of clutter or debris is inevitable. If you spend time outside on a regular basis, your garden will attract the clutter of everyday life, the same way your kitchen table is scattered with sunglasses, coffee cups, and yesterday’s mail. Be realistic and include outdoor storage in your design, whether as a place for furniture cushions, gardening tools, or kids’ toys. Instead of unsightly plastic bins, opt for attractively finished storage chests that can double as benches. If you invest in quality storage pieces, you’ll be more likely to keep them in sight — this in turn keeps the items you need in a handy place that you won’t be ashamed to use as additional patio seating. Storage benches are available at home improvement stores and online in a range of sizes, colors, and styles.
Double-duty design strategies apply to plant choices as well as hardscape and furnishings. While garden centers are adept at creating enticing displays that highlight exotic flowers or richly colored blossoms, before indulging in a major impulse purchase, take time to consider how appealing those new plants will be a few weeks later when the last of the flowers are spent. By seeking out plants that offer more than one benefit or put on a show in multiple seasons, your garden will continue to be interesting long after your neighbor’s petunias have been relegated to the compost heap.
Homegrown fruits and vegetables are on many homeowners’ lists of must-haves. One of the most popular ways to grow produce is in raised beds, but not every backyard has enough space for them. Even when space is available, raised beds are not a style fit for every garden, particularly when a refined look is desired. Fortunately, there are plenty of edibles with foliage and flowers attractive enough to double as ornamentals, making them as easy to mix into the landscape as a traditional shrub or perennial.
Choosing evergreen plants that feature foliage in a consistent range of colors and textures, and making them the backbone of your plan, is a classic way to design a garden with year-round beauty that doesn’t demand excessive maintenance. While this creates a sturdy foundation, elevate your garden to the next level by rounding out your palette with plants that highlight seasonal changes. Plants’ ability to mark the passage of time — whether through a sunny display of spring flowers, a blaze of autumn color, or brightly hued berries in the winter — is an important component to crafting a garden with a unique character. And there’s no need to rely strictly on plants that add only one season of drama — there are many selections that put on one show in the spring and an entirely different display later in the year.
Witch alder (Fothergilla ‘Mount Airy’), a medium-sized shrub that thrives in colder parts of the country, welcomes spring with a profusion of lightly scented, fluffy white blooms. Metallic green foliage makes it an excellent shrub for contrast with other acid-loving favorites like rhododendrons and camellias. Autumn is when the real drama takes place, though, when witch alder ignites into a blaze of fiery orange-red, providing brilliant contrast to evergreen shrubs nearby. Hardy to USDA zones 5–9.
Spring flowers chased by fall color is the most common way for a plant to offer double-duty service, but some plants’ foliage display alone is so varied and colorful, flowers aren’t missed. In spring, ‘Orange Dream’ Japanese maple (Acer palmatum ‘Orange Dream’) unfurls chartreuse leaves banded with pink margins. By summer, leaves have turned a soft shade of pale green. Autumn introduces the most dramatic color change, as the foliage transforms a final time into a rich shade of burnt orange. This small tree rarely grows above 12 feet and is hardy to USDA zones 5–9.
While the vivid colors of changing leaves are hallmarks of autumn, plants that offer more subtle seasonal beauty are also worthy of consideration. Sweet autumn clematis (Clematis paniculata) is a classic cottage garden plant boasting pure white, sweetly scented flowers in summer. What sets this plant apart from other climbing vines is its autumn appearance, when the flowers are replaced by masses of delicate, silvery seed heads. Left unchecked, sweet autumn clematis can reach a height of 30 feet, but small-space gardeners will have no problem keeping growth in check with a hard pruning in spring. Hardy to USDA zones 4–9.
For cold-weather gardeners, winter is often the dreariest time in the garden, as snow blanketing the ground turns most shrubs into indistinct lumps. The solution is structural plants that retain their architectural shape even when laden with snow. With its intricate, twisted form, Harry Lauder’s walking stick (Corylus avellana ‘Contorta’) fits the bill perfectly. In late winter, pale yellow catkins droop from bare limbs. In summer, its branches are covered with dense green or red foliage, but early winter is when the best show starts. Stripped of its leaves, this small tree makes an unusual winter specimen as its smooth branches contort themselves into elegantly twisted shapes. It can be pruned to a compact shape to make a 12- to 20-foot tree in the garden. Hardy to USDA zones 4–9.
Typically, vegetables and other edible plants are segregated from the rest of the garden or confined to raised beds along the perimeter of the yard. For smaller spaces that lack room for a traditional kitchen garden, choose edible varieties whose good looks make them right at home planted among the prettiest of ornamental plants.
| Plant | USDA zones | Description |
|
‘Imperial Star’ artichoke (Cynara scolymus ‘Imperial Star’) |
9 (annual in other zones) |
With their dramatic, silvery green leaves, and stunning summer flowers, artichokes make an elegant addition to an ornamental garden. ‘Imperial Star’ is an improved cultivar that bears fruit in its first year and boasts less prickly stems than older varieties. |
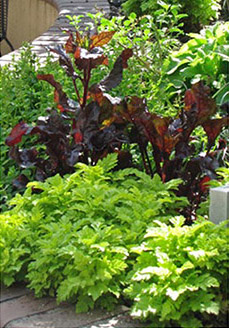
(Beta vulgaris ‘Bull’s Blood’) |
Annual in all zones | The burgundy leaves of this mild-flavored beet make an arresting foil to nearby plants with silver or chartreuse foliage. When picked young, the leaves are tender enough to be mixed into salads. A great choice for semi-shady gardens. |
(Feijoa sellowiana) |
9–10 | An excellent evergreen anchor for hot, dry gardens. Two-toned leaves set off red and white flowers that cover the tree in spring. The taste of the small, oblong fruits has been described as a cross between pineapple and Juicy Fruit chewing gum. |
(Vaccinium ‘Sunshine Blue’) |
5–9 | This sun-loving shrub marks the beginning of spring with delicate, soft-pink blooms, followed in midsummer with a crop of juicy berries. More productive when planted in multiples, so consider massing several together. |
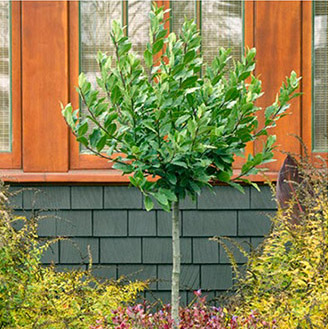
(Laurus nobilis) |
5–9 | Dark green, highly aromatic leaves should be dried before adding to recipes; fresh leaves have a bitter taste. Wait a few years to begin harvesting leaves — they become more flavorful as they mature. |
(Prunus avium ‘Lapins’) |
5–9 | Cherries taste similar to ‘Bing’, but are larger and more split-resistant. Good for small spaces, as ‘Lapins’ is self-pollinating, meaning two trees are not required for it to produce fruit. Stunning white blossoms in spring; vibrant, hot-colored foliage in summer. |
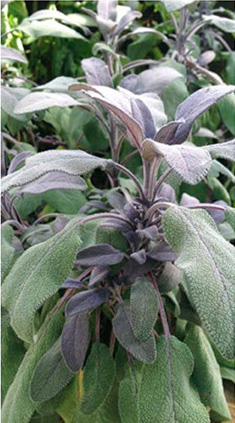
It’s the rare homeowner that doesn’t make room for at least a few herbs. While planting herbs in containers is hardly a new idea, consider moving beyond the old standbys that make for a monotonous bowl of green, green, and green, and instead look for less common versions of the classics. Not only will this ratchet up the flavor at summer barbecues, but by choosing herbs in a mix of colors and textures — not to mention sneaking in a few non-edible flowering herbs — you’ll have a piece of living garden art that’s as eye-catching as it is practical.
Keep an herb container garden simple by favoring perennial herbs over annual varieties to avoid having to replant every year. Many perennial herbs, including the ones listed here, require less water than annual herbs once they’ve had a year to establish — a bonus if you occasionally forget to water. These six versatile herbs from the mint family are also superstars on the grill.