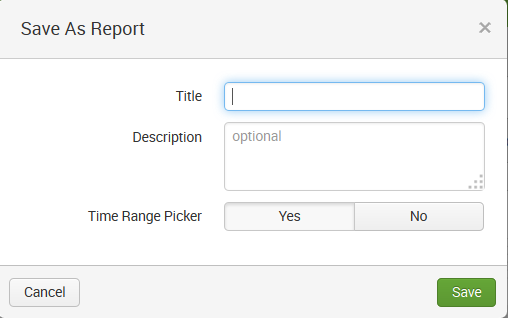
To save your search as a report, click on the Report link. This opens the Save As Report dialog:

From here, you need to do the following:
- Enter a Title (or name) for your report
- Enter an optional Description to remind users what your report does
- Indicate if you'd like to include the Splunk Time Range Picker as a part of your report
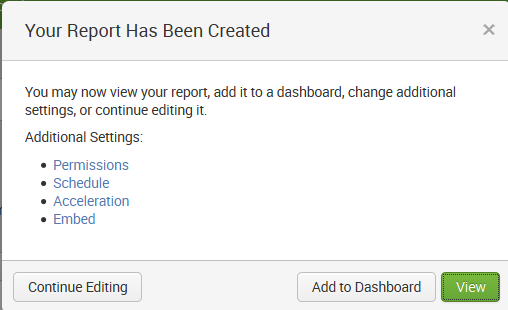
Once you click on Save, Splunk prompts you to either review Additional Settings for your newly-created report (Permissions, Schedule, Acceleration, and Embed), Add (the report) to Dashboard (we will talk more about dashboards in Chapter 5, Simple XML Dashboards), View the report, or Continue Editing the search:

In my example, I named my report My Error Report, added a description (a simple example of a save as report), and included Time Range Picker. The following screenshot displays the saved report after clicking on View:

The additional settings that can be made to the report are as follows:
- Permissions: Allows you to set how the saved report is displayed: by owner, by app, or for all apps. In addition, you can make the report read-only or writable (can be edited).
- Schedule: Allows you to schedule the report (for Splunk to run/refresh it based upon your schedule. For example, an interval like every week, on Monday at 6:00, and for a particular time range (as described earlier).
- Acceleration: Not all saved reports qualify for acceleration, and not all users (not even admins) have the ability to accelerate reports. Generally speaking, Splunk Enterprise will build a report acceleration summary for the report if it determines that the report would benefit from summarization (acceleration). More on this topic later.
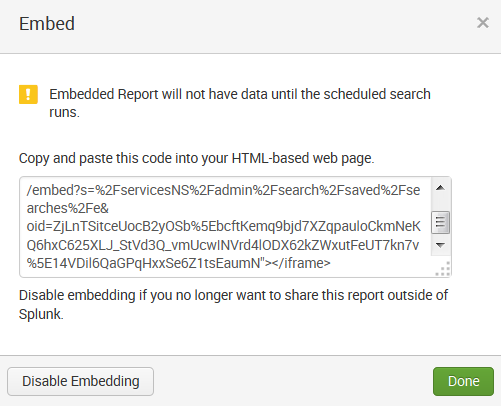
- Embed: Report embedding lets you bring the results of your reports to large numbers of report stakeholders. With report embedding, you can embed scheduled reports in external (non-Splunk) websites, dashboards, and portals. Embedded reports can display results in the form of event views, tables, charts, maps, single values, or any other visualization type. They use the same formatting as the originating report. When you embed a saved report, you do this by copying a Splunk-generated URL into an HTML-based web page:
