Having the right tools for the task is essential in metalworking. In order not to damage your shears, hole-punch pliers, or disc cutters, always make sure that you are not exceeding the manufacturer’s guidelines for the gauge and material you are using. All these tools come in a wide range of price points, and more expensive does not necessarily mean better. Sometimes a hardware-store variety does the trick. The most important thing to remember is to choose tools that are comfortable for you and don’t fatigue your hands.
The thickness of sheet metal and the size or diameter of wire is known as the gauge, but it also refers to the tool used to measure wire and sheet. Known as the Brown & Sharpe (B&S) wire gauge, this tool looks a bit like a flat, round gear. It measures the diameter of wire and the thickness of sheet. Each slot in the tool shows a gauge number as well as the size in inches and in millimeters. A pocket gauge, which is smaller and has a slightly different shape, can be handy.
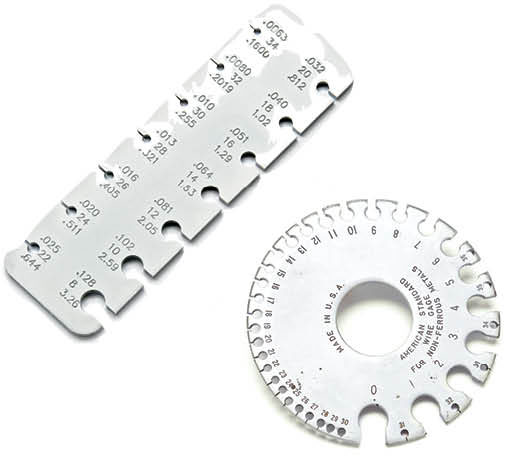
Wire and sheet gauges
Brown & Sharpe (B&S), or American Wire Gauge (AWG), is the standard in the United States for measuring the diameter of wire and thickness of sheet.
When you use a wire gauge, use the small slots around the edge of the gauge, not the round holes at the ends of the slots. Place the wire or sheet edge into a slot (Figure 1). If there’s wiggle room, place it into the next smaller slot. When you reach a slot that it will not fit into, then the number at the end of the next larger slot is the gauge of your wire/sheet.
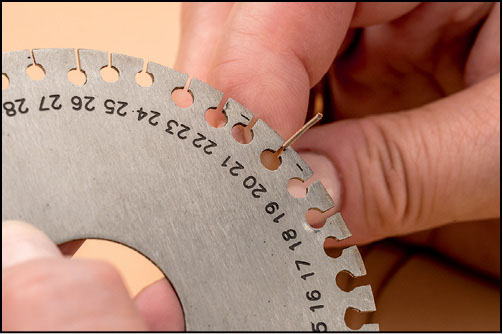
Figure 1
Jewelry makers often use metric measurements. Your rulers should have both standard and metric measurements. Use straight rulers and tape measures to mark measurements in your work. To convert inches to millimeters, multiply by 25.4.
For example: 2" × 25.4 = 50.8 mm.
To convert millimeters to inches, multiply by 0.03937.
For example: 25 mm × 0.03937 = 0.984".

Rulers and tape measure
Used to measure inner and outer diameters, calipers come in manual slide, digital, and dial varieties for reading measurements.
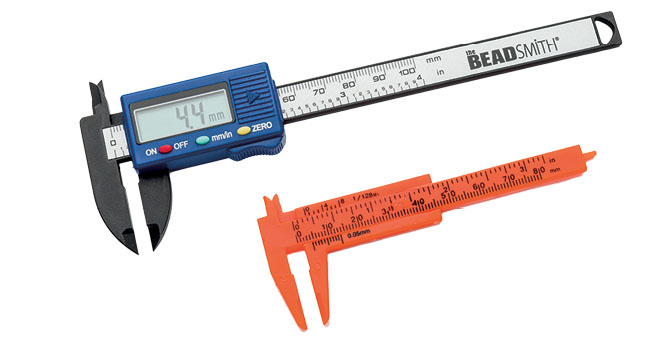
Calipers
Plastic templates such as those used for drawing contain grid marks that enable them to be used to find the centers of your discs or shapes. They’re also good to use for tracing and cutting discs, squares, and other shapes.
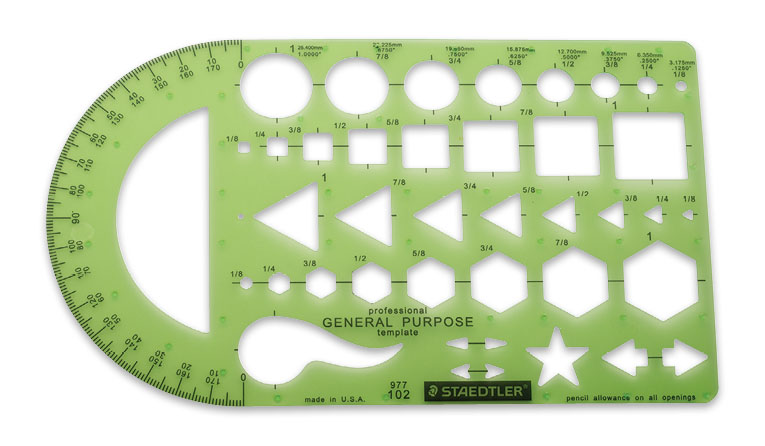
Template
Also called snips, metal shears are made specifically to cut metal sheet and should come with specifications of how thick a gauge they will accommodate. Metal shears can be found at jewelry suppliers. Be sure to follow the manufacturer’s recommendations to keep your tools sharp and effective. Additionally, several scissors brands have heavy-duty shears that are very effective in cutting metal sheet up to 24-gauge, including Fiskars and Joyce Chen.

Metal shears
Make sure you use shears that don’t have a serrated edge. Serrated blades will leave a very rough edge. And do not attempt to cut sheet heavier than is recommended for your shears, or you risk breaking your tool.
1. Prepare your sheet by annealing, if necessary (see Annealing). Starting at the edge of your sheet, use the back of your shears for the most leverage and cut along the desired lines without fully closing the shears until the final cut (Figure 1).
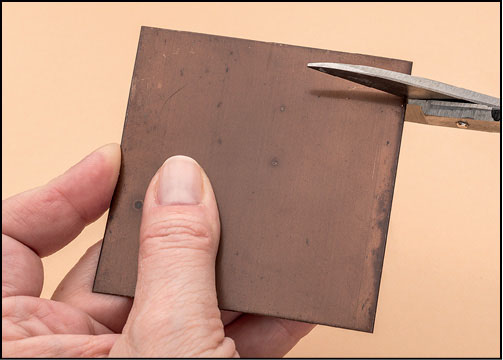
Figure 1
2. If the sheet has become misshapen, use a rawhide or plastic hammer on a steel bench block to hammer it flat (Figure 2).
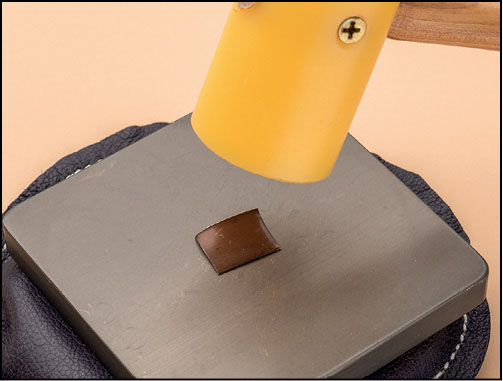
Figure 2
Sold by jewelry suppliers, this tool comes with a steel block with die holes and matching cutting punches to easily make consistent and perfect metal discs. Though pricier than shears, it makes cutting perfect discs a cinch. If you want to cut your own discs from sheet rather than buying precut blanks, this is an essential tool.
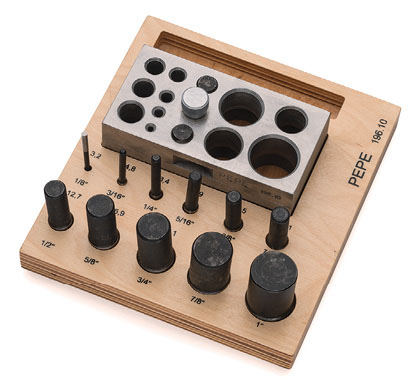
Disc cutter
A disc cutter is appropriate for 18- to 26-gauge metal sheet. Use a 1-pound brass mallet or heavy utility hammer to strike the punch.
1. Place your disc cutter on a flat, even surface. You can use a rubber mat or mouse pad to absorb some of the sound. Open the disc cutter and slide in your sheet, lining it up with the desired hole. Place scrap sheet of the same gauge on the opposite side of the cutter, balancing the tool. Secure the sheets in the cutter (Figure 1).
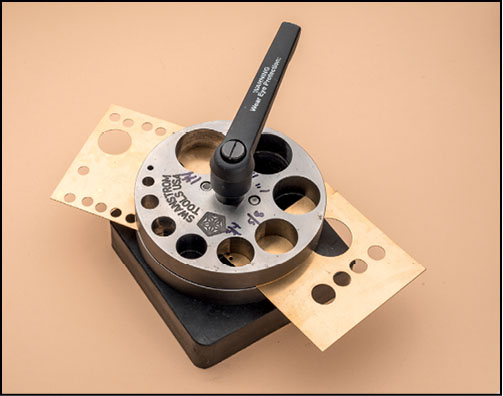
Figure 1
2. Insert the appropriately sized punch in the hole with the sharp edge down. Hammer the punch until you feel it cut through the metal (Figure 2).
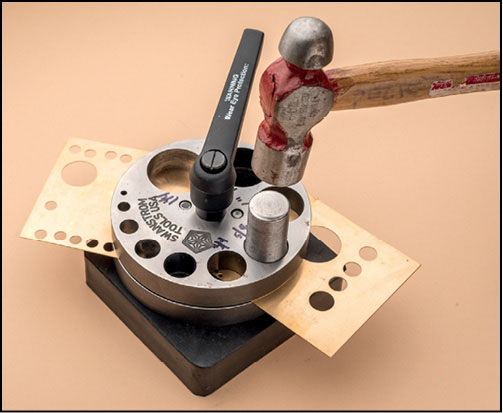
Figure 2
3. Lift the entire disc cutter up and let the punch fall through the hole; you can tap it with the hammer if it doesn’t fall through (Figure 3).
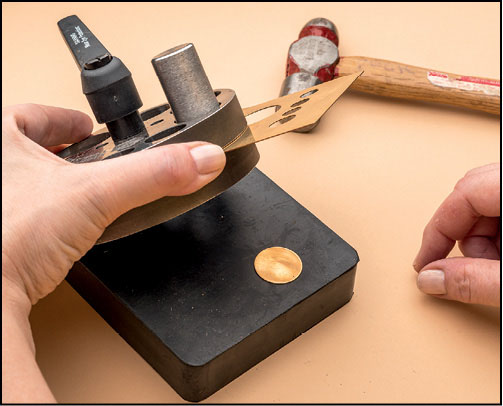
Figure 3
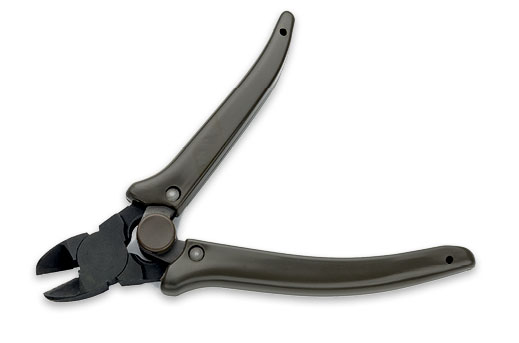
Flush cutters, diagonal cutters, and side cutters are all names for wire cutters that cut on their side. Flush cutters imply a smoother cut, leaving less of a burr on the end. They have pointed, angled jaws that allow very close cuts in tight places. Flush cutters are sold with a maximum gauge-cutting capacity; be sure to use cutters that can accommodate the wire you’re using.
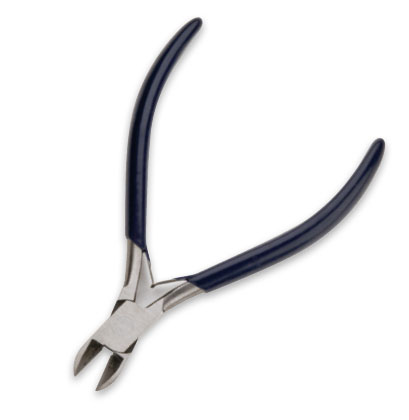
Flush cutters
The unique ultraflush cutters leave a flat surface on cut ends of wire that virtually eliminates the “pinch” left by most cutters. This is valuable when you need an ultraclean cut, for example when you want a smooth join for jump rings. It has a more limited cutting range of gauges, though, so it’s important to follow the manufacturer’s guidelines on maximum gauge.

Ultraflush cutters
Heavy-duty cutters are necessary when cutting heavy-gauge wire. Most heavy-duty cutters will cut to 12- or 11-gauge. Handles are usually ergonomic to prevent pain and injury when cutting such heavy wire. Never cut wire that is heavier than is recommended for the cutters.
Heavy-duty flush cutters
Place the flat side of the cutters against your work and the concave side against the waste. Cut the wire (Figure 1). The flat side will create a nice flush end on your work.
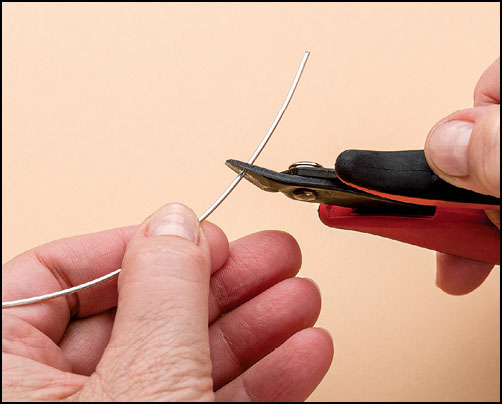
Figure 1
These pliers work exactly like a paper-hole punch and are best on 20-gauge sheet and thinner. They come in various hole sizes that match up with certain wire gauges, rivets, and screws. They’re available in short jaw and long jaw to accommodate longer pieces of metal. Refer to the wire gauges chart to determine what size wire will fit through your hole.
Hole-punch pliers
1. Mark a dot with your permanent marker at the spot where you want the hole.
2. Using the hole-punch pliers like a paper punch, squeeze the handle and punch out the hole (Figure 1).
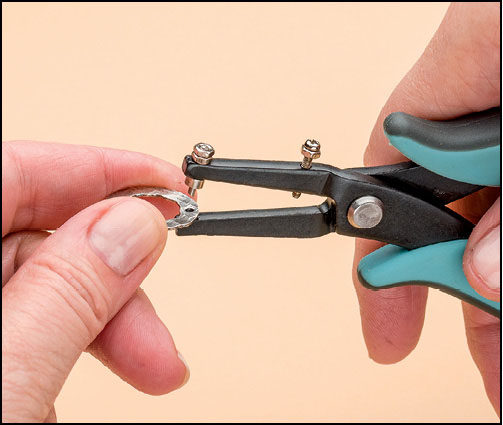
Figure 1
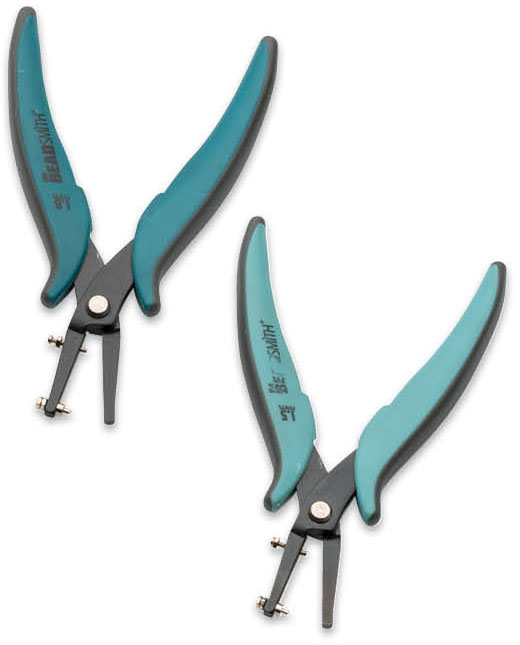
This tool has two drill punches that you manually twist down to create a hole. The drill on one side makes a 1⁄16" (2 mm) hole, and the drill on the other side makes a 3⁄32" (2.4 mm) hole. The 2 mm hole accommodates up to 14-gauge wire, and the 2.4 mm hole accommodates up to 12-gauge wire. This tool will punch through soft metals up to 14-gauge (1.5 mm thick).
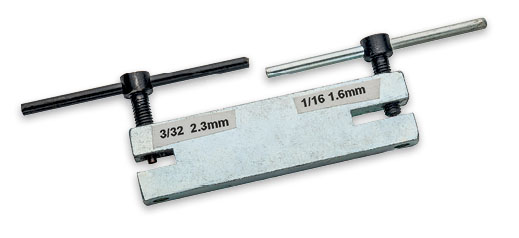
Screw-down hole punch
1. Mark where you want the hole, place the mark under the screw, and gently screw down until you have the drill right over the dot. Eyeball the placement to make sure it’s where you want it. Continue screwing down just until you feel the drill pop through; you will feel the turning get easier (Figure 1).

Figure 1
2. Don’t overscrew as this could mar your metal. Begin turning in the opposite direction to release your metal. Never pull your metal off the screw or you may damage the tip. The scrap should drop out of the bottom of the punch; if it doesn’t, use a tool to pop it through.
This powerful punch accommodates up to 16-gauge metal and comes with seven different size punches: 3⁄32", 1⁄8", 1⁄16", 3⁄16", 7⁄16", 1⁄4", 9⁄32". The punches can easily be switched out to accommodate the size hole you need for your project.
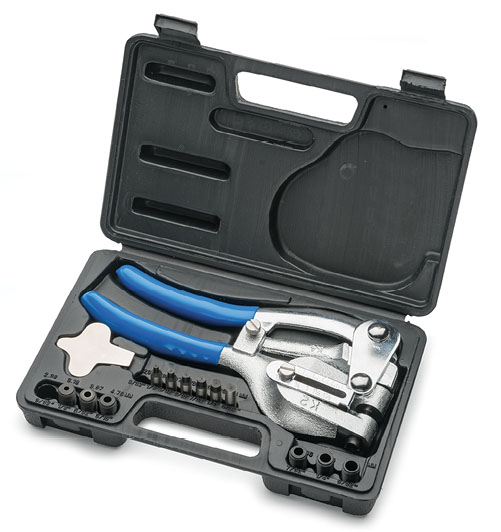
Power punch pliers
Be sure to place a Pro-Polish pad or thin piece of leather between the metal and the tool to prevent marring.
1. Follow the manufacturer’s instructions to insert the appropriate punch and die for your size hole. Mark where you want the hole (Figure 1).
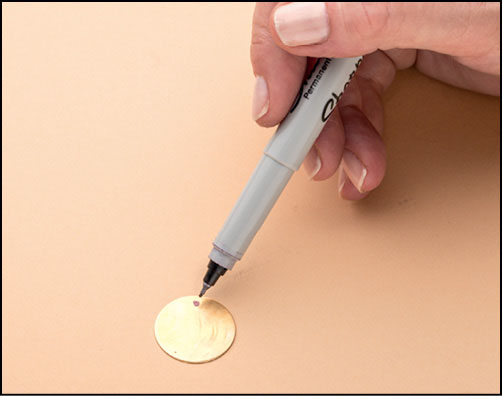
Figure 1
2. Center the metal under the punch (Figure 2).
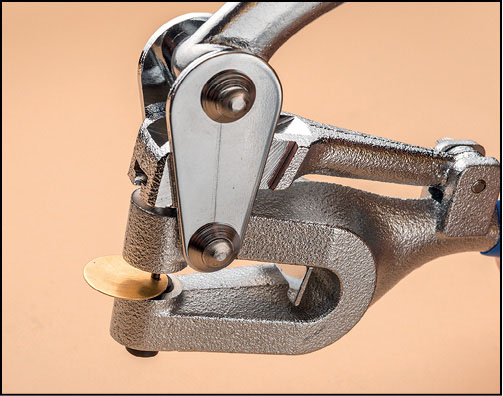
Figure 2
3. Squeeze the handles (Figure 3).
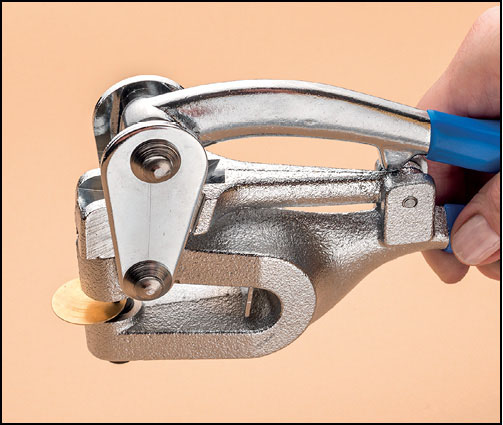
Figure 3