
Texturing is a fast and easy way to add interest to metal and wire. To highlight and bring out the depth of any texture, adding patina afterward is a great option (see Patina + Coloring Tools). For the purpose of the projects in this book, we’ve textured metal that ranges in thickness from 24-gauge sheet to 30-gauge.
Depending upon the gauge of the metal, it may need softening in order to take the texture better. When using a hammer, always grasp the hammer firmly near the end of the handle. Do not “choke up” on the handle as you might a baseball bat. This ensures you’re using the weight of the head optimally and also keeps your hand from absorbing the shock of the impact. When hammering, be aware that you will also be work-hardening the metal, and you may need to anneal it again before continuing to work with it.
A steel bench block provides a small and portable hard surface on which to hammer. It’s made of polished steel and is usually only 3⁄4" (2 cm) thick and a few inches square.

Steel bench block
This sound-deadening and shock-absorbing pad sits beneath your bench block. A mouse pad makes a quick and handy alternative to a leather sandbag.

Leather sandbag
A brass-head mallet strikes a nice, even blow when used with stamping tools. The head is brass and therefore softer than steel. You will see damage to the flat surface of the hammer after using it with your stamps; this is to be expected.
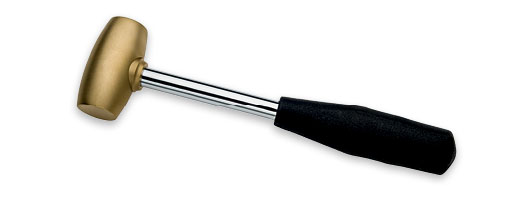
Brass-head mallet
Blue painter’s tape is an essential tool when using coins and texture sheets for taping your metal to the texture surface. Transparent tape is also handy for stamping.

Tape
Chasing or ball-peen hammers: These hammers have one round domed head and one round flat head. The domed heads can be used for making a nice dimpled texture.
Riveting hammer: This hammer has one round face and one chiseled face. The chiseled face makes a very good linear impression on metal.

Ball-peen hammer, chasing hammer, riveting hammer
Texturing hammers: These specialty hammers are made for the express purpose of adding texture to metal. They have carved or embossed faces that make designs such as dots or checkerboards in your metal.

Texturing hammers and changeable heads
There are lots of tools to create texture on metal. One of the simplest is using the ball end of a chasing or ball-peen hammer.
Place your metal on a steel bench block or steel mandrel. Strike the metal with enough force to transfer the impression of the hammer head to the metal and form a dimpled pattern (Figure 1).
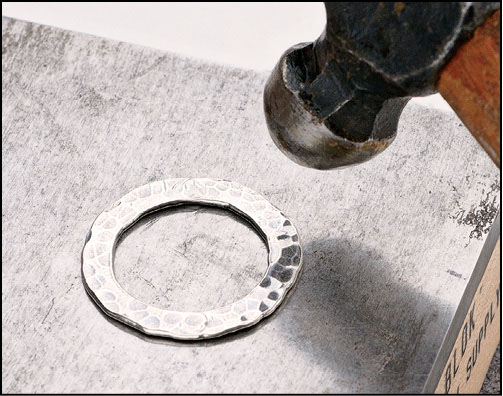
Figure 1
These small tools come in a variety of letters, numbers, and designs, and are made of tool steel with an embossed impression on one end. Used with a brass-head mallet, the small design moves the metal onto which you’re stamping and leaves an impression of the design on your sheet.
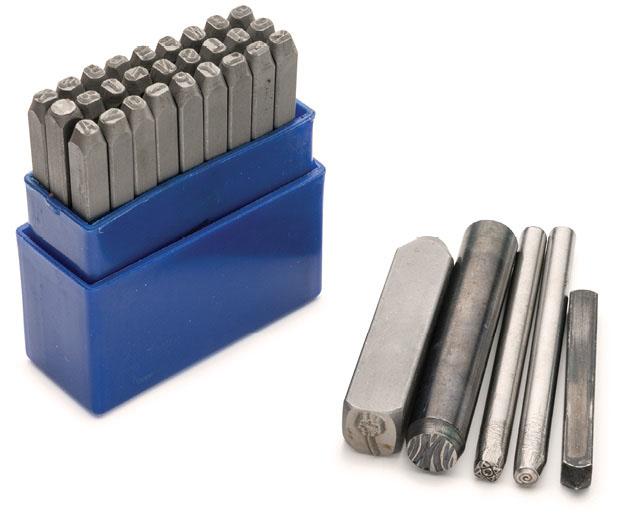
Stamps
There is a huge variety of steel design stamps available for decorating metal, including alphabets in a number of fonts.
Using transparent tape, affix your metal to the steel bench block. With a brass hammer, position the design end of the stamp where you want to place the impression and give a single solid blow to the other end of the stamp (Figure 2). If you have a particularly ornate design stamp, use a heavier 2-pound brass hammer.

Figure 2
Coins are made of hard metal and are intricately designed. By placing annealed or soft sheet metal on top of a coin, you can transfer the coin designs onto your sheet by hammering.

Coins and patterned sheet
Jewelry suppliers sell sheet metal that has already been tooled with intricate designs embossed on them. Hard-metal patterned sheet can be used as texture plates. By placing annealed or soft sheet metal on top of a piece of textured brass sheet, you can transfer the design onto your sheet by hammering.
If using a coin, be careful to avoid hammering too much along the edges of the coin as this may cause weak spots in your metal. Make sure not to use valuable or favorite coins as this technique causes a lot of wear and will eventually ruin them.
1. Using painter’s tape, adhere the annealed metal piece to the textured side of the brass texture sheet or coin (Figure 1).

Figure 1
2. With your sheet metal on the top and texture on the bottom, hammer thoroughly with both sides of your utility ball-peen hammer; first with the flat end and then with the ball end (Figure 2). If you find the impression isn’t deep enough, start with a heavier utility hammer and then finish up more thoroughly with the ball end of your chasing hammer.

Figure 2
3. Remove the metal to reveal the pattern (Figure 3).
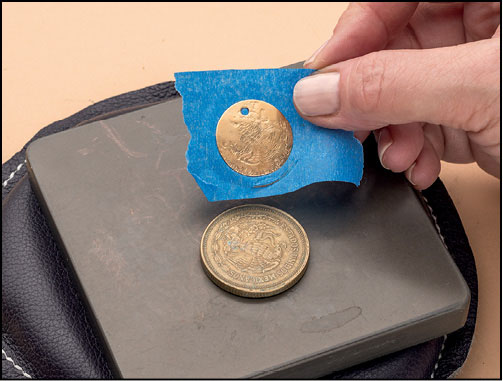
Figure 3
This embossing machine was originally created for the scrapbooking industry. Vintaj has adapted it to work with their metal blanks. It works like a low-tech rolling mill, impressing your sheet metal with designs from purchased embossing plates.
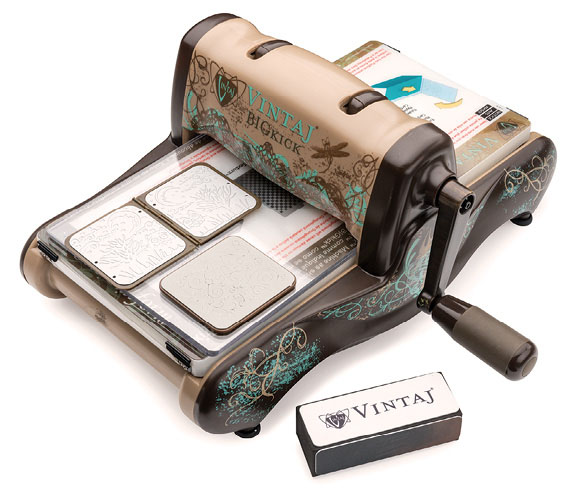
Sizzix BIGkick machine
This machine embosses and etches different designs using DecoEtch and DecoEmboss dies.
1. Place a 24-gauge Vintaj blank on top of the chosen die, following the instructions that come with the machine (Figure 1).
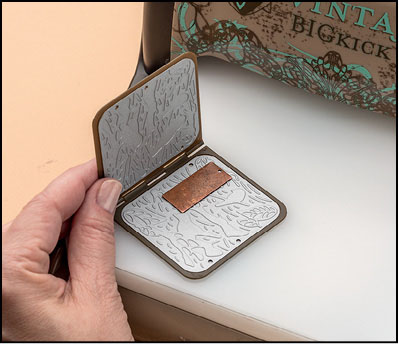
Figure 1
2. Roll the die through the machine (Figures 2 and 3).

Figure 2
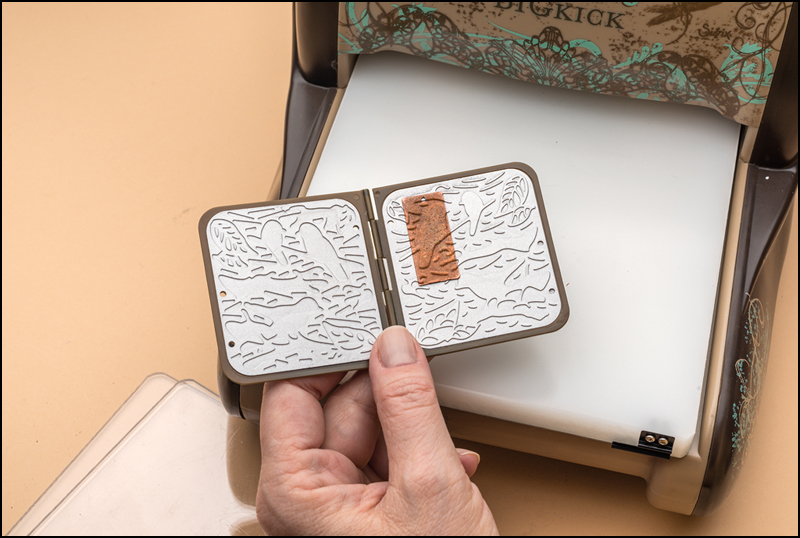
Figure 3
3. Use the sanding sponge to highlight the design (Figure 4).
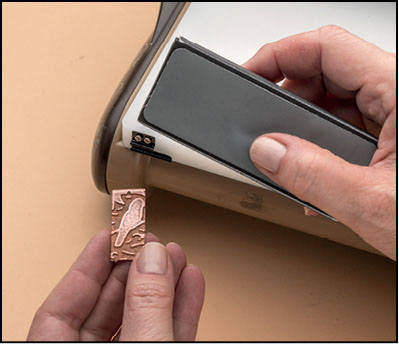
Figure 4
These pliers have one sharply curved jaw and one flat jaw with a dimpled impression. Squeezing your sheet metal in these pliers will form a little bump in your metal. They come in a variety of dimple sizes and make it easy to place the texture where you want it. Rotate the pliers to create a concave or convex impression.

Dimpling pliers
Mark your metal where you want to place the dimple. Place the jaw of the dimpling pliers at the mark and squeeze (Figure 1).

Figure 1
Abrasives such as steel wool, sandpaper, sanding sponges, and brass brushes can be used to obtain an interesting brushed matte finish. It is important to keep in mind what direction you are scratching the surface; moving in a circular pattern creates the most uniformity.
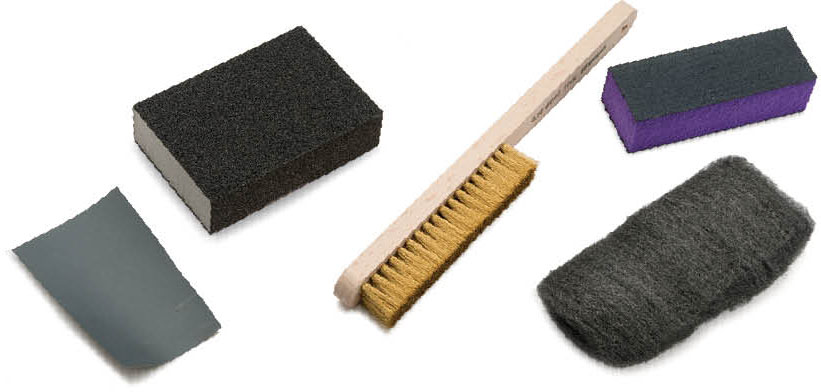
Sanding tools
Apply the sandpaper to the surface of the metal, using consistent strokes. Create the patterns of your choice.