24-gauge copper sheet
32-gauge tin sheet
6" (15 cm) of 18-gauge copper wire
1 pair of ear wires
Disc cutter
Ruler
Fine-point Sharpie marker
Metal shears
Nylon or rawhide hammer
Steel bench block
Alcohol wipes
100/180 coarse salon board
1.5 mm metal hole-punch pliers
Power Punch pliers
Spiral metal stamp
Ball-peen hammer
Bar Keepers Friend powder
Scotch-Brite green scrub pad
Fireproof work surface (cookie sheet)
Oven
Krylon Matte Finish 1311 spray or Renaissance Wax
Soft cloth
Maybelline #320 (Green with Envy) Color Show nail polish
Round-nose pliers
Stepped forming pliers (2–9 mm)
Flush cutters
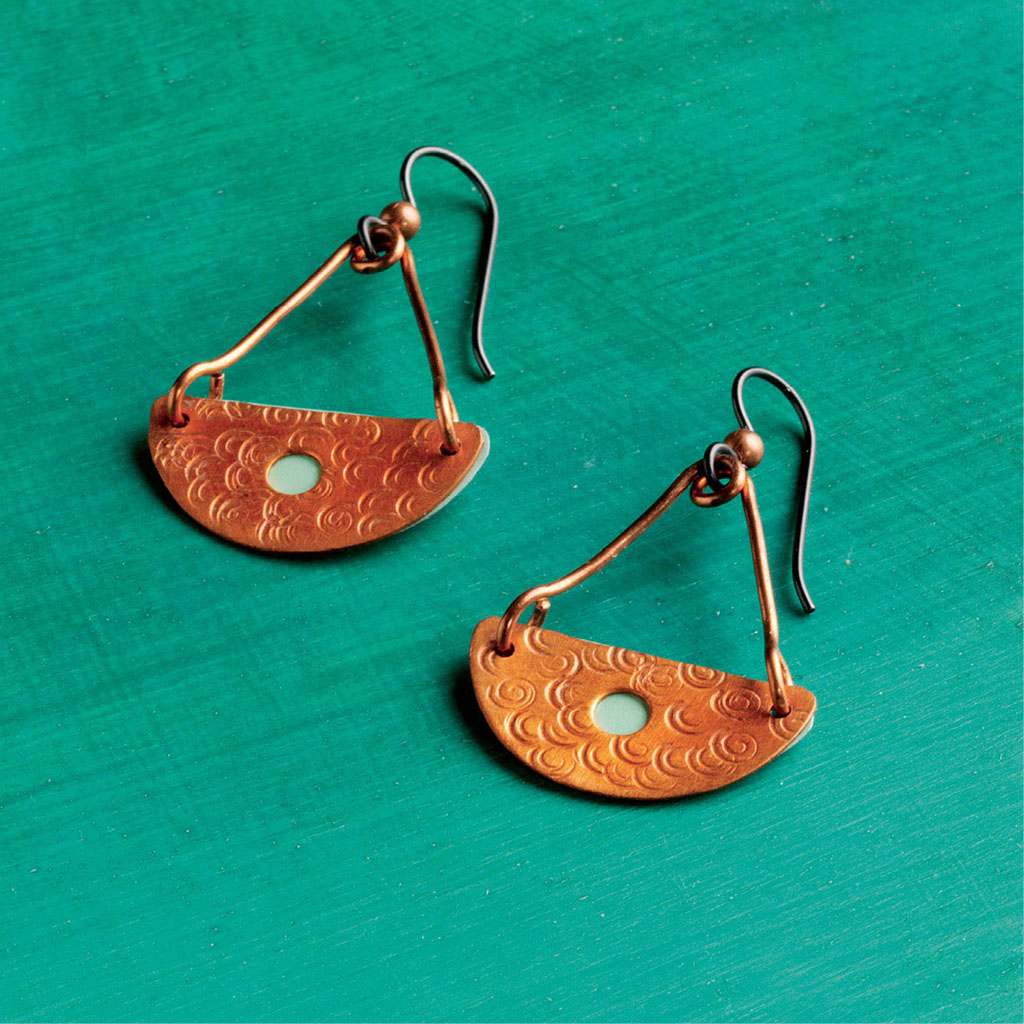
13⁄4" (4.5 cm) including the ear wire
1. Using the disc cutter, cut 1" (2.5 cm) discs from the copper sheet and the tin sheet.
2. Draw a line across the center of each disc with the ruler and Sharpie. Cut the discs in half with shears and snip off the points of the sharp corners. Gently flatten the discs on the steel bench block with the nylon mallet if they are distorted by the cutting. File the edges and round the corners with the salon board. Remove the Sharpie line with an alcohol wipe if necessary.
3. Make a hole in each corner of the copper pieces with the 1.5 mm hole-punch pliers. Using the Power Punch pliers, punch a 5⁄32" (4 mm) hole in the center of each copper piece. Line up one copper piece over a tin piece and mark through the 1.5 mm holes with the Sharpie, making a dot on the tin sheet beneath. Punch 1.5 mm holes in the tin sheet at the marks; repeat for the other tin sheet. File the back of all of the pieces to remove the rough edges from the punched holes.
4. Place the copper pieces on the steel bench block, front side up. Using a ball-peen hammer and steel bench block, texture the front of the pieces with the spiral metal stamp.

5. To color the copper, preheat the oven to 300°F (149°C). Clean the copper pieces with Bar Keepers Friend powder, water, and a green scrub pad, working in a circular motion. Rinse and dry. Place the copper pieces, front side up, on a cookie sheet and bake for about 17 minutes. Check them after 10 minutes and frequently thereafter. Once you see the color change to a tropical orange, remove the pieces and let them air cool. Transfer the cooled copper pieces to a sheet of paper and spray with Krylon Matte Finish or seal with Renaissance Wax.
6. Paint the front of the tin pieces with nail polish and let dry; repeat.
7. Place the copper pieces over the tin pieces and make sure the edges line up. If necessary, trim the tin pieces with shears.
8. Cut two 3" (7.5 cm) pieces of 18-gauge copper wire. Place the center of one wire over the smallest (2 mm) jaw of the stepped forming pliers and wrap both sides of the wire completely around the jaw, making a loop in the center (Figure 1).
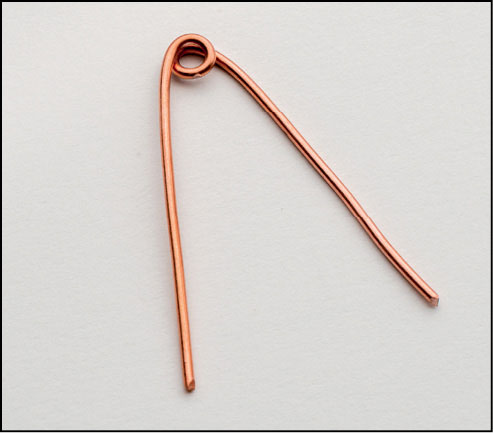
Figure 1
9. Bring the ends of the wires together and flush cut them so they are even.
10. Using the next step up on the pliers (3 mm), make a simple loop on each end of the wire, both going in the same direction and perpendicular to the center loop (Figure 2). Repeat with the other 3" (7.5 cm) piece of wire.

Figure 2
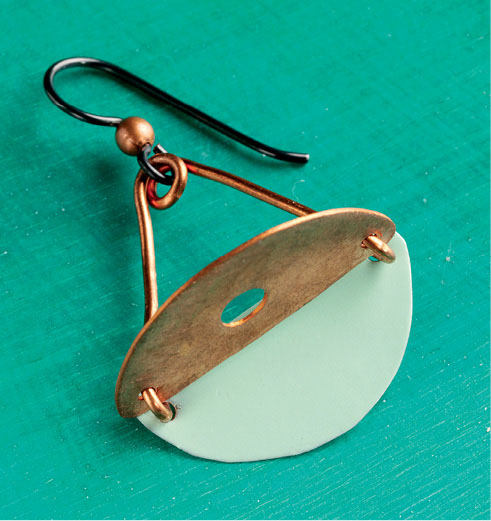
11. Using chain-nose pliers, open the end loops as you would a jump ring and attach the copper sheet, front first, and then the tin sheet, front first. Close the loops. Attach an ear wire to the center loop. Repeat for the other earring.
K&S Create with Metal tin sheet, Bar Keepers Friend powder: doitbest.com. Pepetools disc cutter, scissor shears, spiral metal stamp, Power Punch pliers, 1.5 mm hole-punch pliers, multistep pliers: beaducation.com. Nail polish: bedbathandbeyond.com. Copper sheet, copper wire: riogrande.com. Ear wires, spray matte finish: michaels.com. Renaissance Wax: objectsandelements.com.