Frippery
Melissa Hoopes, CZT
I remember the day I got the email from my friend Melissa saying she had a tangle for this book. I opened the attachment and thought, “Uh-oh.” It looked difficult. So I had a try—and it isn’t difficult. In fact, I love it. Frippery just takes some practice.
Note: About ten Zentangle tiles went to the big paper mill in the sky as I practiced this tangle. May I suggest you try it first on something a little more economical when practicing this tangle!
Materials
Sakura Pigma Micron pen (.01 Black)
Graphite pencil
Fabriano Tiepolo printmaking paper (31⁄2″ [8.9cm] tile)
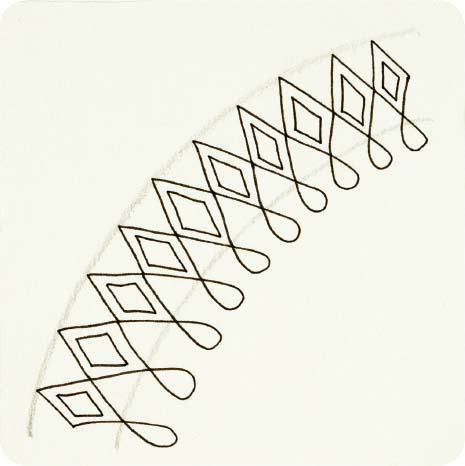
Step 1: Draw 2 curved, parallel lines with your pencil. With your pen, starting in the middle of the 2 pencil lines, draw a diagonal line to the top line. Change direction and draw a diagonal line to the lower pencil line. In a continuous pen stroke, create a loop under the lower line and take it back up to the middle to the same level you began.
Step 2: Return to the original starting point, and draw 2 lines to complete the diamond. This leads to repeating the pattern created in step 1.
Step 3: Continue to repeat the pattern and completing the diamonds until it reaches the desired length.
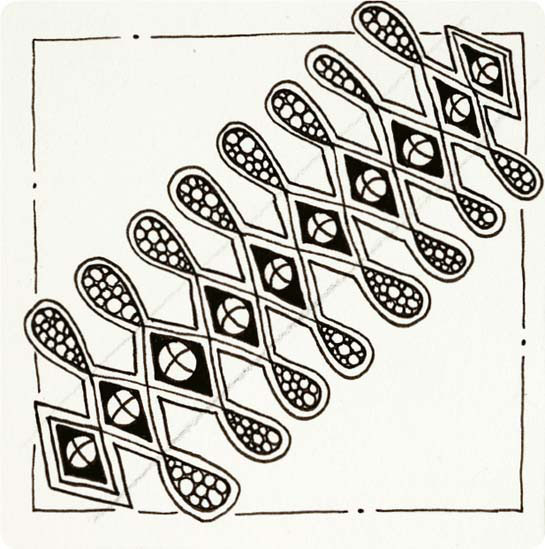
Step 4: On the inside of each diamond draw a smaller diamond.
Step 5: Decorate as desired. Melissa drew a circle inside the inner diamond. Then she added a cross in the middle of the circle and filled in around the circle.
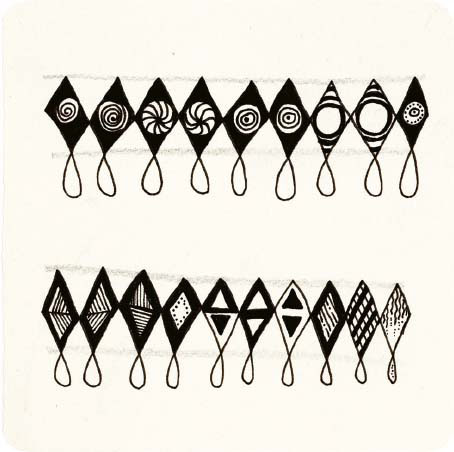
Here you can see some variations that Melissa provided, as well as a few of my own.
Tip
If you find the curved lines a bit of a stretch to begin with, use straight lines like I have in the variations tile. This may help you get the feel for Frippery.
FRIPPERY EH
Sakura Pigma Micron pen, graphite pencil