Before you try out soap making for the first time, it is essential to learn about the jargon of soap making first. This will give you an easier time understanding what you should be doing during the process, and it will also help you better understand the logic behind the instructions. Perhaps it will take some time before you finally perfect soap making, but in order to be eventually successful, it is necessary to start it out the right way. In this chapter, some of the most common soap making terminologies will be discussed. In addition, you will also learn about soap making equipment, commonly used oils, and the saponification chart.
It is important to note that while various types of soaps were discussed in Chapter 1, this book will entirely be about making personal soaps.
Making your own soap at home can be really fun and exciting especially when you’re very particular with details. When you finally decide to try it for yourself, you will probably encounter words or phrases that you’re not familiar with. Here are the most common terms that you will encounter when you read soap making recipes and instructions:
• Additives
Additives are optional ingredients. They are not really mandatory in the whole soap making process but they may be added to enhance the soap. Ingredients such as oatmeal may be added for its exfoliating properties, while flower petals may be added for fragrance. These should be added to your soap recipe at a light trace.
• CP
CP stands for “Cold Processing,” a soap making method. This will be discussed further in Chapter 3.
• Curing
Curing is the time needed for your soap to just sit in the open for the completion of its saponification process. This allows excess water and moisture to evaporate, creating a harder bar that is milder on the skin and produces better lather.
• Discount
This means that you will have to reduce the amount of a particular ingredient. Most of the time, lye is discounted to make sure that it will all be used up. Discounting certain ingredients also allows the addition of excess oils and other substances (additives). Usually, discounts are shown by percentage.
• EO
EO stands for “Essential Oils.” These are usually extracted from plants through distillation or chemical solvents. These oils may be added to the soap recipe to create scented soaps.
• Flashpoint
Essential oils and fragrance oils have a flashpoint, or the temperature in which they begin to evaporate. Do not add oils when the temperature of the soap is higher than the oils’ flashpoints as it will only make the oils evaporate from the soap immediately. Generally, fragrance oils have higher flashpoints compared to essential oils.
• Fixed Oils
These oils can withstand high temperatures without evaporating. Some commonly used fixed oils include palm oil, olive oil, and coconut oil.
• FO
FO stands for “Fragrance Oils,” and they are also known as aromatic oils. These come from the combination of synthetic aromatic chemicals and carrier oils like mineral oils or vegetable oils. Like essential oils, these are added to soap recipes to produce scented soaps.
• Gel Phase
Gel phase is a phase that occurs in the early stages of the saponification process. In this stage, the soap becomes shiny and translucent, and this usually happens within the next few hours of pouring the soap batter into molds. Not all soap batters undergo this phase.
• HP
HP stands for “Hot Processing,” another soap making method. This will be further discussed in Chapter 3.
• SAP Values
SAP value is short for “Saponification Value,” and it is also known as saponification number or SAP number. This is basically the amount of lye or potassium hydroxide that is needed to saponify one gram of a particular fat. Making your own soap means that you need to know the SAP values of the oils that you are planning to use to balance the amounts of oil and lye (or potassium hydroxide). Of course, the SAP values of oils will be different depending on the hydroxide that you will use, so make sure you specify if you need it for a solid (lye) or liquid soap (potassium hydroxide).
• Saponification
Saponification is a chemical process that occurs when an alkaline base such as lye (sodium hydroxide) or potassium hydroxide reacts with oils and fatty acids. This chemical reaction produces soap.
• Seize
Seizing is an indication that something went wrong during the soap making process. This happens when the soap’s consistency starts out as a smooth liquid and then becomes very thick and nearly solid like cookie dough. It can be because of the addition of fragrance oils, temperature or ingredient issues, or the problem could be the batter itself.
• Superfatting
In order to use up all the lye, sometimes you will need to add more oils to the soap. This is what is known as superfatting, and it has two purposes. First, it allows you to have a margin of error in the amount of lye you put in your soap, making sure that all the lye will be saponified. This reduces the dangers of lye burning you. Second, this produces soap that is moisture-rich, as the extra oils serve as skin moisturizers. It is worth noting that many soap recipes would suggest superfatting when a lye discount of 3% to 8% has been applied. Be sure that you don’t put too much oil as it can create a rather unpleasant and greasy soap.
• Trace
The trace is the beginning stage of saponification. This is the stage when the chemical reactions between lye and oils have started, and they can no longer be separated. The soap batter starts out as thin and creamy, which later on becomes thicker as you stir the mixture. You will know that your soap batter is at this stage when you drip a little liquid soap onto the mixture, and the drizzle lines will stay for a while before it fully melts.
• Volcano Effect
Volcano effect happens when you pour water to lye as you make lye-water solutions. This is because as water is added to lye, pressure tends to build in the bottom lye layers until it ruptures the upper lye layers, causing the solution to spray up like a volcano. To avoid this, NEVER add water to lye; add lye to water instead.
Learning about the common soap making terminologies is just the first step to creating your own soap. The next thing you have to do is to gather the necessary materials and equipment for your soap making project. Keep in mind that safety should always be your priority, so we will talk about safety precautions first.
Safety Precautions
Although there are soap recipes out there that don’t include lye in the ingredients, it is more likely for you to encounter recipes which have lye as its main soap component. Lye is a substance that should be handled with care as it is an alkali that is highly corrosive. Make sure that you never leave lye-water solutions unattended, especially in areas where children and pets are usually staying. Also, make sure that you perform soap making in a well-ventilated area with minimal distractions and tripping hazards. As an added safety measure, it is recommended that you always wear the following gear when you make soap:
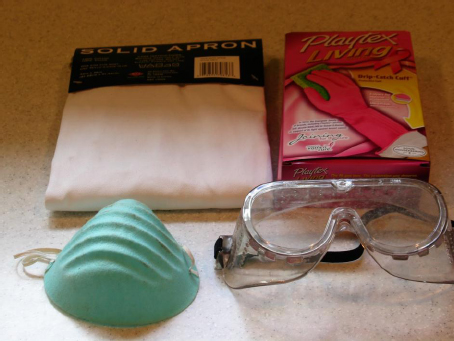
• Rubber or Latex Gloves
This is to protect your hands from coming into contact with lye and raw soap. You may choose to wear rubber gloves that go all the way to the elbow for extra protection, or you may also go for thin latex gloves.
• Safety Goggles
Alkali burns are serious hazards to the eyes, and for this reason you should always wear safety goggles that protect your eyes from all sides. Some people even prefer wearing full-face masks just to reduce the risks of sustaining alkali burns during soap making
• Long-sleeved Shirts, Pants, and Close-Toed Footwear
Make sure your skin isn’t exposed when you are making soap. This is to guarantee that your body will be well-protected against unexpected splashes of raw soap and lye solutions. Wearing overalls may feel hot and uncomfortable, but it is much better to have less skin exposed around highly corrosive substances.
After preparing your safety gear, it is now time to organize your soap making equipment!
Soap Making Equipment
This may already seem obvious, but soap making equipment should be exclusively used for soap making. This means that you shouldn’t use a particular material for soap making if you still intend to use it for preparing food in the kitchen. In addition, these materials should also be hand-washed.
• Pyrex or Non-reactive Containers
Tempered glass, stainless steel, heat-resistant, or polypropylene plastic containers are highly recommended for soap making. Never use aluminum containers because the reaction between lye and aluminum creates a toxic fume.
• Spatula (Rubber)
This is to ensure that all the soap in your container will be poured into your mold.
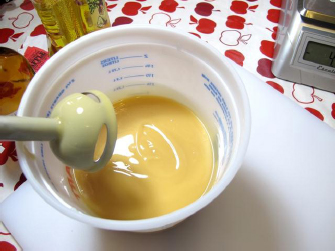
• Stick or Emulsifying Blender
Stirring soap mixtures manually may be a bad idea, but you can count on stick blenders to make the emulsification process of lye and oil more convenient for you.
• Scale
Most soap recipes have ingredients that indicate measurements in weight instead of in volume. Getting a nice digital scale is advisable, but you can use a cheaper kitchen scale as well.
• Molds
The most common types of soap molds include plastic molds, silicone molds, and wood molds. It is not advisable to use glass as mold because it is hard to release soap from it.
Plastic: There are plastic molds especially intended for soap making, but you can also use common household materials like Tupperware or Rubbermaid containers as soap molds. If you plan to reuse household plastic materials for this purpose, make sure that they are clean, dry, and free of any food debris before use.
Silicone: Silicone molds are flexible, making it easy for soap makers to release the hardened soap mixtures.
Wood: Wood molds tend to absorb oils quickly in soap mixtures, so always make sure that you use them with lining such as freezer paper or silicone liner. They can be used for cold process and hot process methods.
When you search for soap making oil charts, you will notice that oils are commonly classified as soft, hard, or brittle, but what exactly does this mean?
• Soft Oils
Soft oils stay liquid at room temperature. Examples include olive oil, avocado oil, castor oil, sunflower oil, grapeseed oil, etc. Soaps made from these types of oils tend to be softer, but soaps with high amounts of olive oil tend to produce hard soap bars. They are also slower to trace, and as a result, you can try experimenting with its colors.
• Hard Oils and Brittle Oils
Hard oils are oils that are in solid form at room temperature but can easily be scooped. Examples are lard, tallow, palm oil, coconut oil, shea butter, and mango butter. Brittle oils, on the other hand, are also solid at room temperature but they need to be chipped before they can be used. Examples are cocoa butter and palm kernel oil.
Generally, soaps made with high percentages of hard or brittle oils are easier to unmold because they usually harden at a quicker rate than soaps made with soft oils. They also require higher temperatures while mixing.
A saponification chart (or saponification table) shows you the different SAP values of oils. These values will let you know how much lye or potassium hydroxide you must add to the oils that you will use for your soap. It is important to know the exact amount of hydroxide solution to be added because adding too little or too much both have negative effects. Adding too little will cause the soap to go rancid as it contains extra fat, while adding too much will burn your skin.
To use the chart, you simply have to multiply the SAP values by the amount of oil in grams or ounces. The resulting number will give you the amount of hydroxide solution required to completely saponify that particular oil. For example:
SAP value of almond oil = 0.136
Amount of almond oil in grams = 100 grams
Amount of lye (NaOH) needed = 100 grams x 0.136 = 13.6 grams lye
OR
SAP value of almond oil = 0.136
Amount of almond oil in ounces = 32 oz.
Amount of lye (NaOH) needed = 32 oz. x 0.136 = 4.352 oz. lye
If you wish to use multiple oils for your soap, simply do the aforementioned process for all the oils to know the total amount of hydroxide solution that you must use to make your soap batter. For example:

Sample Saponification Chart


Although this saponification chart is not complete, the oils that are included here are the most commonly used by home soap makers.
Knowing about the different soap making terminologies and materials will ensure that your first soap making venture will be a success. In the next chapter, the various soap making methods will be discussed before we focus on soap making recipes.