The whole process of soap making is quite complex, but one of the best things about it is that you have total control on the ingredients that you put in your soap. It is completely up to you if you put herbs for texture or if you want to go for a smoother, more natural feel. Use your imagination and creativity to come up with a soap product that you can truly call your own! This chapter will focus on the different soap making methods with an introduction on the benefits of making your own soaps at home.
Although some people may think that soap making is a time-consuming activity, it actually has a number of health and economical benefits. In fact, using your home-made soap can be better than using your favorite commercial soap because:
• Most of the commercial soaps out there leave out glycerine in their soap recipes. Glycerine is a substance that draws moisture to the skin, and companies often put this in lotions and moisturizers to sell a different set of products. Because of this, some people may experience skin dryness and irritation with commercial soaps.
• With home-made soaps, you control what you put in it. You can put certain oils according to your needs and preferences, and you can also go for additives to enhance your soap.
• High quality soaps tend to be costly, but investing in soap equipment and ingredients and then making soaps by batch can prove to be less expensive in the long run.
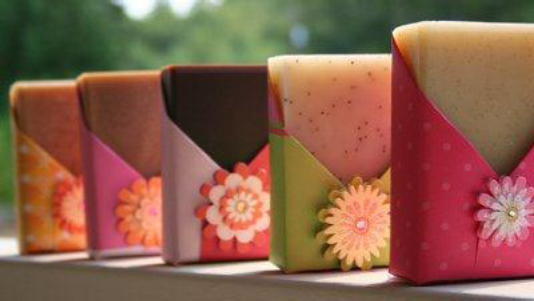
• Home-made soaps are also excellent gifts for your family and friends. If you are thinking of something special to give them, a handmade soap with a personal touch is a great gift idea.
• When you become adept at soap making, you can eventually make use of those skills to put up a soap business. Soap making as a profitable business will be discussed further in the next chapter.
Making homemade soap can be done in four ways. Of course, each method has its own set of advantages and disadvantages, and they have variations as well.
1. Melt and Pour Method
This method is probably the most straightforward of all the soap making methods, as the instructions involve:
• Buying a pre-made soap as a base
• Melting the soap and turning it into a liquid
• Adding ingredients of your choice
• Pouring the soap into a mold
• Designing and decorating the soap (optional)
• Leaving the soap batter to harden
As this method is quite simple, this is probably the best way for beginners to start out soap making at home. However, you don’t have much control over your ingredients, and the soap product will mostly be based on the soap you bought. It also won’t be as “natural” as the products of the other methods.
2. Cold Process
Cold process method is more complex than the melt-and-pour method because this time, you will have to come up with your own recipes from scratch. The resulting soap will be a product of what is known as the saponification process, and it usually takes 4 to 6 weeks to complete. This method is highly popular among home soap makers, because it allows them to tailor their recipe according to their preferences and needs.
However, the cold process method makes use of a corrosive substance called lye, so you will need to learn how to work safely around it. It also takes a lot longer to complete before you can finally use your soaps.
3. Hot Process
The hot process method is a variation of the cold process method, as this time heat is utilized to facilitate the saponification process. You stir the mixture at various times and the batter is heated at various temperatures to let excess water evaporate. This will make your soap ready for use once the batter cools. Although the waiting time is greatly reduced, soaps made from hot process method can sometimes be difficult to remove from their molds.
4. Soap Rebatching
The soap rebatching method is also called the milled soap method. This method is very similar to melt and pour method but this time, the soap base is your very own soap creation. Basically, you will need to create soap using cold or hot process method first before you can create something from soap rebatching. This is usually done to reuse unsuccessful soap batches or to preserve the healing properties and scents of essential oils.
Now that we know about the different soap making methods, let us now focus on the cold process method as this will be the method we’ll use for the test recipe.
1. Set up your safety gear, soap making equipment, and ingredients.
2. Prepare your soap molds and line them up with parchment paper, especially if it is a wooden soap mold.
3. Measure your ingredients; all must be measured using a digital scale. Measure your oils and the amount of lye (or potassium hydroxide) that you will need for them.
4. Note: When making lye-water solutions, pour lye into water to prevent the volcano effect! Make sure your water is no warmer than room temperature.
5. Weigh out your oils and other soap ingredients while your lye solution is cooling.
6. Start mixing your oils and your lye solution and stir it with a stick blender. Check its consistency occasionally and check for trace. When the trace stage is reached, you can now add extra ingredients and stir the mixture until all of them are incorporated well into the soap batter.
7. When everything is mixed, you can now pour the mixture into molds. Use a wooden spoon or a rubber spatula to smoothen out the top layers of your soap batter.
8. Cover your mold with quilts or blankets to ensure that your soap is well-insulated. The insulation will ensure that your soap will retain the heat required for it to complete the saponification process. Leave the cover for about 1 to 2 days.
9. After 2 days, you can now uncover your soap mixture and take the soap blocks out of their molds. Cut the block into your desired bar sizes and let them cure and just sit in the open for approximately 4 weeks.
Using the instructions above, it’s now time to try out making your very first soap! Olive oil soap is a fairly popular soap for beginners, so that is what we’ll be using for your test recipe.
Ingredients
• 17 oz. olive oil
• 7 oz. palm oil
• 10.5 oz. coconut oil
• 1 oz. fragrance oil or essential oil of your choice (optional)
• Other additives (optional)
• Lye-water solution (to be measured according to your ingredients)
Don’t worry if your first soap product doesn’t turn out well because everything becomes better with practice. Besides, soap making is not a straightforward and easy process, so you will have to give yourself enough time before you get the hang of it.