NIJMEGEN CENTRE AND THE ISLAND: XXX CORPS & US AIRBORNE
•Itinerary Four starts at the Valkhof, visits central Nijmegen’s WW2 memorials, crosses the original Waal road bridge and follows XXX Corps through The Island. It ends at Heteren.
•The Route: [Ideally, as driving in this busy city centre is difficult, much of the city route is better done on foot and, apart from the Waal Crossing OP, on a quiet Sunday.) Swing Memorial, City Hall Plaques, The Valkhof, Belvedere, Hunner Park, Jan van Hoof Statue, Jan van Hoof Bas Relief, German 3.7cm anti-tank gun, Grenadier Guards Plaque, Canadian Maple Tree Grove, Jewish Memorial, Civilian Memorial St Steven’s Church, Memorial to Dutch Soldiers, Plein 1944, Belgian POWs Plaque, Waal Crossing Point, Jan van Hoof Execution Site, Titus Brandsma Memorials.
The Island: Lent - Memorial to Nuns of St Joseph Home Convent; Symbolic Tree Memorial, ‘Robinson Tunnel’; Fort Hof van Holland; Memorial to 504th PIR River Crossing; Elst - Railway Workers Plaque, SLI/Worcesters/RDG Memorial, Executed Hostages, First Civilian Killed; Heteren - Allied Wargraves, The Island Museum, 101st US AB Division Memorial.
•Extra Visits are suggested to:
Memorials in the East of The Island: Bemmel - Jac Maris Liberation Monument, Family Costermans Plaque; Chapel of Remembrance, Haalderen Liberation Monument; Gendt Civilian Victims/Liberation Memorial; Doornenberg Phoenix Civilian Victims Memorial; Angeren - Memorial to Leijser Family, Memorial to Piet Kaak and Herman Scholten; Huissen - Civilian Mass Grave, Relief Operation to Civilians Plaque, Evacuation/Liberation Bas Relief. Memorials in the West of The Island: Slijk-Ewijk - 101st AB Plaque, Allied Graves; Zetten - Liberation Monument, Plaques to Dutch Railway Worker and POW in Java; Dodewaard Memorial to the Fallen, Memorial to Crashed Dakota with Members of 156 Para MG Platoon and Pilot; Opheusden - Memorial to Piron Brigade, 101st AB Plaque; Kesteren Resistance Worker Column; Randwijk Memorial to the Fallen.
•Planned duration, without stops for refreshments or Extra Visits: 4 hours
•Total distance: 33 kms/20.6 miles
• The Valkhof, Nijmegen/0 kilometres/0 miles/RWC/OP/Map 7/12

Swing memorial to Schoolchildren
Jan van Hoof Statue and Canadian Plaque

Jan van Hoof bas relief, road bridge

Grenadier Guards Plaque

Canadian Maple Trees
• Main Walking tour of Nijmegen (approximate time: 75 minutes)
Park in the underground Kelfkensbos car park at the Valkhof.
This is an extremely clean and secure (by TV cameras) car park. Parking is Monday-Saturday 0800-0400. Sunday 1200-0400. There is an hourly charge, maximum 3 hours. By the exit are WCs, with a charge of 50cts.
Exit by the sign Uitgang [exit] Vocrweg Kassa and up the escalator into the large open square

Jac Maris Statue to Dutch WW2 Servicemen

Plaque to Belgian POWs
(which on Monday and Saturday mornings is a bustling market).
Turn left and walk towards along Kelfkensbos to the junction to Waalkade to the right. Cross over the road and walk along Burchstraat towards the historic City Hall. Just before it turn left on the upper level of the smart new shopping centre in Marikenstraat. Continue to the clearing on the right.
•Swing Memorial to Accidental Victims of 22 February 1944 Bombing (Map 7l9)/City Hall Plaques (Map 7/8)
The memorial, surrounded by iron railings, was unveiled in 2000 in the presence of families of the 762 victims, of whom 24 were children and 8 were Sisters of the Society of JMJ [Jesus, Mary & Joseph] who were in the Infants’ School on the Raadhuishof, who were killed in the Allied raid. In particular memory of these children the memorial is in the form of a swing, De Schommel, designed by Henk Visch.
Return to Burchstraat, turn left, continue past the medieval building of the City Hall and immediately turn into the gate of the next building on the left.
In the gateway is a Plaque to the Nijmegen citizens killed in Indonesia 1945-1949. and Plaques from MARKET-GARDEN Veterans Club and Operation VERITABLE Veterans.
Return towards the car park exit and walk towards the Valkhof Museum.
The Valkhof Museum of Art and Archaeology, which opened in June 1999, shows Roman art and artefacts with a Knights of St John section and art exhibitions.

The Nijmegen road bridge, September 1944
Open Tuesday-Friday 1000-1700 hours, Saturday, Sunday, public holidays 1200-1700 hours. Includes café and shop. Tel: + (0) 24 360 8805.
Turn left through the ornamental wrought iron gates and over the small bridge.
This crosses the 15th Century original town walls, part of the second line of fortifications around the town, remnants of which can still be seen.
Walk into the wooded knoll.
• Valkhof
Here on Nijmegen’s most historic site the Romans founded Oppidum Batavorum (city of the Batavians) and at the end of the 8th Century Charlemagne built a palace here. Later Roman Emperors expanded the fortress which Emperor Frederick Barbarossa refined in 1155. It was demolished in 1796. The ruins which may still be seen here are of the 16-sided St Nicolaas Chapel, which originated in 1030, and the 1155 St Maarten Chapel.
Walk to the viewing platform and face across the river.
The Waal Road Bridge dates from 1936. Before that all traffic had to cross the river by chain ferry (a Nijmegen invention) which was attached to a cable fixed upstream and which swayed to and fro as it crossed the river.
Of all the bridges over the major rivers which were the targets of the airborne forces, only the Nijmegen Bridge remained wholly under German control at the end of D-Day. Its capture had been the responsibility of 82nd AB Division, but General Browning’s orders to General Gavin were that his first task was to seize and hold the Groesbeek Heights. There is no doubt that had the Americans gone for the bridge in force immediately after landing they would have taken it. But could they have held it against German counter-attacks mounted from Nijmegen and the Reichswald Forest until the Guards, delayed below Eindhoven, arrived?
Face the obvious church spire at Lent. That is at 12 o’clock. At 1 o’clock is the Nimegen road bridge. At 3 o’clock the road runs under the bridge and on the left of the viaduct arch is the Guards’ Plaque (not visible from here). At 4 o’clock is the Belvedere Tower and just beyond it a grassed area called ‘Hunner Park’. Two kms beyond and slightly to the right of it, but not visible, the Groesbeek Heights (covered by Itinerary Three) begin. From here the German border, marked by the western edge of the dense Reichswald Forest, is only 12kms away, beyond the tower. To General Browning it seemed possible that strong German forces were hidden in the Reichswald. Unless he controlled the Groesbeek Heights the Germans could attack his flank and cut off any paratroopers at the bridge. Thus his orders were: first the heights, then the bridge. General Gavin did not agree. With his airborne experience he felt that the key was to capture the bridge. Therefore, before 82nd AB left England, he ordered Colonel Lindquist, commanding 508th PIR, to send one of his battalions directly to the bridge after landing. That is what General ‘Slim Jim’ Gavin remembers. Colonel Lindquist retrospectively disagreed, saying that he was told to take an objective in the town. Curiously, the records of interviews which were carried out at the time with men who took part in order to settle the matter cannot be found in US Army files. It was not until evening that Gavin realised that no attempt had been made to take the bridge and he told Lindquist ‘to delay not a second longer and get to the bridge as quickly as possible’. In all it was to be some 8 hours after landing before any significant attempt to take the bridge began and, by that time, the quick-reacting Field-Marshal Model had sent troops of 9th and 10th SS Pz Division into Nijmegen. The force around the bridge and Hunner Park was later estimated to have been increased from eighteen men at the time the Americans landed to over 400 SS troops, with an 88mm gun where the Jan van Hoof Resistance Memorial in Keizer Traianus Plein now stands, and five 47mm weapons around Hunner Park. There can be little doubt that had Gavin’s orders been followed, the bridge - or at least its southern end - would have been taken that day.
The 508th PIR had dropped between Groesbeek and Berg en Dal, some 7 kms east from here beyond the Belvedere, and so their assault came in from that direction (see the Holts’ Map.) The main body got no further than Keizer Karel Plein reaching it around 2200 hours just as the 9th and 10th SS Pz forces arrived at the southern end of the bridge. One platoon of the 508th did get to the Post Office building (qv). The next attack, again by 508th PIR, began at 0715 hours on 18 September and en route through the streets the Americans were showered with fruit and flowers by Dutch civilians. The attack was stopped by the SS at Hunner Park. Generals Gavin and Browning plotted another attempt for the afternoon of 18 September, but Browning called it off because he considered that holding the high ground around Groesbeek was more important. One may feel that he was wrong and that General Gavin’s instincts were right, but, on the afternoon of 18 September the Guards, who were supposed to cross Nijmegen Bridge, were still south of Eindhoven, more than 40kms away, and there was no news from Arnhem. That night the Germans, using petrol cans and grenades, set fire to hundreds of houses in the bridge area, thus it was not until the afternoon of the following day, the 19th, that the next attempt to take the road bridge was made.
The Grenadier Guards Group (i.e. tanks and infantry) arrived in the area of the Sionshof (qv) around midday on 19 September having crossed the bridge at Heumen. General Horrocks had set up his XXX Corps HQ in the schoolhouse in Malden (see Holts’ Map) and Browning had pressurized Gavin that ‘the Nijmegen bridge must be taken today. At the latest tomorrow.’ Horrocks, Gavin and General Alan Adair, commanding the Guards Armoured Division, held an immediate conference whose outcome is clouded in differing British and American interpretations - as is the story of much of the fighting in and around Nijmegen where the authors, in reading national accounts of what happened, often wondered if they were talking about the same battle. In essence it was decided that a threepronged attack would be made using British tanks and American paratroopers. One column was to take the road bridge, one the railway bridge and the third the Post Office in Nijmegen centre. The Dutch liaison officer insisted that the apparatus for blowing up the road bridge was there, although the 508th had destroyed some apparatus there on the 17th, but, as they had been cut off by the Germans, that information cannot have got through to the Grenadiers. The first, main bridge, column, consisting of a company and a squadron of Grenadiers plus most of the 2nd Battalion of Colonel Vandervoort’s 2nd Battalion of the 505th PIR and supported by Typhoons, moved off at 1530 hours up Nijmeegsebaan (the road leading north from the Sionshof) onto Groesbeekseweg. Then, led by Dutch guides, they went via smaller roads north-east to the edge of Keizer Traianus Plein where the Belvoir Hotel now stands (in 1944 the area was known as the Keizer Lodewijk roundabout) leaving them barely 300m from the bridge. The Germans opened fire with two self-propelled guns and several anti-tank guns plus infantry small arms fire. The leading tank was knocked out and two more damaged, killing the troop leader Lieutenant J. A. Moller who is buried in Jonkerbos CWGC [22.F.1.]. The Grenadiers and Americans took to the buildings and, under cover of small arms fire, attempted to outflank the German defenders, but as night fell they had made no more progress.
The second column, of Grenadiers plus D Company of the 2nd Battalion of the 505th which was heading for the railway bridge led by Captain J. Neville, were stopped short of their objective by a Panther tank and ended up isolated amongst German infantry and burning buildings to the west of the railway bridge. It would be 48 hours before they were reunited with the main force.
The third column, heading for the Post Office and led by Major G. Thorne, was made up from two platoons of infantry and one troop of tanks from the Grenadiers plus a platoon of US paratroopers plucked off the road by General Gavin. They, unlike the other two columns, made it to their objective which was unoccupied. Thorne occupied the building and, apart from a foray towards the road bridge, which was repulsed, remained there overnight.
Thus up to this point four unsuccessful attempts had been made to take the road bridge. Firstly the lost American 508th platoon-strength patrol of 17 September, secondly the 508th company-strength attack that evening that had reached the Post Office, thirdly the 508th company-strength attack at 0745 on 18 September that got within striking distance of Keizer Traianus Plein and fourthly the combined Grenadier and US attacks of the afternoon of 19 September.
Once more 24 hours passed before the next assault, but this time, however, it succeeded. Colonel Reuben Tucker’s 504th PIR made their magnificent assault across the river at 1500 hours on Wednesday 20 September. This assault is described below, but the Guards too were to face some of the fiercest fighting of the campaign over the next few hours. The Grenadiers, whose aim was to take the bridge, came up with a plan to surprise the Germans. They reasoned that the defenders would not expect an attack to come from the city centre. At 0830 hours (on the 20th) the Grenadiers began to fight their way through the maze of small streets to the west of the Valkhof. At 1530, now in their assault positions, they launched a three-pronged attack - one company (the King’s) to take the Valkhof, another to take Hunner Park and elements of US PIRs on the far right to take the ground beyond the Keizer Traianus Plein roundabout. The Valkhof defenders were taken completely by surprise and two platoons of Grenadiers climbed into the position before the Germans knew that an attack had begun. Five minutes of hand-to-hand fighting left the Valkhof in Grenadier hands, though Captain The Hon Vicary Paul Gibbs (qv), the 23-year-old company commander, was killed. He is now buried in Jonkerbos CWGC Cemetery, [22.G.4.] having first been buried at the Nebo Seminary at the Sionshof (qv). Now overlooking the bridge defences, they began to fire upon the Germans dug in along the river bank while in the centre, with tank support and using smoke and phosphorus grenades, the Grenadier force was able to send a patrol down onto the bridge. It was clear. Sadly the patrol commander, Lieutenant Peter Michael Benson Greenall, was killed by a German rushing over the bridge in a side-car. He is buried next to Vicary Gibbs [22.G.3.] in Jonkerbos but his date of death is recorded as 21 September. At last, after four days of trying, the southern end of the Nijmegen road bridge had been taken.
Now it was time to get across. The Red Berets at Arnhem had been isolated for three days, one day longer than they were supposed to hold on. Would it not seem vital, if the operation were to succeed, to press on immediately once the bridge was taken? Apparently not, because after crossing the bridge the Grenadiers would wait until the following morning, the 21st, before going on. As the Americans frequently claimed about the British, ‘They had stopped for tea’. Had they?
Walk back over the small bridge, turn left and follow the path by the corner of the museum round to the platform below the tower.
• Belvedere OP
The original Belvedere, forming part of the old city walls, was built in the 15th Century. Today it is a restaurant. Tel: + (0) 24 322 6861. Lunch by appointment. Dinner daily from 1800 hours.
Ahead is the Nijmegen road bridge over the Waal, built in 1936. To the left of its span the spire of Lent Church can be seen over the river. To its right, on the horizon, the Arnhem TV Tower at Den Brink can be seen on a clear day.
Sergeant Peter Robinson and his troop of Grenadiers crossed this bridge around 1830 hours on Wednesday 20 September, just 10 hours before the tenacious survivors of 2 Para were finally forced off the bridge at Arnhem. The Arnhem bridge is on the horizon (not visible) in the area just to the right of the Den Brink Tower. Looking at the panorama ahead, one can speculate what would have happened if the Grenadiers had kept going, once over the bridge ahead, as Colonel Tucker had wanted them to do. Would they have reached Arnhem, or would the Regiment have been wiped out and the bridge lost? The argument can never be resolved. What is certain is that the Americans and British who fought to take the bridge exhibited extraordinary courage. Sergeant Robinson, peering out of the top of his Firefly (Sherman tank), led his troop 40ms onto the bridge and was hit. His radio failed, so he changed tanks and continued. Under a hail of grenades and small arms fire from German soldiers firing from the bridge girders, he and his Troop Sergeant slewed past a barrier pole and a barricade, shooting up a German 88mm gun which was placed by the northern approach, and continued north to The Tunnel (qv). In a way the Grenadiers’ attack on the bridge, though successful, may have been a mistake, because it was made on the assumption that the Americans held the northern end. They did not.
Return towards the museum and turn left under the bridge and then right into the park, heading for the roundabout. At the edge is
• Hunner Park Time Capsule/Map 7/13
This is in a raised, circular area, surrounded by a small brick wall. It contains a ‘Time Capsule’ with information on Operation MARKET-GARDEN which was sealed in September 1974. It will not be opened until September 2044.
The great roundabout area ahead is called Keizer Traianus Plein. In September 1944 this square was the scene of very heavy hand-to-hand fighting with bayonet and even spade and many were killed here. On the far side is a statue of the Emperor Trajan who granted Nijmegen official market rights in c104AD, thus making Noviomagus the first township on Dutch soil. In the centre of the roundabout, crossed to after descending the steps from the Time Capsule and carefully watching traffic from the left, is
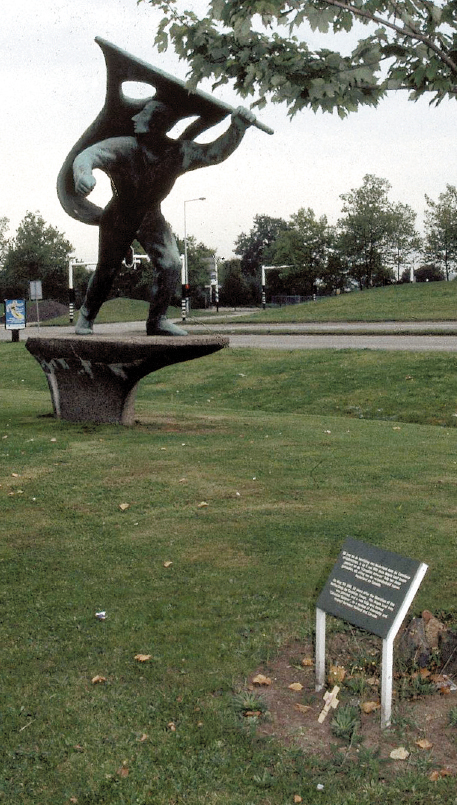
• Jan van Hoof/Resistance Statue/Maple Tree/Map 7/14
In 1944 Jan van Hoof (qv) was a student and member of the Dutch Secret Service. He gathered much precise information about the Waal bridges and the explosives planted beneath them. He became Nijmegen’s best-known resistance worker, credited with the saving of the Nijmegen road bridge, yet was the object of some controversy. The story is that van Hoof was sent into Nijmegen with the 82nd AB Division and was said to have defused the demolition charges on the bridge by penetrating the German lines to cross the bridge to the detonators on the Lent side. A local committee was set up in 1949 to investigate the verity of the action. It was satisfied that he did actually cut some cables and Jan van Hoof was awarded Holland’s highest award for gallantry, the Military Order of William. His citation claims that he alone carried out ‘the task of disabling the means of detonation with danger to his own life’. After the war the citizens of Nijmegen raised money to erect a monument, not only to van Hoof, who was shot by the Germans on 19 September (qv), but to all those who were killed during Nijmegen’s liberation. The bronze standard bearer statue that Marius van Beek designed was erected here on 17 September 1954. Annual commemorations take place here.
Beside the statue is a Canadian Maple Leaf Tree, planted on 5 May 1995,50 years after the Liberation of the Netherlands by Canadian troops ‘and a new tulip was named ‘Canadian Veteran’ as a symbol of friendship between Holland and Canada’.
Walk across the series of pedestrian crossings controlled by traffic lights to the footpath (and beware, it is also a cycle path) on the right hand side of the bridge, turn left and walk along the bridge to the circular indentation at the far end of the bridge span.
• Bas relief by Jac Maris to Jan van Hoof/Map 1N/8
One of the first Dutch memorials to be erected after the war and sculpted by Jac Maris (qv) its inscription reads, ‘To Jan van Hoof: his comrades. September 18th 1945. Nijmegen war veterans.’ It depicts van Hoof de-activating the explosives on the bridge on 18 September 1944.
Return to Hunner Park, walk back up the steps and follow the path down towards the river skirting the base of the Belvedere.
On the left is passed, on a raised platform,
• German Gun/Map 7/12
This German 50mm anti-tank Panzerabwehr Kanone 38 is a relic of the fierce fighting for the Waal road bridge. From 17 September successive attacks on Hunner Park were repulsed by the Germans. About 1530 hours on 20 September the Valkhof and Hunner Park were attacked from three sides by Grenadiers and US paratroopers and at about 1800 hours the park, riddled with trenches, protected by an anti-tank wall and with anti-tank guns, and the bridge, were in Allied hands (see account above).
Below the gun is the Nijmegen Coat of Arms which in season is a beautiful floral display.
Continue to the river bank.
To the left is the Railway Bridge. In 1983 the current single-span bridge replaced the three-span bridge built in 1878. Beyond it the chimneys of the factory and then the power station can be seen. Note the power cables crossing the river. It was at this point that the Waal crossing was made by 504th PIR (qv).
As the Grenadiers crossed the road bridge to your right Captain A. (Tony) G. C. Jones, RE, followed in his Humber scout car immediately behind the four tanks. His task was to defuse demolition charges. He told the authors his own story of what happened just as the last tanks went through the road block.
A PERSONAL ACCOUNT
Captain A.G.C. Jones
I was on the second span from the northern end of the bridge. I got out of my car and told the [wireless] operator to take over the Bren gun. The first thing I saw as I got out of the car was about half a dozen wires on the footway at the side of the bridge. These I cut. I walked up to the road block and saw about ten Tellermines 35 in a slit trench near it. These were obviously designed to close the block. I removed the igniters and threw them in the river.
I then ordered my driver to turn the car round and walked back over the bridge until I came to a set of charges lying on the footpath at each side of the bridge just to the north of the second pier from the north end of the bridge. These had been designed to cut the concrete roadway but had never been placed in position and were quite safe.
Jones then collected seven German prisoners who appeared from behind various arches and took them back and reported that the bridge was clear. The rest of his troop was sent forward under Lieutenant Vivian and he returned to the northern end of the bridge where, with Vivian, he went down into the bridge piers. They found TNT packed in green painted boxes labelled with serial numbers relating to those painted on the girders. These were fitted with electric detonators and were connected to one of the wires that Jones had cut earlier. They removed them and went on to check the rest of the bridge. As they finished they met American soldiers who had just killed an SS officer who had shot at them from the bridge arch, an action wrongly shown in the film A Bridge Too Far as having happened before the Grenadiers crossed the bridge. Jones and Vivian ended up with a total of eighty-one prisoners.
It is inexplicable that Captain Jones did not receive the Victoria Cross for his acts of supreme bravery. In his book, Corps Commander, Sir Brian Horrocks, when talking of the Americans who had made the river crossing (he mistakenly identified them as men of the 505th - they were actually 504th) and Peter Robinson and his men who made the dramatic crossing of the road bridge, wrote of Tony Jones, ‘Perhaps the bravest of all these very brave men was Lieut. Jones a young Sapper officer.’
Eight days later, on 28 September, twelve German frogmen blew a 20m hole in the road bridge and destroyed one of the piers of the railway bridge. The swimmers, pushing six floating naval mines, had entered the river 11 kms upstream from Nijmegen. Only eight survived. The road bridge was repaired and reopened within 48 hours.
Walk to the left of the arch under the bridge. On the wall is
• Memorial Plaque to the Grenadier Guards/Map 7/10
The bronze plaque with the badge of the Guards Armoured Division, erected on 18 September 1994, the 50th Anniversary, and unveiled by Lord Carrington (qv), commemorates the capture of the road bridge by the Grenadier Guards. The tunnel is called Grenadier Guards Viaduct.
Walk back across the road and continue uphill with the Nijmegen Coat of Arms to the left.
Bordering the flower garden is a grove of trees.
• Canadian Maple Trees/Map 7/11
A bronze plaque, in the vegetation in the centre of the double line of trees, records that ‘These forty [now reduced to just over thirty trees] Sugar Maple trees are presented on behalf of the Province of Ontario, Canada, to the City of Nijmegen by the ‘We Do Remember’ National Committee on the occasion of the thirty-fifth Anniversary of V.E. Day [7 May]. 1945-1980.’ After the area was taken in September 1944 the Canadians remained in Nijmegen and this ‘living monument’ of the national symbol of Canada commemorates their stay and Victory in Europe.
Return to your car, exit from the car park, setting your odometer to ‘0’. Follow the oneway system round the Keizer Traianus Roundabout signed Waalkade and Casino and return past the Museum and open square. Turn right and drive down to the Waalkade, the road running along the Waal, and turn left towards the railway bridge past the Casino. Continue over the small roundabout and park as soon as possible in the spaces on the left (1.3 kms/.8 miles).
• Short Walking Tour of Nijmegen (approximate time: 20 minutes)
Walk to the left and up Priemstraat to the small square at the end of Nonnenstraat.
The square has a plaque to ‘Kitty de Wijzeplaats 1920-1942 Killed in Auschwitz.’ Here is the old Jewish Synagogue, built in 1756. In 1814 Henriette, the daughter of the then Cantor, Isaac Presburg, married the father of Karl Marx, founder of ‘Marxism’. Another daughter, Sophie, married Leon Philips in 1820. Their son was one of the founders of the Philips light bulb factory in Eindhoven in 1891. Next to the synagogue building is the former Jewish School built in 1873. In the centre of the square is
• Jewish Memorial/Map 7/5
Designed by Paul de Swaaf, this sculpture of a mourning lady looking towards the old Jewish Schul, was unveiled in 1995. The figure stands beneath a tree and is surrounded by railings in which there are Stars of David. Within the railings is a plaque which reads, ‘Kom vanavond met vernalen hoe de oorlog is verdwenen en herhaal ze duizend malen alle malen zal ik wenen. ‘These are lines by the Dutch poet, Leo Roman, which translate, ‘Tonight come with stories of how the war has faded away and repeat them a thousand times. I will weep every time.’
Walk up the Noorderkerktrappen steps to Saint Steven’s Church and round the wall to the left. At the base of the tower is
• Monument to Civilian Victims/Map 7/6
Designed by Mari Andriesson and erected on 17 September 1979, the winged figure commemorates all the citizens of Nijmegen killed between 1940 and 1945. Around 400 people died in the first years of the war, then the American bombing of Nijmegen of 22 February 1944 resulted in about 750 casualties. Another 750 or so were killed during the period when Nijmegen was a front line town from September 1944-March 1945.
The townspeople requested a National Monument (an officially designated memorial) to remember their dead. From October 1945 until into the Sixties one Central Committee and eleven Provincial Committees vetted all designs submitted as National Monuments. Their aim was to prevent a spate of well-intentioned but ‘unworthy’ memorials being erected. This memorial was rejected, as was the plan to erect a Commemorative Cross on Hatertseweg and a memorial for fallen sportsmen in the Goffert Stadium.
Walk to the right down Ganzenheuvel and continue on Houtstraat into Plein 1944. The memorial is in the far right hand corner of the Square.
• Statue to Dutch WW2 Servicemen/Map 7/7
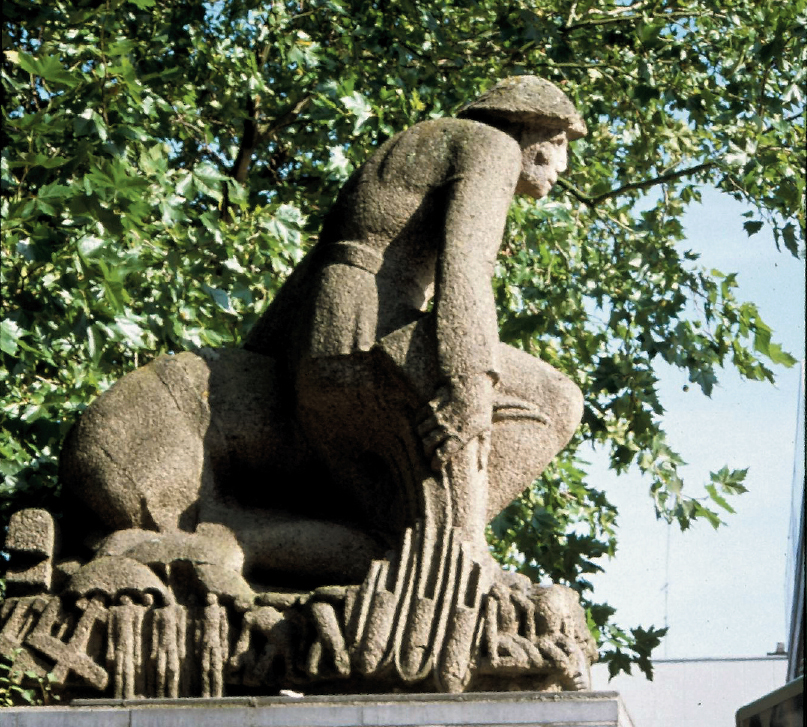
Designed by Jac Maris (qv), this monument of a soldier kneeling beside his wounded comrade commemorates Dutch forces killed during WW2 - an estimated 2,300 soldiers (killed in the German attacks of May 1940) and 2,900 sailors who served with the Royal Navy. It was erected on 5 May 1951 when the name of the square was changed from Koning Hendrikplein to Plein 1944, in memory of the Liberation of Nijmegen. After other requests for a National Monument for Nijmegen had been turned down (see above), this was the one that was finally approved. Maris described it thus,
In the trench I am protecting my comrade. He has been shot down. I am ready to fire. I’ll stay here until someone comes to his aid. Solidarity! If you want to protect your comrade who has fallen, and you cannot take care of him, you hold him, but you also crouch down for anything that may come.
Return to your car and continue past the area where the road widens into a square.
This is the site of the Old Harbour, once contained within the town walls. It was filled in when the walls were demolished in 1874 to make room for expansion. It was at this stage that the wide boulevards fanning out from the hub of Keizer Karel Plein were laid out.
Continue to within about 300m of the railway bridge and park on the right opposite a plaque on the wall to the left.
• Plaque to Belgian POWs, Waalkade/1.6 kms/1 mile/5 minutes/Map 7/2
The inscription on the plaque reads,
In May-June 1940 the citizens of Nijmegen spontaneously rendered assistance to tens of thousands of Belgian prisoners of war on their way to Nazi camps in cramped Rhine barges.
It was erected on 16 May 1992 by the National Belgian Federation of ex-Prisoners of War.
Between 30 May and 5 June ninety barges, packed with a quarter of a million Belgian POWs, were moored at the Waal quay. The road bridge had been blown up on 10 May and was lying in the water, blocking their way to the camps in Germany. Citizens from the surrounding districts of Nijmegen provided the starving prisoners with bread, water, milk and medical care. This, one of the first acts of resistance in newly-occupied Holland, was quickly forbidden.
Follow the road round the Veemarkt and turn right under the railway bridge and at the traffic lights right again following signs to Weurt/Noord Kanaal-haven. Continue to the right turn Winselingseweg opposite playing fields. Turn with the power station building on the left and continue to the end of the road with the v.d. Stadt building and the Noviant Chemicals security gate ahead. Stop. Leave your car.
N.B. To reach the wonderful OP at the edge of the river overlooking the crossing point it is necessary to apply to the security officer and hope that he speaks English and will open the gate for you! The resultant view is well worth the effort. Note that the gate is not manned on a Sunday when only a limited view of the crossing point and Lent church are visible from behind it.
• Waal Crossing Point/4.3 kms/2.7 miles/10 minutes/Map 1N/8a/OP
The crossing took place to the left, immediately below the power line cables. With the pylons on the far bank at 12 o’clock, the Fort Hof Van Holland is at 1 o’clock, Lent Church is at 2 o’clock and the railway and road bridges beyond it are at 3 o’clock.
The task of crossing the Waal here was given to Major Julian A. Cook’s 3rd Battalion, 504th PIR. The attack was delayed while they waited for British assault boats to arrive. The weather, which had grounded most of the tactical air support in previous days, lifted sufficiently for rocket-firing Typhoons to pound German positions on the north bank at 1430 hours. As they were low on fuel they could not wait for the crossing to be launched and returned to their base in Brussels. Fifteen minutes before H-Hour, twelve guns of 376th Para Field Artillery Battalion and 153rd Field Regiment, RA bombarded the far bank. At 1500 hours the Americans pushed off from the banks in front of you, the current swinging the small boats to the left. The Germans opened fire from the dyke with machine guns and 20mm cannon from Fort Van Holland, following the furiously paddling Americans onto the far bank below the power lines. Away to the right heavy enfilade fire from the railway bridge caught the boats. Later, more than thirty machine guns were found on the bridge. Despite supporting fire from tanks of the 2nd Battalion Irish Guards, which were strung side by side along the bank from here towards the bridge, as well as mortars of the 504th, only thirteen (some reports say ten) boats were fit to return to pick up the second wave. The surface of the river, as one paratrooper remembered it, was packed with machine-gun fire like ‘a school of mackerel on the feed’. Six times the crossing was made between H-Hour and 1900 hours. The American losses are detailed at their Memorial below. An extremely detailed, almost minute by minute, account of the crossing is to be found in WAALCROSSING by Father Thuring, Frank van den Bergh, L. Zwaaf and J. Thuring, published by the Groesbeek National Liberation Museum in 1991.
The 504th PIR assault against murderous machine-gun fire was described by General Horrocks, who watched both them and Peter Robinson’s crossing from the roof of the power station, as ‘the best attack that I ever saw carried out in the whole war’. He wanted to award British medals to them and during the war the men of the 82nd were to win six MCs, eleven MMs, two DSOs and twenty-three DCMs. Also watching from the ninth floor of the power station were General Browning, Lieutenant-Colonel GilesVandeleur and his adjutant Captain J. V. Taylor, who remembered not just the ‘calmness and courage shown by men of the 504 Combat Team’ but also ‘the muzzle flashes of the German guns from somewhere in the area of Elst and the shells landing among the attacking troops and the tanks’.
Captain T. Moffatt Burriss was a wartime soldier who had served with the 82nd in Sicily and at Anzio before dropping into Holland. After the war he became a successful businessman then a politician, serving in the South Carolina House of Representatives for 15 years. In 1999, in response to requests from his children to tell them about his war, he wrote Strike and Hold, an account of his experiences. The narratives here [and later] are based upon his book and upon our conversations with him, and cover the period from the time when the Americans were briefed by General Horrocks to make the highly dangerous daylight assault crossing of the river to his arrival on the opposite bank.
A PERSONAL ACCOUNT
By Captain T. Moffatt Burriss, 504th PIR sent the authors this account:
The British general asked, ‘What do you think? Can you do it?’
Colonel Tucker asked him, ‘If we take the bridge, what assurance do we have that your troops will get to Arnhem immediately?’
General Horrocks replied, ‘My tanks will be lined up in full force at the bridge ready to go hell bent for Arnhem. Nothing will stop them. ‘All of us took this as a solemn pledge…
The British were to supply us with assault boats - paddleboats rather than motorboats - and they promised to deliver them by 1100…. We watched 1100 come and go, then 1200, then 1300. The British paratroopers at Arnhem were running out of time…. When we saw the boats we were stunned. They were flimsy, collapsible canvas boats that looked as if they wouldn’t make it across a swimming pool… ‘OK men’ Major Cook said, ‘use your rifle butts as paddles. ‘It was like a Laurel and Hardy movie, only with real lives at stake - hundreds of lives. We would be crossing the river in clumsy flat-bottomed boats propelled by makeshift paddles while the Germans were firing at us with virtually every weapon at their disposal.
We heard the drone of tanks (Irish Guards) and saw them swing into place right behind us. Then they opened fire on the enemy positions across the river. As soon as we launched the first boats, mine among them, chaos reigned… several boats were swept downstream before everyone could scramble onboard… two or three boats capsized…others were stuck in the muddy embankment. German shells began landing nearby. Finally, God only knows how, we got everybody on boats and started paddling across the river. When we were a third of the way across, the river suddenly exploded. As the Krauts unleashed their full firepower the surface of the water looked like it was in the middle of a sudden rainstorm, the sky actually hailing bullets… men began to slump forward in their boats. Some screamed, but most went silently… one, two then three boats sustained direct hits from mortar shells and disintegrated in a burst of flame, with bodies cast in all directions… I was sitting on the stem of the boat next to the engineer… ‘Captain’, he said, ‘take the rudder. I’ve been hit.’ Just as I reached for the rudder he leaned forward and caught a 20mm high-explosive shell through his head…. As I watched his body float downstream I could see the red blood streaming from what was left of his head….
We landed and piled ashore…. ‘OK men,’ I shouted, ‘Lets go. Straight ahead for the dyke.’ The [German] machine gunners shifted their fire from the boats to the charging ground troops…men began to drop on both sides of me… several of us… reached the front side of the dyke and were now safe from the machine guns on the back side.… ‘Use your grenades’, I yelled… . The earth underneath us trembled with the almost simultaneous explosions. Then there was a moment of silence in front, followed by the screams of wounded Krauts. All along the line, other German gunners stood up ready to surrender. But it was too late.
Our men, in a frenzy over the wholesale slaughter of their buddies, continued to fire until every German on the dyke lay dead or dying.
The Americans rallied into small groups and then, with grenade and bayonet, took the dyke and the Fort
Return to the railway tunnel and drive under it to J. Ivens Plein. Drive along the side of the square into Parkweg ahead and as the road turns right park on the left as soon as possible. Walk back to the near corner of the square. Flat in the ground is a plaque to
• Site of Jan van Hoof Execution/5.9 kms/3.7 miles/5 minutes/Map 7/1
On 19 September Jan van Hoof appeared at the Sionshof Hotel with sketches of the German fortifications in the vicinity of the Waal Bridge. At first he refused to guide a reconnaissance vehicle into Nijmegen, but later that same afternoon agreed to conduct a Humber scout car of the Grenadier Guards through the centre of the town from the Post Office towards the rail bridge. As the vehicle entered the Nieuwe Markt it was hit by a German gun and caught fire. Lance-Serjeant William T. Berry RE and Grenadier Guardsman Albert Shaw were shot and almost immediately died of their wounds. They were buried in a field grave and reburied in jonkerbos CWGC Cemetery (qv) but with the wrong date of 21 September 1944. Van Hoof survived the attack but was picked up by the Germans, tortured and shot at this spot.

Site of Jan van Hoof execution, J. Ivens Plein

Titus Brandsma: Memorial and mosiac detail on Chapel


Lent: Huize St Josef with Plaque to Sisters of Divine Providence and (above) the Symbolic tree
The stone was laid on 19 September 1945. This, with the bas relief to van Hoof (qv) on the Nijmegen Bridge, was the first Dutch memorial to be erected.
The square also contains a large sculpture to the movie-maker Joris Ivens, who was born in Nijmegen.
Return to your car and continue along Parkweg.
On the right is the Kronenburger Park, laid out in the ‘English style’ in 1880 and unique in Holland for its 150 varieties of trees and deer park.
Continue to the open parking space on Kroonstraat on the left. Stop.
Here is
•Memorial to Titus Brandsma (6.2 kms/3.9 miles) designed by P. Dijkema and Frans Verhaak. As an adviser to the Roman Catholic Association of Journalists and a Professor at the University, Brandsma opposed German propaganda. He died in Dachau on 26 July 1942. The dramatic, tall white memorial represents the machine guns mounted on high posts at the edge of the concentration camp and the Chapel behind is shaped like a camp block. Above its door is a mosaic of the Virgin Mary and Baby Jesus and the name TITUS BRANDSMA around it. In 2000 plans to develop the area, which had resulted in the boarding up of the Chapel, were dropped, but it has yet to be renovated.
Turn left on Doddendaal and then right on Regulierstraat which becomes V. Berchen and continue to the traffic lights. Turn left along Nassausingel following signs to Arnhem to Keizer Karel Plein, go round the roundabout and return to Keizer Traianus Plein. Follow signs to Arnhem and drive over the bridge.
You are now in the area known by the Allies in 1944/45 as ‘The Island’ and by the locals as Manneneiland [Men’s Island] because of the large number of men hidden in the area during the Occupation and particularly during the battles that raged from September 1944 through the following months. Its correct current local name is the Over-Betuwe. The Island was largely flooded in December 1944 when all the inhabitants had been evacuated.
Pass the Lent-West exit.
300m past this exit sign is a bunker on the right. This was built by the Dutch prior to WW2.
There is a story that on 17 September the German officer responsible for blowing up the bridge was in the bunker and that he remained undiscovered for some days. Much argument revolves around why the Germans did not blow the bridge once they learned of the airborne landing: they probably wished to keep it intact to use in a counter-attack.
Take the next exit signed Lent.
N.B. The whole aspect of the river bank round Lent will alter drastically when radical changes planned to the course of the Waal and new housing developments are effected. In March 2001 250 live shells were found on one building site alone.
Turn right signed Bemmel and first right on Schoolstraat. Continue to the large Huize St Jozef building on the right. Park and walk to the entrance. To the left of the door is
• Plaque to the Sisters of Divine Providence, Lent/10.6 kms 16.6 miles/5 minutes/Map 1N/13
When the inhabitants of The Island were evacuated in September 1944, the only remaining civilians in what was the Convent (then an Allied HQ) were ten Dutch and German nuns. The doors were open 24 hours a day to straggling refugees and the wounded. The nuns provided temporary shelter, tended the wounded and sometimes cooked for as many as 500 people. The bronze plaque, inaugurated on 24 November 1947, bears the image of the Good Samaritan.
Turn round, return to the junction and turn right along Laauwickstraat and then 1st left at the junction with Lentseveld and stop by the school.
• Symbolic Tree Memorial, Lent/10.7 kms/6.7 miles/5 minutes/Map1N/14
Erected on 20 September 1969, this stylized tree by Jan Schoenmakers bears the inscription, ‘From the stump a new tree grew. In remembrance of 1944.’ It consists of a dead black branch shaped like a bridge, symbolizing the dark war years.
• Extra Visit to Memorials in the East of The Island: Bemmel - Jac Maris Liberation Monument, Family Costermans Plaque, Chapel of Remembrance; Haalderen Liberation Monument; Gendt Civilian Victims/Liberation Memorial; Doornenberg Phoenix Civilian Victims Memorial; Angeren -Memorial to Leijser Family, Memorial to Piet Kaak and Herman Scholten; Huissen - Civilian Mass Grave, Relief Operation to Civilians Plaque, Evacuation/Liberation Bas Relief. Round trip: 13.3 kilometres/8.3 miles. Approximate time: 75 minutes.
Continue along Laauwickstraat direction Bemmel and follow the winding road into Bemmel.
Bemmel. From 21-25 September 1944 the area to the west of the main Lent-Elst road was the scene of bitter fighting between the British tanks and the strong German opposition centred around Oosterhout. The Allied breakout occurred on the 24th when Wessen was taken and contact was made with the Welsh Guards who had been attempting to push through to Bemmel since the 22nd. That evening 69th Infantry Brigade arrived to reinforce them and the tanks, together with the 5th E Yorks, finally took Bemmel when the Germans abandoned it. A brigade thrust was then made which pushed the Germans back to the line Halderen-Baal-Rijkerswoerd.
After a heavy German shelling attack on 29 September the inhabitants of Bemmel were mostly evacuated (only a few men remaining) to Ressen, Valburg and Ewijk. On 15 November the evacuation was completed.
Turn right on Loostraat towards Centrum and right at the traffic lights signed VVV/Gemeentehuis. Turn right signed VVV along Kinkelenburglaan.
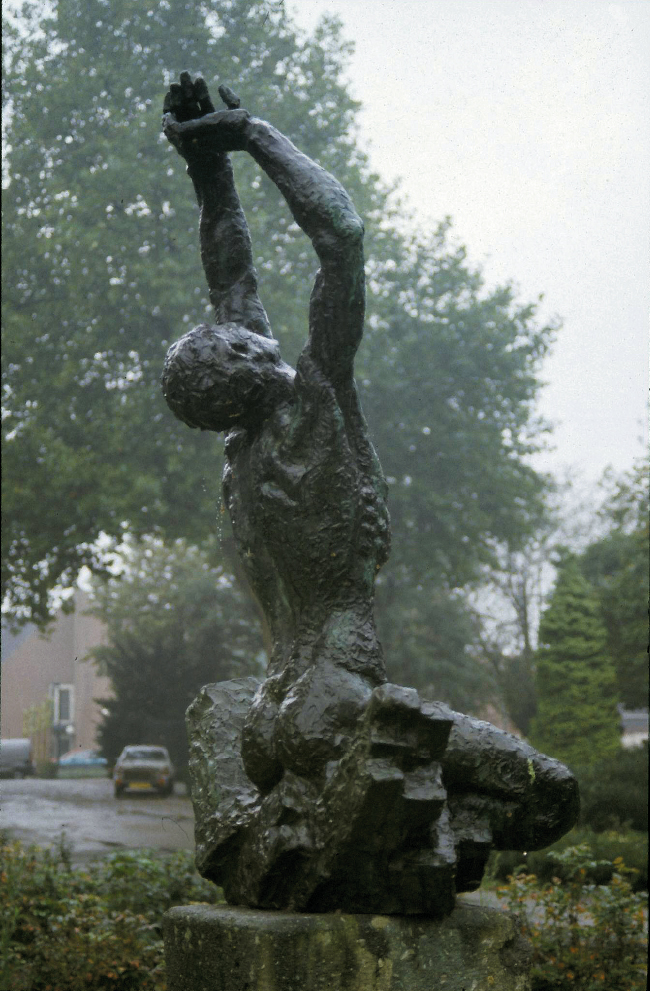
In the park in front of it is a dramatic bronze Liberation Statue by Jac Maris (qv) (Map 1N/15) (4 kms/2.5 miles) depicting a man rising from the debris of a destroyed town and crying, ‘Why me?’ It was erected on 4 May 1957.
Turn round, return to Dorpstraat, turn right and turn first left on Leemkuilselaan. Continue to the end of the road and follow it as it bears left and stop by the first house on the right, No 1 (4.3 kms/2.7 miles).
N.B. Remember that this is a private house.
On the wall by the steps to the cellar to the left of the front door is a Plaque to the six members of the Costermans Family (Map 1N/16). The inscription reads,
As a token of respect and gratitude offered to Mr & Mrs Costermans-Jansen by the families who stayed here from 21 September-15 November 1944, the frightening period of Bemmel’s liberation.
Over thirty people, including thirteen children, were sheltered by the family in the cellar of the farmhouse De Leemkuil.

Plaque to Costermans Family, No 1 Leemskuilselaan, Bemmel

Chapel of Our Lady of the Flowering Betuwe with sign

Haalderen Liberation


Doornenburg War Victims

Huissen War Victims
Return to Dorpstraat. Turn right and then left to the junction of Loostraat and Herckenrathweg.
Note from this point the small blue, white and black signs to the Chapel of Our Lady. These will guide you all the way.
Go straight over signed Elst. Continue as the road turns right, then continue on de Plats as the road bends right. Leave Bemmel, go over the A15.
Note that the new high speed railway to Arnhem is now under construction and may cause considerable disruption to the route.
Continue on de Vergert and turn to the left on Heuvelsestraat. Continue past the farm on the right to the path to the Chapel on the left, No 5. (7.8 kms/4.9 miles)
Memorial Chapel to St Mary of the Flowering Betuwe (Map 1N/17) erected in 1946 on the site of the heavy fighting of September-October 1944. On 1 October there was a fierce battle between the 7th Green Howards and the 10th SS Panzer Division who attacked this high point (it is called a ‘hill’ and is a few feet above the surrounding plain). The Germans had little protection from heavy Allied bombing, the water level being too high for them to dig in and they retreated to a new defensive line beyond the River Linge.
The Chapel has been lovingly tended by the Janssen family - by Kurt who came daily to change the flowers until his death in 1991, and then by his neice Grada. The display of flowers and plants is beautiful. Inside are several photos, a tribute by Grada to her uncle and a poem by an English veteran praising her faithfulness.
Turn round and at the junction turn left on Vergert to the junction. Continue straight on on Heuvelsestraat to the T-junction with the N839 and turn right on van Elkweg. Go straight on at the traffic lights signed Bemmel. Continue into Haalderen and stop just past the church on Van de Mondeweg (11.5 kms/7.2 miles).
Haalderen. The inhabitants were evacuated, with only the barest of possessions, to Brabant and to Belgium. The battle for the town was bitter, but on 6 October, when a German attack on Elst and Driel failed, the 50th (Northumbrian) Division took the town.
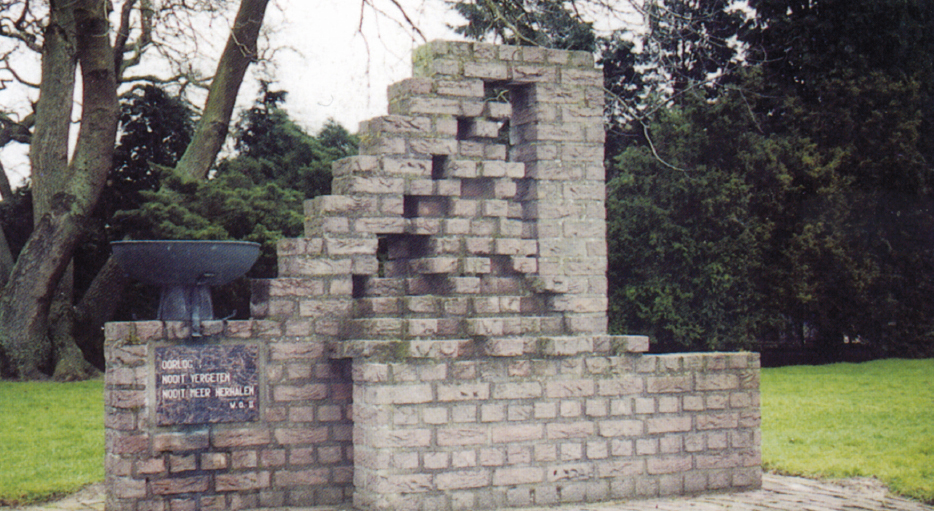
The Liberation Monument (Map 1N/18) by Paula van Kilsdonk, erected on 4 May 1985, is of an open brickwork design. Its inscription reads, ‘War, never to be forgotten, never to be repeated. WWII.’
Continue to the traffic lights, turn right and continue into Gendt, through the square to the T-junction. Turn right on Nijmegsestraat, past a large anchor on the left and take the next left on Pastor Pelgromlaan. Stop opposite the Town Hall. The memorial is on the left (15.7 kms/9.8 miles).
Gendt remained in German hands until April 1945, one of three German bridgeheads remaining on the left bank of the Rhine after the fighting of 7 October. On 13 October the inhabitants were evacuated by the Germans on the Pannerden ferry.
The Liberation Monument (Map 1N/19) by Ed van Teeseling, erected on 4 November 1950, is a tile picture of French Euville limestone, framed by bricks. It depicts a woman (symbolising the Liberation) and a child (symbolising the future). The inscription reads, ‘From our fractures a finer nation is growing.’
Return to the roundabout, go straight over and at the junction go right. Leave Gendt and go right. Continue into Doornenburg on to Pannerdenseweg and continue to the church on the left. The memorial is then on the right (19.4 kms/12.1 miles).
Doornenburg. Like Gendt, this village remained in German hands until April 1945. It was liberated on the 2nd - Easter Monday. From 2 October the town was repeatedly hit by Allied bombing attacks, the late Medieval Castle being particularly badly damaged, and on 12 October the Germans evacuated the population to the Liemers (the area across the Pannerdens Canal). They blew up the Roman Catholic Church and the Memorial to Civilian Victims (Map 1N/20) is on the site of the altar. Designed by Van Donsel, it was erected on 4 May 1958. It is in the form of a Phoenix rising from the ashes on top of a bronze sphere mounted on concrete pillars. The names of the victims are inscribed, the youngest 1 year old, the oldest 84, with several from the same family. Next to it is the church’s altar stone bearing the inscription, ‘In memory of the victims of the 1940-1945 War’.
Turn round, then left and right on Duisterestraat. Leave Doornenburg and continue to the T-junction. Turn right signed Angeren. At the junction turn left signed Arnhem on Lodderoeksestraat. Enter Angeren on jan Hoosterstraat and at the junction turn right on Kerkstraat. Continue to the church (25.1 kms/15.7 miles).
On the wall of Angeren Roman Catholic Church is a Bronze Tablet to Piet Kaak, killed in action at the Grebbeberg in May 1940, and Herman Scholten (Map 1N/21), killed in action in Java in August 1949. It bears a cross (symbolising suffering, struggle and victory) and a helmet (symbol of the soldiers who paid the supreme sacrifice for their country) and was presented to the parishioners in 1950 by the Old Soldiers’ Association.
In the churchyard is a Memorial to the Leijser Family (Map 1N/22) who were all killed in their farmhouse on the Paddepoel Dyke, hit by bombs during the 5 October 1944 Allied bombing raid. Evacuees sheltering with them were also killed. The names of all 27 victims are inscribed on a marble tablet surmounted by a wooden cross.
Turn round, return to the junction right and continue on Iepenstraat towards Huissen. At the crossroads and traffic lights turn right signed Huissen and at the roundabout go straight over. Turn right to Centrum.
Huissen was hit by an Allied air raid on Sunday 17 September 1944, during which twenty-three civilians were killed. Their names are inscribed on the low sandstone wall of the Civilian Victims’ Mass Grave in the RC churchyard. Above the grave, made on 2 November 1947, is a memorial cross designed by Wim Harzing. It depicts Christ and an impression of the air raids. (Map 1N/23).
On 1 October the Germans launched a strong counter-attack from Elden and Huissen on Allied-held Elst. At that time there were about 10,000 people living in the area - 6,000 locals and 4,000 evacuees. On 2 October there was another heavy Allied air raid, which killed ninety-eight civilians. Their names are also on the memorial wall. After this, many of the surviving inhabitants fled to safer shelter - many to the Veluwe (the region to the north of Arnhem).
Continue past the church on the left to the T-junction and turn left on Nazareth to the Market Square and stop (29.4 kms/18.4 miles).
On the wall of the Town Hall is a Bronze Memorial Plaque (Map 1N/24) embossed with the coat of arms of Huissen. Erected on 5 May 1985 it records the assistance given by their fellow citizens to those in need after the battles of 17 September-23 October 1944.
High on the wall of No. 1 Tempelierenstraat is a Bas Relief Memorial Tablet (Map 1N/25). Erected in July 1948 it shows men in travelling cloaks, symbolising the evacuations of October ‘44-May ‘45, the gable of a house in Langestraat and a flying eagle with a broken swastika in its talons (symbolising the Liberation and the fall of Nazi Germany).
Return to Lent on the N839 via Bergerden and Bemmel and the A325. Pick up the main Itinerary (13.3 kms/8.3 miles).
Turn round, continue back along Laauwikstraat, cross over the A52 and turn left following signs to Elst to the railway tunnel.
• Robinson Tunnel/11.8 kms/7.4 miles/Map 1N/26
The bridge is much the same as it was in 1944 although it has been refaced. On the evening of 20 September 1944 many of the inhabitants of Lent sheltered in this railway tunnel as fighting raged around them. Three of them were killed by a German SS soldier.
Taking the direction as the road continues after the railway bridge towards Elst as 12 o’clock, the 504th crossing was made below the power station, 1,500m away at 8 o’clock.
It was to this exact spot that Sergeant Peter ‘Robbo’ Robinson brought his own and one other Grenadier Guards’ tank, having dashed across the Nijmegen road bridge with four tanks at around 1830 hours on Wednesday 20 September. What happened next and why the tanks did not then press on to The Bridge at Arnhem is a story upon which British and American participants do not agree. Essentially the British say that the Americans did not appreciate the difficulties and, typified by Captain T. Moffatt Burriss of the 504th (see account of the river crossing above), the Americans say that the British ‘stopped for tea’. Examples of each of their versions of what happened now follow: -
The American version.
Burriss, having landed on the north bank collected about 10 men and made his way to the northern end of the main road bridge.
A PERSONAL ACCOUNT
By Captain T. Moffatt Burriss (sent to the authors).
It was beginning to get dark. As we looked at the south end of the bridge we saw silhouettes of tanks heading across it in our direction… . Two tanks passed within feet of us. They were British. When the third one arrived we swarmed all over it…. ‘You guys are the most beautiful sight I’ve seen in months,’ I said. ‘Let’s go on to Arnhem and save the paratroopers there.’ We could hear firing in the vicinity of the two lead tanks [then] the lead British tank was knocked out by a German 88. The remaining four tanks backed up to the north end of the bridge. That’s when the British tank crews brought out their teapots. I was furious. I charged to the front of the tank line where I found the British commander Capt. Peter Carrington [later British Foreign Secretary and then Secretary General of NATO] of the Grenadier Guards. ‘Why are you stopping?’ I asked him. I can’t proceed,’ he said crisply. ‘That gun will knock out my tanks.’… ‘We’ll go with you. We can knock out that gun.’… ‘I can’t go without orders,’ he said [see Peter Robinson’s account concerning the Grenadiers’ attitude over the need for orders below.] ‘OK’, I said, ‘I’m giving you orders.’
He was a British captain. I was an American captain. He wasn’t about to recognise my authority… . ‘You mean to tell me you’re going to sit here on your ass while your own British paratroopers are being cut to shreds - and all because of one gun?’ He shook his head. I can’t go without orders.’ I looked him straight in the eye. ‘You yellow-bellied son of a bitch. I’ve just sacrificed half of my company in the face of a dozen guns and you won’t move because of one gun.’
Then I cocked my tommy gun, put it up to his head and said, ‘You get this tank moving or I’ll blow your damn head off.’ With that he ducked into his tank and locked the hatch. I couldn’t get to him.
Burriss then goes on to relate how both Major Cook and Colonel Tucker had similar arguments with Captain Carrington, but to no effect. Apart from the lack of orders to advance, among other reasons given later for not moving on, were the lack of Grenadier infantry, the shortage of ammunition (their tanks were rationed to about eight rounds each), the absence of air support and the coming darkness. When asked by the authors if he would actually have shot at Carrington, Burriss hesitated long enough for the question to be changed to ‘Would you have fired near him?’ The answer, given over 50 years after the event was, ‘Probably, given the way that I felt at the time.’ In his book, though, Burriss admits,
‘We were probably too hard on Carrington…. He was the senior British officer at the battle site, but the man in command of British tanks was General Horrocks. I’m convinced that Horrocks told Carrington to stay exactly where he was, thereby dooming not only the rescue mission but also the entire operation to end the war.’

Personalities of the Nijmegen Road Bridge: Lord Carrington, the British Ambassador, Bill Croft, Peter Robinson with Valmai Holt, City Hall Nijmegen on the 40th Anniversary

Lieutenant T. Moffatt Burriss in doorway of a C-47, June 1944
We asked T. Moffatt Burriss if he had ever met Lord Carrington. He had not - they narrowly missed each other at the Nijmegen Bridge at the 50th anniversary - but he believed that he knew what Burriss had written about him.
In April 2001 the authors wrote to Lord Carrington (created a Life Peer in 1999 after a long and distinguished political career) inviting him to put his side of the story. ‘What an extraordinary story’, he commented of Burriss’s account.
‘Is it really very likely that, having captured the bridge and having met up with our American friends, one of them starts waving a gun at me? In any event, we were all under orders to hold the bridgehead until more troops had crossed. There is, of course, no truth in the story.’

Major-General Tony Jones at the author’s 40th Wedding Anniversary, 1998
The British version
Sergeant Peter Robinson, Regimental Number 2613912, was the troop commander with four tanks in his troop. His own tank was a Firefly (a Sherman with a 17-pounder gun - the others had 75mm guns). His troop was the lead troop of the regiment. His squadron 2i/c was Lord Carrington - known in the regiment as the ‘Short Peer’. In civilian life Robinson was a fisherman and during his later years accompanied many official and other tours back to the battlefield. The following account was given to the authors on the 40th Annniversary.
A PERSONAL ACCOUNT
By Sergeant Peter Robinson
It isn’t fair to have one regiment in the lead all the time… you all took it in turns to lead…. The Irish Guards started off leading first of all… probably Number 1 Squadron and then somebody else and then it comes to the individual Troops. Somebody’s got to be in front there and of course you take that in turn as well and that was where I came unlucky…. The bridge wasn’t taken, which was our objective. We reached the far end of the bridge and immediately there was a road block…. So the troop sergeant covered me through and then I got the other side and covered the rest of the troop through…. We were still being engaged, there was a gun in front of the church [Lent] three or four hundred yards in front of us…. We knocked him out… we got down the road to the railway bridge…we cruised round there very steady…. We were being engaged all the time…. Just as I got round the corner and turned right I saw these helmets duck in a ditch and run… and gave them a burst of machine gun…. I suddenly realised they were Americans… . They had already thrown a gammon grenade at me [confirmed in Burriss’s book] so dust and dirt and smoke was flying everywhere…. They jumped out of the ditch… they kissed the tank, they kissed the gun because they’d lost a lot of men, they had had a very bad crossing.
Well my orders were to collect the Colonel [American] who was in a house a little way back and the first thing he said to me, I have to surrender. I can’t carry on. I’ve lost nearly all my men. I haven’t got many left.’
Well I said,
‘I’m sorry. My orders are to hold this bridge to the last man and the last round. I’ve only got two tanks but if you’d like to give me ground support for a little while until we get some more orders then we can do it.’ He said he couldn’t do it, so I said that he had better come back to my wireless and talk to General Horrocks - because before I started on the job I had freedom of the air. Everybody was off the air except myself because they wanted a running commentary about what was going on. So he came over and had a pow wow with Horrocks. The Colonel said, ‘Oh very well,’ and I told him where I wanted the men but of course you can’t consolidate a Yank [‘Consolidation’ in the British army is the process of adopting defensive positions after the capture of an objective and it involves soldiers staying at their posts] and they hadn’t been there ten minutes before they were on their way again.
Lord Carrington joined us [at the railway tunnel] about two or three hours after because he had been sitting on the north end of the bridge protecting that. He came over after a Lieutenant Jones (qv) debugged the bridge. We stopped there until about 4 o’clock the following afternoon. The Irish Guards went through us and they came and fetched me back on a scout car to our Headquarters…. There was an ‘O’ Group there with all the Generals who wanted to know what had happened… . They taped recordings… in those days the recordings were done on records…. They sent them off with a DR [Despatch Rider] and the DR was never seen any more.
Inevitably there is some confusion about how many of the four tanks that originally crossed the bridge spent the night in the area of the tunnel. Some accounts describe at least one tank being shot up and set on fire and the crew being taken prisoner. Carrington’s tank then joined Robinson. Robinson says there were four tanks at the tunnel overnight and he is likely to be the most reliable source. He certainly remembers that he, the crews and Lord Carrington whiled the night away with a bottle of whisky. Confusion abounds over the Nijmegen bridge battle - General Horrocks in his book Corps Commander records that the crossing was done by the 505th and that the bridge was taken on the 21st and the US Official History map shows the capture as the 23rd. Neither is correct; the crossing was done by the 504th and the date was the 20th. When the authors pressed him for reasons why he did not drive on after reaching the railway bridge, Peter Robinson echoed Lord Carrington’s reply to T. Moffatt Burriss -
When the American said that he had to surrender I told him that I couldn’t - I hadn’t had any orders to surrender - and I hadn’t any orders to go any further. If you tell a Guardsman to jump he jumps, if you don’t he won’t.
A few months later Peter Robinson was personally awarded the DCM by Field-Marshal Montgomery.
Perhaps now it should be asked why orders to advance were not given. To uncover an answer it is important to understand the culture of a disciplined fighting force such as the Guards Armoured Division. Tanks and infantry fight together, particularly in close country such as that in this area. In a regiment of three battalions one battalion might be equipped with tanks while the others remain as infantry. The infantry provide close protection for the tanks and the tank crews and the foot soldiers learn to co-operate with each other, all members of the same regiment with the same command radio network and the same Commanding Officer. The Irish Guards tanks would work with Irish Guards infantry, the Grenadiers with Grenadiers, each developing their own special fighting techniques. When Peter Robinson’s tanks crossed the Nijmegen bridge they had no infantry support, their infantry were still holding the recently captured ground at the Valkhof and Hunner Park. Although Burriss’s Americans offered to provide support, it was not a practical proposition. They were unused to each others’ methods of working and their radios were not compatible. Also it was time for the Irish Guards to take over. Peter Robinson has explained above how it was necessary to alternate the leading formation. It was getting dark and they were short of ammunition; thus it was a situation in which to order an advance could lead to the loss of many tanks, vehicles which were difficult to replace and were needed elsewhere to protect The Corridor. The decision to wait until the following day is understandable, particularly when taking into account just what it was like to be in a tank, a condition now described by Sergeant Bill Croft who, until a few days before, had commanded Peter Robinson’s troop.
A PERSONAL MEMORY
By Sergeant Bill Croft (recounted to the authors at the site)
It may interest you to know something of a troop leader’s tasks. There are 101 things to do. He has to guide his tank, make full use of the ground, give orders to the other tank commanders, keep in touch with his infantry, scan the landscape for the enemy, direct his gunner onto targets, judge the range, position his other tanks, pass messages back to his squadron leader over the air and at the same time be on the alert for all unexpected situations. He must also be an accomplished map-reader. The Sherman, an American tank, was a very reliable one. Weight approx. 30 tons, speed around 28mph, powered by a Chrysler engine which had 5 banks of 6 cylinders, a crew of five: tank commander, gunner, wireless op, who was also the gun-loader - a 75mm or a 17-pounder which we called a Firefly - the driver and co-driver. The co-driver operated a Browning MG. The tank commander could also have a Browning mounted on the turret. The turret could be rotated 360″, clock or anti-clockwise, operated by the gunner. This was the only advantage that we held over the Tiger or Panther of the Germans. Their traverse was manual operation, relatively slow.
In addition a commander must be able to rely upon his orders being carried out while subordinate commanders are aware that if they attempt to exceed their orders they may interfere with plans they know nothing of. Thus, in the absence of an order to advance from a Corps Commander who was in radio contact, a subordinate commander would wait. Why, then, were no orders to advance given? General Horrocks, reviewing the situation some years later, said, ‘On the evening of the 20th we had both bridges and I would have been a very happy man but for three things - One, I had had no word from 1st British Airborne Division. Two, German resistance was getting stronger. Three, I was beginning to look over my shoulder at the lifeline to the rear.’
It was not until 1100 hours the following morning, almost 20 hours after the Grenadiers secured the Nijmegen Bridge, that tanks of the 2nd Battalion Irish Guards began to move through the Grenadiers and over the bridge from the south side in an attempt to continue the advance to Arnhem. During the night and the early morning the 504th commander, Colonel Reuben Tucker, had fumed in anger and frustration at what he saw as British slowness. Yet there were problems of which he was not aware: the road ahead was elevated and exposed, and the Germans were counter-attacking The Corridor south of Nijmegen. Nevertheless it is difficult to equate the actions of Guards Armoured Division on the night and morning of 20-21 September with the earlier instructions of their Corps Commander, General Horrocks,’to keep going like hell’. Oddly, the fault may be that of Horrocks himself. Although the initial briefing that he had given at Leopoldsburg had been a vintage performance he did not maintain the pressure on his XXX Corps commanders to keep driving forward. It has been suggested that he was ill. Additionally Montgomery did not -uncharacteristically - keep pressure on Horrocks. It was as if he regretted the rashness with which he had entered into MARKET-GARDEN and now distanced himself from it. Thus, with the two immediate senior commanders appearing somewhat disinterested in what was going on, impetus was lost. Geoffrey Powell in his excellent The Devil’s Birthday says that even Lieutenant-Colonel Joe Vandeleur who led the Irish Guards wondered why his orders to advance had taken so long to arrive and remembered ‘a general lack of urgency’.
By the time that the Irish did advance the Germans had been able to prepare defensive positions along The Corridor and the 2nd Battalion quickly lost three tanks in the leading troop. In a following tank was Guardsman Roger Keyes. His Sherman was ordered to get off the embanked road and to take cover and then,
Eventually we were ordered to carry on forward and we knew that our tank would be hit before long and it was. The noise was what I imagine it would be like to be inside Big Ben when it struck, the tank immediately went on fire [as Shermans usually did when they were hit - the Germans called them Tommy-cookers].’


Fort Hof van Holland: the way in and the interior


Memorial to the 504th Waal Crossing showing power lines and the names of the casualties
Even with hindsight it does not sound as if it was a moment for a mad rush forward and later efforts by the Welsh Guards, 43rd Division and a Brigade of 50th Division did not succeed.
There is yet another fascinating conundrum uncovered by the authors which is associated with the bridge area. Barely 200m east of the bridge is today’s A325 dual carriageway. In September 1944 it existed in the form of a hard base of sand - known as the’sand road’- and ran from here to the Arnhem road bridge, bypassing the town of Elst which was to prove such a stumbling block to the XXX Corps advance. If the Grenadiers had taken that road… ? The sand road was certainly navigable by tanks as the Germans used it from Arnhem later in the month to bring Tiger tanks south, but it seems that there was a German sign here warning of mines, though none were there on 20 September.
Drive under the tunnel and immediately turn left down the small Zalige Straat.
NB. There is a weight restriction on this dyke road.
Continue to the turning on the right by a house and stop. Walk along the track and turn over the drawbridge into the Fort.
NB. The fort is private property. Permission to enter/photograph it should be obtained from the residents. It is also a nature reserve and access is therefore restricted.
• Fort Hof van Holland/12.5 kms/7.8 miles/10 minutes/Map 1N127
The wooden drawbridge leads over a 20m-wide moat. This small square fort is one of a number of border fortifications built by the Dutch before the turn of the century. In some contemporary accounts of the 1944 fighting it is wrongly named as the ‘Lent Fort’. The Germans had mounted 20mm cannon on and around the walls. The Americans charged from the river with fixed bayonets, with instructions to bypass the fort, but Company H of 504th PIR, led by Sergeant Leroy Richmond, decided to silence the cannons. Some men swam the moat, others went over the bridge and through the tunnel into the centre of the fort. The defenders had withdrawn into the central building with its narrow slot-shaped windows. The paratroopers poked their weapons through the slots and the Germans surrendered. The Americans then moved on towards the Robinson Tunnel.
Walk back to your car. Continue towards the Waal and turn right following the narrow road on the top of the newly reinforced dyke.
In 2000 extensive reinforcement work was undertaken on this stretch of the dyke when a great deal of unexploded material was uncovered. When the work is completed it will offer a short route to Oosterhout.
Continue to the memorial on the left, just before the power cables.
• Memorial to the Waal Crossing of 504th PIR/13.1 kms/8.2 miles/10 minutes/Map 1N/28
This commemorates the crossing, just before 1500 hours on 20 September, of the 504th PIR in twenty-six canvas boats with plywood bottoms under dangerously heavy fire. Five more crossings were made (see account above). The approximate route taken by the boats is that of the power cables.
The striking Memorial by Marius van Beek and Professor Dr F. J. A. Huygen was unveiled on 18 September 1984 by General Gavin by walking through a covering veil between the pillars. On the ground in front of it is a tablet bearing the names of the 48 men who gave their lives in this superb act of heroism and determination. They were from the 3rd Battalion 504th PIR, plus elements of 307th AB Eng Battalion, 376th FAB HQ Battery and the Regiment’s HQ and, later 1st Battalion and some men of 2nd Battalion of the 504th. The Memorial has been adopted by the W. I. Rijnders School and is on the site of the initial bridgehead.
Beyond the Memorial, on the road to Oosterhout, on 21 September, Private John R. Towle, a ‘bazooka man’ of the 504th PIR, rushed beyond his company’s outposts to intercept a German attack supported by two tanks and a half-track. He managed to break up the attack before he was mortally wounded by enemy mortar fire. Private Towle was posthumously awarded the Medal of Honour (Map 1N/29).
Turn round and return to the main road and turn left towards Elst, passing a vast new housing development on the left. Continue to the junction with Oosterhout signed to the left.
• Extra Visits to Memorials in the West of The Island: Slijk-Ewijk - 101st AB Memorial, Allied Graves; Dodewaard - Memorial to the Fallen, Memorial to Crashed Dakota; Kesteren Resistance Worker Column; Opheusden - 101st AB Plaque, Memorials to Piron Brigade and Civilians, 101st 1st Aid Post, Major Horton Plaque; Randwijk Memorial to the Fallen; Zetten - Liberation Monument, Plaques to Dutch Railway Worker and POW in Java. Round trip: 56 kilometres/35 miles. Approximate time: 2 hours
Turn left signed Oosterhout and then right, following Doorgaand Verkeer. Leave Oosterhout and turn left at the T-junction signed Slijk-Ewijk. After 150m stop on the left by the Dorpshuis Beatrix 14 kms/2.5 miles).
On the wall is a Plaque with the Screaming Eagle insignia (Map 1N/30) which bears the legend, ‘In October-November 1944 the US 101st AB Division fought on the ‘Island” for our liberty.’ Divisional HQ was situated at Slijk-Ewijk [known to the Yanks as ‘Slicky-Wicky’].
Continue along the road to the local cemetery on the right with a CWGC sign.
At the end of a long gravel path the CWGC graves (Map 1N/31) are at the back. They are of Signalman R. Waddington, R. Sigs, 9 October 1944, and Captain R.V. Marchand, RA, 8 October 1944.
Continue to the dyke and turn right.
The dyke road, in British military accounts often referred to as the ‘Bund,’ has come in from Lent. On 22 September, taking advantage of cover from the thick fog, in an attempt to bypass the German opposition along The Corridor, a force made up from elements of 2nd HCR, 4th/7th RDG, 7th SLI, 5th DCLI and 8th Middlesex motored along the Bund at speed from here to Slijk-Ewijk. They drove up the road past the cemetery en route to Valburg where they overcame opposition by Hans-Peter Knaust’s battalion of veterans and Hitler Youth at the de Hucht (qv) crossroads and ‘Dashed for Driel’.
Note that the dykes, which were first built by monks in the 14th Century, are constructed in a zigzag shape, which better withstands the force of the water.
Continue on Waaldijk under the A50 and into Dodewaard past a small church to the right to Pluimenburgsestraat and turn right. Continue to the memorial on the left just short of the main square (15 kms/9.4 miles).

Memorials in the West of The Island 1.101st AB Div HQ, Slijk-Ewijk

2. Dodewaard Memorial to the Fallen

3. Ochten C-47 Memorial and 3a. Detail

4. Opheusden: a. Detail of Piron Brigade Memorial, Town Hall b. American Aid Post Monument c. Maj Horton Plaque


5. Zetten Liberation Memorial
Dodewaard Memorial to the Fallen (Map 1N/32). The yellow brick memorial bears a red brick column broken by a black triangle. Designed by G. van Dorland and inaugurated on 2 May 1990 it represents pre-War freedom broken by the occupation and evacuation and rising again through resistance and liberation to recovery. It commemorates twelve citizens of Dodewaard killed in the area, three citizens who died in the former Dutch East Indies and the Allied Liberators -‘those whom we lost during and after World War II owing to acts of war. The enemy was defeated as a result of your sacrifice.’
Units of the 101st AB were involved in bitter fighting against strong German opposition in the area which continued until mid-April 1945. Dodewaard was finally cleared by the Piron Brigade (qv).
Continue to the junction before the square and turn right signed Opheusden. Continue towards the A15 and turn left just before it signed Ochten. Continue on Bonegraafseioeg to the memorial on the right (19 kms/11.9 miles).
The handsome black and red marble obelisk Memorial is to the occupants of C-47 Dakota 43-15180 (Map 1N/33) that was hit by German flak from anti-aircraft guns sited on the river foreland of Ochten. It crashed, carrying half of the 156th Para Battalion MG platoon and its crew, on 18 September 1944 - one of 10 planes brought down in the vicinity. It was erected in 2000 by the Adriaan van Westreemen Stichting and unveiled on 3 May in the presence of the brothers of Privates Thomas Stevens and Henry Philpotts, both among those named on the bronze plaque, which carries a handsome outline of a Dakota. The casualties were originally buried at the crash site by villagers, including the sole Para to survive the crash who was sheltered in a nearby house but who died the next day. Wooden crosses were put on the graves but they were washed away in the winter flooding. The American crew - S/Sgt J. Bobo, T/Sgt G. Collier, S/Sgt X.C. Connett, 2nd Lt H.G. Honeysett and Captain L. Ottaway were reburied in the US Military Cemetery at Neuville-en-Condroz, Belgium. Captain H. Pleumer was buried in New Jersey. The eighteen British Paras could not be individually identified after the war and were reburied in Jonkerbos CWGC Cemetery (qv) in Plot 8, rows A/1,2,3,4,5,6,7,8,9 and B/1,2,3,4,5,6,7,8,9 with the inscription ‘Buried near this spot.’
Turn next right on Lage Kampseweg, over the A15, over the crossing with Varakker and turn left on Parallelweg into Kesteren. Keep to the left of the railway line on Broekdijk to the junction with Ommestraat. Turn right and continue on Hoofdstraat to the junction with Schenkhofstraat. Turn left on Nedereindsestraat to the churchyard (25 kms/15.7 miles).
Kesteren Churchyard Monument to Johannes van Zanten (Map 1N/34). The broken column, symbol of a life cut off, is to the resistance worker who was betrayed by a Dutch Military Policeman and arrested in Utrecht in September 1944. He was shot in the William III Barracks in Apeldoorn on 2 December 1944 and was posthumously awarded the Knightship of the Order of the Bronze Lion. The column, which bears van Zanten’s likeness in bas relief, was erected on 3 July 1945.
N.B. By returning to the junction with Hoofdstaat and turning left and first right onto Boveneindsestraat to Hazenhof there is a Plaque to sixteen men of 10th Para and one American of the USAAF, hidden here when their plane crashed in De Maten. (Map 1N/35)
Return to Parallelweg and continue direction Opheusden. Turn left, cross over the railway and enter Opheusden. Continue past the church and turn left and then right into the square in front of the Toum Hall on Burgemeester Lodderstraat (29.4 kms/18.4 miles).
Opheusden Memorials (Map 1N/38-39). In early October 1944 the 101st AB took over positions between Opheusden and Elst from the 43rd Wessex Division (who had reached here on 23 September, but progressed no further north). They stayed on The Island until 29 November. The Dodewaard-Opheusden front was allocated to the 506th PIR who were involved in heavy fighting with German units which, supported by tanks, crossed the Rhine and advanced from Kesteren on Allied positions. For the 101st ‘Opheusden was by all odds the largest single battle of The Island campaign’ [Rendezvous with Destiny, the Division’s History]. Opposing them was the German 363rd Volksgrenadier Division. After ten days of bitter struggle and heavy casualties (eleven officers and ninety-one men on 6 October alone) the History would be able to report that by 15 October
The 363rd had been virtually wiped out. Giving up all hope of a breakthrough on The Island the Germans fell back 2,400 yards. Both sides settled down to patrolling the noman’s land thus created.
In the Town Hall is a white marble Plaque with a splendid Screaming Eagle ‘In remembrance of the 101st Airborne Division U.S.A. Sept-Dec 1944’. It was erected on 20 September 1979. Outside the Town Hall are Memorials to the 101st with a bronze Screaming Eagle, to all Opheusden civilians killed in the war (both inaugurated in 1990) and to the Belgian Piron Brigade (qv) whose 3rd Battalion liberated Opheusden on 18 April 1945. The latter was designed by H. J. van Brenk and was inaugurated on 8 May 1976. The brick monument bears a grey granite tablet commemorating the Brigade. The tile bearing the Brigade’s colourful badge was presented by Belgian veterans.
Continue to the junction with Patrijsstraat and turn right. At the junction with Smachtkamp turn left and continue to the end of the road, just before the railway line on the left (30.6 kms/19.1 miles) is
A small Memorial to the Americans of the 101st AB (Map 1N/40) who died in the first aid post on the site. Here a 17-year-old Dutch volunteer, Leo Jeucken, who had attached himself to the Americans, was also killed. The memorial, erected on 17 September 1999, is in the form of a ‘V with the names of the six casualties on a plaque.
Return and take the third right on Fazanstraat. Continue to the T-junction and turn right on Dalwagenseweg. Continue to the bridge over the River Linge (31.8 kms/19.9 miles).
On the left railing of the bridge, just short of the railway station, is a brass Plaque to Major Oliver M. Horton and the soldiers of the 101st AB (Map 1N/41) who were killed in the Battle of Opheusden, October 1944, erected on 22 September 1944 by the US 101st AB Division. It bears a Screaming Eagle. Horton, leading Coy H, the 3rd Battalion, 506th PIR, was hit by artillery at 1000 hours on 5 October. He was awarded the Silver Star.
Turn round and return on Dalwagenseweg to Tolsestraat. Turn right and continue on De Hel as it bends left to join Randwijkerserijndijk. Turn right into Randwijk to the Ned Herv Church, opposite is (40 kms/24.8 miles)
Randwijk Memorial to the Fallen (Map 1N/42). Inaugurated on 4 May 1987 by the Leden Oranje-Comité, the brick memorial bears a plaque ‘To the memory of all those who gave their lives for our freedom’. Randwijk was liberated by a Reconnaissance Unit of the Gloucesters, but as heavy fighting continued, the population had to be evacuated. The town was retaken by the Germans in December 1944.
Take the N836 signed to Zetten and immediately after crossing the River Linge turn right on Heldringstraat. Continue through the town to the junction on the left with Kerkstraat. Stop where you can. The memorial is on the right on Wilhelminaplein (43 kms/26.9 miles).
The impressive Liberation Monument (Map 1N/43), designed by G. Berns, was inaugurated on 24 September 1984. It takes the form of a symbolic dugout representing the many civilians and military who are buried in the area - the negative aspect - and then, rising from the slit trench, is the positive - a shining ‘V made of stainless steel which represents the Liberation. The inscription is on a black granite tablet and on five tiles are the coats of arms of Great Britain, the United States, Belgium, Canada and Holland. The monument has been adopted by the Rev. van Lingen School. Note that ‘V stands for Victory but also for Vrijdom (Freedom) in Dutch.
Leave Zetten on the N836, passing the station on the right.
N.B. On the wall of the Station is a Plaque to Railway Worker Wilhelmus Antionius Thijssen who died during the raid which destroyed Nijmegen station on 22 February 1944 and where he was attending a course. Designed by H. G. J. Schelling it was erected on 22 November 1948. (Map 1N/45)
Join the A15 direction Elst. Continue over the Valburg junction and take the exit to Elst. Rejoin the main itinerary just after it crosses the A15 (56 kms/35 miles).
Continue over the A15 into Elst. Continue over the traffic lights to the next traffic lights.
To the right is Elst Station where there is a bronze tablet to commemorate the railway workers of Elst who lost their lives during the war: Willem Zwijnen was killed by shrapnel on 23 September 1944 at his home along Visstee and Cornelius Mientjes was killed along the Arnhem-Elst railway line on 30 September 1944 (Map 1N/46).
Turn left signed Centrum, keeping to the left of the charming statue group with a horse (there is an annual horse fair in Elst) and continue on Dorspstraat to the Gemeente (Town Hall) on the left and stop just past it.
• ‘Incredible Patrol’ Plaque. In the Town Hall, is the plaque which used to be in Heteren Town Hall. The tiled plaque tells the story of Hugo Sims, Peter Frank, William Canfield, Frederick Becker, Robert Nicolai and Roland Wilbur of 501st PIR who, on the night of 29 October 1944, crossed the Rhine at Heteren in rubber dinghies. They landed to the east of Renkum, slipped behind the enemy lines, reached the Ede-Arnhem highway, hid throughout the following day and that night captured thirty-two enemy officers and men. They returned with their prisoners across the Rhine.
On the right, in front of a small ornamental fountain and park, is
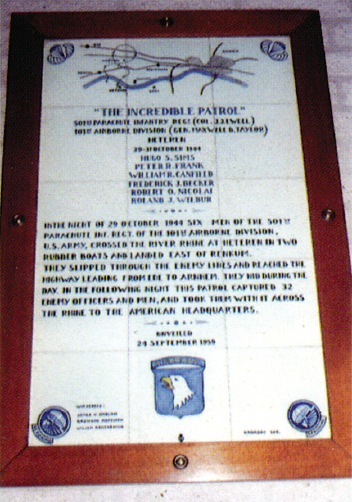
Plaque to ‘The Incredible Patrol’
• Memorial to the 7th SLI, 1st Worcs and 4th/7th RDG, Elst/21.4 kms/13.4 miles 15 minutes/Map 1N/48/RWC
The memorial, designed by Marina van der Kooi, was erected on 17 September 1984. The inscription reads, ‘On September 25th 1944 Elst was liberated by 7th Somerset Light Infantry Regiment, 1st Worcestershire Regiment, 4th/7th RDGs. The SLI liberated Oosterhout (qv) on 22 September, but their progress towards Arnhem was stopped by German tanks near Elst. On the 24th the Somersets and Worcesters managed to fight their way into the outskirts of Elst. About 100 inhabitants sheltered from the battle in the cold store of the nearby auction rooms. A small-scale tank battle then ensued in the town centre, the Germans finally succumbing to the Allies’superior numbers. By the evening of the 25th Elst was liberated.

Memorial to 7th SLI and 4th/7th RDG, Elst
On 22 September the 4th/7th RDG and the 5th DCLI had attempted to bypass Elst to the west. As their column of tanks moved forward two German tanks came out of a side road and, assuming that the column was one of theirs, joined in. They were dispatched by a member of the DCLI using a PIAT. That evening, however, there was another sad incidence of friendly fire, or ‘blue on blue’. As darkness fell the leading tank saw an armoured car ahead and knocked it out. It turned out to be from 2nd HCR.
Walk to the memorial behind in the right hand corner of the garden.

The Island Museum, Heteren

Grave of Hendrik van der Horst, 17 September 1944

Heteren Screaming Eagle Memorial
• Memorial to Executed Hostages, Elst/21.4 kms/13.4 miles/5 minutes/Map 1N/49/RWC
Designed by Th. Jeukens, the memorial was erected on 25 October 1946. It commemorates the three hostages (of seven actually taken), executed by a unit of the Sicherheitsdienst near this spot on the night of 13-14 September 1944. W. L. van Dijk, G. de Koning and A.M.M. Puthaar (two headmasters and a Council employee) were killed by firing squad. That night part of the Arnhem-Nijmegen railway line at De Laar, south of Elst, was blown up and the arrests and the burning of farms were subsequently made. The acts were partly to encourage the 500 workers required to dig anti-tank ditches at Zevenaar. It has never actually been proved that the citizens who were executed took part in the sabotage. The memorial also remembers all the other citizens of Elst who were ‘killed by acts of violence of the occupying forces’.
Continue through Elst on Valburgseweg to the Algemene Cemetery (begraafplaats) on the right.
• Grave of 1st Citizen of Elst Killed on 17.9.44.121.9 kmsl 13.7 miles/10 minutes/Map 1N/50
Hendrik van der Horst, verger of the Dutch Reformed Church, climbed to the top gallery of the bell tower with some friends to watch the action in Oosterbeek. From the tower Mr van der Horst and the small group with him had been able to see the gliders landing. He was killed by a bullet from a German sniper who suspected him of being an observer for the Allies. The memorial headstone was presented to his relatives on 17 September 1946 by members of the church. The grave is to the right of the stone chapel. It bears a quotation from Job, ‘And then the Lord answered Job out of the whirlwind.’
Turn left immediately, signed Heteren, and right at the roundabout and continue to the next small staggered crossroads at De Hucht.
It was here at De Hucht Crossroads (Map 1N/51) on the evening of 22 September that the tail end of the 5th DCLI group making its way towards Driel met five Tiger tanks head on and took refuge in the ditch. Major Parker of A Company, who had successfully charged a couple of Tigers in Normandy, guessing that the tanks would return to Elst later, decided to lay a trap at the crossroads. Men with PIATs were placed around the area and No.75 mines were strung across the roads. When the tanks returned they were preceded by two despatch riders who blew up on the mines. The first tank was hit by six PIAT bombs and blew up, the second received similar treatment and the third tried to back out. Parker’s men pulled a line of mines behind it and finished it off with a PIAT. The remaining two tried to reverse at speed and fell over into the ditch when CSM Philp dropped a grenade into the turret of each. In a tight-knit regimental community there can be little doubt that Philp would have known CSM Adams (qv) who was killed two days later and buried in Driel.
Continue and turn right onto Logtestraat.
On the right a large old farmhouse complex is passed (25.3 kms/15.8 miles). Called Landgoed Schoonderlogt (Map 1N/52) it was occupied by the family Mom during the War. It was used by the Hampshires as their HQ as they moved up through The Island in September and then on 5 October by the 2nd Battalion, 101st AB under Major Richard Winters, DSC. (qv) A photo exists of the Major standing under the archway into the farm. Five hundred or so of his men were camping in the farm’s orchards. In 1982 the 101st AB presented the Mom Family with a certificate creating them ‘Honorary Members’ of the Division. Forty or so civilians from Elst also sought refuge here until everyone was evacuated towards Nijmegen when the Germans blew the dykes on 2 December (qv).
Turn left on Achterstraat, under the A50 to the junction with the N837 in Heteren.
The CWGC Plot is a hedge-enclosed area on the left.
• Heteren General Cemetery Allied Wargraves/30.7 kms/19.2 miles/10 minutes/Map 2/9
In the large grassed area is a long row of CWGC headstones. They are to 1 Unknown Airman, 3 British soldiers, 10 RAF, 5 RCAF and 3 RAAF, killed on 18,20,21,23 and 25 September 1944.
Turn right, signed Driel. Continue to the last turn left before the T-junction at the sign to Museum 40-45 on O. L. Vrouuvstraat to No. 36 on the right past the Italian restaurant.
It has regimental insignia on the fence.
• Museum ‘The lsland’/31.8 kms/19.9 miles/20 minutes/Map 2/8
This private museum was created ‘in homage to all who bravely fought for the liberation of the Betuwe’. It is owned by Marcel ten Bohmer who found the diary his father started on his 16th birthday as Operation MARKET-GARDEN began to rage around him. That diary inspired Marcel to start this collection which for the past fourteen years has been his passion. As he found items - weapons, uniforms, ephemera etc - Marcel painstakingly researched the provenance of those items and has, in many fascinating cases, been able to trace and often meet their owners. The exhibitions are all immaculately preserved and displayed, including the jeep once used by the local fire brigade and the many different nationality uniforms with their personal histories.
It is opened by appointment. Tel: + (0) 26 472 22 85. www.betuwsorlogsmuseum.nl Admission is free. Over the 4 May Liberation Day and September MARKET-GARDEN anniversaries, the Museum is open all the time and is especially popular with veterans.
Return to the main road, turn left and right at the T-junction onto the dyke. Continue under the motorway to the memorial immediately on the right.
• Heteren Screaming Eagle Memorial/33 kms/20.6 miles/5 minutes/Map 2/10
Erected on 27 September 1982, the brick memorial with a splendid Screaming Eagle badge and flanked by two wooden benches, bears the inscription, ‘The Americans of the 101st Airborne Division fought here for our liberty. Oct-Nov 1944.’ On either side are seats with the 101st AB insignia. The memorial is on the site of an old Dutch searchlight base, built in 1939.
After 1 (BR) AB Division withdrew from Arnhem-Oosterbeek, fierce fighting continued on The Island until the Spring of 1945. On 2 October 101st US AB Division were moved north, past 82nd US AB, to relieve 43rd (BR) Division. The first Americans to arrive here were 501st PIR on 4 October. In the following month General Taylor was slightly wounded while inspecting 101st AB positions along the river bank. The Americans were involved in fierce fighting with German units entrenched in nearby brick factories. In defending the ground they gained over 300 men of the Division were lost.
• End of Itinerary Four