Adding Controls to a User Form
The first property in the Properties area is Name
. The default value for the Name of a button is CommandButton
, then a number. Click inside of where it says CommandButton1
. Now press the backspace key on your keyboard to delete it. Type a new Name property. Call it cmdGetNumber
. You should see the top of the Properties area change to this:
The internal name of the button is now cmdGetNumber
.
You might have noticed, though, that the button on the form still says CommandButton1
. This is because this is the text on the button, and not its name. The text on a button is a different property. With your button still selected, locate the Caption
property:
Again, click to the right of Caption
and delete the default text. Type Get Number
instead:
The text on the button on your form will change to this:
We're going to add a text box next. First, we can move to the button to the right of the form, in a more natural position. We'll then have the text box on the left.
One way to move a control is via the properties area. Have a look at the list and you'll see that there is a Top
and Left
property. These refer to top of the form and the left side of the form. Simply type a new value for these and watch your button jump around the form (You can also change the width and height of your form in the same way.
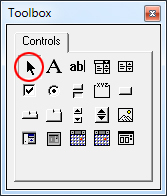
Another way to move a button (or any control) around the form is with the selection arrow, circled in red below:
You must have the arrow selected before moving your control. Don't, for example, right click a button without the arrow being selected, otherwise you'll get a new button on the form. If this happens to you, select the unwanted button with the black selection arrow then press the delete key on your keyboard. This will get rid of the button.
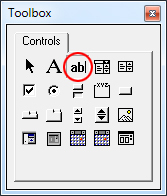
To add a text box to your form, click the TextBox
item in the toolbox:
Now draw one out on your form. Change the Name property of the text box to txtValue
. Change the Width property to 50 and the Height to 25. Set the Top property to 20 and the Left property to 25. Your form should now look like this:
If you have a look in the top left of the form, you'll see the text UserForm1. This is the form Caption. You can change this to anything you like. Click anywhere on the grey from that is not a control (button and text box). With the form highlighted, locate the Caption property in the Properties area. Delete UserForm1
and type Get A New Number
in its place. The top of your form will then change to this:
Now that you have the form designed, press F5 to see what it looks like when it's running.
You'll see that the dots on the grey area have vanished. The dots are there only in design mode, to help you position controls on the form.
Although you can click inside of the text area, nothing will happen when you click the button. That's because we haven't written any code for it yet. Click the red X to get rid of the form and return to the VBA Editor. We'll now add some code to the button.