Adding New Tabs to the Excel Ribbon (versions 2010 and later)
If you have a version of Excel 2010 or greater then you can now add new tabs to the Excel ribbon. When you create a tab, you can place items on it, including buttons for your user forms. You can also add buttons to existing tabs. For example, you could add a new button to the Home tab that displays your user form when the button is clicked.
What we'll do is to add a new tab to Excel. (The screenshots are from versions 2013 and 2016. They should be more or less the same in Excel 2010, though, and later versions.) We'll place a button on that new tab. If you have a version of Excel lower than 2010, you can move on and ignore this section.
Like in Excel 2007, we need to create a Sub first in a module. The Sub is the Macro that will display the user form.
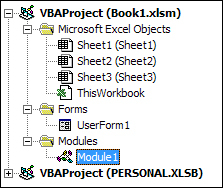
Locate Module1
in the Project Explorer on the left of the VBA Editor:
Double click to open a new coding window for this module. Add the following code to the window:
Sub CallUserForm()
UserForm1.Show
End Sub
The name of the Sub is CallUserForm
. We want to Show
the form called UserForm1
.
With the Sub created in the Module window, it will now appear as a macro when we customize the Excel ribbon.
Return to Excel and click the File
menu at the top. From the File menu, click on Options
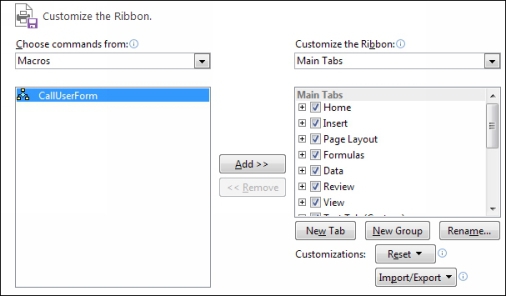
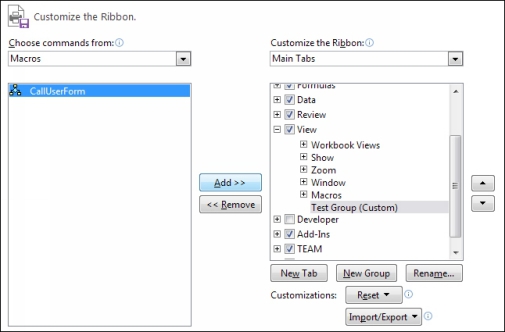
. You'll then see the options dialogue box appear. From the list on the left, click on Customize Ribbon
. The dialogue box will then look like this:
From the Choose commands from
dropdown list, select Macros
. You'll then see the CallUserForm
macro you created in the module coding window:
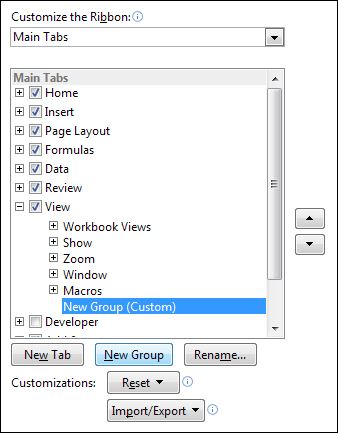
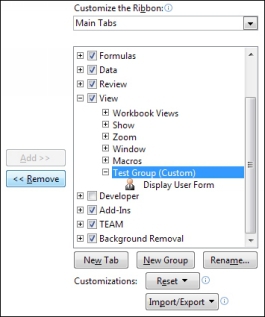
You can add this macro to the Main Tabs on the right by selecting a tab. Click the New Group button to add a new item to that tab. In the image below, we've created a new group on the View
tab:
Click the Rename button and you'll see the following dialogue box appear:
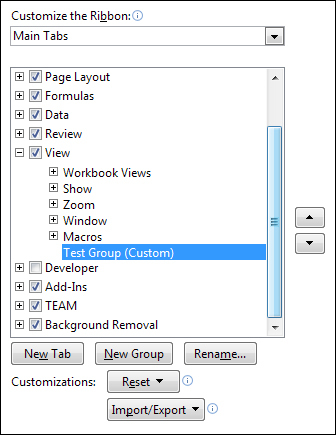
You don't need to select an icon, as this is just the group name. Type a new display name in the text box at the bottom. Click OK to see the item in the list of your chosen tab:
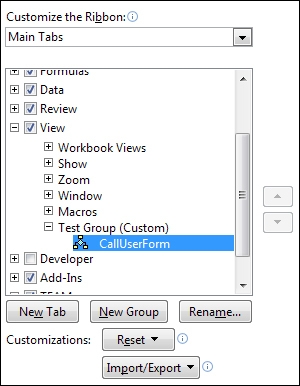
Although we've added a new item to the View tab, it will be blank at the moment. To add something to a new group, select a Macro from the left and click the Add
button in the middle:
When you click the Add button you should see the macro added to the new group:
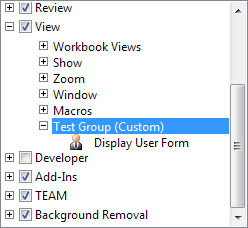
The icon for CallUserForm
is set to the default of three yellow boxes surrounding a blue diamond. You can change this by clicking the Rename
button. From the dialogue box, select an icon and type a new name:
When you click OK, you should see your chosen icon appear to the left of the new name:
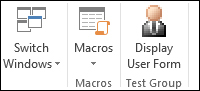
You could click OK (but don't) on the Excel Options dialogue box at this point. If you selected the View tab on the Excel ribbon, you'd then see your new item:
This new item, when clicked, would display the user form.
However, rather than placing our macro on the View tab, what we want to do is to add a brand new tab to the Excel ribbon. We could then have all our macros on this new tab.
To remove an item from the list on the right, select the Group you want to get rid of. Then click the Remove button in the middle:
We'll now add a new tab.