A TreeView Project
In this section, you're going to be learning about the TreeView control. You'll design a small form like this one:
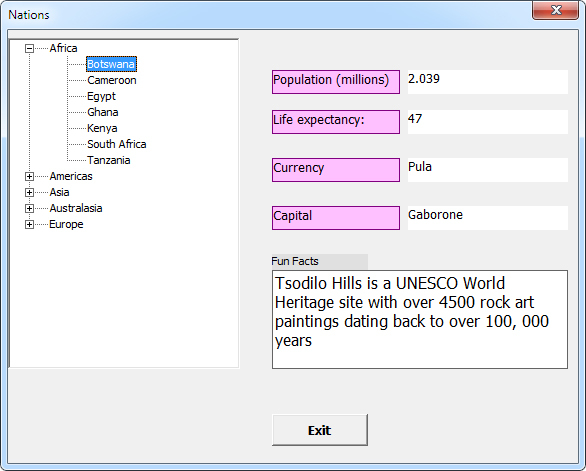
The TreeView on the left of the form has five headings.
Each heading is called a parent node. Click the plus symbol next to a parent node and you'll see other headings appear:
Because these headings are underneath a parent node, they are called child nodes.
What we'll do is to pull information from a spreadsheet when a child node is clicked. This information will appear in the labels and textboxes on the right of the form:
In the form above, Botswana, a child node of the parent node Africa, has been selected. The data for Botswana, therefore, appears on the form.
To follow along with the TreeView tutorial, we have a spreadsheet prepared for you. It is one of the extra files you download previously. If you haven’t yet downloaded the files, the link is here:
The file you need is called TreeViewProject.xlsx
.
Once you have located the spreadsheet, open it up. Now save it as a macro enabled workbook (XLSM file), so that you can do some coding with it.
The workbook consists of two sheets. The first sheet is the country data for the Treeview. (Many apologies if your country is not on the list - no slight is intended!) The second sheet contains the information we want to appear on the form whenever a child node is clicked.
With that in mind, let's add a User Form to the project.