Chapter 5: L-Leash-Walking Problems

Walking: The Leashed of Your Problems
Leash walking is probably the number-one frustration among owners in New York City. And it’s not surprising, when every walk is a live-action video game: dodging skateboards, avoiding garbage, being ambushed by squirrels, and rushing to cross the street while the traffic light is red. There are so many things going on, your dog might not even realize you’re there. The purpose of the leash-walking solutions that follow is to remind your dog that you’re on the walk with him, too. Not only that, but you’re even more interesting than those squirrels because you’ve got awesome rewards!
Loose leash walking is not the same as heeling. I reserve the Heel, with the dog on my left and his shoulder roughly in line with my hip, for short distances like crossing the street, walking past a distraction, or walking in a crowded place. (I have outlined the steps for Heel in Chapter 7.) Loose leash walking, the focus of this chapter, gives the dog freedom to choose whether he wants to be a little in front of me, next to me, or a little behind me, provided that he isn’t pulling or switching sides. Loose leash walking can even include pauses to sniff, pee, or look around, as long as the dog complies when you tell him it’s time to start walking again.
Everyone has her own ideas of what a typical walk should look like, but, for most people, it is a combination of loose leash walking and heeling; for me, it comprises mostly loose leash walking, with occasional heeling to get past an obstacle or through a crowded area. The rest of the time, I let my dog “do his thing” as long as he does so politely. (The guideline for polite leash walking will be laid out in detail in this chapter.) When loose leash walking, I do not demand that my dog walk behind me in some delusional display of pack leadership. In fact, I like him a little ahead of me so I know his mouth isn’t full of garbage and I can watch his body language more easily. A dog walking in front of you is rarely trying to usurp your position as pack leader; in actuality, he is completely bored by your slow pace or is simply more interested in getting to the destination than you are.
At the expense of sounding like a nag, please remember that the walk is your chance to bond with your dog, not time to text your friends or run a bunch of errands (and tying your dog to a pole while you go shopping is a terrible idea for myriad reasons; see Chapter 8 for the full explanation). For the most part, you should be paying attention to your dog on the walk, and your dog should be paying attention to you. If you treat your dog like an afterthought, then expect him to do the same to you.
When it comes to greeting unfamiliar dogs on leash, I suggest you never do it. Seriously, never! It’s not normal for dogs to approach each other head-on, as the sidewalk forces them to do, so by the time the dogs make contact, one or both of them could already be stressed out. Then, when the dogs try to greet, they are inhibited from saying “Hi” freely due to tight or tangled leashes, which results in more potential stress. A friendly greeting can turn into a fight, with no discernible warning to a human’s eyes, caused by very subtle body-language signals.
At the other end of the misbehavior spectrum are dogs who have so much enthusiasm for making new canine friends that they become uncontrollable to walk. These dogs drag their owners down the street, head-on toward other dogs (who may be giving “leave me alone” signals left and right). They don’t mind that they’re choking against their collars or dislocating their owners’ shoulders. Dogs like this, infinitely sweet and clueless, can start dog fights by not heeding other dogs’ warning signals to back off. Moreover, since they have so much fun finding new playmates along their walks, they become consumed with a “find-the-next-doggie” game, and their owners don’t stand a chance to get their dogs’ attention. It’s not fair to allow your dog to drag you toward every dog on the street while expecting him to listen to you at the same time. You can’t have it both ways. If your dog likes to interact with other pups, take him to supervised off-leash play groups or possibly the dog park, which is discussed in detail in Chapter 8. But while on leashed walks, channel your inner New Yorker as laid out in this chapter, and when you see another dog along your path, just keep walking.
The leash-walking problems in this chapter are divided into three sections. Distracted Doggie provides the foundation of loose leash walking. Whatever your walking problem is, this section can help, so please start here. Reactive Rascal focuses on dogs who react strongly to a certain trigger; for instance, perhaps Fiona sees a squirrel and tries to dart toward it, or Ringo barks and lunges when another dog approaches. Finally, Sidewalk Snacker gives you strategies to curb your dog’s tendency to pick up all kinds of garbage on the street. It is possible that your dog falls into two or all three of these categories, so feel free to use multiple leash-walking strategies, depending on the situation.
Distracted Doggie

My dog drags me down the street looking for squirrels, trash, other dogs, and so on. He’s too interested in his surroundings to listen to me.
Management Strategy 1: Choose the Right Equipment
Would you go hiking in high heels? Or to a job interview in muddy sneakers? Let’s hope not. The same holds true when walking dogs; the equipment you use can either help or hinder you. Here are the pros and cons of the most common collars, harnesses, and leashes.
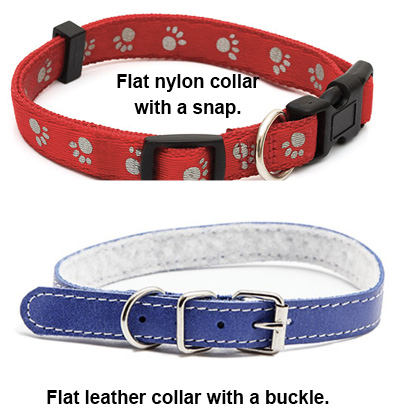
Flat Collar
This is the traditional collar, usually leather or nylon with a buckle or snap, worn around the dog’s neck.
Pros: For dogs who walk calmly and don’t pull or lunge, this is the simplest option.
Cons: For dogs who do pull or lunge, a flat collar can put excessive pressure on the trachea and esophagus and, according to a 2006 study by Amy Pauli, DVM, et al., can exacerbate certain eye conditions by increasing intraocular pressure. As you may have already found, a typical dog doesn’t seem to mind that he’s choking himself while pulling against a flat collar, so the discomfort associated with pulling does nothing to teach good walking.
Martingale Collar
Similar in appearance to a flat collar, a martingale can tighten somewhat when the dog applies pressure to the leash.
Pros: It’s appropriate for dogs with proportionately small heads (giving it the nickname “Greyhound collar”) to prevent the collar from slipping off if the dog pulls backward.
Cons: It does not deter the dog from pulling and can do the same damage to a dog’s anatomy as a regular flat collar.
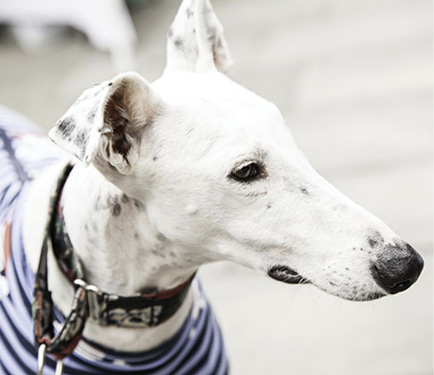
A martingale collar on a Greyhound.
Back-Clip Harness
Usually mesh or nylon, this is the most common type of harness sold in pet stores. While there seem to be countless styles and variations, the leash always clips to the harness at the top, along the dog’s spine.
Pros: Compared to collars, these generally do not pose a health risk to dogs. They’re safe for puppies and small dogs.
Cons: If your dog pulls, you’re in for an upper-body workout. A back-clip harness essentially turns any dog into a sled dog, so even a medium-sized dog can easily pull you down the sidewalk. As a result, it is not recommended for dogs that pull or lunge.
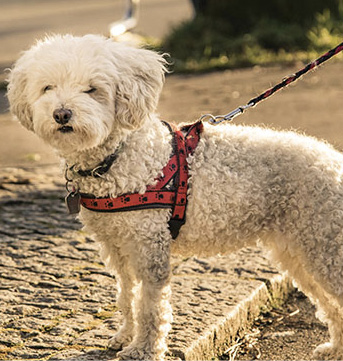
A back-clip harness.
Front-Clip Harness
These harnesses usually look similar to nylon back-clip harnesses, but the leash attaches in the front, near the breastbone.
Pros: These are great for dogs who pull or lunge. When the dog gets to the end of his leash, he physically can’t pull you like a sled dog; his body will turn slightly toward you instead. It is a pain-free way to reduce or stop pulling by stopping the dog’s forward motion. This is generally the safest style of no-pull harness because a properly fitted front-clip harness will not cause the dog any discomfort or stress. There are currently more and more brands offering front-clip harnesses, so you have a lot of choices for fit and style.
Cons: Because the dog’s head is still free to move, these harnesses don’t address sidewalk snacking. I also worry about certain dogs squirming out of the harness (depending on the brand and style), so I like to back it up by attaching a flat collar to the harness with a short chain or carabiner for an added layer of protection if it does not already have a safety clip built in. Styles of front-clip harnesses that include a single strap lying horizontally across the dog’s chest have been reported to impede the dog’s natural gait when running, so I don’t recommend this style for running, hiking, playing, and so on.
Head Collar
No, no, it’s not a muzzle. As the name implies, a head collar is similar in function and appearance to a horse’s halter, with a loop around the dog’s neck like a traditional flat collar (only higher on the neck) and another loop that goes around the muzzle.
Pros: This is my preferred equipment for some difficult walkers. It effectively and significantly reduces all the usual naughty behaviors—pulling, lunging, and sidewalk snacking—without inflicting pain. I have seen much faster leash-walking progress in dogs who use this type of harness as compared to the other options. Once the dog understands how the head collar works, he generally doesn’t try to engage in pulling or snacking because he knows it won’t work. This makes your training much easier, especially in the early stages when your dog may have trouble focusing on you.
Cons: Notice how I said a head collar was my preference for some dogs? For conformational reasons, many brachycephalic (flat-faced) breeds like Bulldogs and Pugs are automatically disqualified, given their lack of real estate around the snout. Furthermore, even though it is not painful, it does appear uncomfortable to some dogs. It often takes a few weeks of acclimation, much like a new pair of stiff shoes.
I’m most comfortable with a trainer fitting a head collar and showing you how to use it because you need very little pressure to control the dog, and a dog that bolts or lunges needs to be introduced to the head collar in a low-distraction environment first. (When learning how a head collar works, if a dog continues to bolt or lunge while wearing it, he may actually endanger himself. In this case, a trainer will advise you to try a different tool.)

One type of head collar, also called a head halter.
Corrective Collars
Corrective collars include the old-standby choke chains, as well as prong collars and e-collars (also called shock collars). Because they all, in some way, use pain as a way of keeping a dog from acting out, I do not recommend them.
Pros: None. If your dog’s leash behavior is so out of control that you are considering one of these options, contact a trainer first, using the guidelines in Chapter 1. These are not the kinds of collars you should be experimenting with yourself, and it’s likely that a trainer will provide you with less aversive options to teach polite leash walking.
Cons: Since corrective collars get the dog to behave by inflicting pain, there can be behavioral side effects. For instance, using an e-collar incorrectly can traumatize a dog who’s already under stress. You don’t want your dog being the guinea pig as you learn to use a potentially painful tool, so just avoid this kind of equipment.
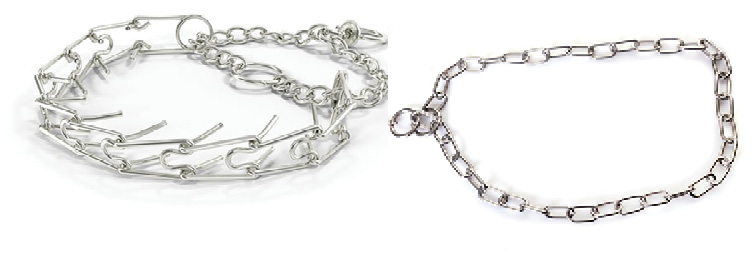
Prong collars and choke collars are not recommended training tools.
Retractable Leashes
When I see someone walking a dog on a retractable leash on a city street, I actually cross the street. The likelihood of that dog and owner understanding polite leash walking when on a fully extended 16-foot leash is far lower than a dog walking on a standard 4-foot or 6-foot leash. Why? Well…
Pros: These leashes are great for giving your dog more freedom. I use them when I take my dogs to the beach, hiking, or walking in large, open spaces.
Cons: These leashes are terrible for actually controlling your dog. They are difficult to reel in, so unless your dog has a solid Recall, you will be yanking and yanking to bring your dog back to you, like a fisherman reeling in a shark. Retractable leashes are, in my opinion, completely inappropriate for sidewalk walking. At worst, your dog could dart into traffic, pick up a chicken bone, or get into all kinds of trouble with you helplessly 16 feet behind. At best, your leash acts like caution tape that blocks off a wide area of the sidewalk, so other people can’t get around you. Another problem is that, if you lose your grip on the retractable leash, the heavy plastic handle will hurtle toward your dog, noisily bouncing against the pavement and hitting the back of his legs, which can cause a loose dog to panic and run even faster. Lastly, if a dog ever sprints past you while on a retractable leash, the burn of someone’s rapidly extending leash tearing into the thin flesh behind your knees is an unforgettable sensation!
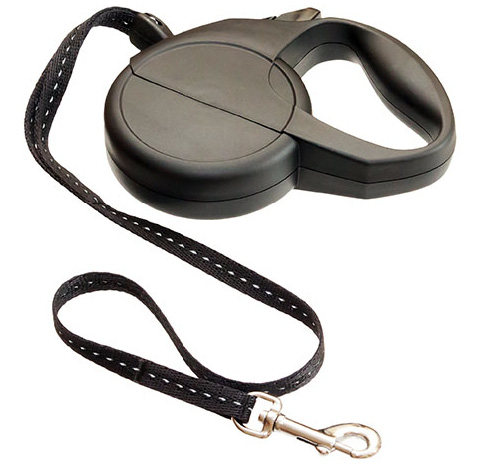
Retractable leashes are useful for open spaces but not suitable for sidewalk walking.
4- to 6-Foot Leashes
Usually leather or nylon with a metal clip at one end and a loop for your hand at the other, this is my preferred type of leash. I generally use nylon leads, so I can tie a knot midway down the leash for easy grabbing when I do my New Yorker walk. If you are using a head collar, consider the size of your leash’s metal clip; because the weight of the leash is applied to the dog’s muzzle, I try to choose a lighter clip than usual (as long as it’s still strong enough to stay secure and control the dog).
A standard nylon leash is good for walking and training.
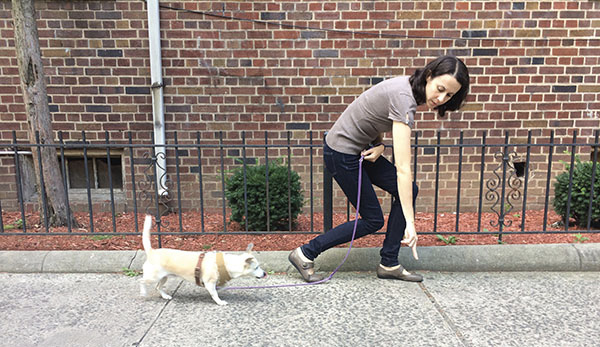
Management Strategy 2: New Yorker Walk
Revisit Chapter 4 to see the components of the New Yorker walk, which allows you to walk briskly past distractions without being tempted to stop. When you shorten the leash, body-block, and keep a fast pace, it sends a message to both your dog and the other people around that you’re on a mission to move forward. There’s no time for sniffing, squirrel stalking, or meeting new friends. While the New Yorker walk doesn’t teach your dog to be polite while on leash, it prevents him from being able to engage in bad behaviors, such as jumping, pulling, sidewalk snacking, or stopping.
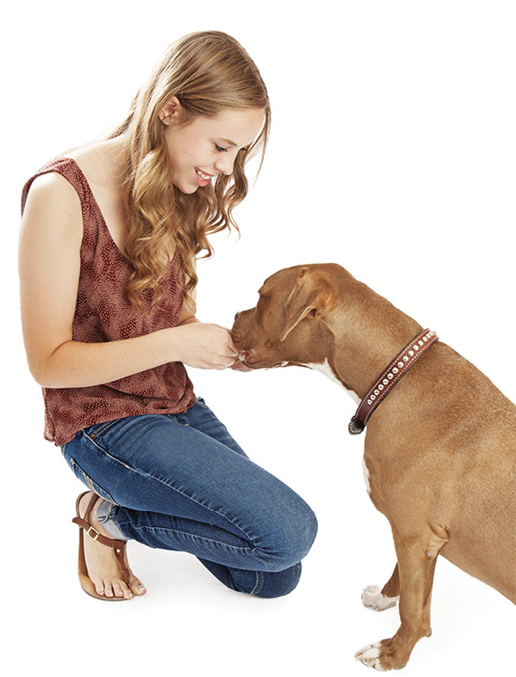
Training Strategy 1: Walk with Attention
Your dog already knows how to walk; that’s the easy part. The trickier part is reminding him that you’re there on the walk with him. Walk with Attention is essentially an in-motion form of Check Me Out from Chapter 2, which rewards the dog for making eye contact with you. The goal of this training strategy is to teach your dog to check in with you frequently while walking, and, as a result of those check-ins, he will automatically be walking on a loose leash. Especially in the beginning, you accomplish this by rewarding the dog when he looks at you, and this reward reminds him how much more awesome you are than everything else in the outside world. With practice, you’ll get a dog who is acutely aware of your presence on the walk and whose default behavior is checking in with you. Those check-ins are incompatible with sidewalk snacking, pulling, cat chasing, and so on. By simply teaching your dog to look at you frequently, you might even eliminate the need to teach him other, more complicated, leash-walking strategies.
Before the actual walking begins, however, let’s talk about how to hold the leash to facilitate your training.
- Decide which side you would like your dog to be on. Have treats in your pocket or in your hand on the same side as the dog. So, if you want your dog on your right side, have the treats in your right hand or pocket. I don’t care which side the dog is on, left or right. I actually teach loose leash walking on both sides because you might need to switch the dog back and forth, depending on the obstacles you encounter. Generally, my dogs are on my right side because, on city sidewalks, that keeps them to the outer edge of the sidewalk, which protects and blocks them from oncoming foot traffic. For the instructions that follow, assume the dog is on your right.
- Hold the leash, with a little slack, in the hand farther from the dog. So, if your dog is on your right side, hold the bulk of the leash in your left hand with the leash across your torso.
- This feels unnatural at first, so before you even start walking, practice indoors at a standstill. You’ll notice that it’s much easier to just reach down a little (or a lot, if your dog is as short as mine) to reward. If you revert to your old ways and hold the leash in your right hand (the same side as the dog) and keep the treats on the left side, you will have to reach across your body to reward. Your pup will gladly help you out by meeting you halfway, but then—whoops—you’re tripping on your dog.
- Practice the following routine thoroughly while standing: Have a handful of treats or kibble. (If indoors, kibble will probably suffice.) With your dog standing or sitting to your right side, talk to him gently. Tell him how handsome he is or give him a recap of your day so far; the cheerful tone is more important than the words themselves. The moment he looks up at you, mark with “Yes!” and reward by popping a treat in his mouth from your right hand. Repeat this dozens of times. Any time he looks up at you, mark and reward from the right hand. Then, do this activity from the left side. He is starting to learn how unbelievably awesome it is to check in with you.
Similar to Check Me Out, there is no cue for this behavior. Your cheerful chatter should be different words every time, and, as such, it is not exactly cuing the dog to look at you. For most dogs, the talking simply shows the dog you’re paying attention to him, and this encourages him to look at you. However, if your dog will look up at you without the need for chatter, great! You can give him extra treats for unsolicited looks.
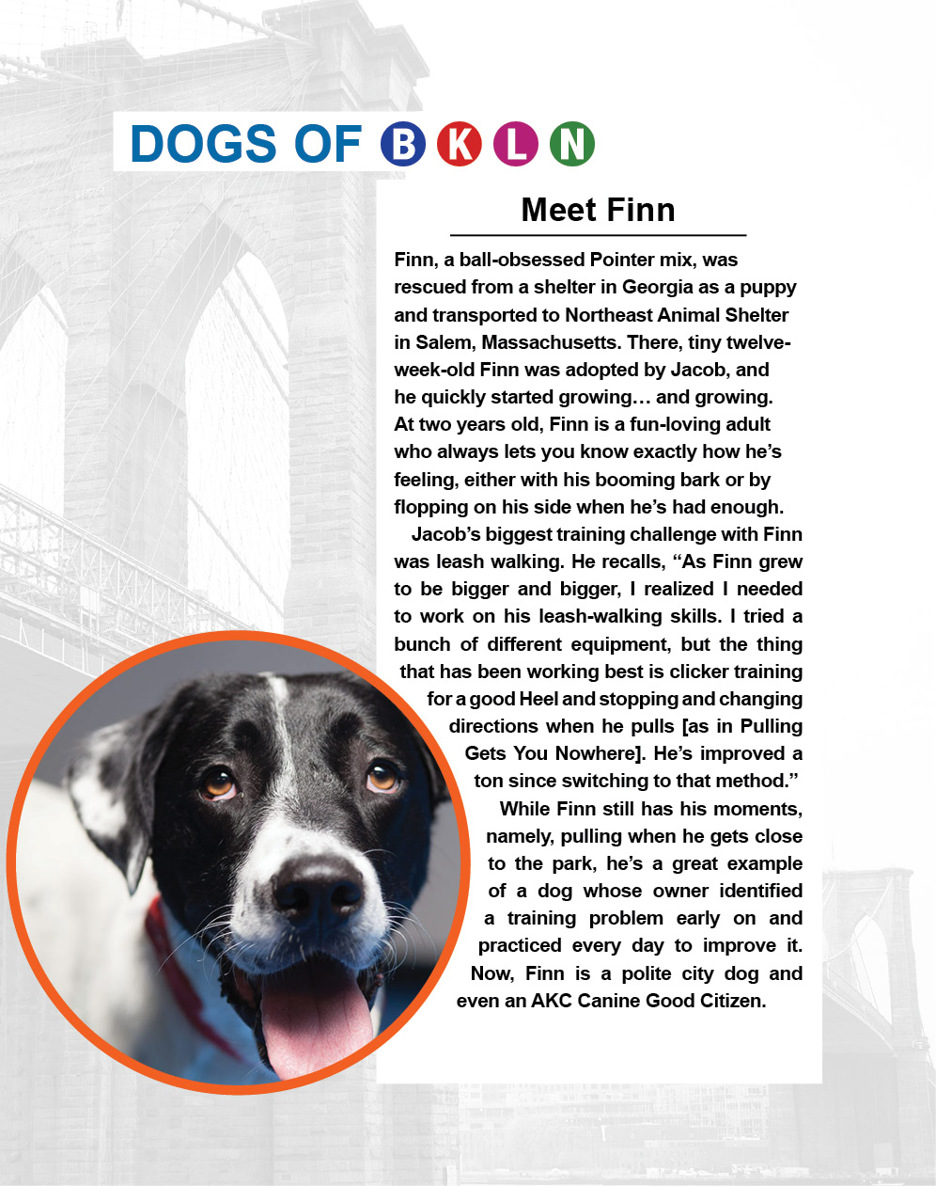
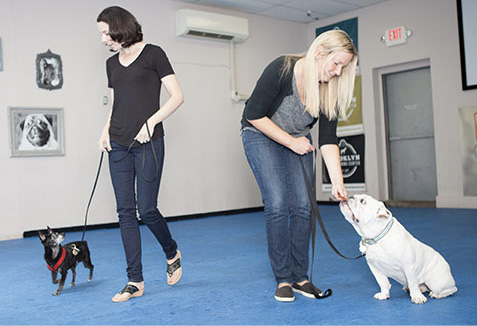
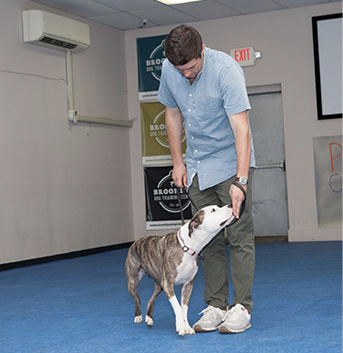
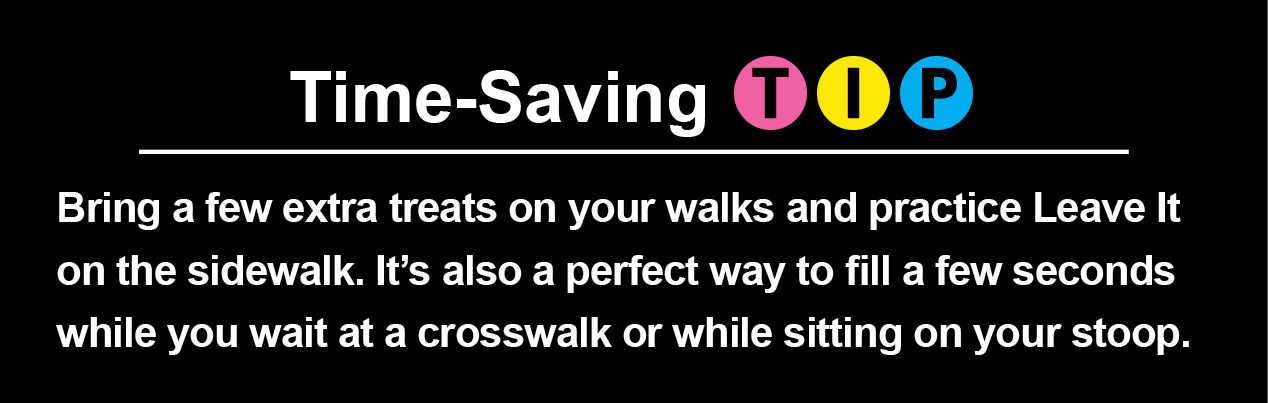
▲ Start Walk with Attention without actually walking. Jacob is standing with treats in the hand closest to Finn and the leash across his body in the other hand. Every time Jacob reaches down to give Finn a treat, it teaches Finn how rewarding it is to stay by his handler’s side.
How to Teach Walk with Attention
Choose a quiet location to practice this at first: your living room, a hallway in your building, your backyard, an alley, or on a side street during a quiet time. You want your dog to be successful, so choose a place where he is able to focus on you and will not be overwhelmed with distractions. Upgrading to irresistible treats, like tiny pieces of chicken, deli meat, or cheese, will help him focus on you outdoors, especially in the beginning.
- Holding the leash as previously described, walk and engage with your dog. Talk to him happily; if that doesn’t get his attention, make chirping or clucking noises. There is no verbal cue for this technique, so avoid using the same word or sound each time, and avoid repeating the dog’s name. You want eye contact to be a default behavior, meaning that the dog chooses to look at you on his own without being cued every time, so engage with him naturally.
- Any time your dog looks up at you, mark and reward from the hand that is closest to your dog. At first, do this each and every time.
- Do your best to continue walking as you reward, though this can take some practice.
- If you are practicing this outside, do so in short intervals, about twenty to thirty seconds at a time. The rest of the time, rely on your equipment (for example, a front-clip harness) to ensure that your dog is under control. Repeat Walk with Attention several times on each walk, at times when there are few distractions.
From there, continue to practice talking to your dog and getting his eye contact in short intervals. It doesn’t have to be constant attention during the whole walk, which would be exhausting for both of you. Keep sessions short and fun. However, at the times when you’re not practicing Walk with Attention, if he looks up at you without being prompted, always mark and reward in the early stages of training. What a good dog—he is choosing to be polite all on his own, even when you don’t ask.

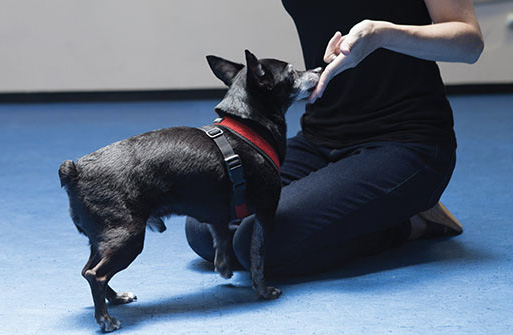
▲ The moment Batman looks at me, I mark “Yes!” and reward him from my right hand. Make sure to reward from the hand closest to your dog so he doesn’t try to cross in front of you to get his treat.
Once your dog starts to learn the game in a quiet place, he might look at you all the time. That’s great! It tells you that you can start to graduate to higher levels. There are two aspects of increasing the difficulty of a behavior: (1) reducing the number of treats at the current distraction level, and (2) moving to a slightly more distracting location, for which you will go back to treating for every correct response. The following is a sample sequence, but you can adjust the process to your own situation.
- Elementary-school level: In this quiet place, once your dog has mastered Walk with Attention, slowly reduce the frequency of treat rewards and increase the enthusiastic “Good dog! You’re so smart!” words of praise. Don’t stop treats cold turkey. Gradually taper them off over the course of a few weeks or more.
- Middle school level: Start practicing in slightly more distracting places, like the same quiet street at a more active time or a busy street at its quietest time. When you start training in a more distracting area, go back to rewarding every time your dog looks at you. Among higher distractions, he’s working much harder and needs the encouragement.
- Junior-high level: Once he is offering his eye contact in the aforementioned setting, start to slowly replace some of the treats with enthusiastic praise. Simultaneously, you can start to practice in more distracting places, like a main street at a busy time. Go back to rewarding all correct responses in this new environment.
- High school and beyond: Using this template, you can work your way up to crowded areas, like farmers’ markets, train stations, or street fairs. Just remember to treat for every correct response when you start training in a new, more distracting environment.
- The final step is to phase out the treats and use mainly praise for eye contact, with two exceptions. Once a day, treat your dog for unsolicited eye contact on your walks, just to keep the game fun. (Not just any glance will do; I only reward the dog if he gives me a good, long look. As your dog’s training progresses, you’ll find that he can sustain the eye contact for longer and longer.) Second, if your dog is reactive to certain things, such as a squirrel hopping by, give him a treat if he looks at you in the presence of that trigger; doing so takes a lot of self-control and is definitely worthy of a tasty reward.
- Practice with the dog on both your left and right sides. Urban dogs need to be flexible.
See the Appendix for a sample plan and chart to help you track your progress when training Walk with Attention.
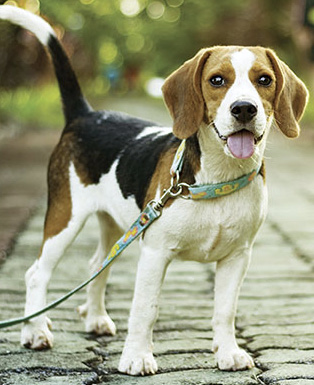
Scenthounds, like Beagles, can be easily distracted by tempting scents.
Troubleshooting
Problem: My dog never looks at me. He’s way too interested in the outside world.
Solution: This is a common challenge for many dogs, particularly puppies and adolescents, adult rescues unaccustomed to leash walking, and breeds that are genetically programmed to search or hunt for animals (such as scenthounds). In these cases, you will benefit from practicing indoors first, where there are no distractions with which to compete. Living rooms and hallways are suitable “preschool-level” places to get started, and you don’t even need a leash to practice Walk with Attention indoors. Once you are ready to start training outdoors, reward handsomely with high-value treats when your dog does look at you, even if it’s only once or twice.
Be patient with the program. Asking your dog to pay attention to you outdoors is a simple concept, but it’s not always easy to execute. Also, ensure that your dog has expended enough of his energy to be able to focus. If he is relaxed after a romp at the park or a long play session indoors, that’s the time to train. Asking a dog to walk politely on leash without exercising him first is like asking a child to read a book on the first day of summer vacation; it’s much easier if you let the dog (or the child) burn his energy first.
Training Strategy 2: Pulling Gets You Nowhere
In addition to your dog being distracted, he may also pull. In most cases, your dog pulls because he wants to get to something fantastic up ahead, and you’re just not walking fast enough for him to get there. You’re going to teach him that when he pulls, he gets the opposite of what he wants, meaning that you stop and turn around, actually taking him away from where he wants to go. The only way to move forward is when the leash is slack. This technique is a modification of those made popular by Turid Rugaas.
How to Teach Pulling Gets You Nowhere
You do not use treats in this activity. Instead, you will reinforce polite leash walking with the “life reward” of the freedom to move forward. Rover walks nicely, and he’s rewarded with the permission to keep walking, but when Rover pulls ahead, he loses his ability to move forward. The only tool you need is an iron will, because in an urban environment, it takes a lot of stopping and turning in the beginning. But I always remind my clients that if it’s frustrating for you, it’s even more frustrating for your dog, and therefore he will quickly figure out that a slack leash is his ticket to walking forward. Start this activity on quiet streets, at a time when you are not in a hurry. The first few sessions of this can literally be stop-and-go because you have to do this strategy every single time your dog pulls.
- The split second the leash becomes tight, stop your motion.
- Give the dog about three seconds to consider this. Make sure to keep your hand still and do not reel the dog in yet.
- If he backs up and the leash becomes slack, even a little, tell him how great he is and proceed forward. Because he made the leash loose again, he is being rewarded with permission to move forward. However, if the leash is still tight after three seconds, pat your leg or use a word (not a word he knows, like “Come,” but something new, like “Over here” or “This way”) to encourage him to follow.
- Turn your back and walk the other way, backtracking for a few steps, dog in tow. Tell him how brilliant he is for following you. He does not get a treat for following, just verbal encouragement.
- Once the dog’s attention is on you (usually it takes only two or three steps), turn back toward your original direction and continue on your way together. This is his reward for coming back to you.
- As soon as you’re back to your original direction, your dog may need a little help to prevent him from pulling immediately again. Practice Walk with Attention, as in the previous section, for a few steps to get your dog’s head back in the game.
- Repeat every time he pulls.
Once your dog understands this for a few sessions on quiet streets, you can venture into more exciting places. As with Walking with Attention, increase the distractions as gradually as possible. Set him up for success; don’t bring your dog to Times Square and expect him to walk nicely if you’ve only ever practiced on a quiet cul-de-sac.
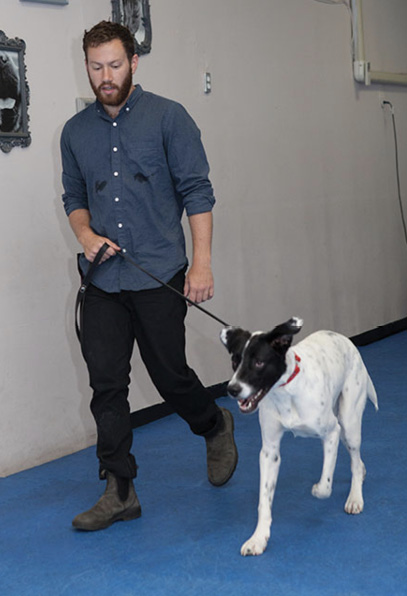
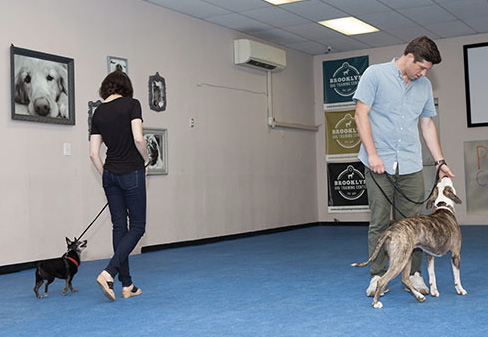
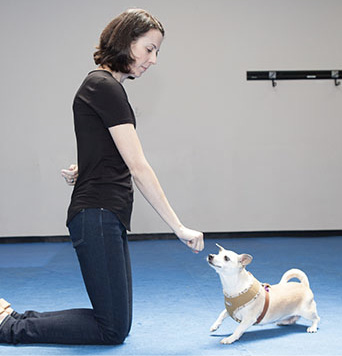
Uh oh—Finn spots a dog up ahead.
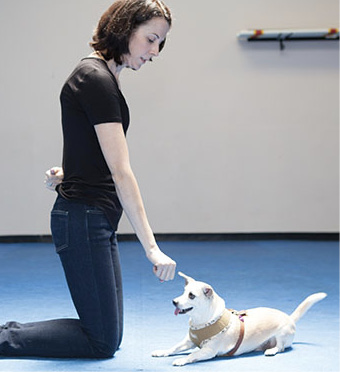
Jacob has stopped and given Finn three seconds to slacken the leash by backing up a bit. But Finn is too focused on the other dog…

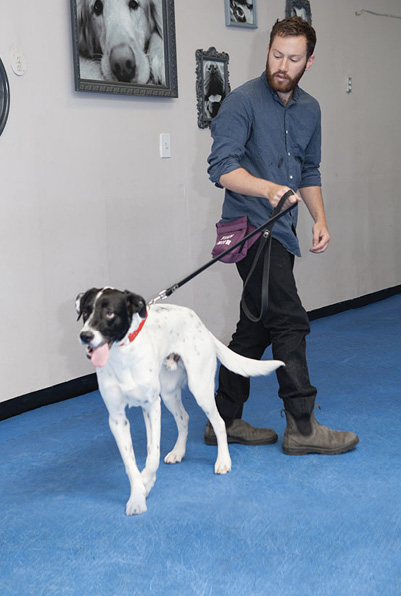
…so Jacob turns back for a few steps and encourages Finn to follow

Finn’s head is back in the game, and now they can proceed.
Training Strategy 3: Hand Target
Of all the behaviors I use and teach, the most useful is a Hand Target. Usually when I tell owners that we’re going to teach the dog to touch his nose to their outstretched index and middle finger, I get the you-must-have-lost-your-mind look. Why would anyone want to teach that? In fact, I use hand targeting far more frequently than any other behavior, especially on leashed walks. It is easy to teach, and once your dog knows how to target, your outstretched fingers act like a magnet that can draw your dog toward you regardless of where he is or what he’s doing. Skeptics might say, “If I need to bring my dog back to my side, I can just reel him in with his leash.” But try to pull your dog toward you with his leash on your next walk, and you’ll see that pulling triggers your dog’s opposition reflex—he will lean against the pressure and actually try to move farther away from you. A much more effective way is to show your Hand Target cue and have your dog come to you without the need for a struggle. Here are some of the ways I use it with my dogs daily:
- When I see a distraction, like another dog coming on my left, I target Beans to my right side without her resistance. Now I can do my New Yorker walk past the distraction.
- When Beans gets focused on something up ahead, I can magically reel her back in with a Hand Target so she is in a Heel position.
- If Batman puts on the brakes during the walk and refuses to move, two or three Hand Targets in a row easily get him “unstuck” and moving forward. I do the targets and reward as I walk forward, so he has to follow.
- Wednesday is garbage day, which means that both my dogs tend to have their noses to the ground. Hand Targeting in different directions—left, right, forward, backward, up, down—becomes a fun game that reminds them to look up and engage with me rather than hunt for food scraps.
- Batman, now well into his senior years, is slow to respond when I say “Come,” but when I show him the Hand Target cue, he can’t help but touch it with his nose.
Most dogs seem to just love bonking their noses into their owners’ hands. There is something inherently cool about hand targeting for them, a coolness that is then amplified when you teach using positive reinforcement. Variations of this technique are used in canine sports, such as agility (see Chapter 8), as well as in animal-assisted therapy work that requires dogs to open doors, turn lights on, and so on.
How to Teach Hand Target
- Rub a treat on the fingertips of your index and middle fingers and hold those fingers out at the dog’s eye level, barely an inch away from his nose. Wait for your dog to notice this yummy-smelling hand and touch it with his nose. You will only make your hands stinky with a treat for the first training session.
- The moment he touches (or crashes into!) your hand, mark and reward. Get four-for-four at about 1 inch away. He does not have to touch your two fingers exactly; any part of your hand is fine.
- Next time, add the cue “Touch” before showing your fingers. Get another four-for-four at 1 inch away.
- Start to add distance, an inch or two at a time. Next time, put your hand 2 inches from his nose, then 4 inches, then 6 inches. For now, keep your visual cue at eye level with the dog. Dogs tend to learn this cue quickly, so you don’t need to do four-for-four at every distance unless your dog is struggling.
- If your dog does not respond at a certain distance, go back to a slightly shorter distance and get four-for-four to make sure he clearly understands what you are asking at the easier level. For instance, your dog “touched” when your hand was 12 inches away, but when you increased to 14 inches, he simply sat and stared at you. Go back to 12 inches and get four-for-four.
Batman loves hand targeting so much that he smashes his face into my outstretched pointer and middle fingers. This is the moment I will mark “Yes!” and reward from my other hand. Notice how my target hand is eye level with Batman.
Once your pup can easily do the Touch from a foot away, start changing the context. You can start to give the visual cue at slightly lower or higher levels, in different directions, and from increasingly longer distances so that he has to take a few steps toward you to touch. Here are some suggestions:
- Move your hand in different directions to the right and left so your dog has to make more of an effort to touch.
- Add motion by stepping away from the dog so he has to get up and follow you to touch your hand. Each time, add another step away from your dog and then cue him to touch. This essentially turns the Hand Target into Recall, and you can apply it to increasingly longer distances.
- Practice hand targeting during your leashed walks, too. Due to the distractions outside, start from Step 1 (a Touch from 1 inch away) and gradually work your way up. Once your dog can easily do Hand Targets from the full length of the leash, you can ask him to do them in the presence of a mild distraction, such as a dog barking a short distance away. (See the Reactive Rascal section later in this chapter for detailed instructions on using Hand Targets during distractions.)
Whenever you add a new variable, for example, doing a Hand Target in the presence of another dog passing by, reward handsomely. Make note of any attempts that don’t work out. What made the cue too hard for the dog to perform? Too much distance between him and you? Too many distractions? Was your voice too quiet or your hand too high to be reached?
Once your dog fully understands and responds to the cue, you can start fading out the treats. I do this by asking the dog to perform a series of two or three Touches in a row, marking each one but only treating the final one. You will probably be able to do this in a low-distraction area, like your home, fairly quickly. It might take a lot more practice for your dog to “get it” while outside.

If your dog can perform a reliable Hand Target, you will find that you are rarely pulling him (and he is rarely pulling you) on the leash. You can use the Touch cue to prevent a number of unpleasant on-leash encounters before they happen.
- You see something troubling up ahead and need to quickly turn around. Say “Touch” and show the visual cue as you change directions. Your dog turns around with you.
- Your dog is dying to pee on the neighbor’s newly planted shrubs up on the left. Use a Hand Target to move your dog to your right and then body-block as you pass the tempting greenery.
- A school bus is approaching, and your dog is afraid of large, noisy vehicles. Before the bus reaches you, do a Hand Target to move your dog farther from the street side. As the bus passes, you can now body-block, using your body as a visual barrier between him and the bus.
- It’s a cool fall day, and your dog has extra energy on his walk. Occasionally say “Touch” and show your visual cue as you quickly change directions. Keep him guessing by stepping in a different direction each time. This will keep his mind on you. (You can take your training a step further with the DIY agility course later in this chapter.)
- You’ve taken your pup to the farmers’ market, and you want to prevent your dog from counter-surfing while you’re paying for some items at one of the booths. Use a Hand Target to get your dog very close to your body and then ask for a Sit-Stay (discussed in Chapter 7) while you pay.
I suggest practicing a Hand Target once on each walk, every day, for your dog’s entire life. Do this at times when your dog is just plodding along or slightly distracted. A surprise Touch cue breaks up the monotony of the walk and reminds your pup how much fun you are to walk with. If this behavior is part of your dog’s daily repertoire, it will be easier to use it when you need to control your dog during a distraction.
Troubleshooting
Problem: My dog can’t reach my hand.
Solution: In the beginning stages, remember to hold your cue hand at the dog’s eye level, or even lower if necessary. Set him up for success by making it easy at first. (Bouncy dogs love to jump up to touch, but that’s high-school level hand targeting, and you need to get through elementary school first.)
Problem: My dog gets close to my hand but won’t touch it.
Solution: You can adjust your body language to be more inviting. Firstly, look at your outstretched hand after you give the cue, and your dog will likely follow your gaze. If you look at the dog, then it becomes an awkward staring contest. Also, give him at least ten seconds to think it through; many dogs get confused at some point and will touch your hand if they are simply given time to ponder it. Additionally, keep your hand still as you give the cue, making sure you don’t “help” your dog by pushing your fingers into his nose. If you do, your dog is essentially training you to touch his nose, and he still gets the treat! Finally, turn your body away from the dog so you are not facing him. Some dogs are sensitive to people’s body language and will interpret someone’s facing them head-on as “stay away” rather than “come here.” Instead, turn your body to the side or actually face away from your dog and hold your cue hand out to the side rather than in front of you.
Turning or walking away, in doggie language, is an invitation to follow. I have had to use this technique with shy or fearful dogs, including my own Beans. When I adopted her, she was extremely hand-shy and hesitant to engage in any face-to-face interactions. I started teaching Hand Target by cheerfully jogging a few steps away from her to encourage her to chase me. Then, with my back still turned to her, I stopped and held out my hand to the side. This was a much less stressful encounter for her, and she felt comfortable trotting up to my side and touching my hand while the rest of my body “ignored” her. After several weeks of this, I started facing her a little more each time I cued the Hand Target. Now, she is comfortable doing a Hand Target with me, and even with many strangers, fully head-on.
Problem: My dog devours my entire hand rather than touching it with his nose.
Solution: For the first training session, I accept almost any contact, even if it is a little bitey or slobbery. However, by the second day, I start to tighten the criteria and withhold the reward for egregiously rude touches. With each training session, get pickier and pickier about which touches are acceptable, ultimately only rewarding for nose-only touches. I also will “help” the bitey dogs by pulling my hand away the second I feel contact rather than holding my hand there and allowing the dog to ingest my forearm. Imagine that your dog’s nose gives you a shock, and you reflexively pull your hand away; that’s what the “touch” should looks like for chompy dogs, allowing just a split second of contact.
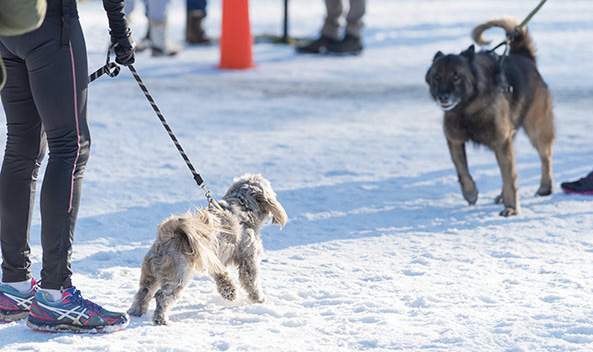
Reactive Rascal
The term reactive essentially means “my dog loses his mind when he sees [blank].” On a walk, when a dog seems to go wild at humans, other dogs, skateboards, or other triggers, we call that leash reactivity. Remember that living life on a leash is not natural to dogs. They are designed to chase small animals or herd big ones, run ahead to greet a new friend, defend their territory—and then eventually come back to you. And just because you’re holding your dog back on a leash, those impulses do not go away. I can only imagine how frustrating it would be if my friend and I were walking down Fifth Avenue to enjoy a little window shopping, and every time I slowed down to peek into a shop window, my friend jerked me away and scolded me for it. Her actions wouldn’t teach me to stop window shopping; rather, I would feel frustrated with her and remember not to invite her the next time I went for a stroll! So frustration about being restrained can be one cause of leash reactivity, as can fear (say, lunging at children in order to scare them and make them go away), guarding the owner, or other causes. Even the overly exuberant adolescent dog who just wants to play can become reactive when he is restrained by the leash and his excitement turns to frustration, which can look like aggression. Fortunately, while reactivity has many causes, the management and training solutions are almost always the same.

My dog reacts badly when he sees people, other dogs, other animals, bicycles, and so on. (His reaction could be an excited, fearful, frustrated, or aggressive display. The solution is the same for all cases.)
Management Strategy: Choose the Right Equipment
For a dog who lunges or pulls when he sees a trigger, I generally recommend a head collar. It allows you to control the dog’s head, from where the rest of his body will naturally follow. The idea is that the dog does not even try to lunge at that bicycle whizzing by, because he knows the head collar will not give him that freedom. However, as mentioned in the previous section, it can take a bit of acclimation, and the dog needs to be comfortable with the head collar in low-distraction areas first. Please also note that although the head collar is considered a safe tool, anything that gives you control of the dog’s head and neck should be used with care.
I have found that, with a highly reactive dog, using a head collar can help you get the ball rolling with the training strategies in this section. I’m reminded of Mickey, a feisty terrier mix who reacted to other dogs he saw on walks. In a flat collar, Mickey normally reacted to other dogs at an intensity level of ten out of ten, complete with pulling, lunging, and frantic barking. Once he had spotted a dog and gone completely bonkers (or what trainers refer to as over threshold), there was nothing his owner could do. He was emotionally overwhelmed at that point. After acclimating Mickey to a head collar, the intensity of his reaction to other dogs reduced to a four out of ten, and this was before we even started training. When we did start training, he progressed quickly with few setbacks because he wasn’t getting himself so worked up anymore, and, as a result, he could focus on our training much more easily.
You can certainly do the Reactive Rascal training techniques using any kind of collar or harness. Similar to a head collar, a front-clip harness can facilitate your training by reducing pulling. However, if your dog falls into the following categories, a head collar is worth trying for at least a month.
- Your dog is reactive to triggers to the point that he could scare or hurt someone (including you) were he to get off leash.
- Your dog is strong enough to pull you or make you lose balance.
- Your dog usually notices triggers before you do (and subsequently has enough time to go bonkers before you can intervene).
For a full description of equipment, see the previous Distracted Doggie section. When in doubt, consult a trainer, because every dog’s situation is unique.
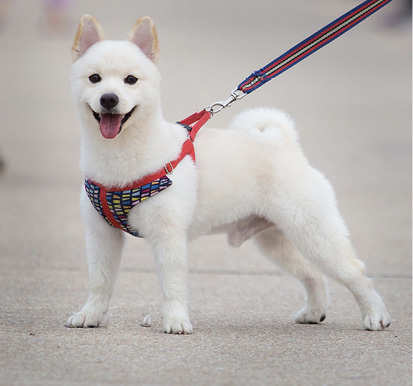
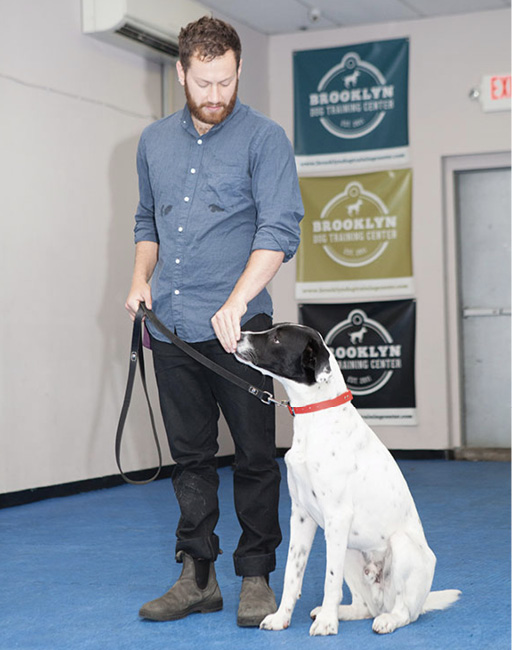
A flat collar does not help control a pulling dog.
Training Strategy 1: Emergency Recall
What happens when you hear your phone “ding” with a text message? Most of us feel a little rush of excitement and immediately drop whatever we’re doing to check it. It doesn’t matter if you’re in the middle of dinner or an important meeting; you’ve got to check it, right? That’s classical conditioning at work, and you’re not so different from Pavlov’s dog, who associated a bell with food. With repetition of the bell-and-food sequence, the sound of the bell triggered a similar rush of excitement and salivation. The Emergency Recall uses this principle, too, by pairing a specific sound with a super-delicious reward, so anytime your dog hears that specific word or sound, he drops whatever he is doing and thinks, Cookie time! Thus, he will happily trot over to you to get his treat.
Technically you’re not training your dog to do anything (no one “trained” you to associate the sound of your text message with picking up the phone, after all), but it does require repetition for the dog to make the connection.

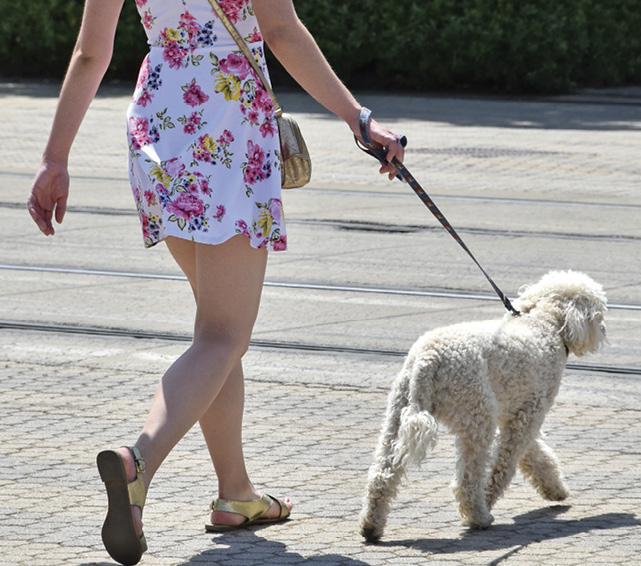
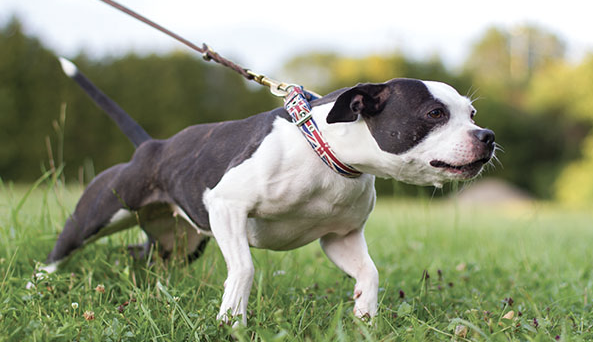
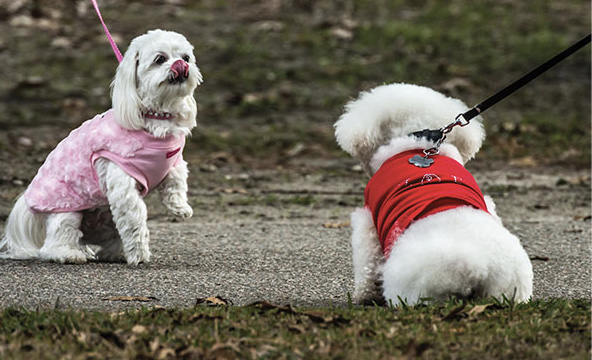
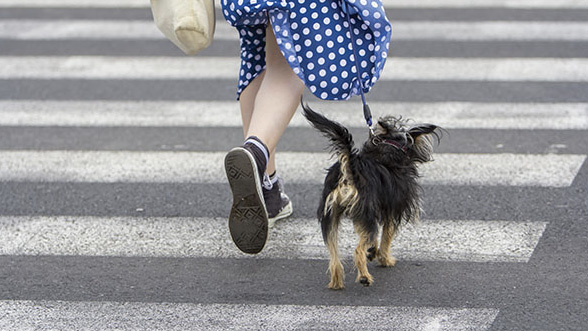
An excited dog pulls on the leash.
When working with dogs that are highly reactive, with owners whose training skills and timing are not fully developed yet, or in urban areas that are chaotic or crowded, I like to start with Emergency Recall. This is a very simple activity. You will teach the dog a unique cue that, to him, means “cookies!” It can even be the word cookie, though I prefer a kissy noise, whistle, or cluck, because a distracted dog might tune out your speaking voice but will definitely hear a distinct noise. Every time you use this cue, you absolutely must follow it with a great reward, regardless of what your dog is doing. Remember, we are not technically training him to do anything; rather, we are teaching him to associate the noise with a treat. (Note: Many excellent training guides discuss the differences between operant conditioning and classical conditioning, but you’re in a hurry to get your dog to behave, right? So we won’t get into it here.) The by-product of this noise-and-treat association is that your dog will come to you.
As the name implies, Emergency Recall is a technique for getting a dog to come when he has, say, slipped out of his collar or is in a dangerous situation. I used this once for my beastly girl Beans, whose leash slipped from my grip and who darted toward the street in hot pursuit of a squirrel. One loud kissy noise from me, and Beans whirled around to come back for her treat. I think at that moment she wasn’t even thinking about the treat, but the Emergency Recall response had become so ingrained (we had been practicing it daily for at least six months) that it was a reflex, like looking up if someone yells, “Watch out!”
In addition, it is also a great remedial step before embarking on Training Strategy 2. If your dog is about to react to a dog on the other side of the street, your Emergency Recall can snap him out of it and bring your dog’s attention to you instead of on the trigger. This effectively prevents a confrontation and gives you an extra second or two to plan your next step.
If your dog ever gets loose on a city street, the Emergency Recall is an essential cue.
How to Teach Emergency Recall
To prepare for teaching Emergency Recall, choose a sound (kiss, cluck, specific whistle sound, or something similar) that you do not use for anything else. You may also choose a word that you do not say often in regular conversation. From now on, this sound or word will exclusively be used for Emergency Recall and nothing else. You will also need really great treats for this; the better your reward, the more quickly your dog will be programmed to stop what he’s doing and run to you. Because we are classically conditioning your dog to connect your noise to a treat, you will never phase out treats for Emergency Recall. (Going back to the analogy of a text message “ding,” if you get an overwhelming number of unwanted and spam texts, you will eventually stop checking it when you hear the ding. The ding no longer predicts anything enjoyable. Likewise, if you do not always reinforce your chosen Emergency Recall noise with a treat, the noise will lose its meaning over time.) Start this sequence at home, when there are no distractions.
- Make the unique sound you have chosen—just once!
- Immediately give your dog that fantastic treat. It doesn’t matter what the dog is doing at that moment. Don’t tell him to sit or come or anything else.
- Repeat this a bazillion or more times indoors. Casually walk around, make your unique sound, and treat.
- Once your dog understands that your sound means “cookies,” start doing it outside when there are no major distractions present.
- Do it a few times, randomly, on each walk.
With practice, your dog should automatically come to you for his treat when you make the noise. (If he doesn’t come to you, he gets the treat anyway.)
Once your dog can respond flawlessly in low-distraction areas, try it when a small distraction is present. For instance, if skateboards trigger your dog, do an Emergency Recall when a person on a skateboard is a fair distance away. Remember to always treat regardless of what the dog does; he does not have to come to you.
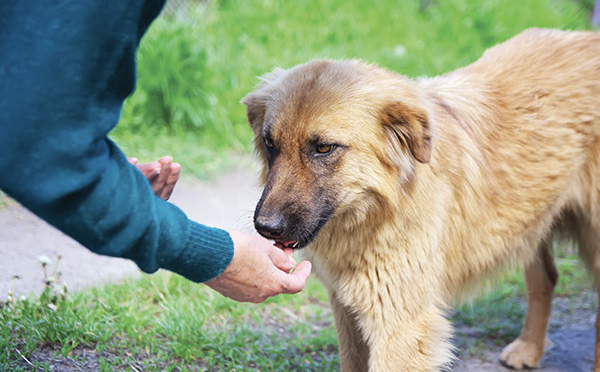
Reinforce the Recall with a treat every time.
When your dog can consistently come to you in the presence of mild distractions, you’re ready to use this technique in the presence of bigger distractions, like a skateboard whizzing past you. However—and this is important—at least once per walk, practice an Emergency Recall when there is no distraction. If you only make your kissy noise (or whatever chosen sound) in the presence of a skateboard, your dog will think the sound is warning him, “A skateboard is coming! Freak out!” In this situation, he has connected the kissy noise with the trigger rather than the treat, and he will have a negative emotional response to the kissy noise. Classical conditioning can work both for you and against you, so make sure your dog is connecting your kissy sound to awesome treats, not to other factors around you.
See the Appendix for a sample plan and chart to help you track your progress when training Emergency Recall. Keep in mind that this strategy can only get you so far. Once your dog is a little less reactive and can focus on you in the presence of a distraction, it’s time to do the real work, which is desensitization and counterconditioning.
Training Strategy 2: Desensitize and Countercondition to Triggers
Let’s go back to Pavlov and his dog, who associated the bell with dinnertime and salivated simply by hearing the bell ring. That bell must have gotten the dog super-excited for dinner. Because a bell in itself is not inherently exciting, Pavlov changed the way the dog emotionally reacted to that sound by adding the consistent result of food. In the case of reactive dogs, if we take this classical conditioning a step further, we can replace the bell with the trigger that your dog reacts to.
Let’s say your dog’s trigger is another dog. Normally, because he feels anxious or frustrated, your dog would bark and lunge at the sight of another dog on the street, but what if that other dog predicted amazing treats? Then, with repetition, that dog would no longer produce negative feelings, but happy ones. Oh goodie, a dog! Where’s my treat? The sight of a strange dog causes your dog to actually turn away from that trigger and look at you instead, in excited anticipation of being given a treat. This is called counterconditioning.
The other half of this strategy is desensitization. When you begin counterconditioning, you should do it when the trigger (the other dog) is far enough away that your dog is able to keep it together and not bark or lunge. We call this under threshold. If your dog is already barking and lunging, it is not the time to train. Imagine if someone is having a panic attack and you ask her to multiply 12 times 45. She can’t do it because, while in panic mode, stress hormones are racing through her body and rational thought is temporarily suspended. The same is true for your dog; if he is over threshold, he is not able to listen to any commands, nor is he interested in your delicious treats. If your dog gets over threshold, you simply have to add distance between him and the trigger by walking away.
City folks, hold your eye-rolling for a moment. I understand that it’s not always as easy as crossing the street or walking away because that street is packed with moving cars, and walking away means confronting a different dog that’s closing in on you from behind. You simply cannot practice desensitization perfectly in all locations, so do your best. Do the counterconditioning protocol when your dog is far enough away to be under threshold. When you can’t give yourself adequate distance, do your best to create a barrier between your dog and the trigger. Your dog can still learn, albeit a little more slowly, in this kind of unpredictable environment. Here are some examples of in-a-pinch barriers:
- Squeeze between two parked cars, body-blocking between your dog and the passing trigger.
- Momentarily sneak into someone’s walkway or driveway, putting your body between your dog and the oncoming trigger.
- Use the Emergency Recall to bring your dog’s attention to you and then treat-treat-treat generously with high-value treats while the trigger passes by.
- Make sure you’re using equipment that facilitates, rather than hinders, your training. A front-clip harness or head collar acts as a built-in barrier because it doesn’t give your dog the freedom to pull and lunge toward the trigger.
As your dog is progressively desensitized to a certain trigger, you will find that you can get closer and closer to that trigger with your dog remaining under threshold. The goal is always to ascertain how close you can get to the trigger without your dog feeling anxious or excited, and then you countercondition at that point. Over time, this distance will decrease, which means you will not have to cross the street or change directions forever.
Using desensitization and counterconditoning, a great many dogs learn to calmly walk right past triggers. Nevertheless, there will be days when it feels like you’ve taken a step backward in your training. Don’t despair; this is part of the process. Your dog might have a surprisingly bad walk due to various factors; for example, your dog has extra energy because he didn’t have a long walk yesterday, he feels irritable due to a sore paw, or he is exposed to too many triggers in one walk. Just take note of the circumstances surrounding that particular walk to look for causes and then see how you can improve the situation for future walks. Measure your progress on a weekly or monthly, not daily, basis.
How to Desensitize and Countercondition
- Be ready. When you’re on a walk and approaching the trigger, be prepared with a handful of amazing treats.
- Desensitize. When you see a trigger up ahead, situate yourself so that the trigger is far enough away that your dog will notice it but not react emotionally. Urban dwellers, do your best! Cross the street (if you can) or pull over to the edge of the sidewalk well ahead of time. Note: If you cannot create enough space, it’s best to turn around and avoid the confrontation.
- Countercondition. The moment your dog notices the trigger, immediately and cheerfully say “Yes!” and treat before your dog has the chance to react inappropriately. Continue rapid-fire treating until that trigger is gone. It’s critical to mark and reward before your dog starts barking or pulling. We are making the association of “I look at the trigger and get a treat,” not “I bark at the trigger and get a treat.” You will find it easiest to stop walking and pull over while you’re counterconditioning, until you and your dog get the hang of it.
- Once the trigger has passed, all treats stop and you can resume your walk. Make sure you go in a direction away from the trigger. I like to do the New Yorker walk here, just to ensure that my dog won’t try to head back toward the trigger.
Sometimes you can’t get away from the trigger and will have to manage the situation.
Going forward, you need to repeat this sequence every time you are confronted with the trigger. You will always have two choices (1) countercondition when the trigger is far enough away that your dog can stay under threshold or (2) give more space and countercondition once you are far enough away. Walk the other way to avoid confrontation if you have to.
As time goes on, you’ll notice that your dog will see a trigger up ahead and turn to you as if to say, Oh boy, it’s another dog! Treats, please! This is exactly what you want, because it means your dog has learned the “game” and is reacting to the trigger with a different kind of emotion. At this point, you can start to close the gap between you and the triggers, but do so very gradually, and let your dog dictate what his threshold is. If you push him too close to the trigger too quickly, you can undo some of your progress.
Many owners ask, “When can I start to reduce the treats when counterconditioning?” This will vary depending on the situation. As time goes on, your dog will get more comfortable with the trigger when it is at a considerable distance, such as across the street. Once he is at ease with the trigger from this distance, you can start pausing between treats. Eventually, just one or two treats, rather than the rapid-fire method from the first week, will be enough to keep your dog’s attention on you. But if you encounter that same trigger in close proximity, on the same side of the street, you will likely need to rapid-fire treat. You will know if you’re treating sufficiently based on your dog’s behavior. A dog that can see a trigger and then focus on you is below threshold, so you can slowly reduce the number of treats. A dog that sees the trigger, gets a treat, and then turns back to the trigger and barks is not being treated quickly enough and needs a more rapid-fire approach. Here are a few suggestions for how to proceed, but your dog’s progress may be faster or slower than in the following examples.
- Bella can completely focus on me when the trigger is across the street and I rapid-fire treat. Now, when I see the trigger across the street, I will reduce my treats by adding a one-second pause between each treat. However, when the trigger is approaching on the same side of the street, I will pull over between cars and rapid-fire treat.
- Bella can completely focus on me when the trigger is approaching on the same side of the street and I rapid-fire treat. Now, when I see the trigger approaching on the same side of the street, I will add a one-second pause between treats. If the trigger is on the other side of the street, it should be easier for Bella to focus on me, and I will add a three-second pause between treats.
- Bella can completely focus on me when a low-level trigger (for instance, an elderly dog) passes by on the same side of the street; I can pull over and give her just one treat. From here, rather than pull over, I will actually walk Bella past the other dog, giving her the treat just as she passes the calm trigger. However, Bella will lunge at a high-level trigger (such as a yappy puppy). In this case, I will continue to pull over and treat as frequently as needed to keep her attention.
There is no set timeline to this kind of training. I have seen some dogs respond almost immediately, while others take months. When I work with Doggie Academy clients whose dogs have leash reactivity, I tell them that counterconditioning is more like dog therapy than dog training. Whereas training usually teaches the dog to do something, such as sit or stay, therapy teaches the dog to feel something, for instance, having a positive reaction to a trigger that used to cause stress or frustration. Think of how many years a person might be in therapy before being able to regulate his or her emotions. Fortunately, dogs usually change their emotional responses to triggers much faster than humans do, but, as with any therapy, it takes time, and each patient is unique. See the Appendix for a sample plan and chart to help you track your progress when practicing desensitization and counterconditioning.
Malik Jr. gets several pieces of hot dog while Batman and I pass. Notice how Rachel has body-blocked, putting herself between Malik Jr. and the trigger. Note: For highly reactive dogs, this proximity to the trigger is too intense. Start from a distance where your dog is under threshold.
Troubleshooting
Problem: Sometimes I can’t cross the street or walk the other way, so I have to face the trigger.
Solution: In this case, I will lead my dog to one side of the sidewalk or between two cars. If my dog has already noticed the trigger, I will lure him with a treat in front of his nose rather than drag him. Then I’ll body-block, acting as a barrier, and rapid-fire treat until the trigger has passed. While this is not an ideal training scenario, it is effective in preventing the dog from going over threshold.
Problem: My dog is getting it, but he sees the trigger, barks once or twice, and then comes to me for a treat.
Solution: Your timing is off. The moment he sees the trigger, exclaim “Yes!” and treat before he gets to the barking part. In the early stages of counterconditioning, always be ready with a treat in your hand because sometimes you can get “ambushed” by another dog coming around a corner or a squirrel jumping in front of you. You’ve got to be ready to act the moment your dog sees that trigger, at least in the beginning stages of training.
Problem: I don’t seem to be making any progress.
Solution: There could be many reasons for this, so contact a qualified trainer if you don’t see any change after about a month. First, make sure your treats are sufficient payment for the extremely difficult work your dog is being asked to do, and make sure you are treating rapidly and consistently enough to keep your dog “in the game.” I also advise tracking your progress on paper. Approximately how close can your dog be to the trigger today? What were the defining characteristics of that trigger? For example, “Bella walked past an excited Lab that was on the other side of the street. I gave her one treat every four seconds and she stayed below threshold. Then we passed a calm, old dog on the same side of the street. I gave Bella one treat every two seconds; she looked mildly agitated.” Look at your progress on a weekly, not daily, basis. You will have good days and bad days, depending on all of the variables that accompany walking a dog in a city; you might even have a frustrating walk one morning followed by a fantastic one that afternoon.
Training Strategy 3: Hand Target
The Hand Target, as outlined in the previous Distracted Doggie section, is also an effective way to redirect a mildly reactive dog’s focus. As with the foregoing counterconditioning strategy, hand targeting turns a situation that might stress your dog into a fun experience. It is also a good way to create distance between the trigger and your dog without having to drag him.
How to Teach Hand Target for Reactivity
The moment your dog sees a trigger but has not yet reacted to it, you will cheerfully give the Touch cue and step away from the trigger, creating a more comfortable distance. Hold out your cue hand, with index and middle finger outstretched, in the direction opposite the trigger so that your dog turns away from the trigger in order to perform the Hand Target. You can do two or three Touches in a row, if needed, and give a super reward at the end for your dog’s hard work and attention. Here is an example:
- Missy sees a cat dart in front of her and run under a car to your right. Before Missy can drag you to the right to chase the cat…
- You cheerfully hold out your left hand and say, “Touch.” This moves Missy firmly to your left side, so you can now shorten your leash and body-block if needed. Mark and reward when she touches your hand.
- With Missy now in a more secure position to your left, continue walking forward and do two or three more Touches as you walk down the sidewalk past the cat. Keep walking as you do the Hand Targets. Each time, mark and reward.
Going forward, depending on how well Missy has practiced the Hand Target, you might not need to reward every Touch in the sequence, but rather just the last one. It could be “Touch” and “Yes!” but no treat, followed by another treatless “Touch” and “Yes!” and finally a “Touch” with a “Yes!” and a yummy treat, all the while walking forward past the cat. However, when in doubt, it’s better to give Missy a treat after each correct Touch to make sure you reinforce her polite behavior of paying attention to you rather than chasing the cat. See the Appendix for a sample plan and chart to help you track your progress when training Hand Target.
▲ As the trigger (another dog) approaches, Joe uses a Hand Target to move Susu away from it.
▲ As the trigger passes Susu, she is already engaged in the targeting. From here, Joe can body-block between Susu and the other dog.
Sidewalk Snacker
Of the many temptations your dog faces on urban streets, the dreaded chicken bone is probably the most worrisome. Many new owners have told me, “I never realized how much chicken people eat until I got a dog!” But, beyond that, edible obstacles on the sidewalk are ubiquitous, and some dogs turn each walk into a scavenger hunt for little bits of nastiness.
For sidewalk snackers, I recommend a combination of management and training strategies. The management techniques will reduce the number of opportunities your dog has to pick up tasty pieces of garbage every few feet. This, in turn, means you do not have to use the training strategies as often. But when you cannot avoid an encounter with a ripped-open garbage bag, the training strategies will give you the tools to walk past it without incident.
Since the focus of this section is on preventing sidewalk snacking, I do not include Drop It here. Drop It does not prevent the dog from picking up an object; rather, it tells the dog to spit out whatever he has in his mouth. This is also a critical skill for some snackers, and you can find a thorough description of Drop It in Chapter 7.
My dog is a like a rogue Roomba on walks. Edible or not, he eats it.
Management Strategy: Proper Equipment and the New Yorker Walk
These two management techniques, as explained in the Distracted Doggie section of this chapter, can go a long way toward stopping the snacking. First, make sure your dog is wearing a collar or harness that facilitates your training and gives you sufficient control of your dog’s body. A head collar gives you much more control over your dog’s head than other equipment without inflicting pain. I find that, once a dog gets accustomed to the head collar, he doesn’t try to snack anymore because he knows he won’t actually be able to snag that chicken bone unnoticed. If you have control over what your dog’s head is doing, the rest of his body is sure to follow.
For a hardcore snacker, another piece of equipment to consider is a muzzle. A muzzle is not only useful to prevent bites, but it can also prevent your dog from ingesting something dangerous. Though I generally don’t use a muzzle when helping clients with their snacking dogs, consider using a muzzle if your dog has a health condition—such as food sensitivities or digestion issues—that make sidewalk snacking dangerous. Additionally, if your dog is a resource guarder, meaning he might bite if you try to remove a chicken bone from his mouth, a muzzle can help you avoid a dangerous confrontation over a piece of garbage he’s picked up. For owners who choose to muzzle a snacking-prone dog, it may not need to be permanent; once you have fully trained him in both Leave It and Drop It, you won’t need the muzzle anymore.
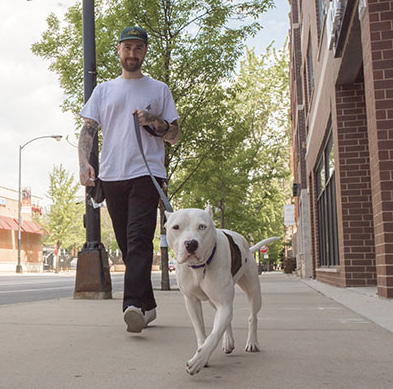
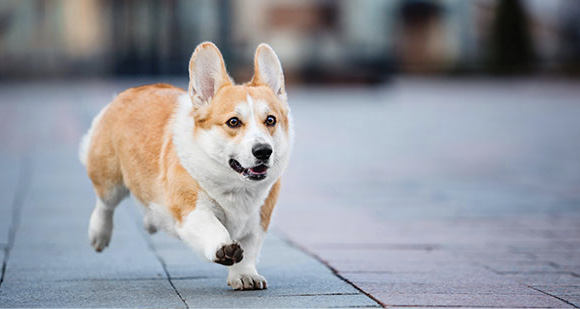
The New Yorker walk is a walk with purpose.
If your dog’s snacking situation warrants a muzzle, know that it takes some time for dogs to become comfortable with this kind of equipment, so a slow introduction is a must. It’s also paramount to choose one that allows your dog to pant, drink, and take treats so you can train while on walks. Look for a basket muzzle, not a grooming muzzle, as the latter does not allow the dog to pant.
The New Yorker walk will also effectively get your dog past a delicious distraction. Kick your walk into a higher gear, and if your dog starts to slow down at the sight of that ketchup-smeared styrofoam container, briefly apply a little tension on the leash to let him know that slowing down is not an option at the moment. Keep your pace consistent and resist the urge to slow down or veer off course just because your dog wants to. I’ve found that many well-meaning dog owners fall into this trap: Sergeant starts to slow his walking when he spots a pizza crust up ahead, and Sergeant’s handler unknowingly slows down, too. This gives Sergeant the go-ahead to slow down even more and veer toward the crust. By the time the handler realizes what’s going on, it’s a tug-of-war between her and the dog, both of whom end up frustrated. Here is a better way:
- Sergeant slows his pace slightly. His handler notices this and scans the area.
- The handler sees a pizza crust ahead. She says, “Let’s go, Sergeant” and gets in New Yorker mode, accelerating her pace. “Let’s go” serves to indicate that they will not be stopping. Sergeant will know that when he hears “Let’s go,” he won’t get the chance to slow down.
- A little later on the walk, Sergeant slows down again. His handler sees that her dog is eyeing a clean patch of grass. She says, “Go ahead, Sergeant” and gives him a little extra slack on the leash. “Go ahead” indicates that he has permission to check out the grass.
By simply adding structure to the walks, you, not your dog, will decide what he can investigate. That being said, I tell my dogs “Go ahead” a lot more than I tell them “Let’s go.” As long as their desired sniffing spot doesn’t present a danger, I am happy to let my dogs check it out for a several seconds. (If the sniffing drags on and on, I simply say “Let’s go” and start moving again.) Leashed walks are the only opportunities that many urban dogs have to interact with the outside world, and I believe it should be a time that they truly enjoy. I will never understand the ecstasy of smelling a shrub, but, to my dogs, that shrub might be the most interesting aspect of their otherwise boring day indoors. So I advocate being relatively generous with your permission to “Go ahead.” However, when I say “Let’s go,” I mean it.
As you add these terms to your own walk, keep in mind that polite leash walking doesn’t mean that your dog has to ignore every stinky fire hydrant; it simply means that when you do say “Let’s go,” it means your dog has no chance to investigate. Some dogs with hardcore snacking histories might need to hear “Let’s go” more often than other dogs, so the balance depends on your particular pooch.
Training Strategy 1: Leave It
Leave It is the ultimate impulse-control behavior because you are asking your dog to stop approaching something that beckons him and follow you instead. It takes time and practice to build this up, but the end result is a dog that will stop in his tracks when you tell him to “Leave it” and trot back to you. While this section focuses on leaving food, you can also teach your dog to leave squirrels, skateboards, other dogs, and anything else he would otherwise head toward.
Leave It is a preventative measure that tells the dog, “Stop approaching that forbidden thing and stick with me.” It is different from Drop It, which means, “Spit out what you already have in your mouth.” It is easier to use Leave It to prevent the dog from approaching an object than to do damage control once the dog has gotten an object in his mouth, so I encourage you to make Leave It part of your daily practice. When you see a discarded bagel up ahead, tell your dog to “Leave it” the moment he sees it; don’t wait for him to dash toward the forbidden snack. Let’s put it in perspective with a human example. Like any respectable New Yorker, I love a good slice of pizza, so let’s imagine I decided to cut pizza out of my diet. As I walk down the street with my friend, the smell of pizza lures me towards a shop. Before I get to the pizza shop, my friend warns, “Don’t you dare go in there! You’re on a diet.” OK, fine. I keep walking and treat myself to a healthy snack later instead. But imagine if I go in there, buy a slice, and am taking my first bite when my friend yells, “Spit that out!” My response will likely be, “Ha, make me!” as I wolf down the slice before she can grab it out of my hands. When your dog is faced with garbage on the street, he is undergoing the same decision-making process. The most humane approach is to tell him well ahead of time that the garbage is off-limits and then reward his self-control with something even yummier. If you wait until the garbage is nearly in his mouth, it will be much harder for him to resist.
A key factor in teaching a solid Leave It is making sure that your rewards are as good as or better than what you’re asking the dog to leave. Don’t ask Sophie to leave a hamburger and then reward her with kibble. Rather, in the early stages, ask her to leave something relatively boring, like her kibble or a toy she doesn’t care much about, and reward her with hot dogs or cheese or her absolute favorite toy. She’ll start to see that leaving things is pretty awesome, and several repetitions of this sequence will actually get Sophie excited to leave objects. This excitement is critical because, with Leave It, your dog really has a choice. Being shorter and faster than the typical human, he could probably grab that street meat if he really wanted to, so we need to teach him how fantastic it is when he makes the right choice and leaves it.
There are four levels of Leave It. This kind of behavior is most successful when tackled methodically, so make sure your dog can reliably perform at the first level before proceeding to the next. Think of the levels of Leave It as school grades. Your dog has to finish elementary school (Level 1) before he is ready for middle school (Level 2), and so on. Also, resist the temptation to test your dog’s Leave It skills on actual street garbage before he is fully proficient at the preceding levels. If you do use Leave It on the street before your dog is ready, he almost certainly won’t leave it. That is like asking a first-grader to pass a calculus test; he’s just not ready for that level of challenge yet. Set your dog up for success by practicing the following steps thoroughly before using Leave It in real-life situations.
How to Teach Leave It: Level 1
- Sit or kneel so you’re roughly at your dog’s level. If your dog is sitting, that’s fine, but do not ask for a Sit (or he will learn to only leave things when asked to sit first). Put some dry food or a mid-value treat in one hand. This will be the “temptation” hand, symbolizing street garbage. Your dog will never get this treat, because in real life you would never reward your dog with the street garbage. In the other hand, put an equally yummy or yummier treat. This is your “reward” hand, and you will hide it behind your back.
- Say “Leave it” once, firmly (because in real life, it naturally comes out in a serious tone), and then immediately present your temptation treat in a loosely closed fist.
- Stay still and quiet while your dog paws at, slobbers on, and chomps at your temptation hand. He is learning that none of these rude behaviors will get him the treat.
- Eventually, he will give up and pause. At the moment he pauses for any reason, mark and reward from your other hand. This identifies the moment he backed off as the behavior you want.
- Get four-for-four in that location and take a break. It may take many reps before you get four-for-four consecutive Leave Its.
- Repeat this in several different locations until your dog is consistently backing off as soon as you tell him to “Leave it.”
▲ Beans is learning Leave It: Level 1. I said “Leave it” as I presented my fist with a “temptation” treat inside. The “reward” treat is behind my back. Now, at Step 3, I am staying still while Beans tries to sniff and lick my hand.
▲ Beans finally backs off. At this moment, I will mark “Yes!”…
▲ …and reward her with a treat from my other hand. (Remember, the dog should never get the temptation treat.)
How to Teach Leave It: Level 2
Your body, hands, and treats are in the same position as Level 1. This time, however, your temptation hand will be open, and your dog will not be able to resist the sight of that treat.
- Say “Leave it” and then immediately present your temptation hand, open with the treat. If your dog is facing you, hold the temptation treat off to the side as far as possible. You want to create a few feet of distance (as much as your wingspan allows) between the dog and temptation treat. Your hand should be at the dogs’ eye level.
- Your dog probably won’t leave it. That’s normal because we’ve changed the scenario. The moment he makes the slightest move forward to get the treat, snatch your hand away. He is learning that his forward motion makes the treat go away.
- Repeat. Say “Leave it” and present the temptation treat as far away as your arm allows. Snatch the temptation treat away the split second his body moves forward.
- After repeating this sequence a few times, he will realize this strategy is not working, and he will not move when you present the temptation treat. Immediately mark and reward. Good dog! Don’t expect him to stay still for long, though, so initially, mark after just a split second of his staying put. Reward him from your other hand. Remember not to give him the temptation treat, as it symbolizes the forbidden street garbage.
- Get four-for-four in that location.
- With each subsequent practice session in that location, bring your hand lower and lower to the ground. The lower your hand gets, the more impulse control it takes for your dog.
- Repeat Steps 1–6 in numerous locations, both indoors and outdoors. By practicing Level-2 Leave Its outside, you’re setting a great foundation for solid real-life Leave Its down the road.
How to Teach Leave It: Level 3
You will start this level by crouching down; by the final step, you will be standing fully erect. Because you will be tossing a treat on the ground, I recommend having the dog on leash so he doesn’t simply try to outrun you for the temptation treat. The leash should be slack while practicing Leave It except if the dog darts toward the treat and you need to hold him back. In other words, when you tell your dog to “Leave it,” make sure you’re not restraining him on the leash. If you are holding him back by the leash, of course he’s going to leave the object, but it doesn’t teach him impulse control if you’re doing all the work for him.)
- While sitting or crouching, say “Leave it” and gently drop the treat on the floor a few feet away from the dog. Your dog will likely dart toward the treat, so use your hand, body, or leash to block him.
- Just as with Level 2, repeat this until your dog learns that not approaching the temptation treat is actually what gets him the reward from your other hand. Get four-for-four.
- Next, you will stand. When you say “Leave it” and toss the treat, toss it a little behind you at first. As your dog develops more impulse control, you can toss it closer and closer to him, but always be ready to body-block or use your leash to prevent the dog from pouncing. Get four-for-four.
- Practice at this level in many locations, especially outside.
Level 3 of Leave It mimics real-life indoor situations, for example, if you are standing at your kitchen counter and drop some food at your feet. Your dog will be able to leave the food alone in this context. When this kind of real-life Leave It happens, remember to reward your dog with something awesome! But don’t limit your practice to indoors; bring some treats outside and practice while waiting at a crosswalk, sitting on your stoop, or in any other outdoor scenario.
How to Teach Leave It: Level 4
This level is different in that we add motion. In the beginning, you will set up Leave It scenarios on your walks so you can control the outcome.
- Prepare. Place a low-level temptation, like a paper bag or uninteresting toy, on the ground. Have a great treat ready to go in your hand.
- Walk your dog toward the temptation, as if passing it on the sidewalk, body-blocking at first. The moment your dog spots the temptation, say “Leave it” once.
- If your dog responds to you, mark the moment he stops approaching the temptation and continue to cheer enthusiastically for a few steps before giving him his treat. You want to reward him once the temptation is safely behind you so your dog won’t change his mind and turn back. “Leave it” now means “walk past that temptation and keep going to get your treat.”
- If your dog doesn’t respond and tries to go for the temptation, just keep walking. No reward. Try again but with more distance between you and the temptation.
- Get four-for-four correct responses in which your dog follows you rather than veers off to investigate the temptation.
- From here, use increasingly valuable temptations, making sure that your reward is always as good as or better than what he’s leaving. You could upgrade to a pile of dry food or an empty food container as a temptation. From there, a pile of training treats. Finally, actual food. Get four-for-four with each temptation.
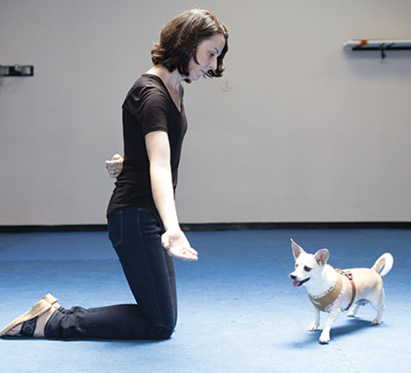
▲ Beans is learning Leave It: Level 2. I said “Leave it” as I presented the temptation treat in my open hand, a few feet away from Beans. The moment she starts to approach the temptation treat…
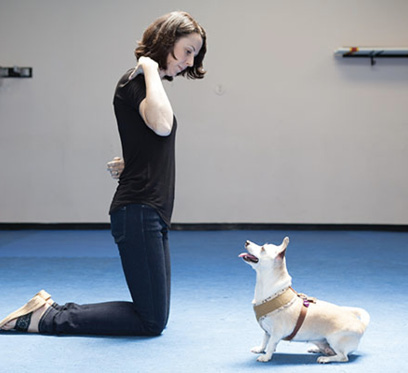
▲ …I snatch it away. Beans is learning that running toward the treat actually makes it go away.

▲ Beans tries a different strategy: staying put when I say “Leave it” and start to present the temptation. (Note: Like Beans, many dogs at this stage will lie down rather than pursue the treat. That’s fine. By lying down, they are leaving it!)
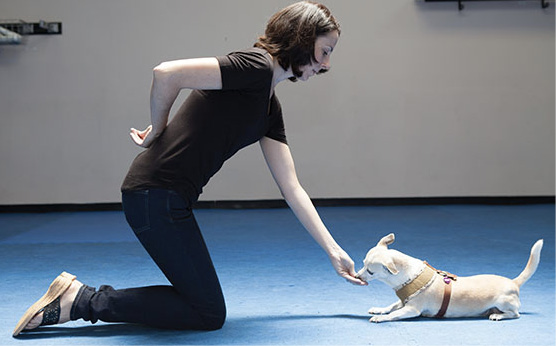
▲ Bingo! I mark and reward her from my other hand.
Note: If your dog struggles with a certain temptation, it usually means one of two things. First, he needs more practice with an easier temptation. Some dogs need many reps of four-for-four at a certain level over the course of many days or weeks. Second, it could mean your rewards are not valuable enough, compared to the temptation. Make sure you reward with a treat equally or more exciting than the temptation.
After completing the previous steps, you’re ready to use it in the real world. Start with rather bland temptations, which should be easy for your dog to resist. Here are some real-world Leave It examples.
- Elementary-school level: If you see a fire hydrant up ahead and you think your dog will want to sniff it, prepare for a Leave It by getting a treat ready and body-blocking. The moment your dog spots that fire hydrant, say “Leave it” and keep walking. Reward for good Leave Its.
- Junior-high level: Continue using mild temptations, such as fire hydrants, but do not body-block. This means the dog will be closer to the temptation than you are. He really has a choice here to either respond to your cue or sniff the hydrant. Be ready with a great reward when he chooses you.
- High-school level: Choose mid-level temptations, such as an empty food container or discarded bag. Body-block as you say “Leave it” and reward when he does not slow down to investigate the temptation.
- College level: Choose the same mid-level temptations, but do not body-block. The dog will now be closer to the temptation than you are. Reward generously for leaving it.
- Master’s level and beyond: At this point, your dog should consider Leave It a really fun game. Once your dog looks forward to leaving mid-level items, you’re ready to kick it up to food or moving distractions, such as the neighborhood cat. Continue to reward with high-value treats.
I reward the Leave It behavior long-term. Once my dog really understands how to leave things, I will use verbal praise for easy Leave Its, and I sometimes reward with a treat for leaving a chicken bone, discarded food, and the like. After a lot of practice, my dogs Batman and Beans love leaving things, and sometimes they even try to “stage” a Leave It by eyeing a piece of garbage on the street and then trotting over to me as if to say, “I didn’t try to eat that garbage! Did you see?”
It’s up to you if you want to reward these self-directed Leave Its with a treat or simply some enthusiastic verbal praise. See the Appendix for a sample plan and chart to help you track your progress when training Leave It.
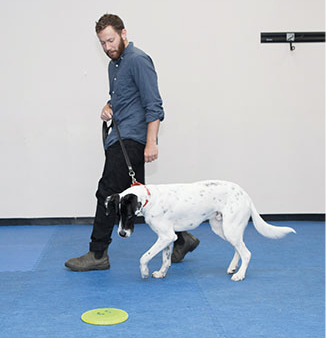
▲ At Level 4, Jacob demonstrates what happens if you don’t say “Leave it” early enough. It’s too late to cue Finn to leave it now because he’s already decided to go for the frisbee. At this point, Jacob can only encourage Finn to keep moving forward. Make sure to give the cue the moment your dog spots the temptation—before he gets fixated on it.
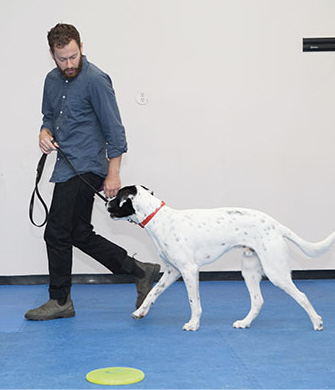
▲ Here, Jacob gives the “Leave it” cue before they reached the temptation, and Finn responds perfectly by turning his attention to Jacob.
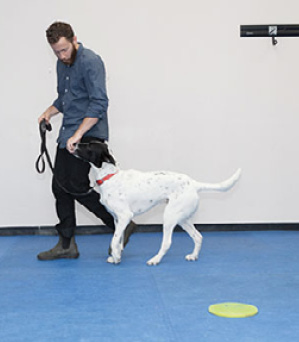
▲ Once they pass the temptation, Jacob marks and rewards Finn. By getting his reward as they walk away, Finn learns to keep moving when told to Leave It.
Troubleshooting
Problem: My dog seems to be on to the game. He is only leaving the temptation in order to get his reward.
Solution: This is not a problem. In fact, the goal is for your dog to think that Leave It is a game and that he is incredibly clever for learning how to ace it. If your dog performs Leave It with enthusiasm, you don’t have to be as concerned about sneaky sidewalk snacking. Keep up the good work!
Problem: At levels two or three of Leave It, my dog starts to approach the temptation treat in my hand. When I then say “Leave it,” he ignores me and keeps approaching the temptation treat.
Solution: Your timing is off. Make sure that you say “Leave it” just as you are presenting the temptation treat (in other words, the moment the dog spots the treat). If your dog has already taken a few steps toward the treat before you say “Leave it,” you’re too late because he’s already made up his mind to eat the treat. Also, ensure that you remove the temptation the moment your dog starts to approach it. Don’t snatch the treat away after you’ve already let him take a few steps and almost eat it. Just as if someone snatched a slice of pizza from under your nose, you’d feel frustrated and, from then on, Leave It would cease to be fun.
Problem: My dog will leave boring treats but not really delicious ones.
Solution: There could be a few things happening here. First, make sure your reward is equally as good as or better than the temptation treat. Also, this problem may indicate that your dog doesn’t understand Leave It as well as you think. Practice each level thoroughly in many locations, especially outside, and do not ask him to leave anything that you think would be too difficult. This is one behavior that will likely take more than one round of four-for-four. The goal is to gradually and systematically work up to higher levels of temptation, just as a child gradually builds her skills from kindergarten to college without the expectation that she can skip a few grades. In your dog’s case, start temptations with dry food, then move up to dry treats, then to soft treats, and finally to pieces of meat or cheese. In each case, increase the deliciousness of your rewards accordingly. You might need to practice for days or weeks at one particular level.
Training Strategy 2: DIY Agility Course
Many dogs turn to sidewalk snacking because they are bored out of their doggie minds while walking. Whereas a walk may be considered rigorous exercise for some humans, it is simply not enough to keep active dogs interested. But, not to worry—this doesn’t mean you have to take up ultramarathon running or wake up at 4 a.m. to walk your dog for hours. In many cases, you can improve the quality of your walks without having to increase the quantity. How to improve the quality? Engage your dog’s body and mind by asking him to perform more intense athletic activities during walks. Use common objects, like benches and fire hydrants, to turn each walk into your own personal agility adventure. You will expend more of your dog’s physical and mental energy than with walking alone, giving you a dog that doesn’t need to sniff for garbage in order to entertain himself.
The prerequisite for this technique is Walk with Attention from the Distracted Doggie section earlier in this chapter. First, your dog needs to realize that you’re there on the walk with him. Once you have his attention, you can teach him to do all sorts of fun things.
Please keep safety in mind with all of these techniques. Depending on factors such as your dog’s size, weight, conformation, and age, some of these activities might not be appropriate. I have provided less physically demanding alternative activities for the ones that follow, but I welcome you to be creative and keep your dog’s particular needs in mind when designing your own DIY agility course. Here are some examples.
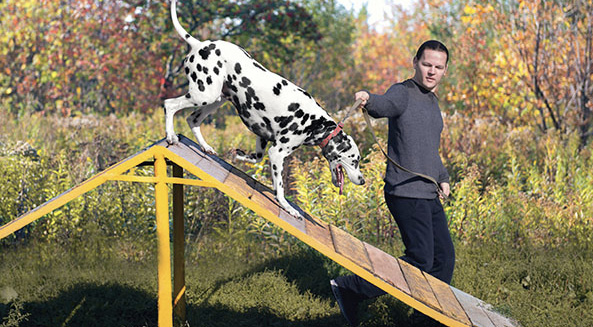
The A-frame is a typical obstacle in agility competition.
Target with Both Front Paws
For this behavior, your dog will put his front two paws on either a ledge or a vertical object, like a wall, tree trunk, or fence, while his back paws stay on the ground. If your dog is easily distracted outdoors, start indoors against a wall. Here is a simple way to teach it.
- Walk up to a wall and use your palm to tap on it, encouraging your dog to put his front paws on it. The first few times, you can tap on the wall with one hand and lure with a treat with the other hand to encourage him to stand up.
- The moment both his front paws touch the wall, mark and reward.
- After getting four-for-four, add the word “Paws” (or the cue of your choice) right before you tap on the wall.
- Once your dog understands the verbal and visual cues, start applying them to other upright things. The first several objects he targets should be relatively ordinary and flat, like different walls. From there, your dog can target other solid objects, such as mailboxes on street corners, fire hydrants, lampposts, and so on.
If your dog is not physically suited to standing on his hind legs, you can replace the paw target with a nose target, teaching Buddy to touch his nose to an object you point to. First, use the steps in the Distracted Doggie section of this chapter to teach Buddy the Hand Target. Then, you can transfer this targeting to other objects. Start this indoors. Say “Touch” and put your finger on a wall at the dog’s eye level. Whenever Buddy touches not only your hand but also the wall, mark and reward. Practice this on several different walls or other flat vertical surfaces until he is willingly touching them, and then you can start to change the context. You’ll add your new verbal cue before the “Touch” cue, so if you’d like the new cue to be “Target,” you’ll say “Target touch” and hold out your finger to the wall as before. This allows Buddy to hear the new cue first but still be able to respond to the old one. Once Buddy has figured out the game and is being rewarded for touching the wall consistently, you can drop the “Touch” part so that the cue is a pointing gesture and the word “Target.”
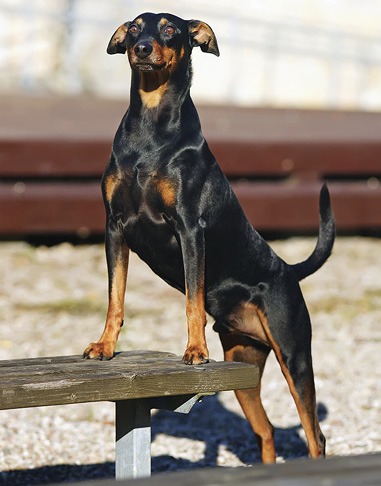
Athletic dogs can turn anything into an obstacle.
Balance Beam
You can use elevated surfaces like benches or stairs to teach your dog to hop up, walk along the length of them, and then hop off. Benches are extra fun because they often have armrests midway along the seat that your dog can jump over. (Be careful with some wooden benches, which may have broken or widely spaced slats.)
- Encourage your dog to jump on the bench by tapping it with your hand or luring with a treat. Walk alongside the bench next to your dog, verbally encouraging him. At the end, encourage him to jump off by patting your leg, calling him, or luring with a treat.
- Once you’re sure he’s comfortable this way, add the cue “Jump up” (or any novel cue you choose) when the bench is almost in front of you and then tap or lure as before. Add the cue “Off” right before he jumps down.
- If you are using a bench with an armrest dividing it midway, your dog can jump over it. I say “Over” before the dog jumps over the armrest.
- Once the behavior is solid with benches, apply this process to other elevated surfaces, like the steps of a public building, where you can do several rounds of jumping up and off.
This activity assumes your dog is physically capable of and interested in jumping on and off benches. If your dog might endanger himself jumping, it’s best to avoid this activity.
Circles
This one is easy for dogs of all shapes and sizes because all four paws remain on the ground. Your can teach your dog to run in a circle around any of the objects along your path: traffic cones, light posts, street signs, hydrants, even your own body. When teaching this new behavior, practice it thoroughly in one direction first before starting the other direction.
- Choose an object to circle, like a stool (indoors) or a fire hydrant (outdoors). It’s easiest to choose an object shorter than your torso so you can reach over it as you lure and so your leash will not get wrapped around it.
- Start by luring with a treat. Very slowly lure the dog in a counterclockwise circle to the left. It helps to use a treat that your dog can continuously chomp on as he revolves, like a piece of string cheese or a dab of peanut butter. (If you have to break it up and treat at the 180-degree point, then another treat at the end of the circle, that’s fine.) For dogs who get distracted by the treat, doing a series of hand targets at 90, 180, 270, and 360 degrees is also an effective way to teach them to circle. Get four-for-four.
- Add the cue “Left” before you lure. Practice this until your dog can go fully around the object, only getting one treat at the end of the circle. Get four-for-four.
- For short dogs, there is an extra step here. It’s likely you have been crouching down during Steps 1–3 to lure. Once your dog understands “Left” and the 360-degree lure, you can start to elevate your body. With each circle, hold your lure hand about an inch higher than the previous time. Continue to elevate your body a little bit with each rep until you are in a comfortable position. If at any point your dog doesn’t respond to your lure, it means he is confused. Go back to the previous step (an inch lower) and get four-for-four at that level to ensure your dog understands that he is to follow your hand even though the treat is out of reach.
- Do the same hand motion at the same slow speed, but with an empty hand that circles the object 360 degrees. Now your hand gesture is a cue, not a lure. Treat at the end from your other hand. Get four-for-four.
- Gradually fade how dramatic your hand movement is. Each time, after saying “Left,” make the cue a little more subtle. I do this by making the circle a little less complete with my hand each time, in extremely small increments. Rather than a full 360-degree sweeping motion, I’ll do about 340 degrees and stop a little short, and then 320 degrees, and so on. The dog has to come back to the starting point (where I’m standing) to get the reward anyway. Ultimately, I’ll say “Left” and point at the object with hardly any curve.
- Follow the same sequence for “Right” to teach a clockwise circle.
If you and your dog enjoy playing these training games on your walks, check out the discussion on dog parkour in Chapter 8. You might just have a parkour dog in the making!