Stock your sewing area with the following basic supplies, most of which are available at quilt shops and larger craft-supply stores.
■45mm or 60mm rotary cutter with an ergonomic squeeze handle
■24˝ × 36˝ self-healing cutting mat
■6˝ × 24˝ clear plastic quilting ruler with both grid and angled markings
■4˝ × 14˝ or 6˝ × 12˝ ruler for working with smaller pieces
■Iron and pressing board
■Starch alternative, such as Flatter smoothing spray by Soak
■Sewing machine needles: 80/12 microtex/sharp for piecing
■Long, sharp quilting pins
■Magnetic pincushion
■Fabric scissors
■Utility scissors for cutting templates
■Seam ripper and snips
■Water-soluble fabric marker
■Freezer paper for making templates (either the 8½˝ × 11˝ printable sheets that are available at quilt shops or the larger rolls sold in supermarkets)
■Pencil for tracing template patterns
■Envelopes for storing templates
As you look through the blocks and read the instructions, you’ll find that I cut out a lot of pieces individually rather than using shortcut techniques like strip piecing. I’ve chosen to make my blocks and write the instructions this way not because I’m unfamiliar with these techniques but because they don’t provide the same opportunities for thoughtful fabric placement. It may take longer to fussy cut a quarter-square triangle unit, but it will definitely be more beautiful and memorable!
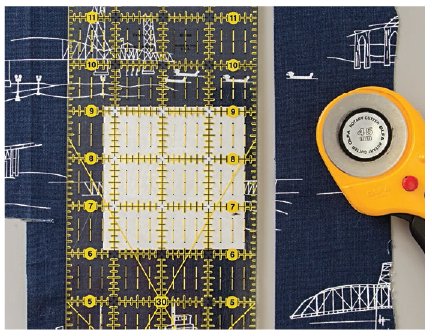
Rotary Cutting
Accurate rotary cutting will improve the success of your projects. Make sure your fabric is free from wrinkles before you start cutting, and always use a sharp blade.
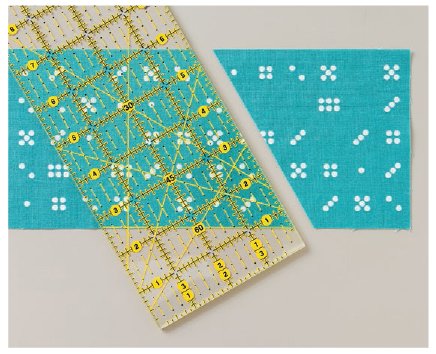
MAKING ANGLED CUTS
Most 6˝ × 24˝ rulers include guidelines for cutting 30°, 45°, and 60° angles. To use these guidelines, tilt the ruler to the left until the guide you want is lined up with the bottom edge of your fabric. Then cut along the side of the ruler, just as you would if you were making a standard 90° cut.
NOTE
If you are left-handed, tilt your ruler to the right, so it looks like a mirror image of the photo. This will allow you to cut safely along the left side of the ruler.
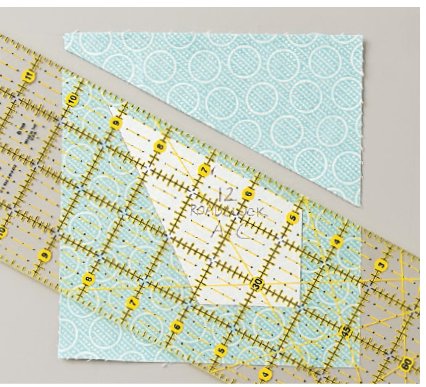
Fussy cutting is the common term for cutting a print fabric to highlight or center a particular part of the print. For this book, I recommend using freezer paper to measure fussy-cut shapes. If the block construction makes use of freezer-paper templates, you can use the templates themselves.
For the other patterns, you can use a piece of freezer paper cut to the finished size of the piece you want to cut. Use your iron to fuse the freezer-paper shape onto the area of the fabric you want to cut and then rotary cut the shape, adding the seam allowance just as you would if you were using a template pattern.
Making and Using Freezer-Paper Templates
Most of the nonrectangular shapes used in this book are made with freezer-paper templates. Freezer paper is an excellent template material because it can be temporarily fused to fabric by pressing with an iron, making it easy to fussy cut and to cut accurately.
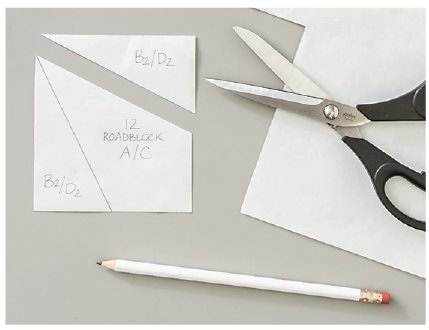
Making Templates by Tracing
Use a pencil to trace the pattern shape onto the paper (nonshiny) side of the freezer paper. Be sure to transfer all markings and the name of the pattern.
Use utility scissors or an old rotary cutter blade to cut out the template patterns, and store each template in a small envelope labeled with its block name and piece ID.
Making Templates by Printing
For your convenience, a digital file of the template patterns is available at tinyurl.com/11072-patterns-download. This file is formatted to allow printing directly onto 8½˝ × 11˝ freezer-paper sheets available from C&T Publishing, eliminating the need for tracing. Be sure to print onto the paper (nonshiny) side.
Use utility scissors or an old rotary cutter blade to cut out the templates, and store each one in a small envelope labeled with its block name and piece ID.
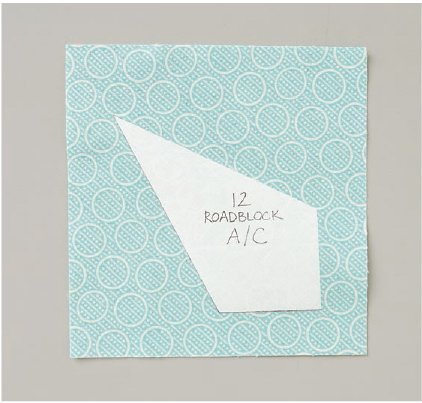
Using the Freezer-Paper Templates
The freezer-paper templates do not include seam allowances. This means that when you place the template shape onto your fabric, you can easily see what the finished shape will look like without a seam allowance, making it very easy to fussy cut. It also means that you won’t inadvertently shave off bits of your template as you work.
Once you’ve determined where you want to cut the shape, place the template shiny side down and briefly press it with an iron. A dry iron is best, particularly if you’ve used an inkjet printer to print onto the freezer paper. The heat will melt the coating on the back of the paper, which will hold the template in place while you cut. (Don’t worry! It will peel off when you’re finished, without any damage to the fabric.)
Carefully move the fabric back to your cutting mat and use a ruler to cut the shape, adding a ¼˝ seam allowance around all sides.
NOTE
Be sure to use a water-soluble, not a disappearing-ink, marker. You don’t want your marks to disappear while you work!Use a water-soluble fabric marker to mark each corner or point on the fabric shape. These points will be used to match and sew the pieces accurately.
Peel away the freezer-paper template and save it for making the next shape, or for making another block later. Freezer-paper templates won’t last forever, but you should be able to cut several shapes from each one before it becomes too linty to adhere to the fabric.
Seam Allowances
The projects in this book are made using a ¼˝ seam allowance. Sewing an accurate ¼˝ seam allowance will help ensure that your finished blocks are the right size. To easily achieve accuracy, I recommend using a ¼˝ piecing foot. I prefer the kind without the flange or guide on the side, but some quilters find it helpful.
Pressing Seams
I press my seams open. It takes a bit more effort than pressing them to one side, as many quilters do, but I think the results are worth it. If you press the seams open, your finished blocks will be more precise, will lie flatter, and will be easier to machine quilt in an allover pattern.
Having said that, I realize that many of the designs in this book involve a lot of small pieces. If you find that you’re fighting with a particular seam, don’t hesitate to press that seam to the side!
Sewing the Cut Shapes
Use the marked points to match the pieces to one another, keeping in mind that unlike rectangular shapes, the shapes cut from the templates may need to be lined up at what look like odd angles, rather than by simply matching the ends of the pieces.
NOTE
X marks are shown on some patterns as an additional guide for constructing the block.
TIP
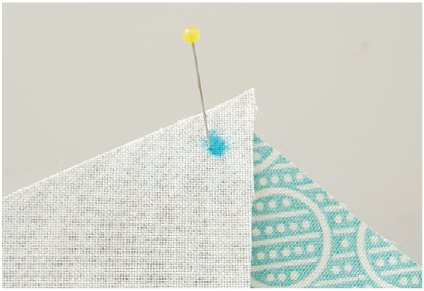
If you’re having trouble lining up the marked points, try sticking a pin through the point in one piece and then through the point you are trying to match. Pull the head of the pin all the way up to the fabric, matching the points perfectly. Then use a second pin to secure them together.
Sew the pieces together using a ¼˝ seam allowance and press the seam open. Trim away any additional seam allowance (for instance, on points) before sewing more pieces. Once all the pieces have been joined, square up the block or block unit, removing any excess seam allowance.

Remove any remaining markings by blotting with a damp washcloth.
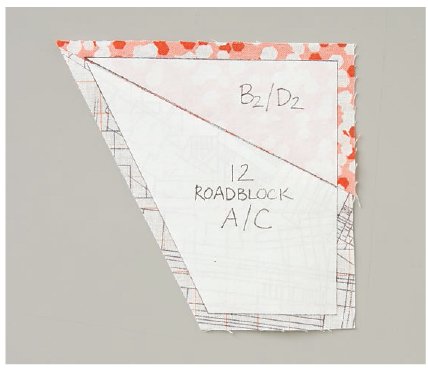
If you want to avoid matching up the tiniest template shapes and are willing to use a little more fabric, you may prefer shortcut piecing.
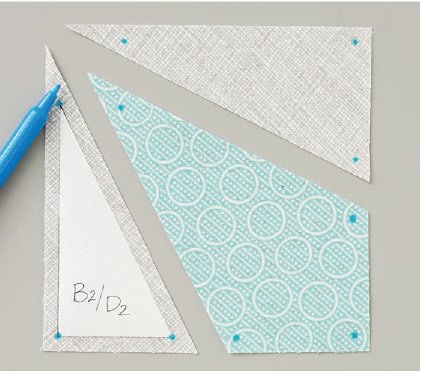
For this method, begin by cutting to size the first piece you need to sew, leaving the freezer-paper template fused to the fabric. Don’t worry about marking the points as you would with standard piecing.
In shortcut piecing, you’ll sew on the next piece of fabric before you cut it to size. This eliminates the need for matching points and fiddling with the tiniest pieces.
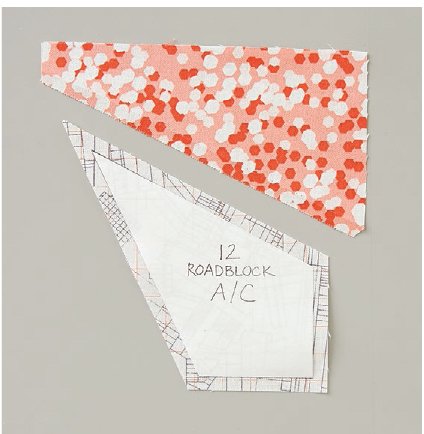
Refer to the block pattern to see which piece should be added next and select a piece of fabric a little larger than you think you’ll need. Depending on the look you’re going for and the fabric you’re using, you may want to cut the fabric at a matching angle before you sew it on. Do this by using the edge of the freezer-paper template as a guide.
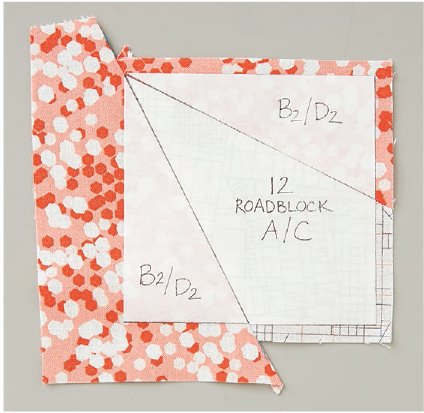
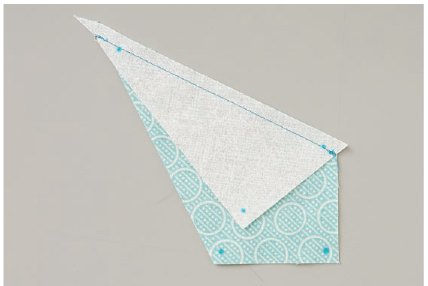
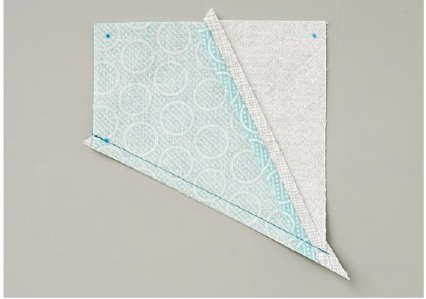
Sew the two pieces of fabric together, centering the already cut piece on the larger piece that you’re adding. Press the seam open.
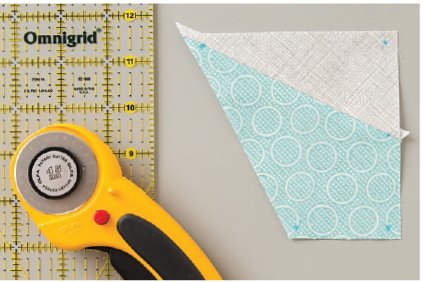
Use your iron to fuse the freezer-paper template in place, matching it with the freezer-paper template still on the first piece.
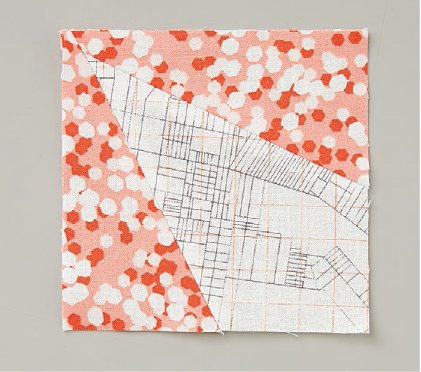
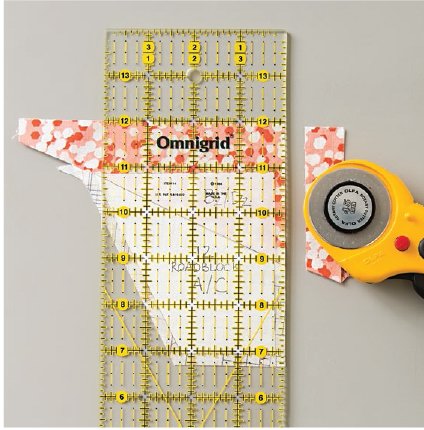
Use your rotary cutter and ruler to trim away the excess fabric, leaving a ¼˝ seam allowance. Continue using this method to add generously cut pieces of fabric, fuse the templates in place, and cut the block components to size until all the pieces are sewn.
If you find that your freezer-paper templates are not staying fused in place or are getting caught in the seams, don’t hesitate to peel them off the block during sewing. Just take a moment to fuse them back in place each time you trim to size a new part of the block.
Detailed explanations of quilting basics such as cutting, piecing, making a quilt sandwich, machine quilting at home, and making and sewing binding can be found in my earlier books The Practical Guide to Patchwork and Modern Patchwork. You can also refer to C&T Publishing’s website for general quiltmaking instructions: ctpub.com > Resources > Consumer Resources: Quiltmaking Basics.