Chapter 8
Primitive Wilderness Containers
No hunters or gatherers are worth their salt without something to put their gatherings in. As with most other aspects of primitive living, assembling a suitable container is actually much easier than you might at first suspect, what with all the cumulative knowledge that you’ve gained in reading about other aspects of primitive living in the other chapters. The importance of some suitable container can’t be stressed enough—it really does make life easier. Remember, you’re going “naked into the wilderness,” and you’ve got no pockets.
I designed this chapter to show you a lot of photos with some descriptive and explanatory words. I figure that the photos pretty well speak for themselves. This material, however, is far from the final word on containers. Instead, what you’ll encounter here are several types that have worked for Geri and me and that are primarily functional, with little or no artwork. There are many, many ideas that will work as well but that we haven’t covered, due not only to lack of space but also to our own lack of knowledge. We do show workable products, and—most importantly—we explain the characteristics that you need to look for to get the job done in your own region of the country.
Baskets
The first container that comes to mind to most folks would be a basket. Here we’ll show you three methods to obtain some sort of basket. While the instructions in this chapter will be far from definitive answers to your every question on basketry, they do offer three ways that work well to give you a finished product. You don’t need to stick to any one of these methods but can mix and match, as you will and as the circumstances dictate. To all you artists in basketry out there, please bear with us and remember that these are functional.
Materials
As will be shown, many things in nature work well in basketry. You only need to search out particular characteristics—mainly that a material is pliable, or can be made to be. It helps if it’ll remain a bit pliable after the project has been completed so that it won’t fall apart in use. The purpose of the basket will help to dictate this. If it’s to be used only for gathering nuts (the ones growing on trees, not those living in them) or herbs, a lighter-duty basket will suffice. If your goal is to gather heavy-duty rocks or whatever (and remember, we cavemen do need our rocks!), then a brittle basket will be wasted. The longer the material is, the less splicing will be necessary to create a basket.
Stick baskets—as I refer to those made of, well, sticks—can and should be made more pliable by soaking for several hours or days, depending on the material. We mostly use dogwood and willow for these. You can use the information in this chapter as a guide, but do search out your area to find what it has to offer, and then maybe experiment or temporize. As you’ll see, many other materials can be and are used—cattails; any cordage; some vines, barks, and grasses. As we approach these various materials herein, we’ll explain how to prepare them.
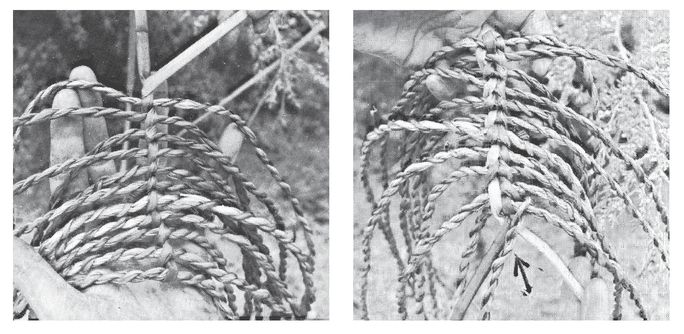
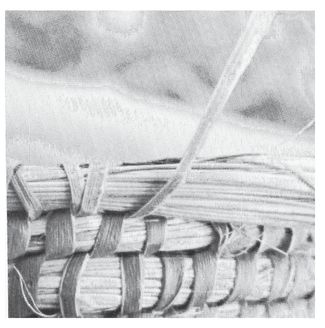
Warps, Wefts, and Woofs
These are what your baskets are composed of. Warps are the longitudinal threads, sticks, or cords into which the wefts (also known as woofs) are threaded. This is a simple definition, and in practice the actual basket is sometimes not so simply accomplished.
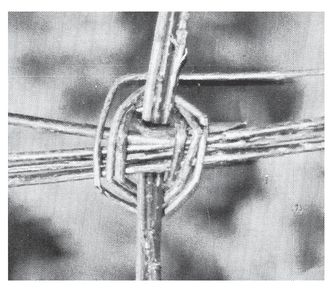
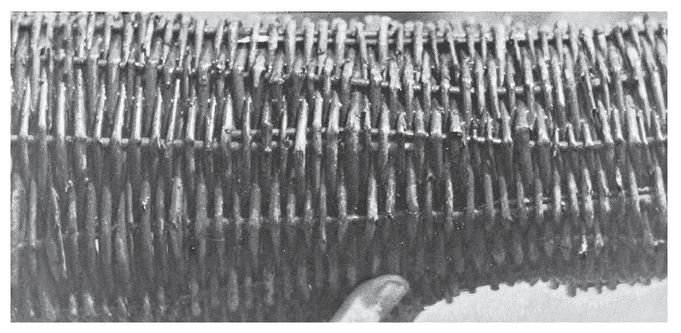
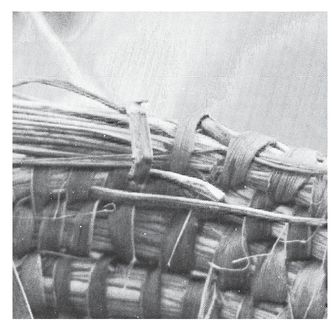
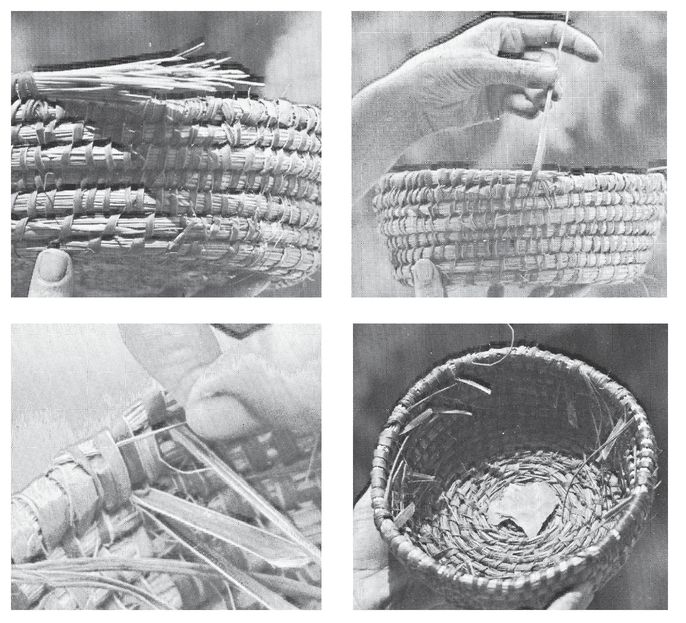
Note that an additional warp has been added (lower center, arrow). As we proceed, you’ll find that warps will be added as necessary for strength.
Note the splicing in of a new weft (the upper arrow shows the last of the old; the lower arrow points to the new).
Note, on the far side, how the warps have been threaded down into the wefts to finish. Another cord has been wrapped around the perimeter for added strength
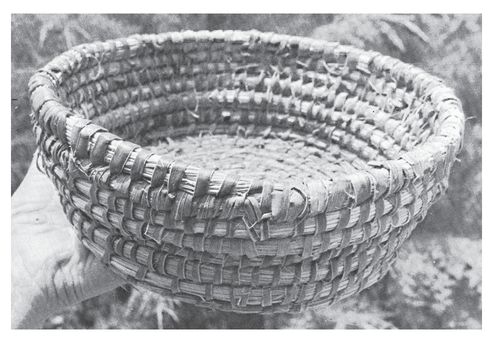
The finished product.
Twining
In twining, you’re working with two wefts. Normally you twist these once, between warps.
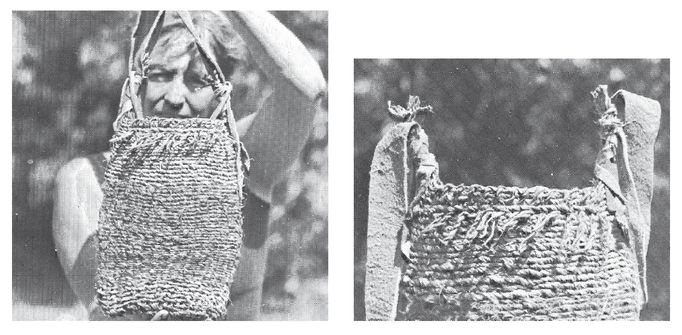
With this basket (actually, here a bag), shown in the process of being made, we’re using cattails exclusively as the material. These were cut dead in winter, and allowed to dry (cattails grow where it’s wet), and resoaked, then corded for the warps. The cording allows for a stronger basket or bag. (Cording is taught in detail in Chapter 1.) Then a single piece of cattail, wet, was twined in.
This bag, also twined, has been made from a variety of materials. Elm bark was corded for the warps, while the bottom coupla inches was single-strand elm bark, followed by a few inches of western dogbane, followed by several more inches of eastern dogbane (not corded; the fibers only cleaned and then twined in). The whole was finished at the top with several inches of grass—what we call slough grass, since it grows in wet areas, and what others call reed canary grass. The strap is brain-tanned deerskin (finished according to methods given in Chapter 10).
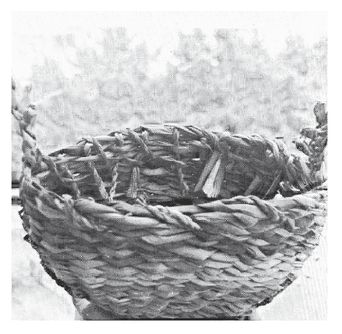
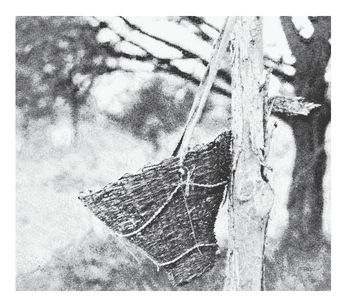
This burden basket, appropriately named, is made mostly from dogwood, with a bit of willow tossed in. Deer rawhide supports the basket, to which is tied a tumpline (pack strap) of brain-tanned deerskin. The tumpline goes around the shoulders or the head when carrying, leaving the hands free.
Basket Weave
To basket weave means, of course, to weave a basket.
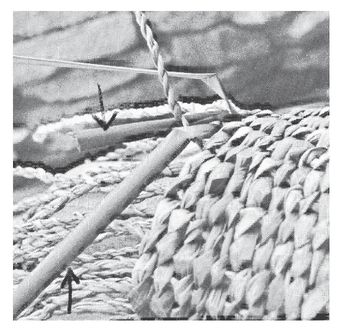
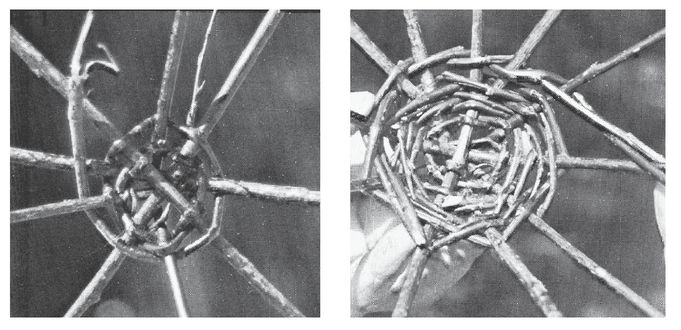
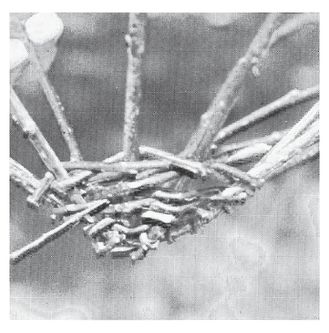
There are many ways in which you can begin your warps (your up and downers). This step is almost always the most difficult. You’ll never have nearly enough hands for this operation. Sticks are always wanting to fall apart here. Just persevere and it’ll work.
Now, when basket weaving, you need to have an odd number of warps, for the weaving to work out. With twining it makes no difference.
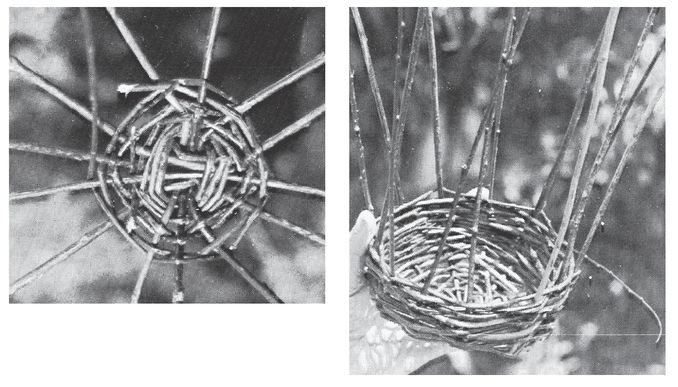
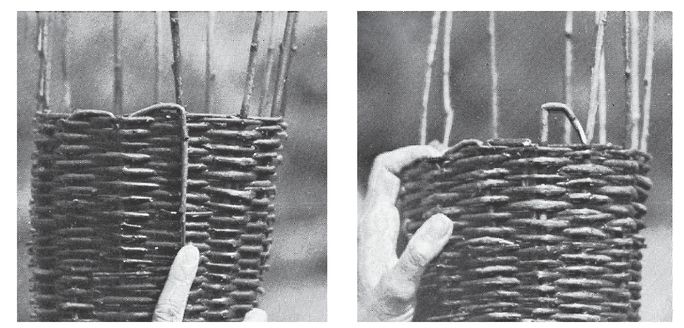
Note the addition of a 13th warp in the upper left.
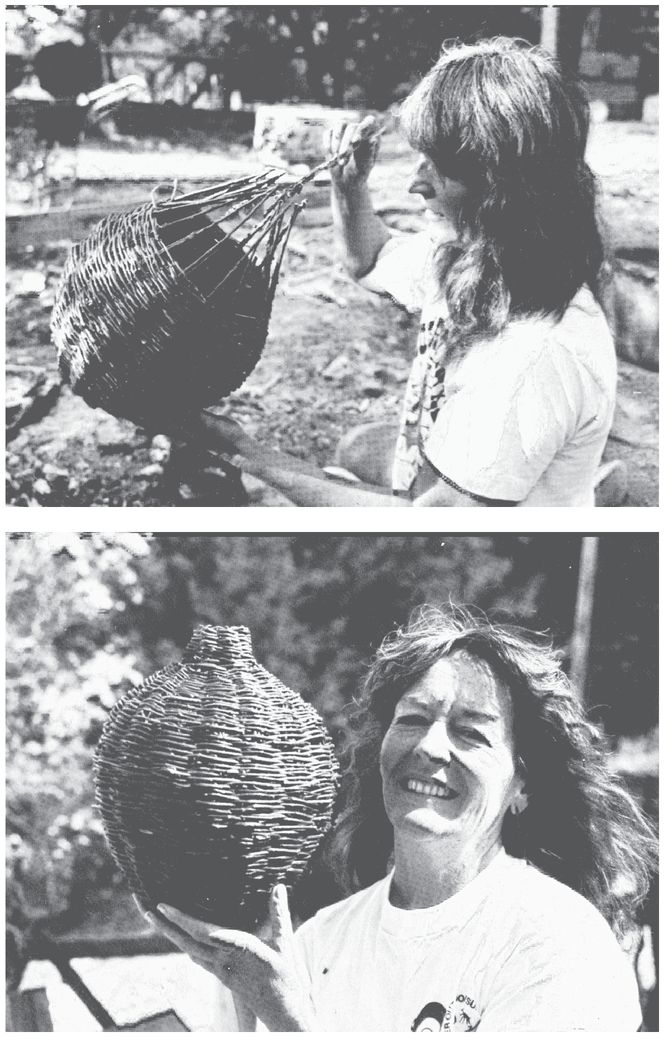
Geri did most all the basket work illustrated on these pages. She simply laid 3 shoots (of willow) on 3 others (making for 12 warps). She then made several wraps using the basket weave, which is simply one over and the next under the warp. Then she stuck another shoot in, in order to make an odd number, and from here on out the basket weave achieves its purpose, alternating one above and one below on each full turn. After only a few wraps she decided to bend the shoots upward, to make for a more cylindrical basket.
How warps are added in as we go.
Showing how to bend the ends of the shoots over and shove them into the space provided next to the next warp—got that? Naturally, cut the shoots just a coupla inches long for this.
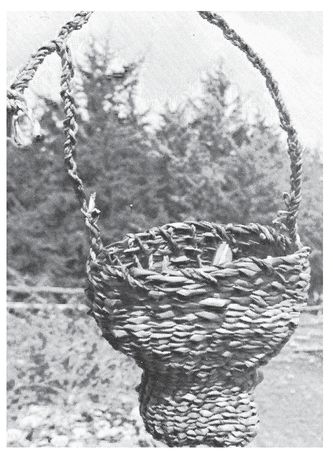
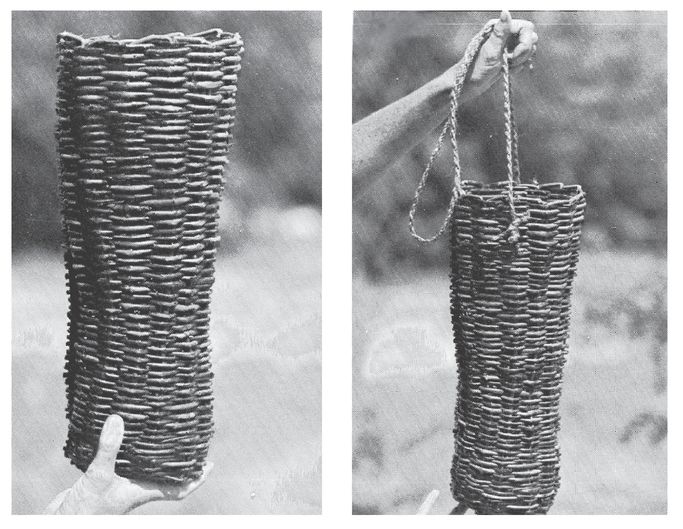
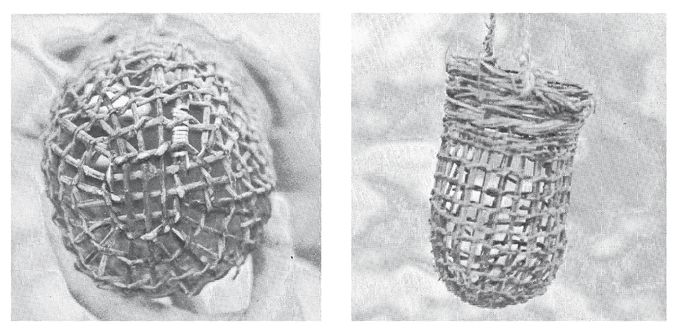
The finished basket, with the addition of a cordage strap.
Here we have quite a combination. Using willow, we begin with the one-strand basket weave, changing to a two-strand twining .
The same, seen from the side.
The completed basket, using slough grass, wetted, in a basket weave the rest of the way. Result: a surprising useful basket, much stronger than you’d expect.
A variation of twining that’s very useful in baskets that can use spacing, such as fish traps. (This was made for and sent to us by a master basket-maker friend of ours in California who wishes to remain anonymous.)
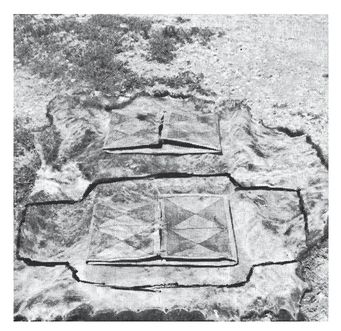
Coiled Basket
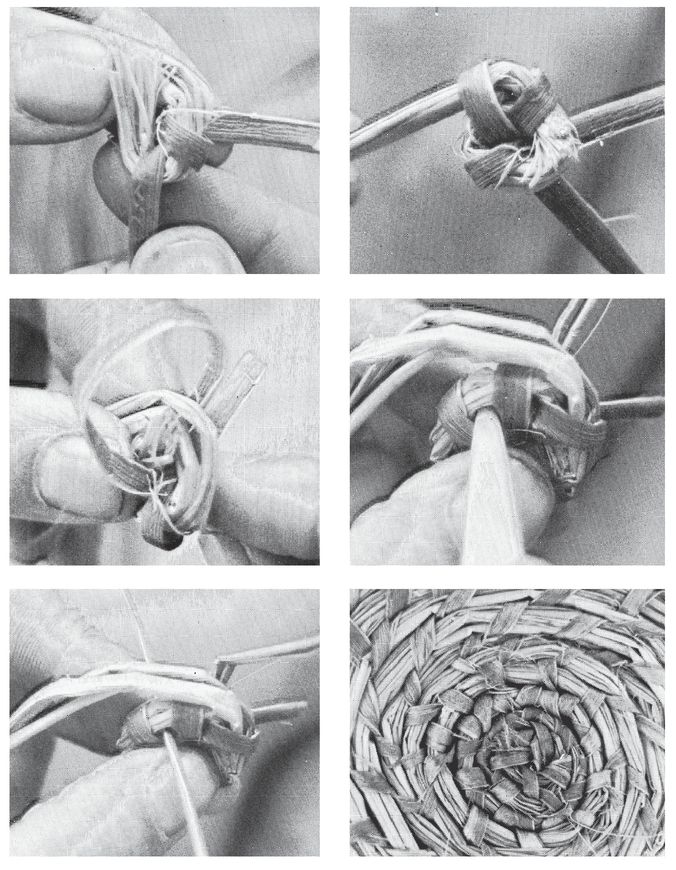
You’ll have to closely study all the following photos, remembering that starting is the hardest part of all. Here we’re using only slough grass and tying it together with yucca fibers, though almost any cordage-type material would suffice.
The middle photo on the right shows Geri opening a passageway for the yucca, using a bone awl.
Ending off a piece of yucca and bringing it under the preceding two loops.
From the inside of basket at same tie-off, beginning with a new strand.
Showing, from the outside, beginning anew after the initial tie-in.
How to tie off, or finish, the basket.
Flint blade to be used in cutting off loose ends.
The finished basket.
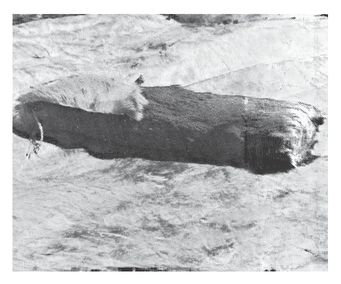
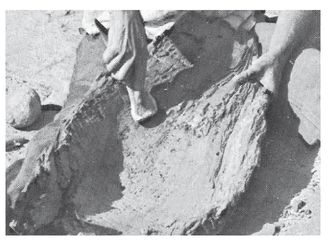
Bark Container
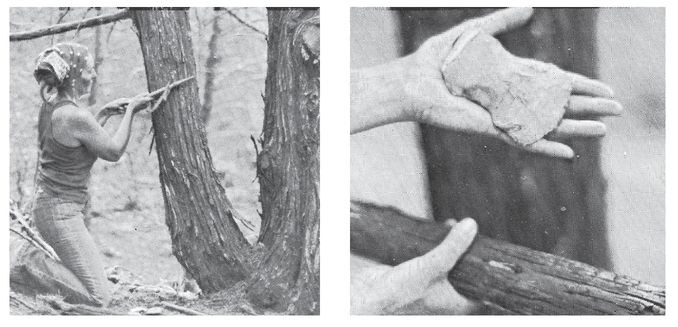
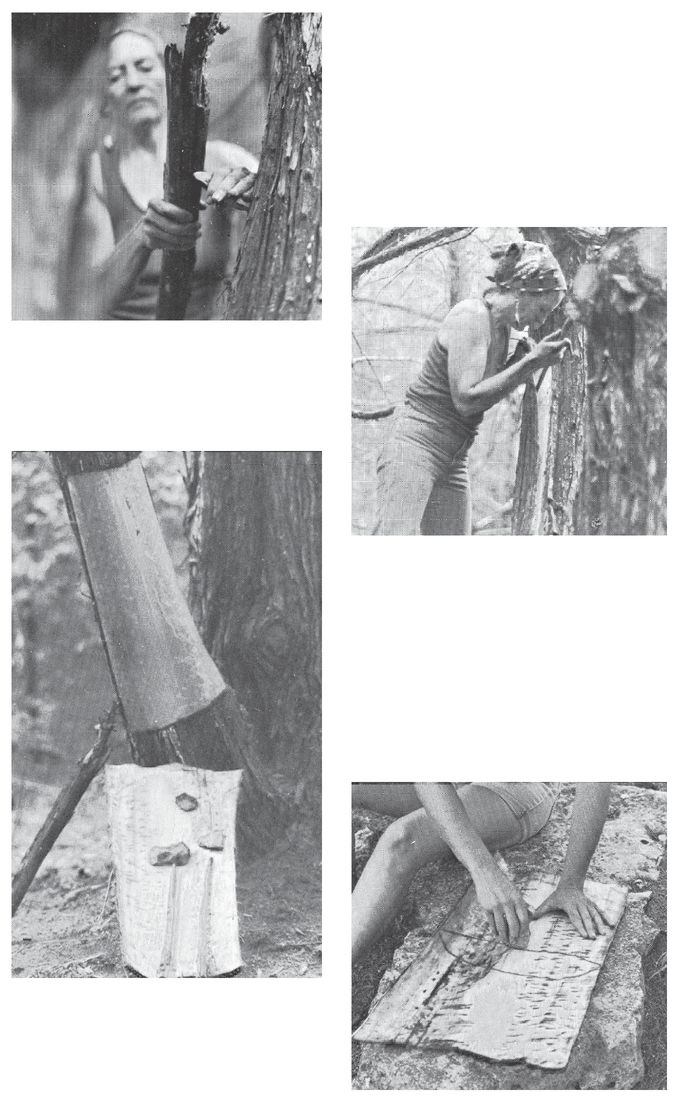
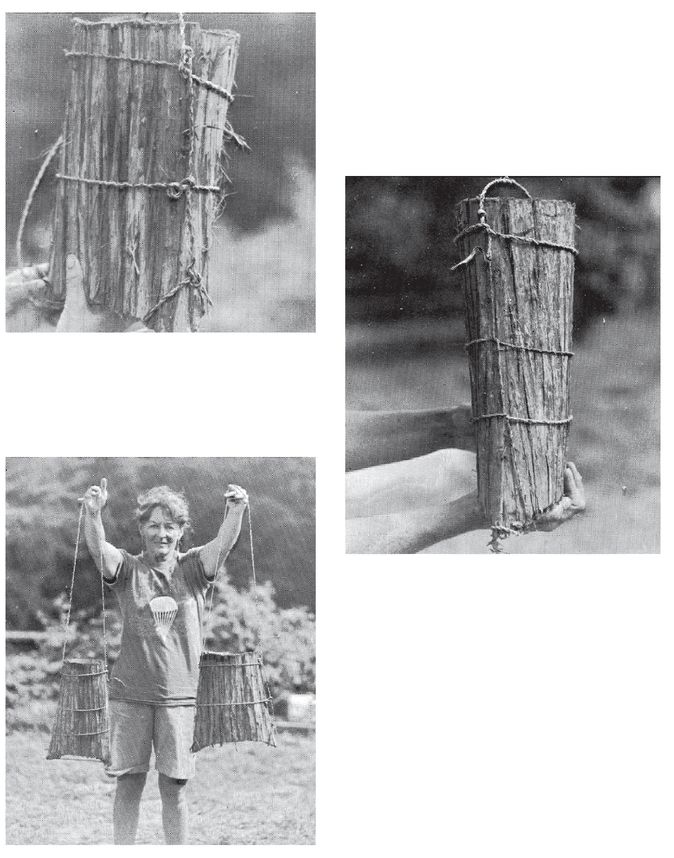
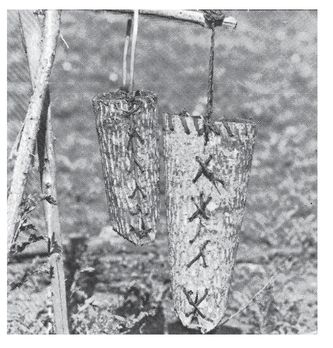
In the field, you can use bark in a surprising number of ways. The one that interests us here is the making of containers. Using bark is one of the quickest means of making a finished container. What we illustrate in the photos is working with eastern red cedar. The first priority in selecting bark is that it easily separates from the tree. The second is that it isn’t so fragile and brittle that it’ll self-destruct. Most of us know that birch bark works for any number of containers, including the famous canoe of poems and stories. The first “other” bark container that I was presented with was made of juniper (one of which is illustrated later). Another useful bark is that of the tulip poplar. Many species of elm work well. Experiment.
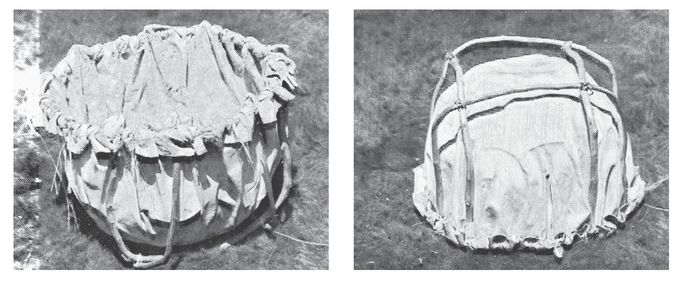
Since the photos are self-explanatory, I’ll list here the more important aspects to be aware of. You’ll note that any holes are drilled into the bark, not cut. The bark really wants to split, so care must be taken. When the container’s finished, place it over an object that will force it to keep its shape as it dries. Here we used a log.
Also note that in the two photos where Geri ties the container together, each is done differently. One uses a series of holes with cordage run through in such a way that there’s a hole for the cord to run through, and also the cord runs around the container. In the other photo, there’s only a single tie at the top and the rest is held together with cord. The pointed sides of the bottoms make it easy to tie the cordage off there, adding more strength.
Two bark containers made by and given to us by our friends Ken and Lynn Berry of Alabama, using tulip poplar. Note the wooden handle on the one on the left and also how they’re tied.
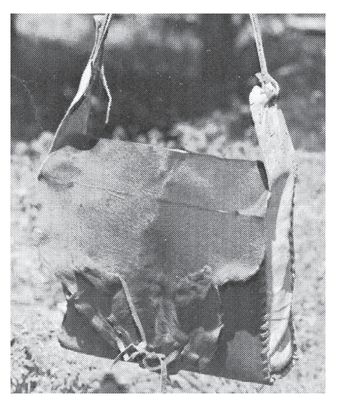
Container made from juniper, tied with brain tan, to make a fine quiver (made by our friend Brian James of Washington State).
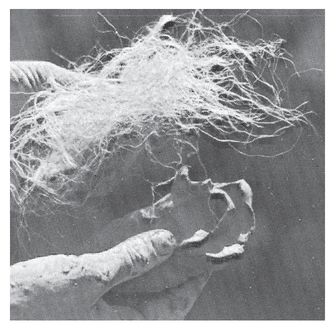
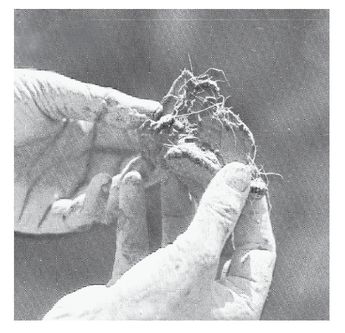
Cordage
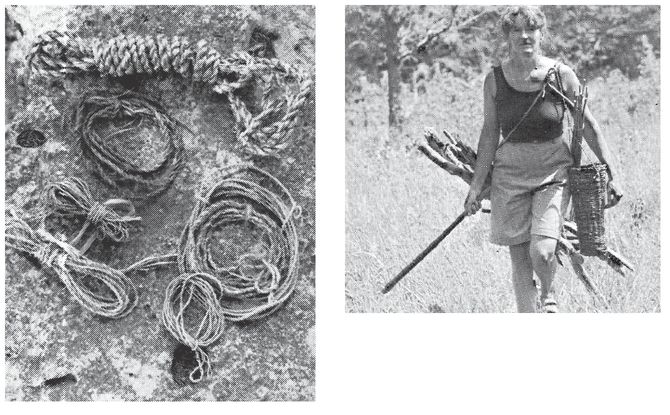
We covered cordage in depth in Chapter 1, so we won’t go into it again here, except to note that, though not necessarily a “container,” cordage can sure haul a lot of stuff on a gathering expedition. In many circumstances, it can also be made on the spot.
Note a variety of cordage made from natural materials and also the general carryall using it.
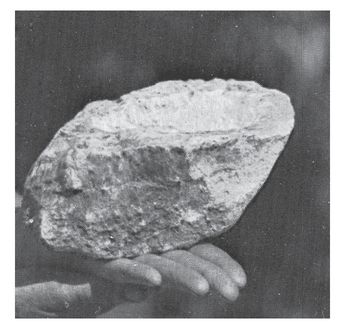
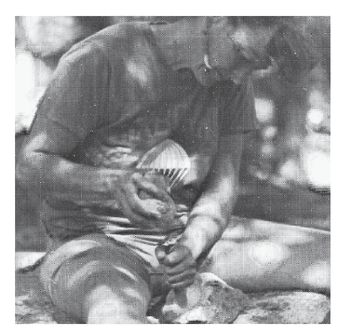
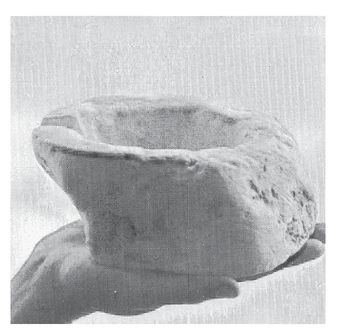
Stone Container
Some stones are soft enough to work with. The accompanying photos show soapstone being used to create containers. This material works super easily and was used extensively in days of old, where it was available.
Beware: Soapstone sometimes contains asbestos, which can be harmful to your health.
Soapstone beginning to be worked.
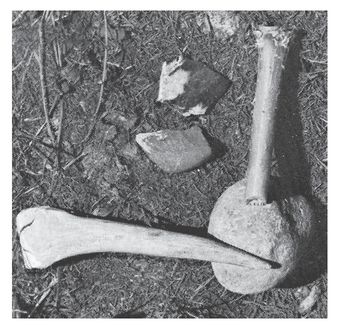
Working materials of bone, antler, sharp cutting stones, and a hammerstone.
Geri hard at it.
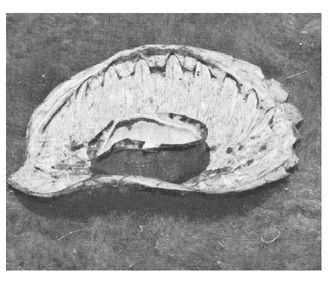
The finished container.
We’ve also used limestone for containers (our Kentucky limestone, not what’s found in the Southeast). Though it can be used for hot rock cooking, it won’t withstand the higher temperature of being placed directly into the fire.
A beautiful soapstone bowl on the left, a gift from Steve Watts of Gastonia, North Carolina (ours is on the right).
Our finished product, an oil lamp, filled with deer tallow (cooked with prickly pear cactus to keep it firmer) and using a sage bark wick.
What can happen if you’re not careful.
Animal Parts Used as Containers
The animal kingdom sure does provide us with an abundance of spare parts, many of which we can use as containers. Our ancestors did it, and so can you. Here we’ll delve into several of them, beginning with the outside.
Rawhide—Such a variety of containers can be made from the raw hide of the animal that it staggers the imagination.
Buffalo rawhide laid out with a pair of parfletche, traditionally two to a hide.
A container made from the raw skin of a deer, leaving the hair on, for holding our firemaking kit.
Parfletche- This was the Plains Indians’ suitcase. All types of containers can be made from a heavy hide: round, square, rectangular, what-have-you. They can be held together in any number of aways, such as by sewing, tying, or gluing, or in combination. But rawhide becomes an oozing mass when wetted, so you must take care to waterproof anything made from it, or otherwise protect it from moisture. We size (varnish) our products with the juice of the prickly pear.Several other waterproofing options are available that we won’t cover in this book.
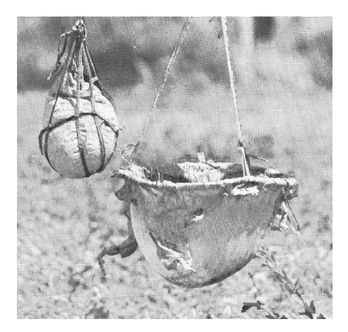
A container that can be used for several purposes. It’s simply rawhide of a deer, laced to a wooden frame. Most obviously, this could be used for water or hot rock cooking (see Chapter 7).
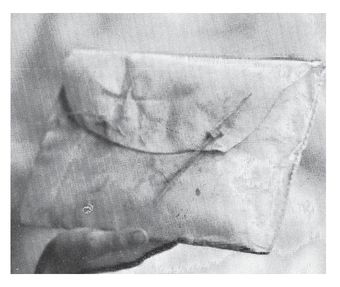
An unborn calf rawhide with gussets of rawhide deer, laced together with brain tan.
Deer rawhide with gussets and lacing of brain tan.
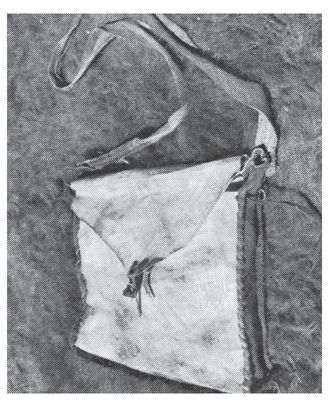
Deer rawhide container that we use to carry many things, from arrowheads to granola, sewn with sinew (Chapter 10) and tied with brain tan.
Knife sheath made from buffalo rawhide, laced with brain tan.
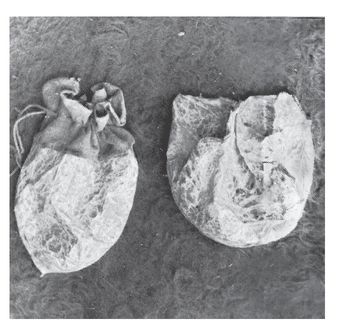
A cow’s bladder, after cleaning the “p” out of it, makes a dandy canteen; carrier made of brain tan. The water bucket next to it we’ve used for several years, made of a deerskin that we make certain to dry every night so it doesn’t begin to rot. The evaporation of the water through the skin keeps it surprisingly cool.
Two heart sacs from cows. To prepare, same as with bladders, let them dry, moistening and manipulating them carefully as they dry. They make good, waterproof containers. Sac at left has brain tan sewn on top.
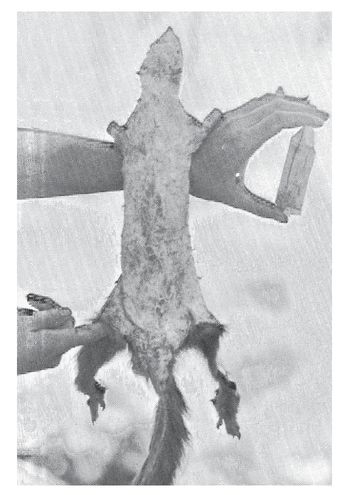
Raw squirrel skin, made somewhat flexible by rubbing while it dried—with wooden cork.
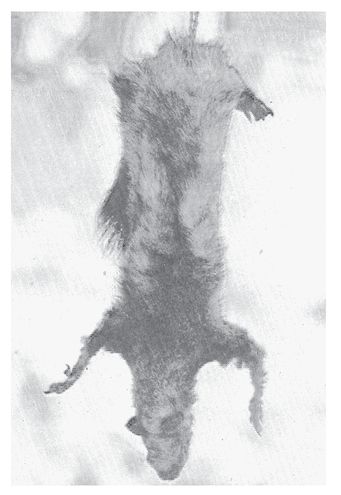
Skin inverted, cork inserted in neck, cordage to tie the bottom together, and we have a dandy small bag for trap triggers and other uses.
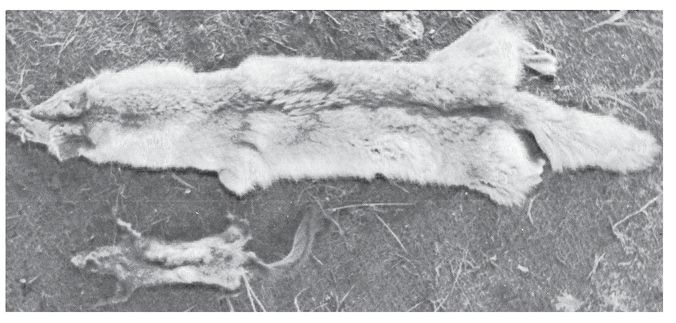
A much larger bag can be made from this coyote or almost any other big animal.
Two turtle shells, which have many uses: as dishes, water carriers, dippers, cups, or (in the case of the smaller, deeper one) a fine oil lamp.
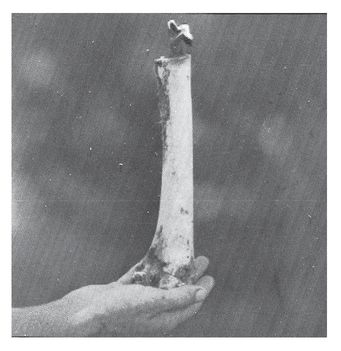
The leg bone of a bear, filled with a tallow-soaked wick and tallow, makes a great torch.
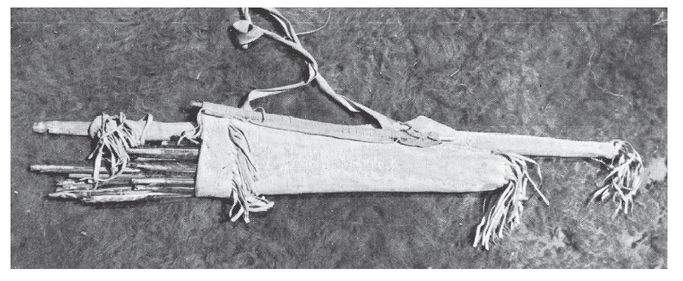
Finished-out buckskin makes for many swell containers. Illustrated is a typical Northern Plains bow case and quiver.
Wood Container
Most containers made of wood are associated with bowls for eating, or as dippers or buckets. In most cases, a container of one piece of wood is too heavy or is prone to break, or both. Canoes, consisting of dug-out logs, would be an exception.
A solid, dry piece of a softwood can be chipped, carved, or burned out to make most of the above items. One caution, though, when burning: If moisture remains in the wood, the high temperature of the burning coal can cause the expanding steam to crack the wood.
Drinking bowl made by burning, chipping, and scraping.
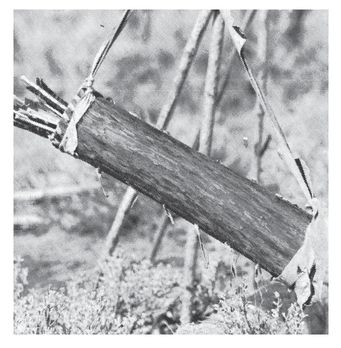
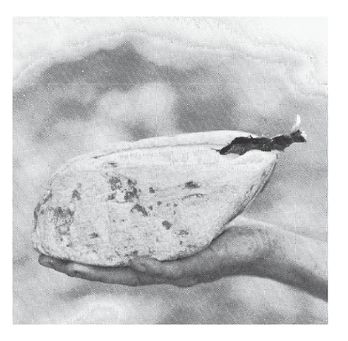
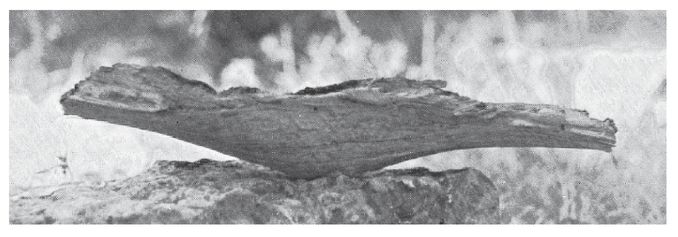
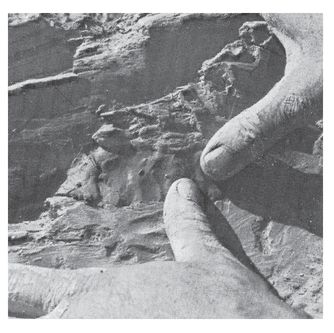
Now, here’s something a bit different. Many woods, especially soft cottonwood logs, when left out to weather, rot from the inside out.
I discovered this fact while gathering punky wood for smoking skins. The insides were well rotted while the outside (having been sunbaked) was still reasonably hard.
Find the “just right” piece of wood and you can carefully break away an area that you can use—a container ready to be made.
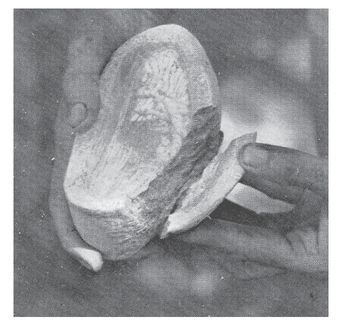
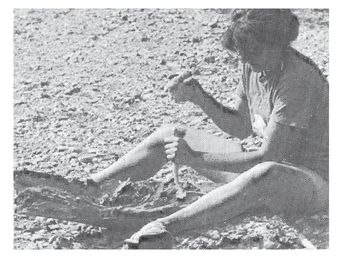
About the same tools used in working the stone (preceding section).
Geri hard at it. Actually, the rotted wood separates easily.
She smoothes out her work.
A major crack shows in the wood (there were also several smaller bug holes).
Fine cordage-type material and a small hunk of clay.
These items mixed together.
Geri patches the crack as if caulking a log cabin, sealing the smaller round bug holes as well (though some holes were sealed by jamming in sticks of the appropriate size).
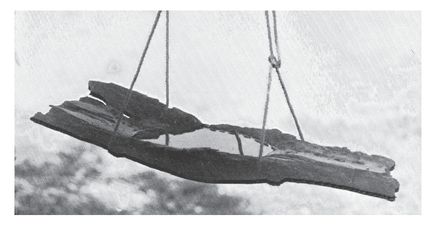
The finished container, holding 1 1/2 to 2 quarts of water. The seals held up real well for several hours and even through a hot rock cooking session.
Now you’ve seen many and varied means to obtain or make containers in the wilds. More important, you possess the knowledge of just what to look for when you want to go a-gatherin’. Knowing and understanding the principles and characteristics of what you’re doing and looking for is vastly more important than knowing only how one or two methods or materials work—and much better than having any kit.