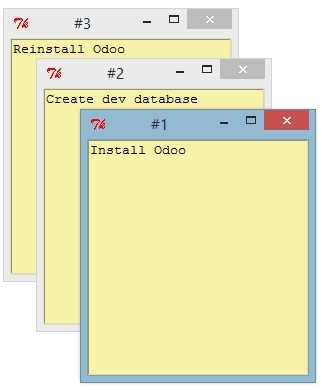
Let's do something interesting with the RPC API. Odoo provides a simple app for notes. What if users could manage their personal notes directly from their computer's desktop? Let's write a simple Python application to do just that, as shown in the following screenshot:
For clarity, we will split it into two files: one dealing with interactions with the server backend, note_api.py, and another with the graphical user interface, note_gui.py.
We will create a class to set up the connection and store its information. It should expose two methods: get() to retrieve task data and set() to create or update tasks.
Select a directory to host the application files and create the note_api.py file. We can start by adding the class constructor, as follows:
import xmlrpclib
class NoteAPI():
    def __init__(self, srv, db, user, pwd):
        common = xmlrpclib.ServerProxy(
            '%s/xmlrpc/2/common' % srv)
        self.api = xmlrpclib.ServerProxy(
            '%s/xmlrpc/2/object' % srv)
        self.uid = common.authenticate(db, user, pwd, {})
        self.pwd = pwd
        self.db = db
        self.model = 'note.note'
Here we store all the information needed in the created object to execute calls on a model: the API reference, uid, password, database name, and the model to use.
Next, we will define a helper method to execute the calls. It takes advantage of the object stored data to provide a smaller function signature, as shown next:
def execute(self, method, arg_list, kwarg_dict=None):
    return self.api.execute_kw(
        self.db, self.uid, self.pwd, self.model,
        method, arg_list, kwarg_dict or {})
Now we can use it to implement the higher level get() and set() methods.
The get() method will accept an optional list of IDs to retrieve. If none are listed, all records will be returned:
def get(self, ids=None):
    domain = [('id',' in', ids)] if ids else []
    fields = ['id', 'name']
    return self.execute('search_read', [domain, fields])
The set() method will have the task text to write, and an optional ID as arguments. If ID is not provided, a new record will be created. It returns the ID of the record written or created, as shown here:
def set(self, text, id=None):
    if id:
        self.execute('write', [[id], {'name': text}])
    else:
        vals = {'name': text, 'user_id': self.uid}
        id = self.execute('create', [vals])
    return id
Let's end the file with a small piece of test code that will be executed if we run the Python file:
if __name__ == '__main__':
    srv, db = 'http://localhost:8069', 'todo'
    user, pwd = 'admin', 'admin'
    api = NoteAPI(srv, db, user, pwd)
    from pprint import pprint
    pprint(api.get())
If we run the Python script, we should see the content of our to-do tasks printed out. Now that we have a simple wrapper around our Odoo backend, let's deal with the desktop user interface.
Our goal here was to learn to write the interface between an external application and the Odoo server, and this was done in the previous section. But it would be a shame not to go the extra step and actually make it available to the end user.
To keep the setup as simple as possible, we will use Tkinter to implement the graphical user interface. Since it is part of the standard library, it does not require any additional installation. It is not our goal to explain how Tkinter works, so we will be short on an explanation of it.
Each task should have a small yellow window on the desktop. These windows will have a single text widget. Pressing Ctrl + N will open a new note, and pressing Ctrl + S will write the content of the current note to the Odoo server.
Now, alongside the note_api.py file, create a new note_gui.py file. It will first import the Tkinter modules and widgets we will use, and then the NoteAPI class, as shown in the following:
from Tkinter import Text, Tk
import tkMessageBox
from note_api import NoteAPI
If the preceding code errors with ImportError: No module named _tkinter, please install the python-tk package, that means additional libraries are needed on your system. On Ubuntu you would need to run the following command:
$ sudo apt-get install python-tk
Next we create our own Text widget derived from the Tkinter one. When creating an instance, it will expect an API reference, to use for the save action, and also the task's text and ID, as shown in the following:
class NoteText(Text):
    def __init__(self, api, text='', id=None):
        self.master = Tk()
        self.id = id
        self.api = api
        Text.__init__(self, self.master, bg='#f9f3a9',
                            wrap='word', undo=True)
        self.bind('<Control-n>', self.create)
        self.bind('<Control-s>', self.save)
        if id:
            self.master.title('#%d' % id)
        self.delete('1.0', 'end')
        self.insert('1.0', text)
        self.master.geometry('220x235')
        self.pack(fill='both', expand=1)
The Tk() constructor creates a new UI window and the text widget places itself inside it, so that creating a new NoteText instance automatically opens a desktop window.
Next, we will implement the create and save actions. The create action opens a new empty window, but it will be stored in the server only when a save action performed. Here is the corresponding code:
def create(self, event=None):
    NoteText(self.api, '')

def save(self, event=None):
    text = self.get('1.0', 'end')
    self.id = self.api.set(text, self.id)
    tkMessageBox.showinfo('Info', 'Note %d Saved.' % self.id)
The save action can be performed either on existing or on new tasks, but there is no need to worry about that here since those cases are already handled by the set() method of NoteAPI.
Finally, we will add the code that retrieves and creates all note windows when the program is started, as shown in the following code:
if __name__ == '__main__':
    srv, db = 'http://localhost:8069', 'todo'
    user, pwd = 'admin', 'admin'
    api = NoteAPI(srv, db, user, pwd)
    for note in api.get():
        x = NoteText(api, note['name'], note['id'])
    x.master.mainloop()
The last command runs mainloop() on the last note window created, to start waiting for window events.
This is a very basic application, but the point here is to make an example of interesting ways to leverage the Odoo RPC API.