Thumbnails are small sketches used to generate visual ideas quickly. They allow you to create multiple versions of specific panels or entire comics pages in a short time.
Generally, comic artists draw two types of thumbnails: rough and tight. Rough thumbnails can be as small as an inch or two in height. This prevents you from overrendering a drawing and also forces you to concentrate on the arrangement of shapes within a panel and the way the shapes within individual panels “read” when placed side by side on a page.
You can even use an iPad or any other pressure-sensitive digital tablet to create rough thumbnails.
Most comic pages are drawn on Bristol board, which has blue lines and guides printed on it to help ensure that the panel borders have a consistent width and that the ratio of height to width is correct.
You can also use templates for creating your thumbnails. Templates are just smaller versions of comic pages, and they are easy to make. Simply scan a page that has these guides and reduce its size in Photoshop. Two-, four-, and eight-page templates printed on 8.5-inch by 11-inch printer paper are used the most frequently by comic artists.

If you scan this example into Photoshop, you can create your own templates, fitting two, four, or eight pages on a single sheet of 8.5-inch by 11-inch printer paper.
This artist used a template to create thumbnail layouts for his story. Each page is approximately 2 inches by 4 inches. The small size makes you consider composition and the use of small shapes. At this stage, details are unnecessary.
When you have determined the final compositional layout of a page using rough thumbnails, you may find it helpful to create tight thumbnails. Tight thumbnails are drawn on a larger sheet of paper. Most artists use an 8.5-inch by 11-inch sheet of printer paper with printed guidelines that correspond to an 11-inch by 17-inch Bristol board page. The larger drawing area allows more details to be added and makes drawing horizon lines and vanishing points manageable. These templates also create consistently spaced panel borders, and you can enlarge them in Photoshop to a standard-size art board.
Some artists prefer to draw individual panels on separate pieces of paper. When they have finished all the drawings for a page, they scan them and organize them with a computer program.

This artist created her tight thumbnails with a computer. With tight thumbnails, you can include more details, like indications of shadows and text box placements.

Research and superb drawing and compositional skills were necessary to create this interesting and specific interior space. Try recreating the thumbnail that the artist may have used to compose this image.
If I were given a dollar every time I heard someone say, “Using photographs for reference is cheating,” I’d be a rich man. It’s a common misconception and one that I shared when I was younger. I thought that a real comic artist could draw anything from his or her imagination. However, although some artists don’t rely heavily on photographic reference, almost all of them have to use it at some point.
A photograph can help you capture any number of poses. Several artists I know who have to draw a page a day use themselves exclusively as their models; they’re both artist and muse. Photo reference for objects and environments also allows you to add specific details, which prevents your images from being too generic.
The only thing you want to avoid is being a slave to photographs, simply tracing a picture to create a drawing. Unless you’re a skilled photographer and know how to avoid the visual distortions created by different focal lengths, most of your photographs will be distorted to some extent, and if you simply draw on top of them, your drawings will look awkward and stiff.
However, if you use a photograph as a point of reference to help you visualize a difficult pose, it can be an extremely useful aid. Taking photographs today is easier than ever. Digital cameras can be purchased for under $20, and almost every smartphone has a camera built into it.

This panel was drawn by using those pictures on the previous page for reference. You can use a projector, light box, or software program to create a composition that incorporates your photo reference. However, remember that your photos are reference, and you can’t simply trace over them.

The final inked image is impressive. It is well composed, the car and buildings have specific details, and the black placement and inking make it very energetic. The photographs of the car and building allowed the artist to give the illustration specific, idiosyncratic details.
Consider this scenario: You’ve just been assigned a story that takes place in New York City in the 1920s. The main character, David Duncan, has an office in the Flatiron Building, but he commutes daily via commuter train from his suburban house in White Plains, New York. Each day, Mr. Duncan stops at a newsstand in Grand Central Station to purchase three newspapers: the New York Herald Tribune, the New York Times, and the Evening World.
These newspapers will become significant later, after Mr. Duncan is framed for the murder of a prestigious stage actress. Each of these papers documents his arrest and the salacious allegations in front-page stories.
Mr. Duncan is incarcerated on Blackwell’s Island (the majority of the story will take place here) before being exonerated.
To do this story justice (pun intended), you’ll need to do a lot of research. In addition to finding photos of all the buildings involved, you’ll need to find references for the various types of clothing worn in the 1920s by these character types: successful businessmen, street vendors, policemen, and so forth.
Since the newspapers play a prominent role in the story, you’ll need to find images of them from this era and deconstruct the way they were designed. How did the front page of each newspaper appear? What typeface did each paper use?
Since the majority of the story takes place in a penitentiary, you will have to learn about its history. Who was imprisoned there? What were the living conditions?
You get the idea.
TRY IT
Here is a good and enjoyable way to create unique characters: take photographs of friends and exaggerate their features. Turn them into heroes, villains, monsters, and the like.


I used Google to find references for the thirty-sixth American president, Lyndon Baines Johnson (LBJ), when I began this illustration. I was able to locate numerous photographs and newspaper headlines in a matter of minutes from my desk at home.
You can use Photoshop or other software programs to help you incorporate photographic reference into comic drawings.
You can import a photo into Photoshop by using a scanner, or by opening up a photograph you have on your computer. Take a photograph and import it into Photoshop. Most photographs will be imported as RGB (Red-Green-Blue) files (full color). Change the image mode to greyscale (Image > Mode > Greyscale).

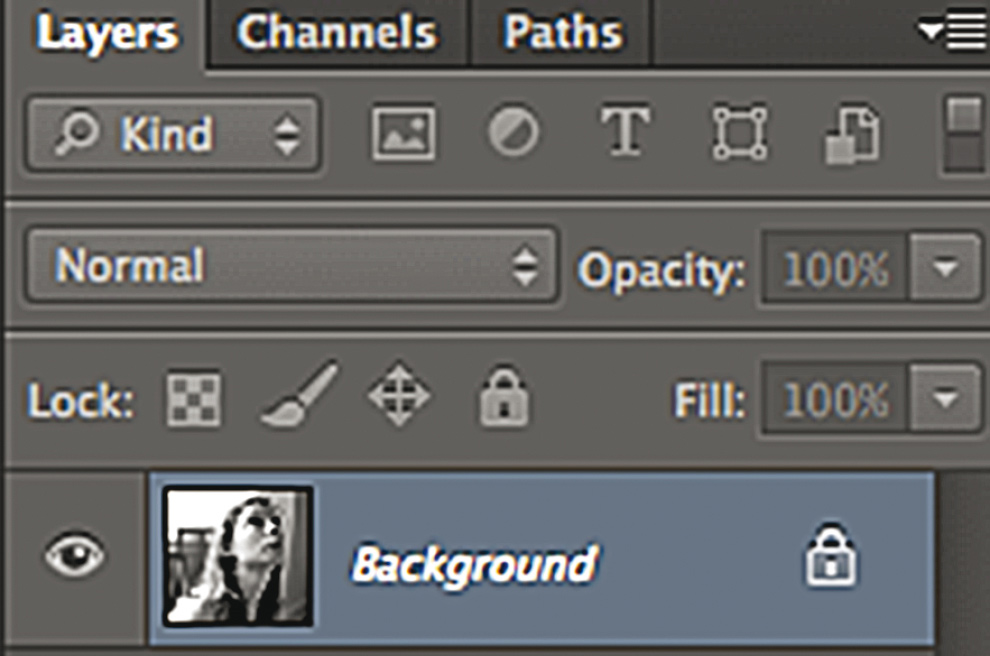
This new Photoshop file is assigned to the background layer, and that layer is locked (meaning you can’t alter it). Right-click the layer and a new dialogue box will appear. Click “Layer from Background.” You can now change the name of the layer (but you don’t have to) and click OK. The layer is now unlocked.
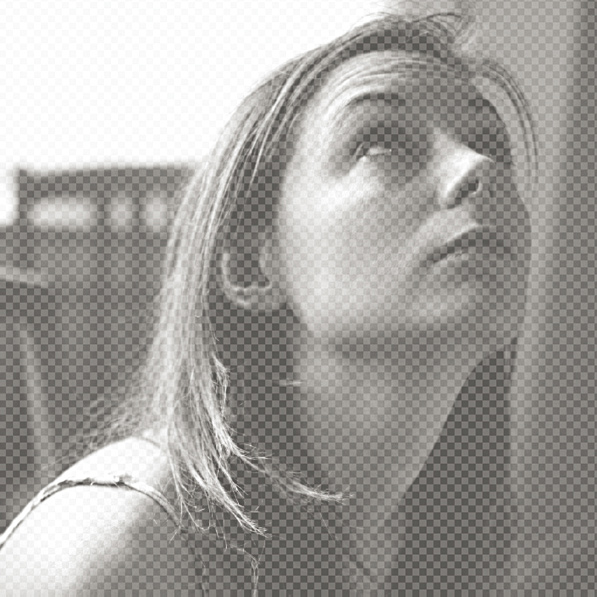
Lower the opacity of the layer to approximately 83 percent and create a new layer (Layer > New Layer). Once the layer is unlocked, you can change the opacity by using the slider bar in the Opacity window.

Change the image mode back to RGB (Image > Mode >RGB) and create a new layer. Select a brush or pen tool and a color and draw on top of the photograph, using it as a point of reference. Block in basic shapes and significant features that will help you create your own drawing.

At this point, you can trash the photograph or click the eye symbol to make it disappear. The eye symbol is located on the left-hand side of every Layer created in Photoshop. Lower the opacity of the drawing you just made to less than 50 percent. Create a new layer and select a new color. Refine your drawing.

If you work digitally, you can create your final drawing on the computer. If you prefer to finish the drawing by using a pencil, as I do, delete all the previous layers, lower the opacity of the final drawing to approximately 20 percent, and print it out. The lowered opacity creates a faint print that you can draw on top of.
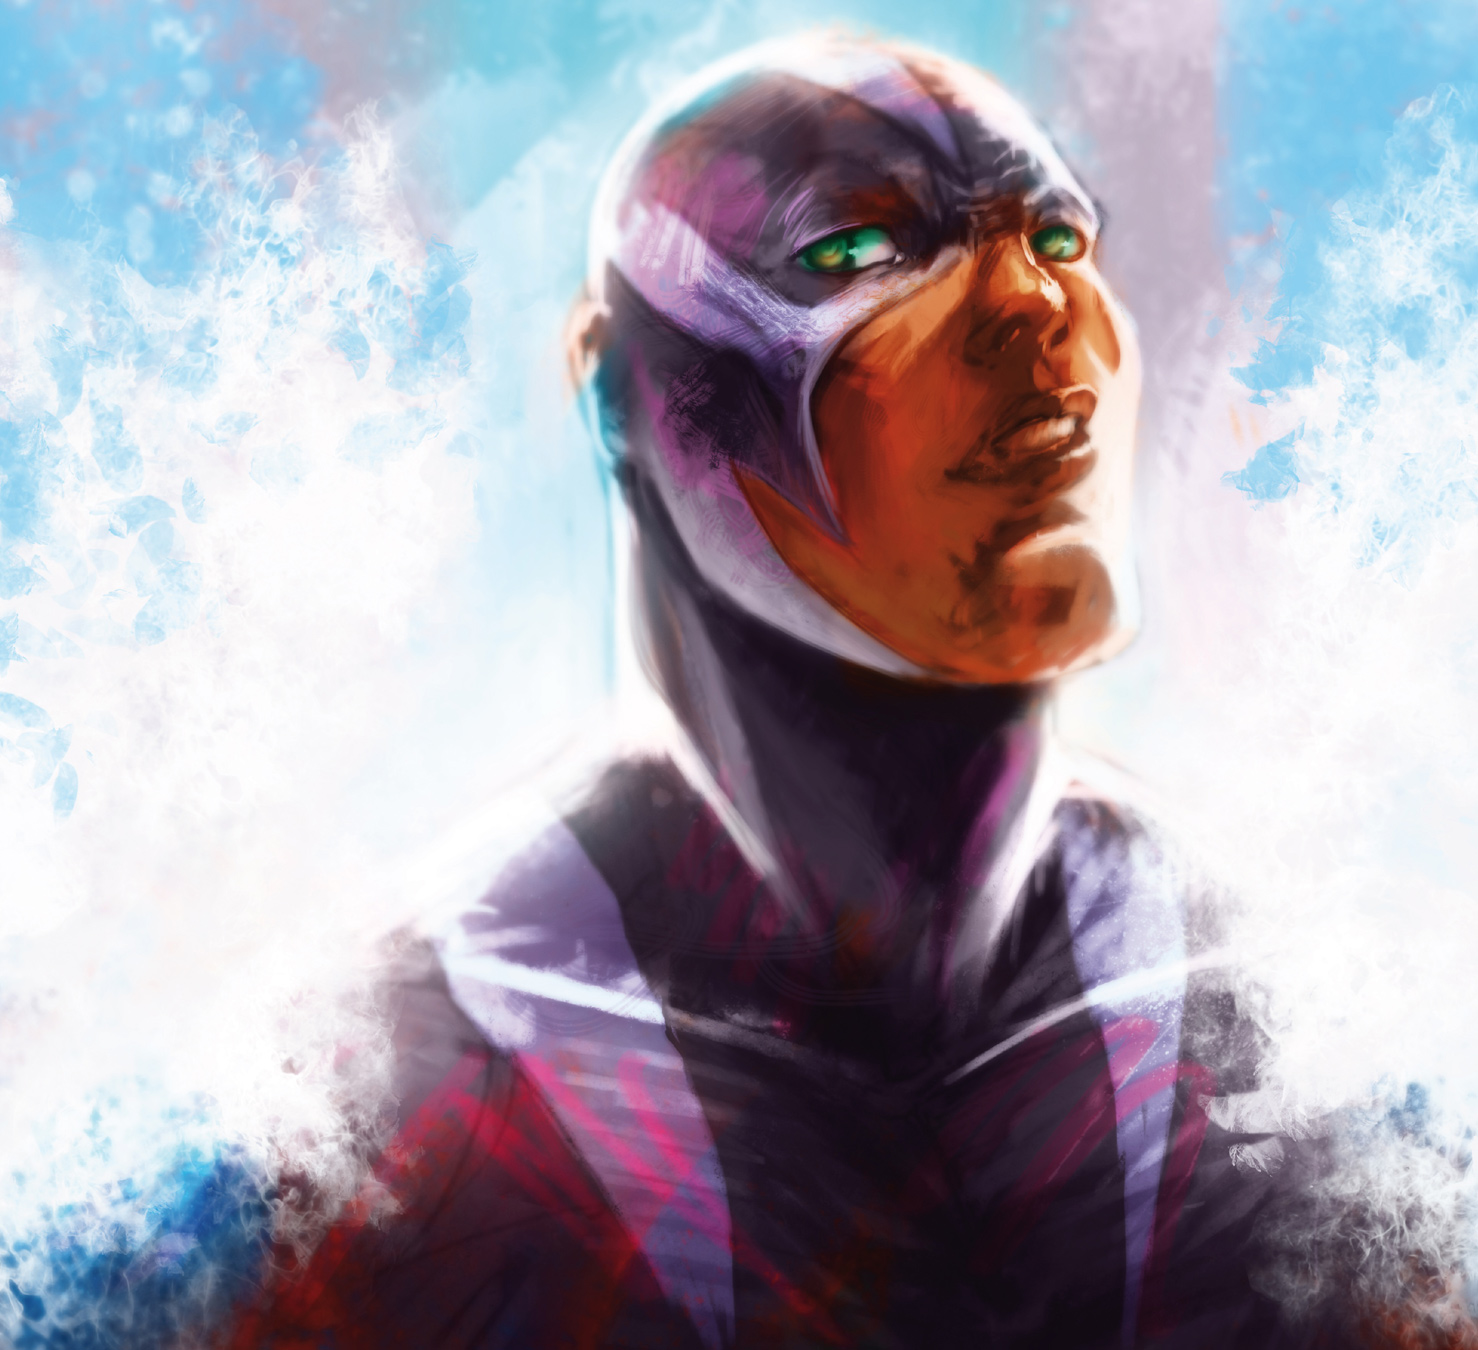
Robert Bouches used Photoshop over my initial pencil drawing to create this full-color digital painting.
When you have completed your drawings, scanned them, and designed the final page, use a large-format printer (a printer that can accommodate an 11-inch by 17-inch page of Bristol board) to make a blue-line print.
Pencilers used to send comic art to inkers via FedEx or UPS, but the computer has made that unnecessary. Today a penciler can scan his or her artwork and send it to an inker via email. The inker downloads the image, converts the lines from gray to blue, prints the page out on Bristol board, and inks it. When the inker has finished the page, he or she scans it. With a few quick adjustments, all the blue lines drop out, leaving only the ink lines.
Even if you ink your own pages, you may want to use this method, because you won’t need to erase the page when you’re finished.
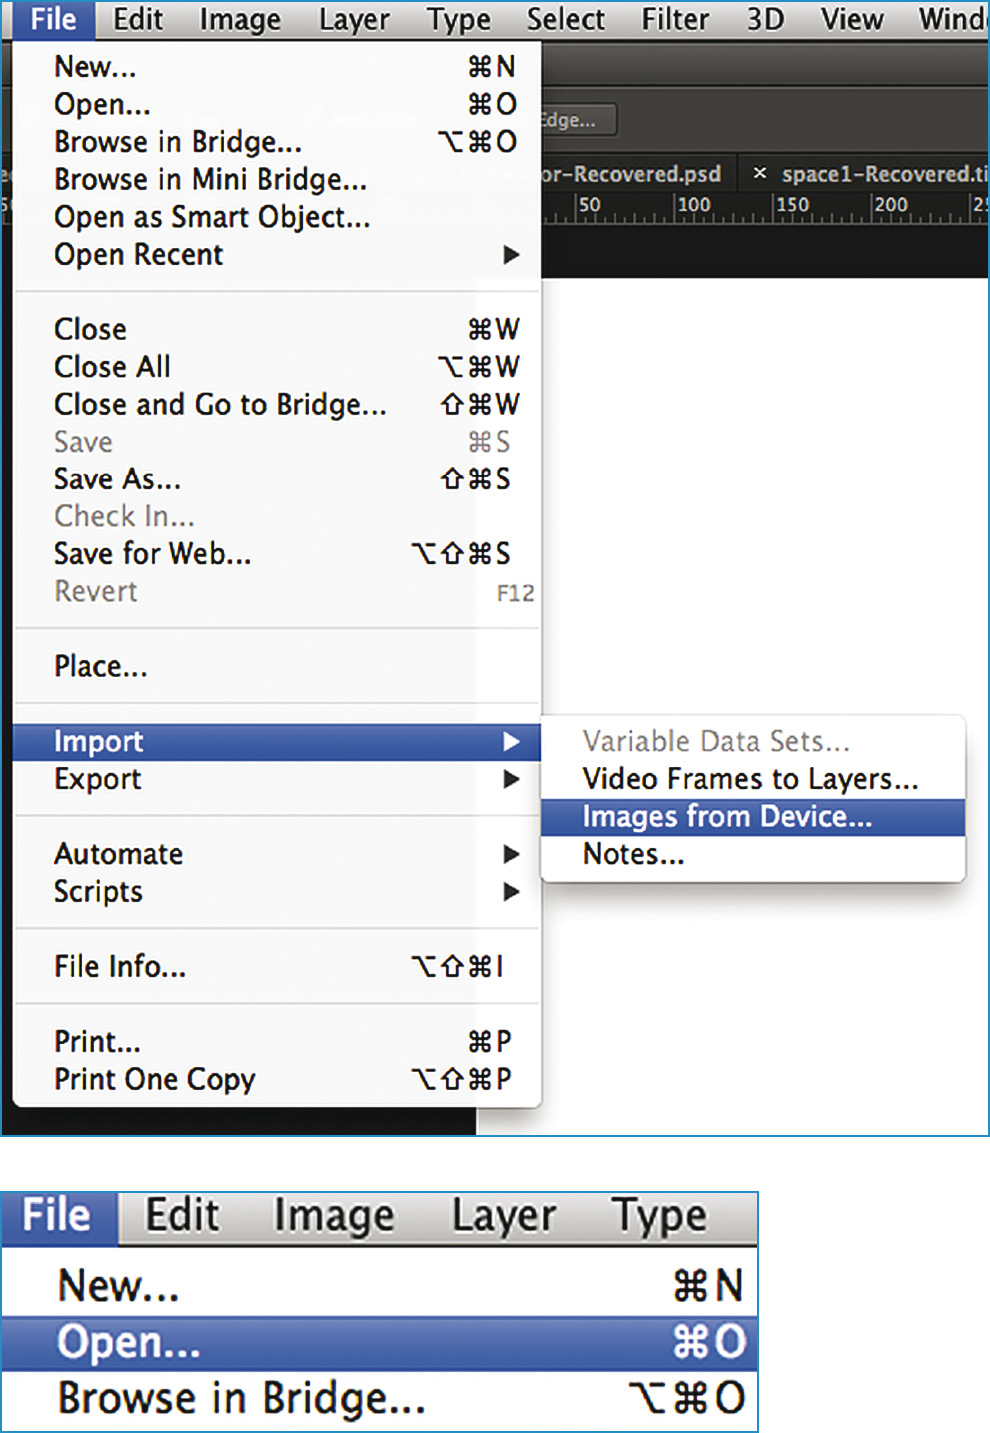
1. Open Photoshop and choose File > Import > Images from Device. If you have already scanned the page, choose File > Open.
2. Scan the penciled page as a greyscale image at a minimum of 300 dpi (dots per inch) and save it as a JPEG or PNG file. When it opens in Photoshop, you may want to adjust the image by using levels. Choose Image > Adjust > Levels and use the slider bars until you are satisfied with its resolution.

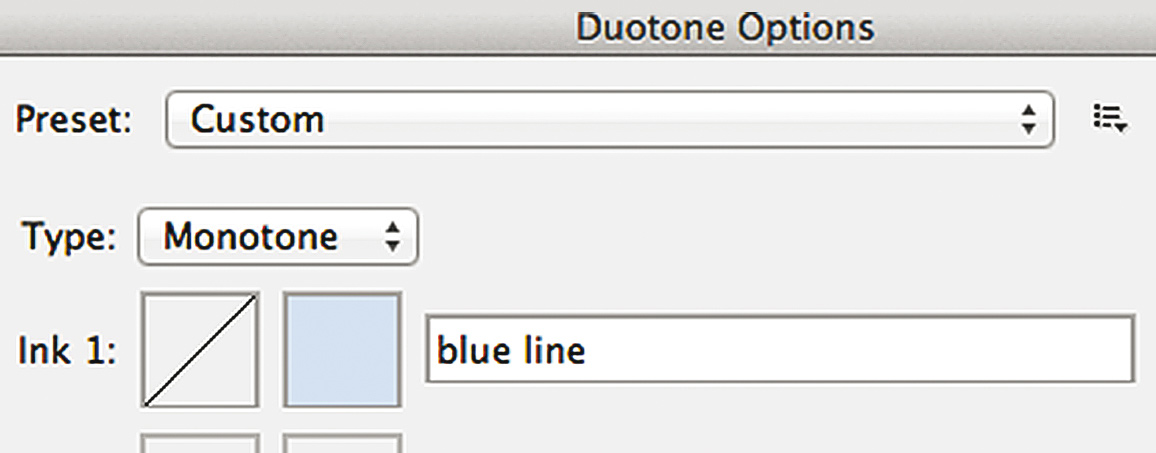
3. Choose Image > Mode > Duotone. A box titled “Duotone Options” will open. Click in the Ink 1 color window and the Color Picker window will appear.

4. The C (cyan), M (magenta), Y (yellow), and K (black) channels are located in the bottom-right section of this window. Change the C channel to 18%, change the M to 7%, and set the other channels to 0%. There is a lot of latitude here; as long as you zero out the K channel, you can ink the page and drop the other colors out later by returning to these settings.
5. When you have made your selection, type “blue line” in the window by the new color you have created. The page has now been converted and is ready for printing and inking.