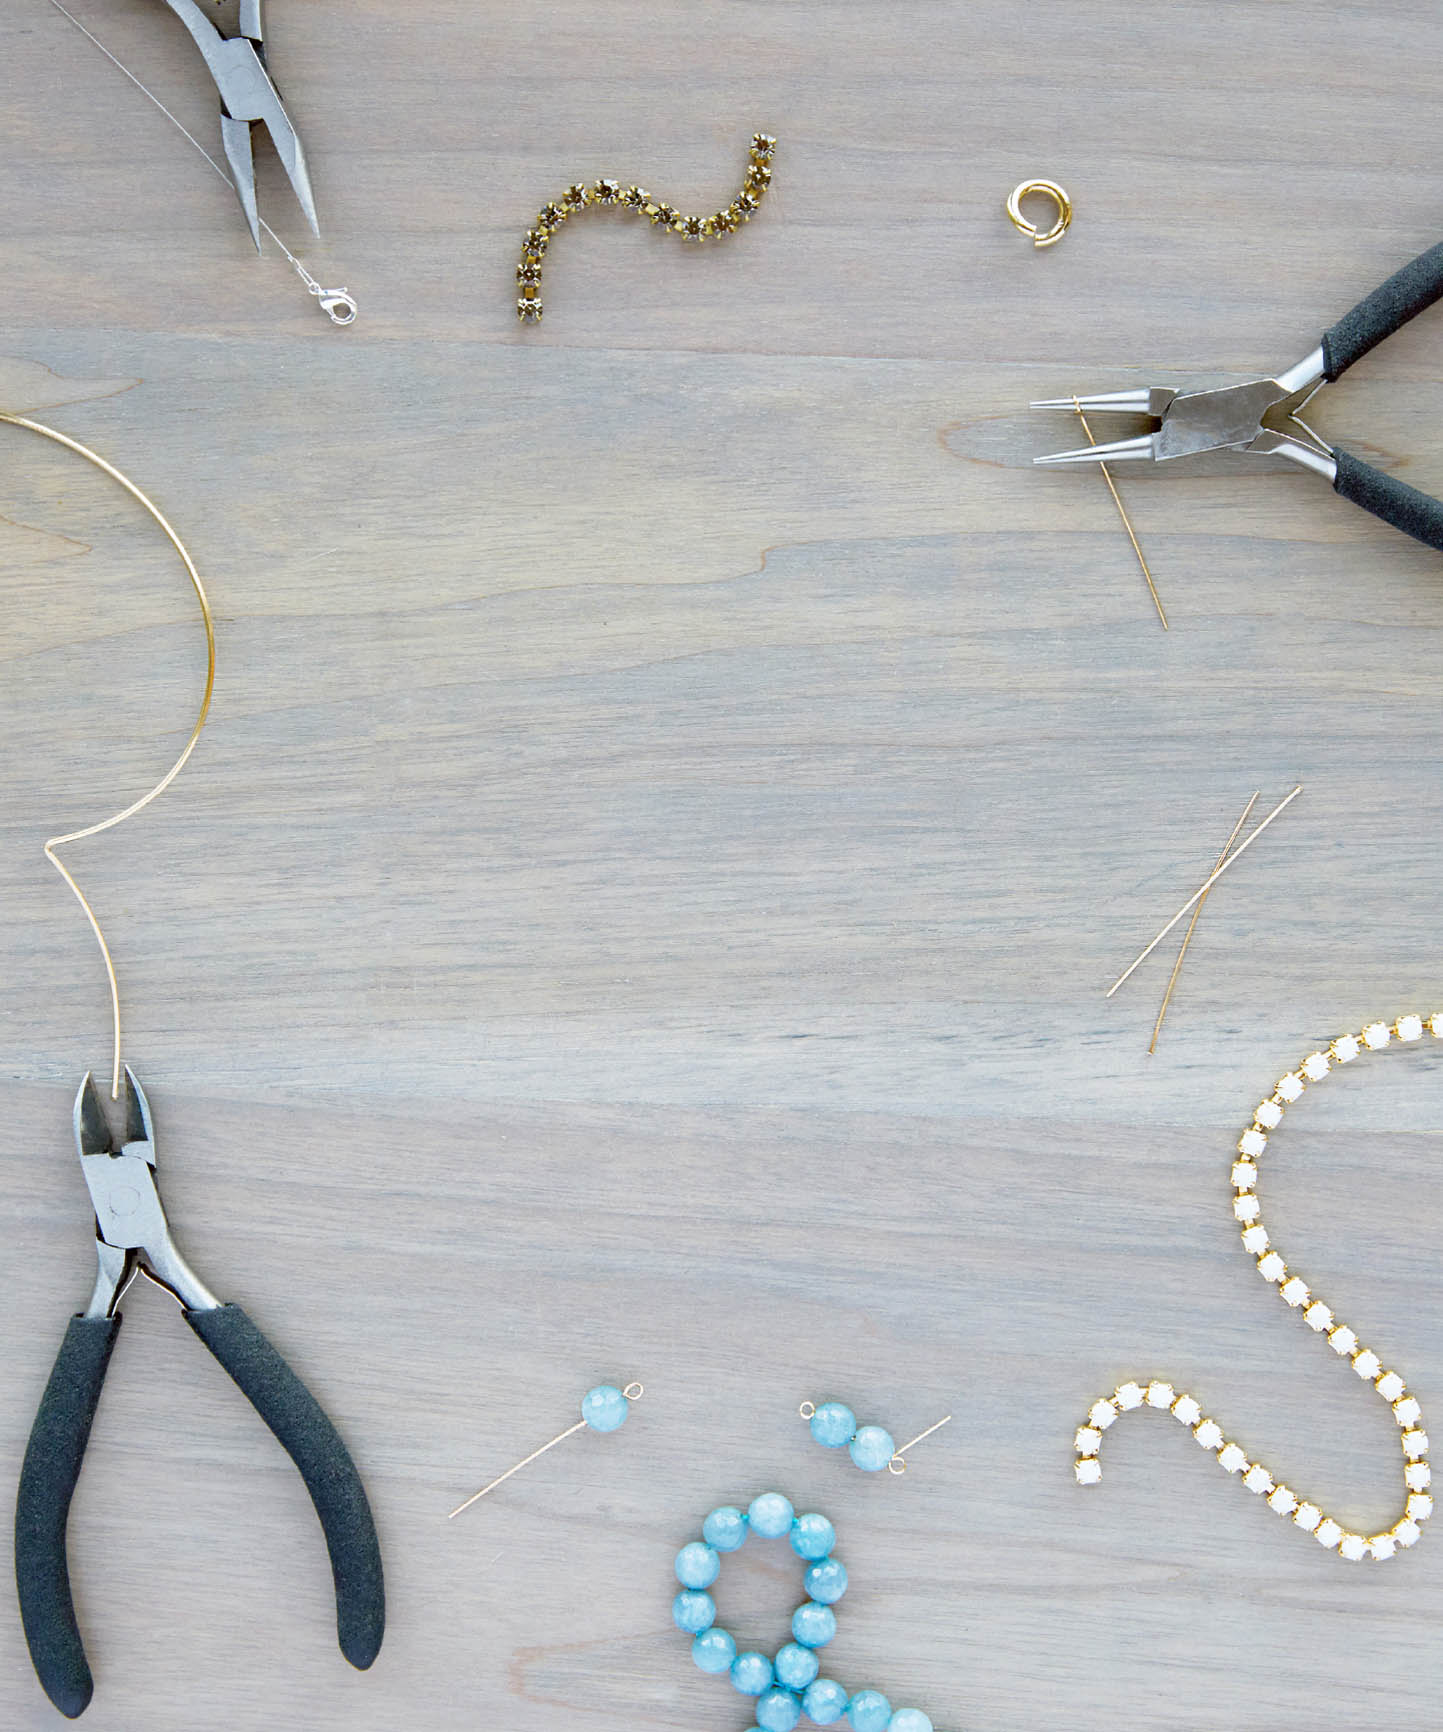
With these basic techniques, you’ll not only be on your way to making each of the projects in this book, but you’ll also gain the knowledge needed to design and create your own projects to suit your personal style. As with any craft, beading may take a bit of practice, but that moment when everything clicks is always the best part of learning a new skill. You may want to try out new techniques on scrap materials before diving into a project.
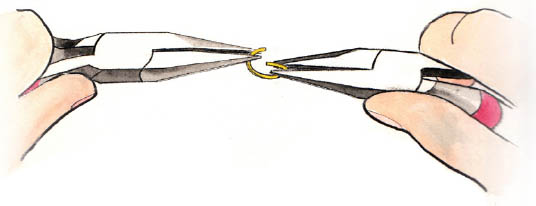
1 Grasp the jump ring with two pairs of flat-nose pliers at each end of the opening. If you don’t have two sets of pliers, grasp the jump ring with your pliers on one end of the opening and use your index finger and thumb on your other hand to grasp the other end of the opening. Pull one side of the jump ring toward you, while pushing the other away from you, in a north-to-south direction. Do not open a jump ring by pulling side to side, or east to west, because this will weaken the wire and make it difficult to bend it back into shape.
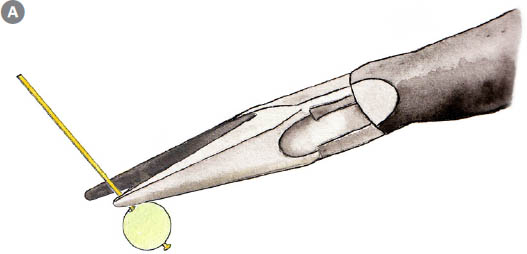
A wire-wrapped loop is one of the most secure ways to connect beads and findings. You’ll need a bead with a vertical hole, a headpin, chain-nose pliers, round-nose pliers, and clippers. Choose a headpin that is at least 1 in/2.5 cm longer than the bead.
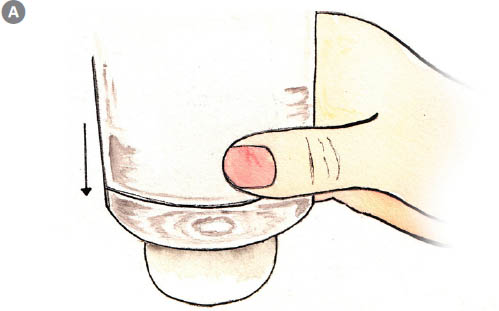
1 Thread the headpin into the bead, and with the tip of the chain-nose pliers, hold the wire directly above the bead. A
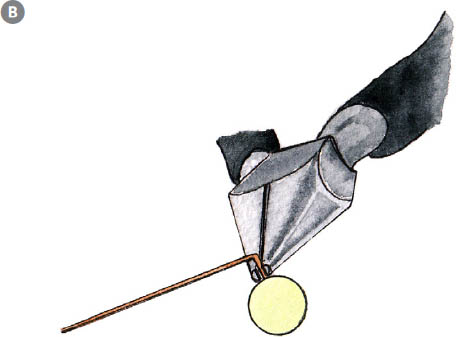
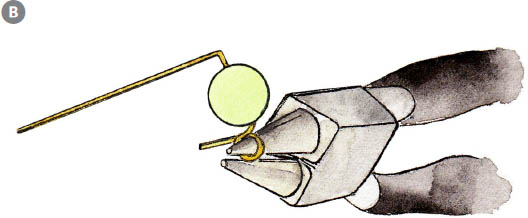
2 Bend the wire at a 90-degree angle with your fingers. B
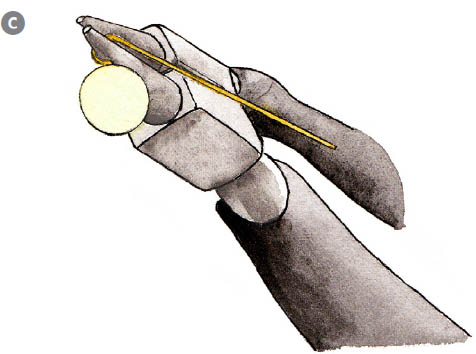
3 Grasp the space inside the bend with round-nose pliers. With your fingers, pull the wire around the round-nose pliers so that the wire is pointing down. C
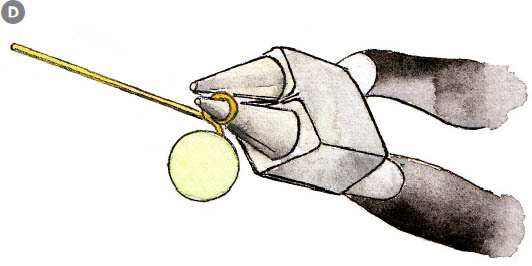
4 Pivot the round-nose pliers in your hand, so that the bottom tip is now on the top of the loop. Continue pulling the end of the wire to complete the loop. D
5 Holding the loop with chain-nose pliers, tightly wrap the loop around the wire in between the loop and the bead. Wrap until you’ve reached the bead, usually two or three times. E

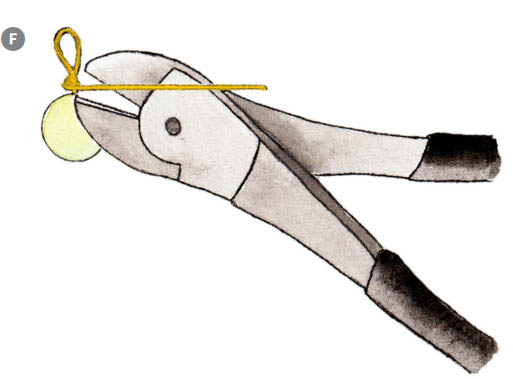
6 Snip the excess wire with clippers, and tuck the end into the wrapped wire with your chain-nose pliers so it doesn’t catch on anything. F
Looping is the best way to connect elements to both ends of a bead, rather than just one end, like with a headpin. You’ll need a bead with a vertical hole, an eye pin (or a headpin), chain-nose pliers, round-nose pliers, and clippers. Choose an eye pin that is at least 1 in/2.5 cm longer than the bead. If you don’t have an eye pin on hand, you can create one by making a loop on one end of a piece of wire.
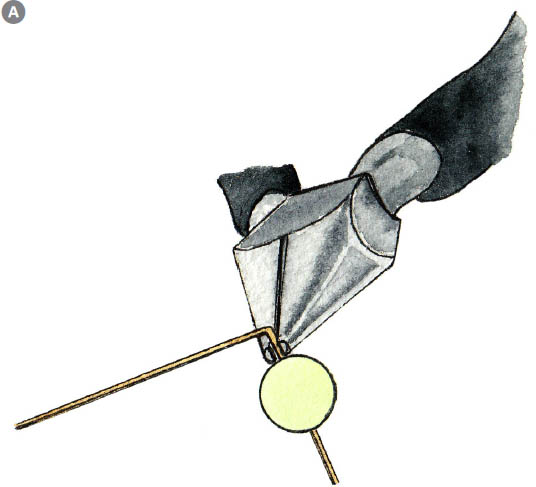
1 Slip the eye pin (or a headpin) through the hole in the bead. Cut the wire, leaving a tail poking out of the bead. With chain-nose pliers, fold the wire at a right angle above the bead. A
2 With the round-nose pliers, hold the end of the tail and bend the wire around toward the bead, creating a loop. The size of the loop will depend on which part of the nose of the round-nose pliers you use, as well as how long your wire tail is, so adjust the size according to the component you are attaching the loop to. Snip off any excess wire using clippers. B
Bead stringing is used to create long strands of beads with bead wire or thread. You’ll need beading wire, beads of your choice, a clasp, and two crimp beads. Special crimping pliers are available but you can also use chain-nose pliers. Here’s what to do when you are ready to attach a clasp or component.
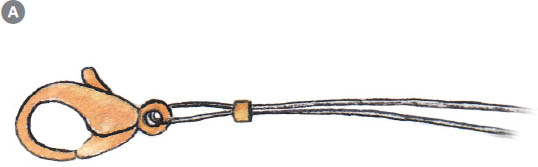
1 Thread a crimp bead onto the end of your beading wire. Loop the wire through the small loop in the clasp and back through the crimp bead, leaving several inches/centimeters of tail at the end. A
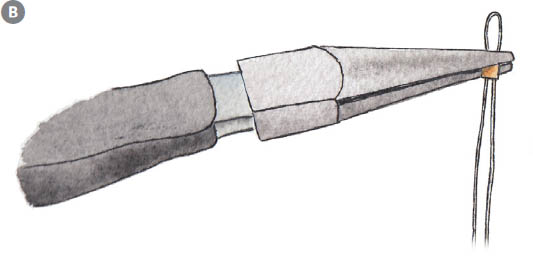
2 Adjust the crimp bead so that it’s close to the clasp but the clasp has enough room to move freely. Squeeze the crimp bead with chain-nose pliers to flatten the bead around the two strands of wire. B
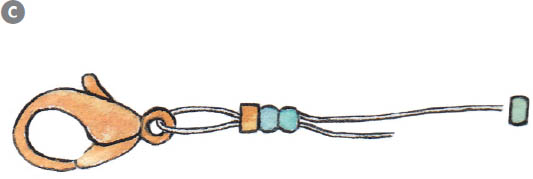
3 Add beads to the beading wire, covering both the long piece of wire and the tail for the first few beads. When you’re ready to end the string of beads on the opposite end of the wire, repeat this process. This step will determine the length of the bead strand, and how tight it is, so take a moment to adjust the tension when you’re adding the final crimp bead. Hold the clasp with one hand and pull the tail end of the wire with the chain-nose pliers to tighten. C
Polymer clay beads give you the look of ceramic beads and allow you to customize the shape, size, and texture of the beads. You’ll need a cookie sheet, a glass with a flat bottom, an oven, a plastic drinking straw, and wax paper or parchment paper. Once you’ve baked the polymer clay, it’s easy to add color to the exterior of the beads with paint, nail polish, or gold leaf.
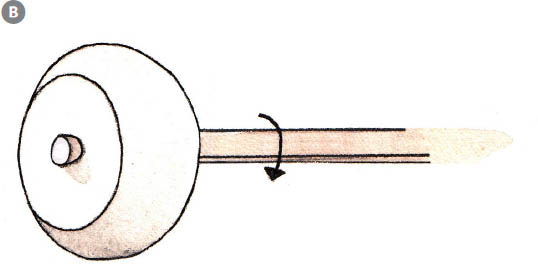
1 Break off a piece of polymer clay that is approximately the size of the bead you want to make. Roll the clay in your palms until it warms up and becomes malleable. To make a donut bead like the one shown here, roll the clay into a sphere and then flatten the sphere on two sides with a drinking glass or other flat, even surface. A
2 Push a plastic straw through the center of the clay to create a hole. To remove the straw cleanly, twist it as you pull it out. Place the bead on a cookie sheet lined with wax paper or parchment paper. B
3 Bake the bead in a preheated oven according to the package directions, usually 30 minutes at 275°F/130°C for every 1/4 in/6 mm thickness.
Rhinestone chain is a sparkly addition to any piece of statement jewelry, but it requires a bit of extra hardware to connect it to other elements. A crimp end makes this easy work. You’ll need two crimp ends and chain-nose pliers.
1 Place the last crystal of the rhinestone chain in the open side of a crimp end. A
2 Press each prong over the crystal with chain-nose pliers, or press the prongs against a hard surface. The prongs will hold the crystal stone in place. B

3 Repeat steps 1–2 with the second end of the chain.
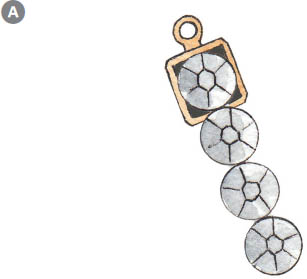
You may have a stash of ready-to-use charms on hand, or there might be a particularly pretty object you’d like to incorporate into your jewelry but aren’t sure how. Luckily, most objects can be turned into charms and then added to your accessories.
An object needs one of two things to become a charm: a loop or a hole. Add a jump ring to anything with a loop and it’s ready to attach to your piece of choice. Add a headpin and a jump ring to anything with a hole. Thread the headpin through the hole in the object and attach it to the jump ring. The jump ring attaches to a link in your piece and provides movement so the charm has room to hang freely from your charm necklace or bracelet. By drilling a small hole and adding a headpin and a jump ring, you can turn almost anything into a charm. For brooches, hatpins, and post earrings, simply trim the pin back or post and use the shortened wire to create a loop. Then add a jump ring, and attach.
The fit of a necklace or bracelet largely depends on how long you make your piece. Since you’re making the pieces yourself, you can ensure that they hit exactly where you’d like them to with a little advance preparation.
To determine BRACELET LENGTH, measure the diameter of your wrist with a tape measure or a piece of chain at the spot where you’d like to wear the bracelet. With chain styles, you can usually add or subtract links to adjust the bracelet fit. Most women’s bracelets you’ll find in stores have a wrist measurement that ranges from 6.5 to 7 in/16.5 to 17 cm long.
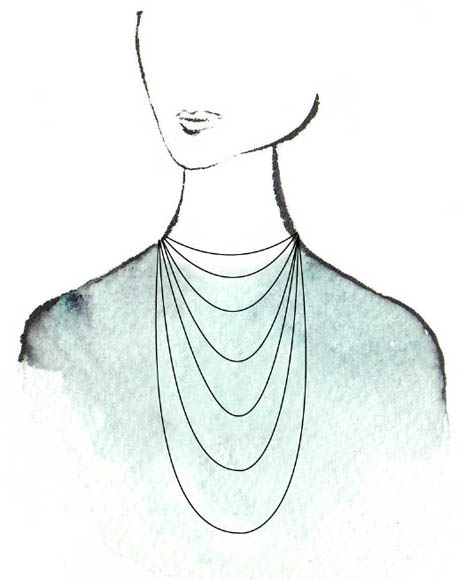
For each of the necklace styles in this book, we provide guidelines on the NECKLACE LENGTH, but when making your own jewelry, you can simply adjust the length to fit your body. You may want to hold the chain up to yourself to see where and how it falls, before cutting to the length specified in the project.