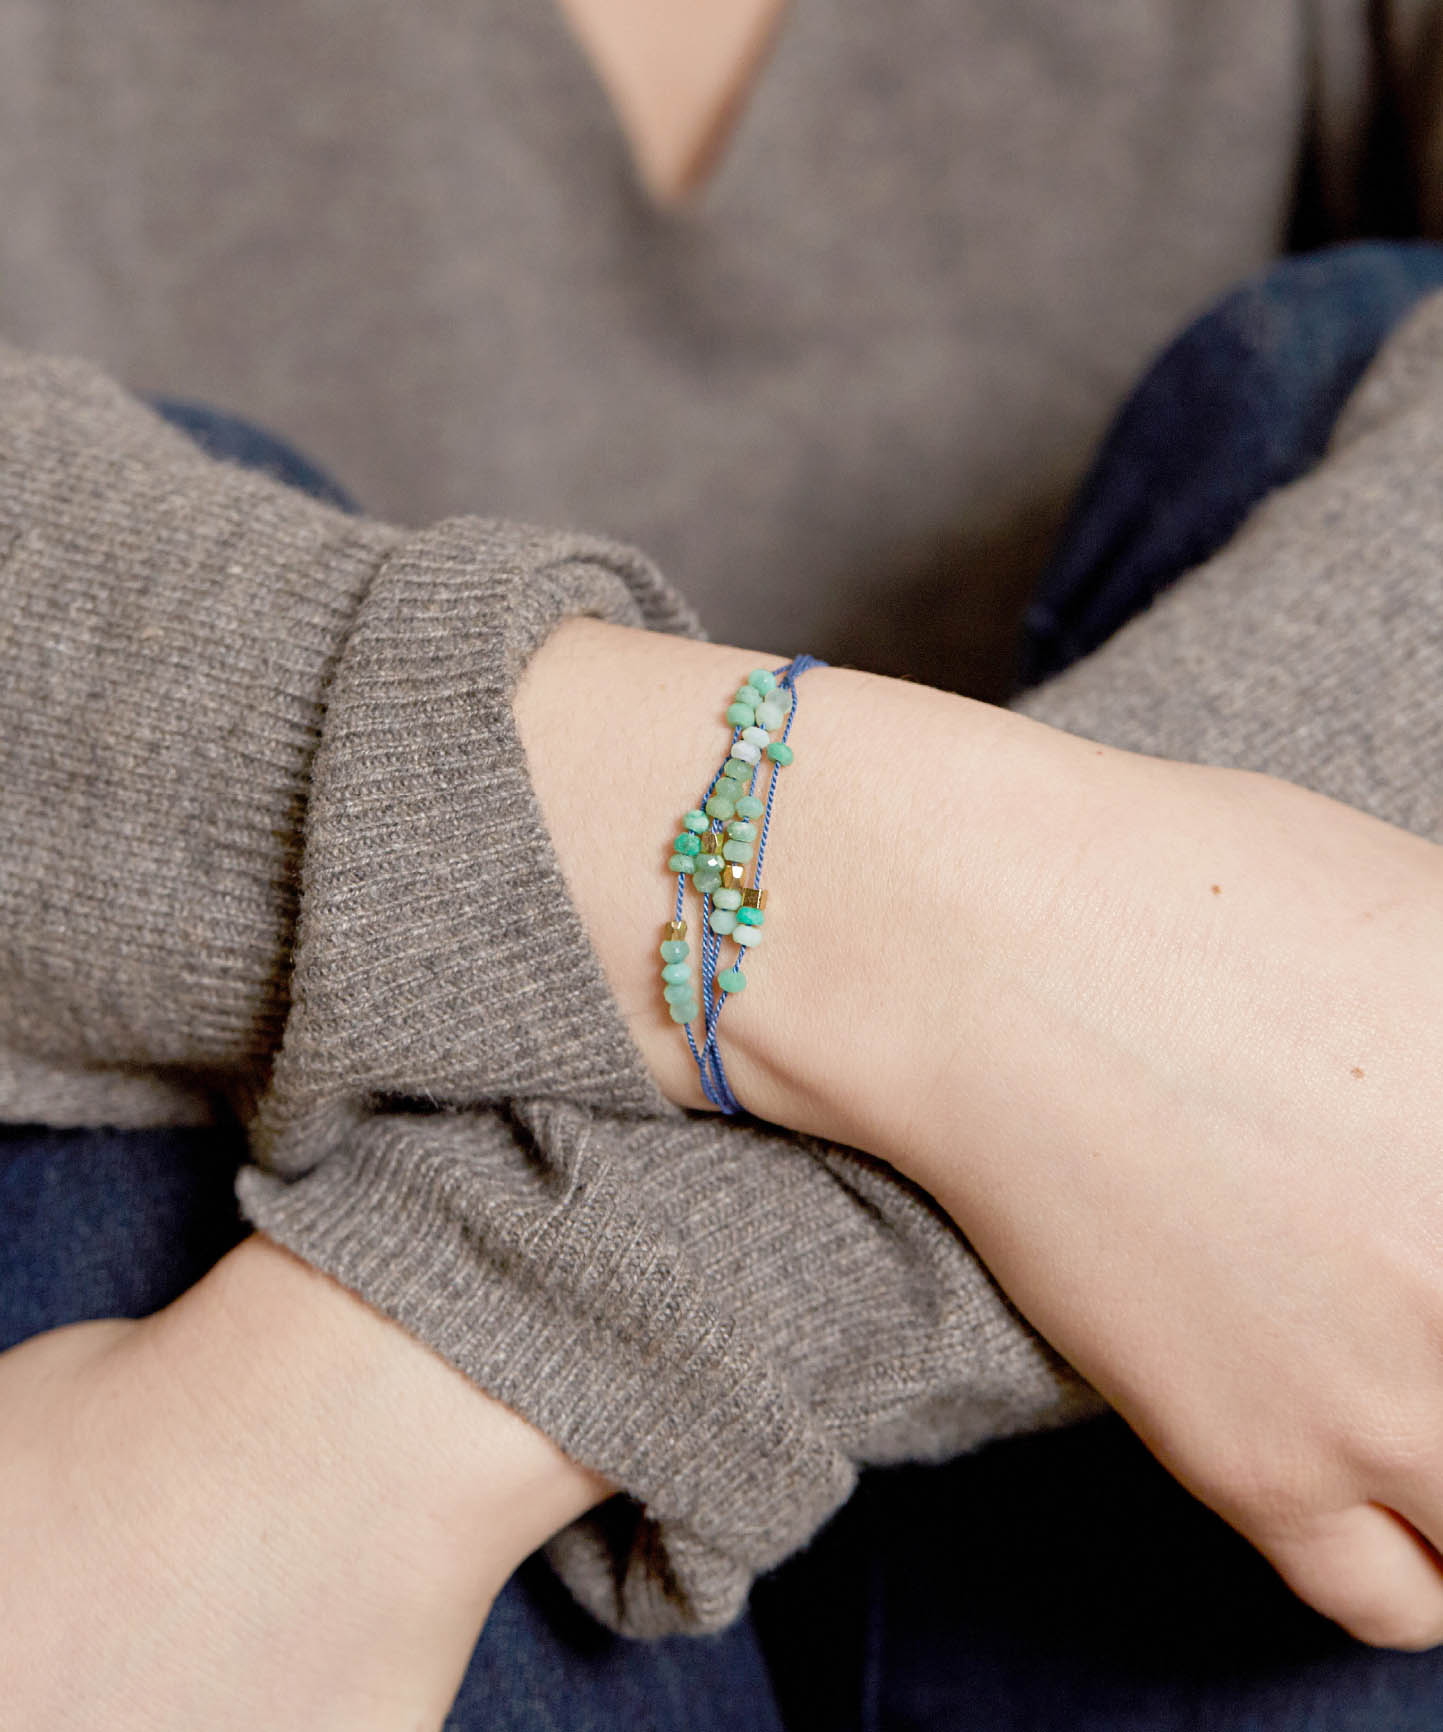
WHILE WORKING ON PIECES FOR THIS BOOK, we were excited about incorporating some of our treasured finds into projects that look and feel like fine jewelry. These delicate emerald stones are luxe but, because of their size and rough facets, they are inexpensive and easy to find at your local bead shop. Other tiny gemstones like garnet, amethyst, or pearls would be lovely in this style, but we recommend sticking to a natural stone. With the simple styling and gossamer-like silk thread, the stones stand out.
28 emerald rondelles, 2 mm wide × 4 mm long
4 gold nugget beads, 2 mm wide × 3 mm long
1 skein (2 yd/2 m) of navy silk beading thread with attached needle, size 4
Ruler
Scissors
Tape
Tacky Glue or other fabric glue
Thread the beads
1 On the work surface, separate all the beads into 5 groups. Mix the gemstone rondelles with the metal nuggets for a loose, organic feel.
2 Unwind the skein of silk beading thread and use the attached needle to thread the stones onto the silk thread. Since the needle is attached to the silk thread and cannot be rethreaded, thread all of the 5 groups of beads at the same time before you cut any of them off the skein.
Cut your thread
3 Once you are happy with your bead layout, cut the first section of beads, strung onto the first 10 in/25 cm of thread, from the skein.
4 Cut each of the other 4 beaded sections off the skein, each strung onto 10 in/25 cm of thread.
Arrange strands
5 On the work surface, line up each 10-in/25-cm strand and center the beads on each one. Knot the end of each strand together so that each of the 5 strands are attached.
6 Arrange the strands into a circle, with the ends of the strands overlapping. Tape all 10 overlapping strand ends to your work surface to hold them in place.
Create the closure
7 Now you will use some of the remaining silk thread to create a sliding knot or cobra knot closure for the bracelet. Place the thread under and perpendicular to the 10 taped strands.
8 Pull the right-hand side of the single working thread over the center strands and under the left side of the opposite end of the working thread. A
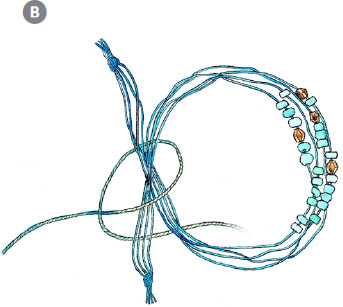
9 Pull the top thread from your left over to the right, running it under the center strands. B
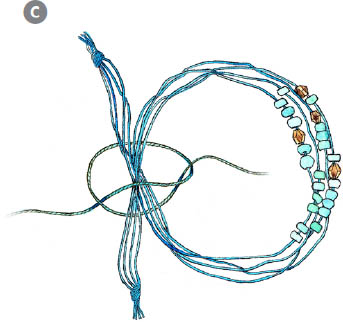
10 Pull the thread through the loop you created and pull both sides to secure the knot. C
11 Repeat the knot, reversing the order. Take the thread on the left and move it over the 2 center strands of thread and under the thread on the right. Pull the thread up through the loop you just created.
12 Repeat these 2 passes 5 times.
13 Place a dab of glue onto the last pass and the thread excess. You want to glue the excess thread to the cobra knot surrounding the thread strands, but not use so much glue that the cobra knot glues to the strands of thread. Let dry for at least 1 hour.
14 Trim the excess thread once the glue has hardened. Remove the tape. Pull the ends of the closure to tighten or loosen the bracelet to fit your wrist.