TECHNIQUES
The next few pages offer an overview of brush loads, strokes and techniques used in the book. Depending on your experience level, you may want to practice these on a blank canvas before attempting them in a painting.
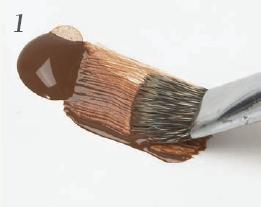
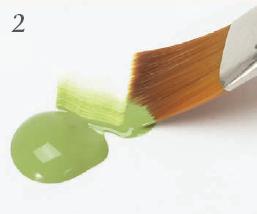
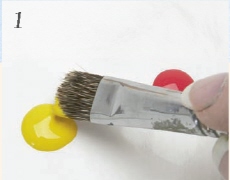
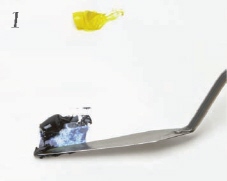
DOUBLE LOAD (OIL & ACRYLIC)
This load can save you time when you’re painting a fence rail or tree trunk. It is used in both oil and acrylic painting.
Step 1: Load Dark Color Create a loading zone by pulling a little paint from the puddle with your brush. Load one flat surface of the brush in the first color. When loading the brush in oils, you need to thin the first color of paint with a little blending and glazing medium. With acrylics, you do not need to thin the paint.
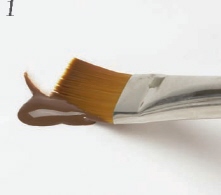
Step 2: Load Lighter Color Turn the brush and swipe through the lighter color once. When double-loading oil paint, do not thin the lighter, second color. Typically your palette will contain a light color that is spread on the palette from prior use. If the paint that is going to be used for the highlight is still in a puddle, spread the paint out on the palette with a palette knife so you have a thin layer of paint to load the brush.
Step 3: Work into Bristles Hold the brush on the chisel with the lighter color facing toward the light source and stroke. This gives you the dark, medium and light colors at once. You can then refine them.
CORNER LOAD
This load is used with both oils and acrylics for touches of color or for highlight.
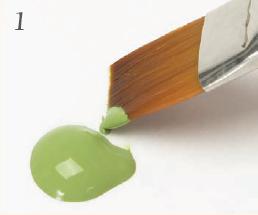
Step 1: Grab paint Pick up paint from puddle on one corner.
Step 2: Work into Bristles Stroke the brush to blend the paint into the bristles.
SIDE LOAD
This load is used for floating shadows.
Step 1: Load Run one side of the brush through the edge of a paint puddle.
Step 2: Work into Bristles Blend on the palette so the color goes from color to nothing. Do not let the color travel across the entire brush.
LINER LOAD
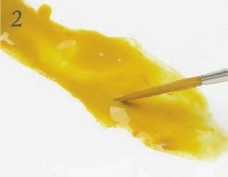
Always thin your paint before loading a liner. When working with oils, use blending and glazing medium or turpentine to thin the paints. With acrylic, thin with Easy Float mix (see Easy Float mix) or water. To best load a liner, your paint needs to be an ink-like consistency.
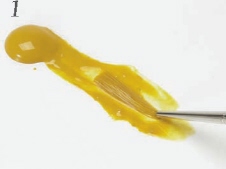
Step 1: Load Create a loading zone and fill the brush to ferrule.
Step 2: Create a Point After loading, roll the brush to a point.
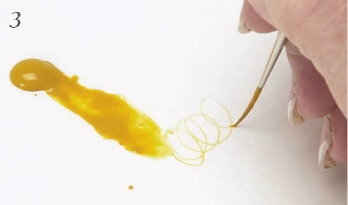
Step 3: Check Load The brush is loaded correctly if you can scribble with it. This load is used to line tree branches, fence wires, grass — anything that needs a thin line.
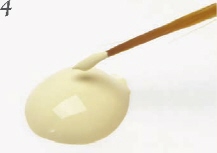
Step 4: Loading for Highlights If loading for highlights, don’t dilute the paint. Pick up a heavy dab on the point. When you apply the paint to canvas, the paint will break instead of giving a continuous line. This technique creates the brightest highlights on tree branches, deer antlers and hay bales.
STIPPLING
Stippling is mainly used to create foliage. I also use stippling in this book to create foam in water and to suggest weeds and flowers. I always use an old, scruffy brush for this technique, but if you do not have such a brush you can use an angular bristle brush.
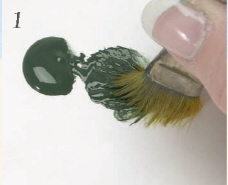
Step 1: Load Dark Color Load the darker color by tapping on the palette to flare the bristles. Load just the toe.
Step 2: Stipple Canvas Pounce (stipple) color on canvas.
Step 3: Double Load Stipple To apply two colors at once, load the heel of the brush with the dark value and the toe with a light value.
Tap once on the palette and then stipple on the canvas. You now have two values, dark and medium.
Step 4: Add Highlights Load just the toe with highlight color and stipple on highlight.
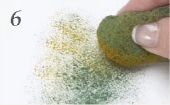
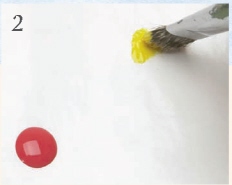
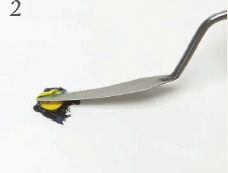
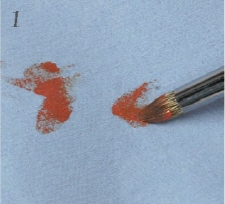
SPATTERING
Spattering is useful for adding spotty textures, such as falling snow or a suggestion of gravel. It can be done with a toothbrush, but a fan brush gives me more control.
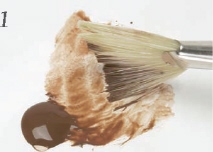
Step 1: Load Dampen the brush with water (acrylic) or blending and glazing medium (oil). Pull out some paint from the puddle to create a “soupy” loading zone.
Load one side of the brush.

Step 2: Scrape Brush Scrape the brush across a palette knife for a spatter.

Step 3: Use Easel or Lay Flat You can spatter with the canvas flat or on an easel, but most people prefer to have the canvas flat. Cover areas you wish to keep clean with a paper towel.
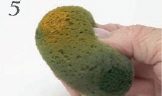
SPONGING
Sponging is sometimes used to create foliage. It can also be used to create clouds, although it is not used in that way in this book. This technique typically is not used with oils, however I have successfully used it with that medium. With oils, I usually use a little blending and glazing medium on the canvas and sponge on top of the medium.

Step 1: Dampen Sponge If working with acrylics, dampen the round synthetic sponge with water and blot out the excess dampness in a paper towel.
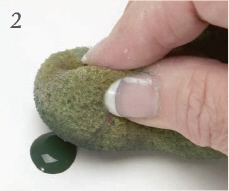
Step 2: Pick up Paint Squeeze the sides of the sponge together to create a rounded surface on the flat side. Dab the rounded surface into the paint.
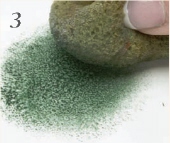
Step 3: Pounce to Disperse Paint. Pounce the sponge on the palette to disperse the paint into the sponge.
Step 4: Tap on Canvas Tap painting surface, pointing sponge in different directions.
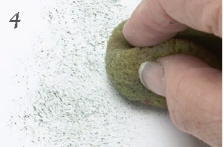
Step 5: Load Second Color Turn the sponge to a clean spot and load as you did in steps 2 and 3.
Step 6: Tap on Second Color Tap second color onto the painting surface.
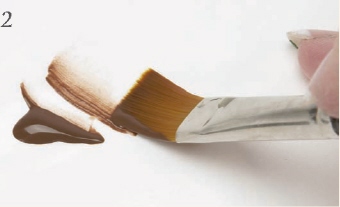
MOPPING
Mopping is used for blending parts of the painting together, such as clouds into sky or sky into the top of a hill.
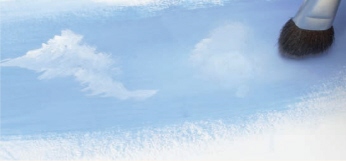
Acrylic: The cloud on the left hasn’t been mopped, while the cloud on the right has. Acrylic mopping is stippled — or tapped — onto the surface.

Oil: The cloud on the left hasn’t been mopped, while the cloud on the right has. To mop oil, sweep over the paint with a light touch.
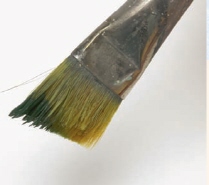
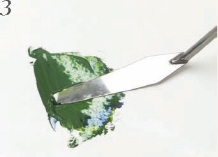
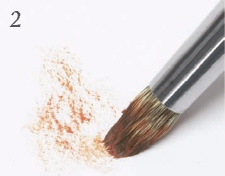
BRUSH MIX
You can achieve many different values and colors when you brush mix. Since you typically cannot brush mix the exact same color every time, the technique provides a wider variety of colors in the painting.
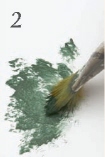
Step 1: Pick Up Color Pick up first color (either light or dark).
Step 2: Work in Paint Tap once or twice on palette.

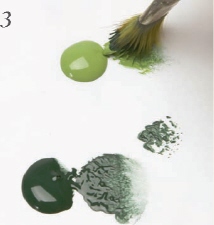
Step 3: Add a Second Color Pick up the second color.
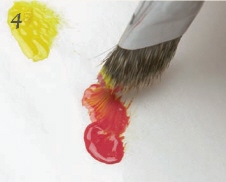
Step 4: Tap on Palette Again, tap once or twice on palette. Do not over mix. If you mix two colors until they are well blended, you could have used a palette knife instead.
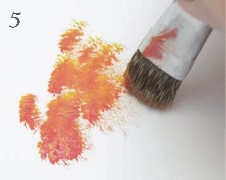
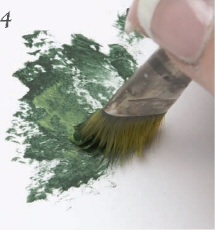
Step 5: Tap on Canvas Tap the mix onto your painting surface — in addition to the mixed color, both colors come out at once. The brush mix works well for grass and foliage.
PALETTE KNIFE MIX
Mixing paint with a palette knife produces what I call “dead color.” The color doesn’t provide the spontaneous variations and commingling of colors that add so much to a painting — although sometimes the dead color is necessary for the task. I use palette-knife mixing more with oils, because there are so many colors already manufactured for acrylics.
Step 1: Load First Color Scrape the designated portion of the first color in the mix onto the palette knife.
Step 2: Add Additional Color Clean the palette knife and scrape up the next color.
Continue to clean the palette knife after scraping up each color.
Step 3: Mix the Colors Then mix the two or more colors together. The resulting color should be solid with no streaks.
DRY-BRUSHING
Use dry brushing to add tints and highlights. The highlights on the children’s clothing in Down a Country Lane (page 46) was applied with the dry-brush technique. Use this technique any time you want to have a broken look, as with highlights or shading.
Step 1: Load Brush Load brush well and then wipe the outside bristles on a paper towel.
Step 2: Move Brush in Circle Lay the brush on its side and move it in a circular motion.
This technique is used to apply highlights to rocks, roofs, clothing and other items.
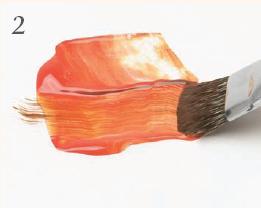
GLAZING
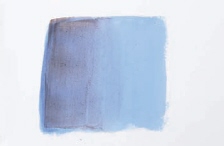
Apply Medium Glaze Glazing is a transparent layer used over dry paint. First put medium on dry paint. Then glaze. Here you see a blue base (right) with a Black Plum glaze (left). Among other things, I use glazing to deepen shadows.
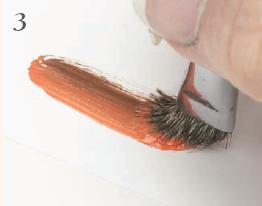
WASH
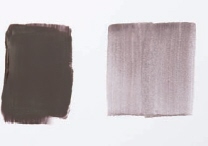
Dilute Paint Washing is a transparent layer often applied to a canvas as a base coat. On the left is a straight color; on the right is a wash of the same color. Create a wash by diluting the straight color with water (acrylic) or medium (oil).
CHECKING VALUES

Using Red Acetate You can check the values in your painting by using red acetate. The red acetate blocks the colors and lets you view the painting in gray tones. This makes it much easier to see your values and to correct the painting should values be missing or need to be corrected.
WATERFALL WITH POOLED WATER
Two painting projects in this book have waterfalls. These instructions break down the steps more than the project step-by-step.
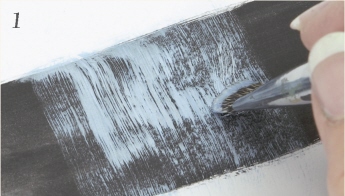
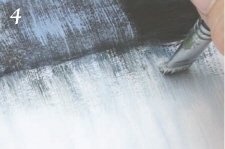
Step 1: Load and Dry-Brush The dark strokes are the based rock ledge. For the fall itself, you can use a fan, rake or old scruffy brush (my preference). A flat also works, but it’s harder to use. To begin the fall, load with the color used for the water and then wipe out the back (dry-brush). With the paint on top, pull the brush straight down, allowing the paint to break over the ledge.

Step 2: Use the Chisel Edge Use the brush’s chisel edge where the water breaks over the falls to make the water more opaque and hide the edge of the rock line.
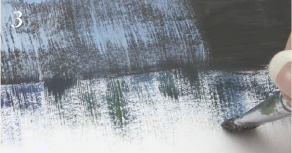
Step 3: Load Dark Color Water pooled at the base of a fall is painted with the same technique as water in a pond or lake. First, load dark color in the brush and pull straight down from the rock ledge or bank. Pull some strokes farther than others.
Step 4: Fill Pool with Vertical Strokes Fill in the pool with a brush and thin paint. Start the light color in an unpainted area above the dark area and catch the edge of the dark colors as you pull down. Use vertical strokes.

Step 5: Blend Blend horizontally with a dry bristle fan brush.
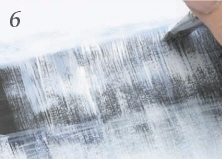
Step 6: Add White to Waterfall Now return to the waterfall. Load the brush with white and pull down falls again as you did in step 1.
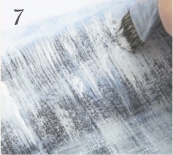
Step 7: Create Sheeting You can create a sheeting effect with the brush chisel and white. Use vertical strokes.
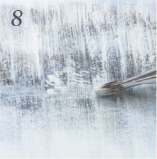
Step 8: Add Foam To create the foam at the bottom of the fall, corner load brush with white and stipple appropriate area.
PINES
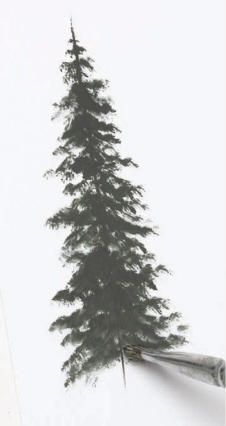
Corner load and Tap Start a pine by painting a spine with a liner. This is just a reference for the center of the tree. Don’t worry if it becomes covered in paint. Corner load a flat brush and turn it so the paint is on top. Tap in the branches with the brush corner, creating an irregular outside edge.
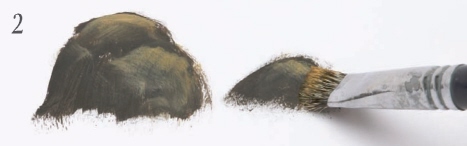
ROCKS

Step 1: Base coat Rock Paint rocks with any flat brush. Load the brush with rock colors and base coat the rock.
Step 2: Create Form with Highlights Corner load the brush with your first highlight color and create form, facets, and edges.
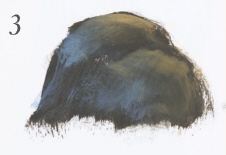
Step 3: Highlight Cool Side Continue to add highlights and reflected lights. Give the cool side (the one facing away from the light source) bluish colors.
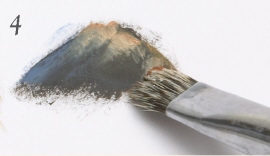
Step 4: Highlight Warm Side Give the bright side (the one facing toward the light source) warm colors.
GRASS
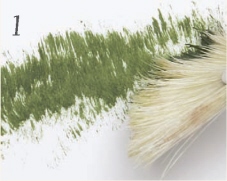
Step 1: Corner Load First Color To paint grass in oil, use a fan brush; to paint grass in acrylic, use a fan or flat. Load only one corner of the brush and then turn it so the paint is away from you. Stroke only with the corner in short, downward, overlapping strokes.
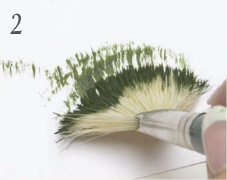
Step 2: Avoid Arches If you load the whole fan brush and use the middle bristles to stroke, you’ll makes undesirable arches.
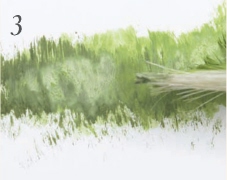
Step 3: Corner Load Second Color When you’ve finished with the first grass color, corner load the next color and lay it over the first in short, downward strokes.