Leader ends can often get caught in a reel under the line or other leader coils. To find the end of the leader (the leader tippet), use a hook (a large fly works well) to catch one leader coil. Then hold the fly with the leader coil and turn the reel handle as you would if retrieving line. The leader tippet will come free after a few turns.
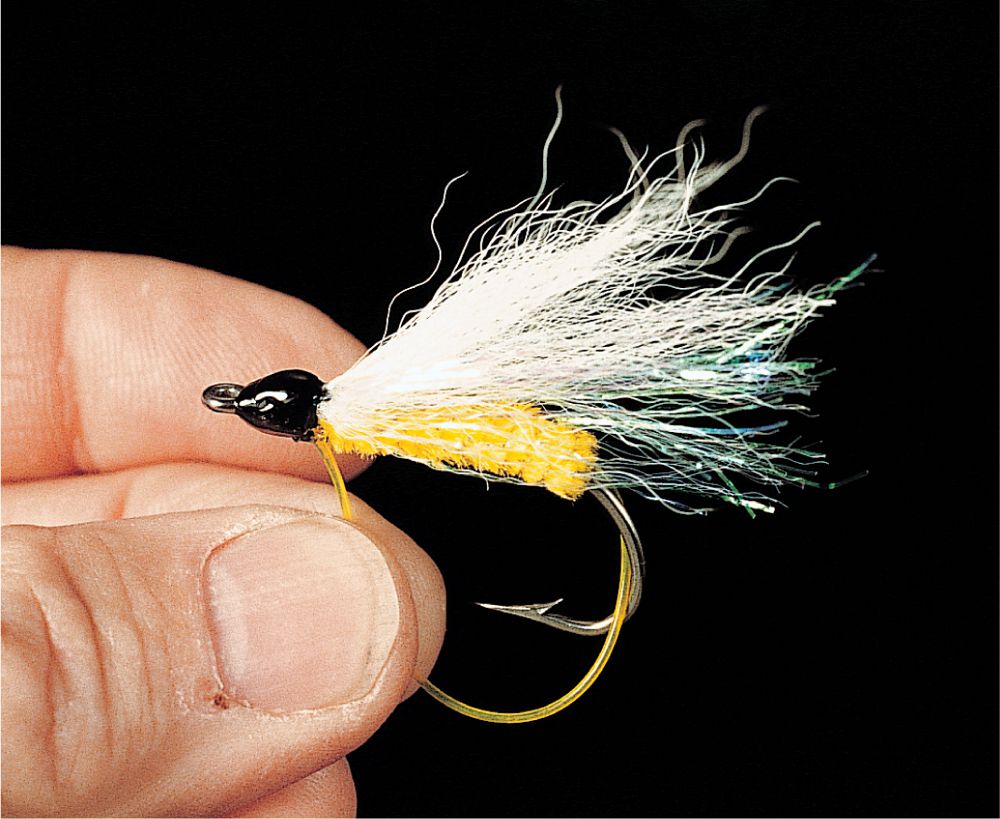
For some fishing, weighted flies are a must. This includes steelhead fishing, fishing for Pacific salmon, and some warm-water fishing such as that for largemouth, smallmouth, and pike. Where possible, avoid tying or fishing with heavily weighted flies. The heavy weight does have the advantage of getting the fly down to the fish, but has the disadvantage of deadening the action and movement of any fly. The heavy dumbbell eye weights in a fly can also cause the hook to ride point up, an advantage in preventing snags when fishing the bottom.
As an alternative, tie flies without weight or with very little weight, and use other weighting methods to get the fly deep. Possibilities for this include using several split shot on a leader, using a sinking or sinking-tip line, or using a “mini lead head” of several feet of lead-core line in the middle of the leader or between the line and a short leader. You can buy these mini lead heads (Gudebrod, Orvis, and Cortland) or make your own from 2-foot (0.6-m) lengths of lead-core line with loops spliced and wrapped into each end for loop-to-loop connections with the leader/line. If so inclined or required in your fishing area, you can also use non-lead weighted line.
Another situation that requires a change in casting tactics when surface fishing with a floating line occurs when you are casting heavily weighted flies. Common in steelhead and some trout fishing, this is often called a “chuck ’n duck” method, because of the heavy weight in the fly or leader tippet.
To help prevent problems, cast with a wide loop to keep the fly higher than normal and less of a hazard to the caster. The necessity of these techniques varies with the weight in the fly or on the leader and also the size of the outfit and weight of the line.
Even after securing a fly to the hook keeper or to the guide, you still have a long length of line or leader from the tip-top to the reel seat. To prevent this from tangling with other rods or other tackle when storing gear, hold the line or leader in the middle and flip it around the rod, and over the nearest guide. This holds the line/leader out of the way, prevents it from hanging down, and keeps tangles to a minimum. Just remember that you did this so that you unhook the middle of the line/leader when getting the outfit ready to cast.
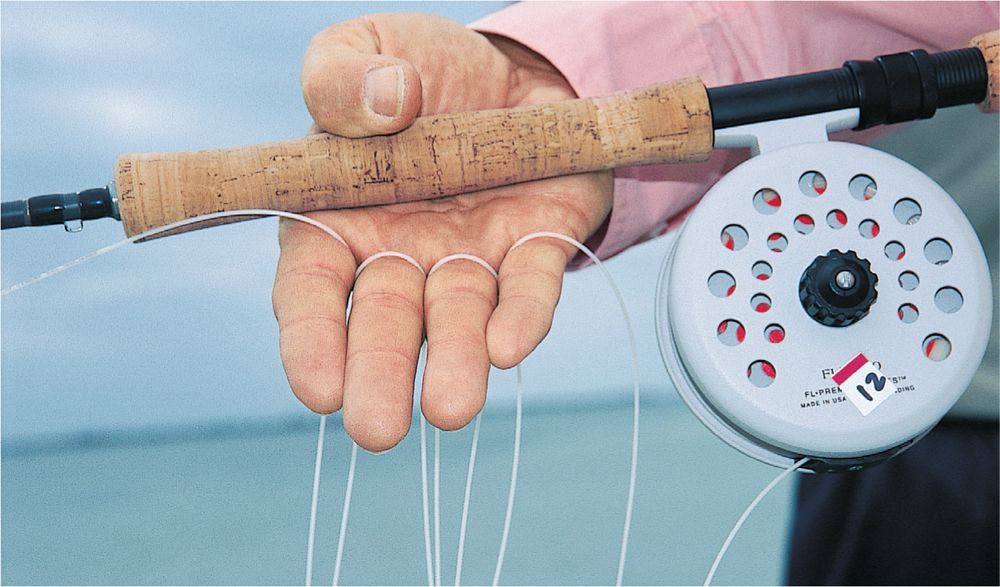
Over the years, anglers have suggested several ways to hold coils of line to prevent the current from catching it when wade fishing, or to keep boat fittings from catching the line. One of the best ways is to hold each coil of line on a separate finger of your line hand as you strip in the line. This allows you to carry four large coils of line in your hand without any possibility of them tangling, as might occur if looping coils together in the palm of your hand. This also makes it easy to release the line without tangling when making the next cast or shooting line.
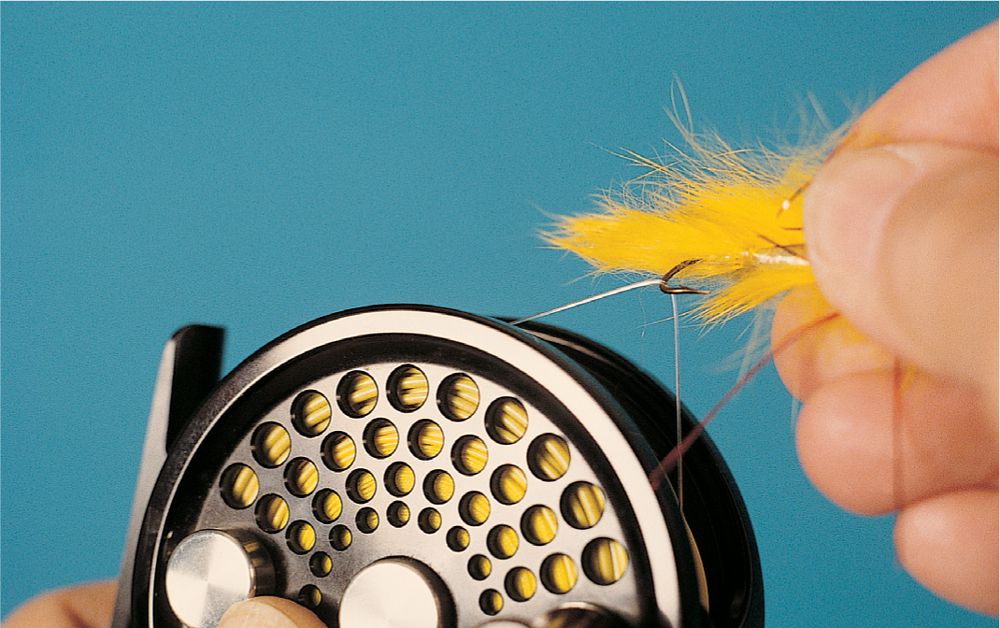
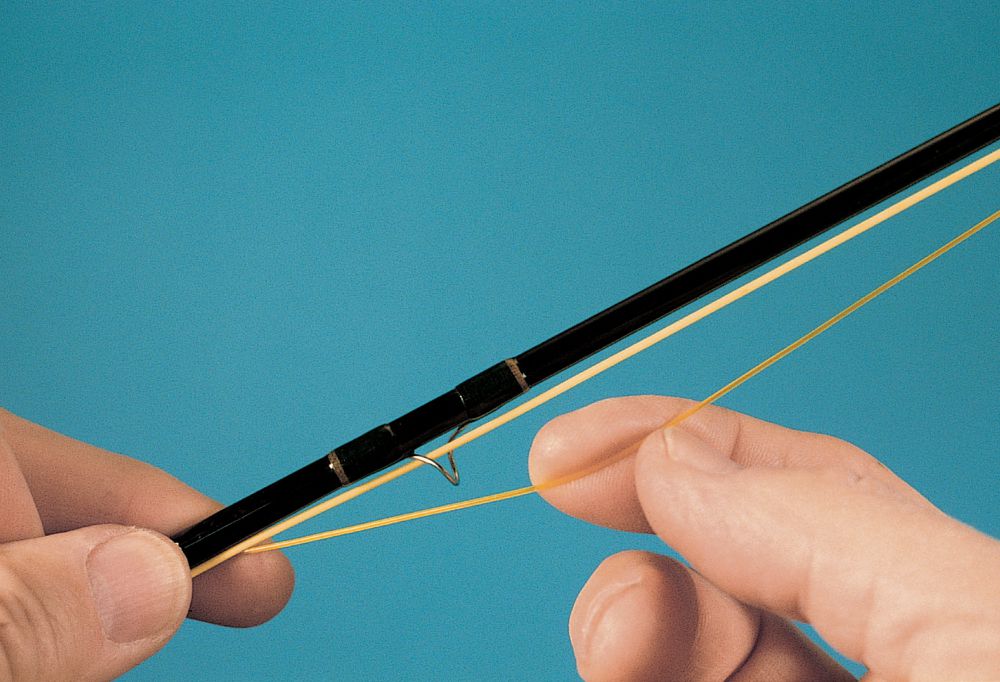
Most anglers fly fish with a long leader—longer than the length of the fly rod. If you slip the fly into the hook keeper and reel the leader through the rod tip, it creates a sharp bend or kink in the butt section of the leader. To prevent this, and keep the line and leader secured, keep the end of the fly line several inches out of the rod tip, hook the fly into one of the upper guides, and loop the extra leader around the circumference of the reel. This allows using the rod instantly, since you do not catch the leader/line connection in the tip-top.
The right way to fly fish deep in open water is with a sinking line. While sinking-tip lines are great, the floating portion tends to plane up the sinking-tip end and raise the fly in the water column. To get down and stay down, use a full-sinking line, add a “mini lead head” between the line and the leader, use a short leader, and keep the rod tip low throughout the retrieve. This keeps your fly in the deep strike zone from the moment the fly sinks after making the cast until you pull the line out of the water for the next cast.
Most leaders come in lengths from about 71/2 to 12 feet (2.3 to 3.7 m). However, if fishing deep with sinking or sinking-tip lines, these are entirely too long. Too long a leader bellies up in the water if you have a sinking line and a sinking fly, or causes a non-sinking fly to suspend high in the water column without ever getting deep.
To solve this, make your leader for a sinking line no more than 3 feet (0.9 m) long. Consider a 1-foot (0.3-m) length of heavy butt section and a 2-foot (0.6-m) length of the required tippet size. The butt section might have to be of lower test strength than normally used to be able to easily tie knots to connect the two leader lengths.
If your leaders are not sinking, and creating refraction on the surface to scare trout, use mud to sink the monofilament. Smear the mud along the entire length of the leader to help it soak up water (it will absorb water in time anyway) and sink on the next cast.
Another way to sink leaders is to take a tip from the past when fly anglers used to carry their silk gut leaders in aluminum cases between layers of wet felt to keep them moist and ready for casting. Manufacturers designed this to help the silk leaders straighten out easily. Store your leaders in a zipper-seal sandwich bag with a few drops of water that the leader will absorb. This allows the leader to sink quickly when fishing and prevents the leader from floating and scaring fish. It also makes it easier to straighten the leader.
After every catch, check your tippet for abrasion or roughness. Lightly run the leader tippet through your fingers, run it over your tongue, or hold it up to the light to spot any rough areas. Check particularly close to the fly. If you find a rough area, cut back the leader tippet if the roughness is close to the fly or replace the entire tippet to retie the fly.
If you have a weed guard that is still catching weeds, you can improve it and strengthen it for better weed protection. For the single mono-strand loops that are standard on most weedless flies and bugs, slip the weed guard around and in front of the hook bend. This effectively makes it stiffer. It repels weeds better and still collapses when a fish hits it.
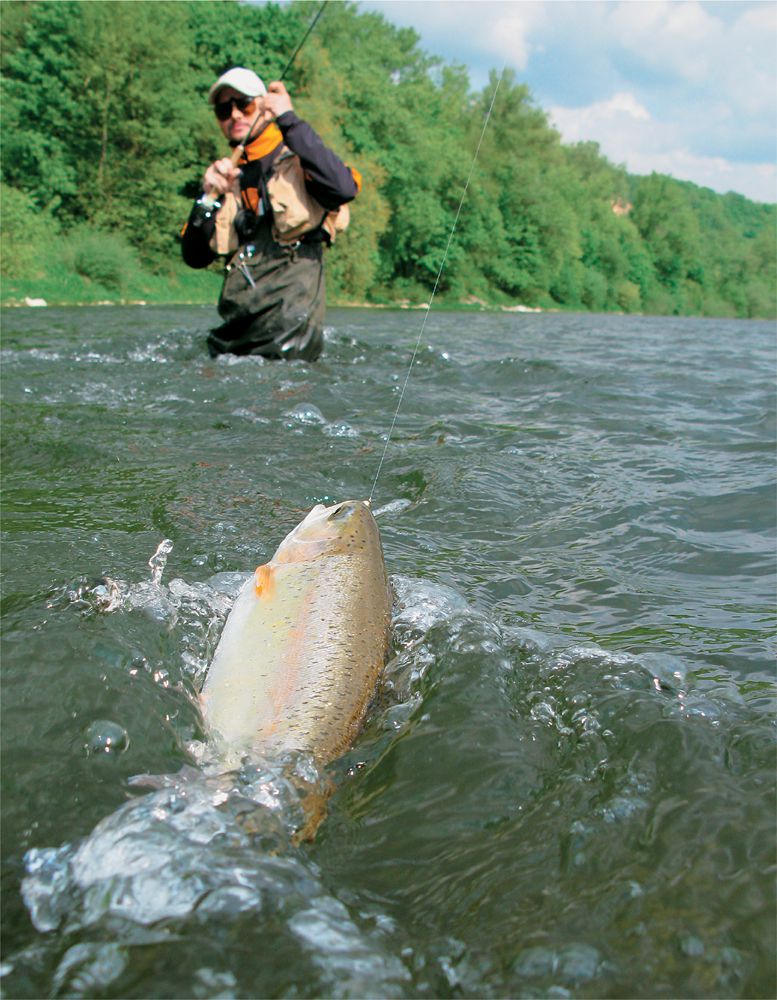
Since you strip fly line out to cast, you can fight fish in two ways: stripping them in or fighting them from the reel. It’s best to leave this decision—strip or reel—to the fish. If a fish is small and you can strip it in, do so without reeling in line at the same time. Often anglers trying to reel in line while stripping in a fish at the same time end up losing the fish. If the fish is strong and makes a run, allow the line to run controlled (through your fingers) out of the guides until all the slack line is gone. At this point, drop the rod tip a little and push the rod toward the fish to lessen the shock of the fish pulling line from the reel and against the drag. Then fight the fish from the reel—reeling it in by pumping when the fish tires, and allowing the fish to run when it desires.
If you pressure a hooked fish with a high rod, it tends to come to the surface, thrash around, and possibly become unbuttoned. A better solution is to use side pressure with the rod held close to parallel with the water. This tends to keep the fish in the water rather than struggling on top, and allows you to turn the head of the fish to lead it to you.
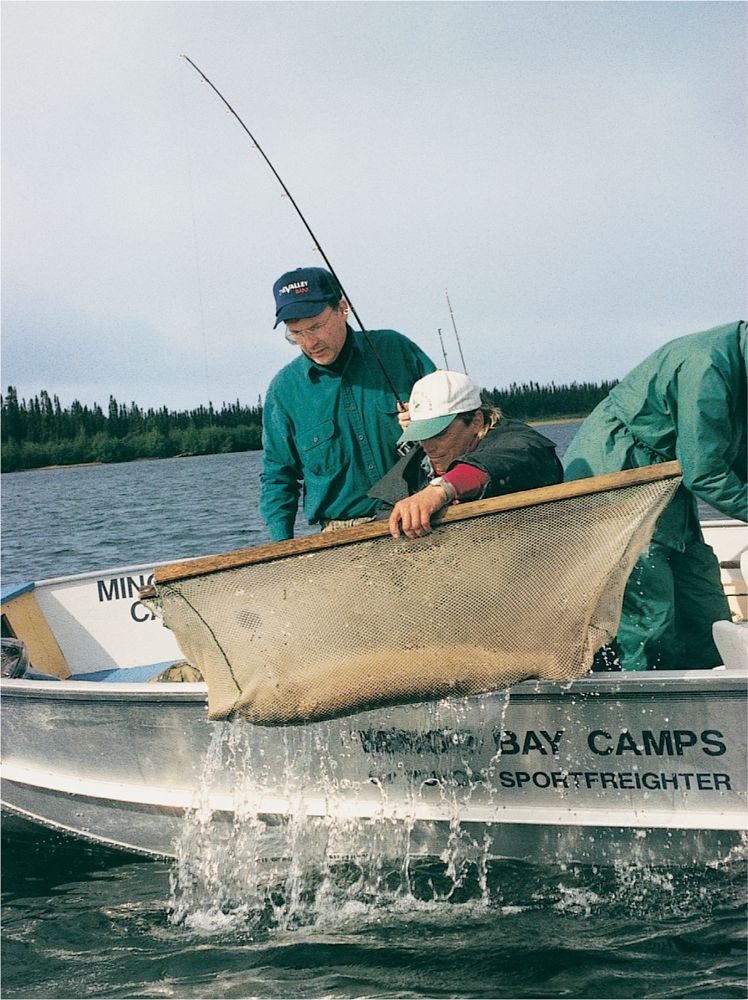
Pike have teeth and you can’t lip them as you can largemouth bass. An old way to land pike was to put your thumb and forefinger into their pronounced eye sockets and lift them into the boat. Don’t do it! In these days of catch-and-release fishing, such mistreatment can damage or possibly blind the fish, dooming it to a slow death. Instead, use a cradle (square net) to land pike.
To make a cradle, buy a rectangle of mesh netting, about 3 feet by 4 feet (0.9 m by 1.2 m). (You can make it smaller or larger depending upon the fish you plan to catch.) Then staple or stitch the long side of the net to 11/2-inch (38-mm) dowels, 5 feet (1.5 m) long, to the dowel. It will look almost like a World War II stretcher or a camp cot. To help sink the netting, add a few small pinch-on sinkers along the net. To land the pike, suspend the cradle in the water to sink the netting. Have the angler lead the pike into the cradle. Then lift both sides of the cradle to lift the pike straight up to remove the fly and release the fish.
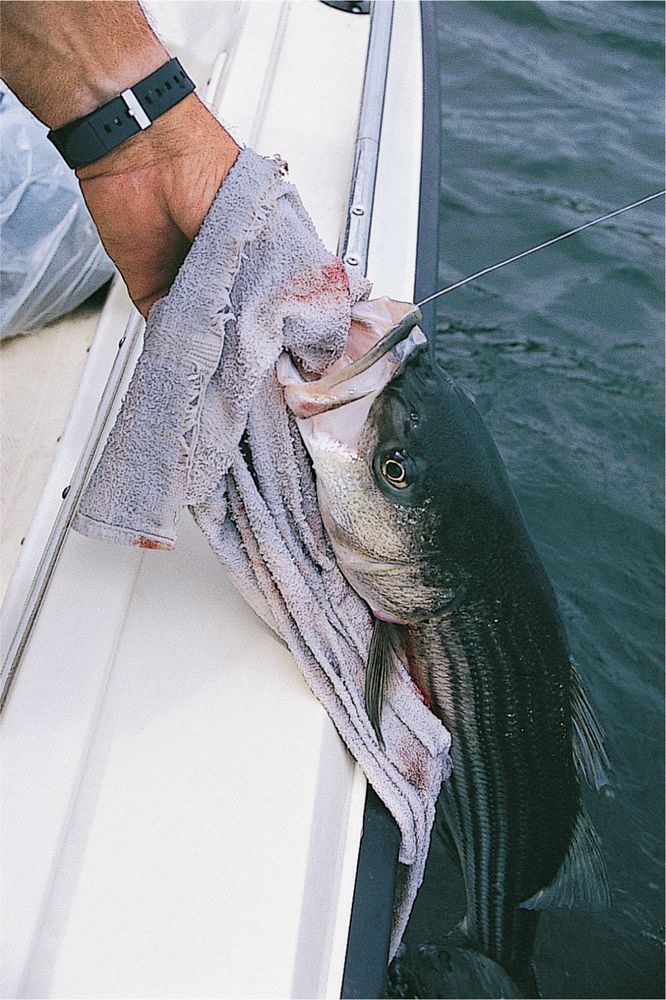
Lip landing large fish, such as stripers, steelhead, and salmon, can be difficult. The fish are strong, with tremendous power to twist out of your grip and break tackle. Many fish, such as big largemouth, trout, steelhead, and salmon, also have small but abrasive teeth that can make you sore. One good tip for these situations is to use a rag or small towel. Wet it and hold it between your fingers, then lip-grab the fish by the towel held in your hand. This creates a better grip, is easier on the fish, and won’t abrade your thumb. You can also use a cotton gardening or work glove for the same purpose.
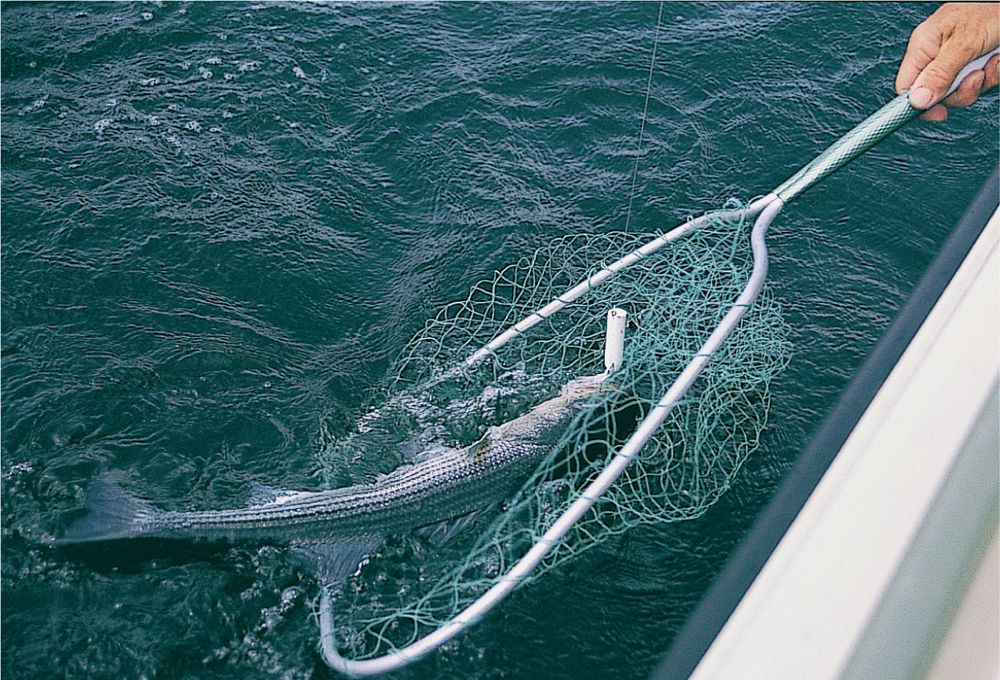
Nets are the traditional way to land fly-caught fish. Both short-handled wading and long-handled boat nets are available, in a variety of bag diameters and depths. First make sure that the fish is tired and ready to land. Lower the net into the water, and lead the fish head first into the net. Never land a fish tail first.
If the fish is moving head first into the net and strikes the net, it will dive farther into the net. If netted tail first and striking the net, it will leap out of the net. Once the fish is in the net, rapidly raise the net. If the fish tries to jump out of the net, and if you have a deep enough bag, turn the net frame sideways to close the net opening and secure the fish.
Once you have caught a fish, taken a couple of quick photos, and unhooked it, you have to release it the right way if not keeping it. Don’t just throw the fish into the water. Gently place the fish in the water. If it lacks teeth (trout, bass, stripers, carp, etc.), hold it by the lower jaw and work the fish back and forth to force water through the gills to help it recover. Usually, the fish will dart out of your hand when it is ready to go.
If the catch has teeth, hold it in back of the head—just behind the gills—and by the tail. Work the fish back and forth to help it recover. With all fish, avoid dangerous parts of the fish (gills, pectoral spines, etc.) and wait for the fish to recover enough to dart out of your hand.
The easiest and best way to release fish is to never take them out of the water, but remove the fly while they are tired but resting. To do this, tire the fish enough so that you can control it without touching it. Hold the leader close to the fly and work the fly out of the fish’s mouth. Push the fly sharply back to disengage it. If it is a large fly, hold the body of the fly and partly lift the fish up to cause the fly to pull out. Lacking that, use pliers or hemostats to hold the fly and twist it out of the fish. Tools made exclusively for fly removal include the Ketchum Release by Waterworks, which features a small slit-sided collar on a handle. To use this, fit the slit-sided collar over the line and slide it down over the fly to push the fly back and out of the fish. Several sizes are available for freshwater and saltwater fish.
Seams and edges are places where two currents touch, where two different flows of water meet, or where a fast current slides past a quiet eddy. Places like this in both freshwater and saltwater are ideal spots to throw a fly. They offer quiet water where game fish can rest while staying close to fast water that can wash a meal past their nose. For this reason, try fishing in the fast or faster current right next to the seam to get fish that are resting but ambush feeding. To produce the most strikes, cast the fly upcurrent and then allow it to swing downstream or downcurrent on a snug line.
Non-anglers often wonder how an angler can land a heavy fish using a light tippet. The answer is in both the drag and the ability to pump, which is how to fight fish properly. First, the drag must be set much lighter than the pound-test of the leader. To fight fish properly with the fly rod (or any rod), bring the fish toward you by lifting the rod from the horizontal to about a 45-degree angle. Then lower the rod as you reel or strip in your fly line. Continue to do this until you land the fish or until it makes a run and you have to repeat the process. This also allows dropping the rod and allowing the line to run off of the fly reel, should the fish make a run while you are pumping it in. Note that it is also possible to work the rod with side pressure by working the rod back when held parallel to the water, then retrieving line with your hand or reel as you point the rod toward the fish each time.
Fish react to sound waves. All fish have pores in their scales along a lateral line so that underlying nerve endings can detect water impulses. This means that you must always wade carefully and never create waves that might signal to fish that a predator (you!) is in the area. For best results, always wade slowly and carefully, planting one foot firmly before moving your other foot. Moving sideways to the current creates less water pressure against you and thus generates less disturbance in the water.
When standing on a sandy bottom, any fast-moving current or tide washes sand out from under your feet. This can occur on a tidal flat, fly fishing the surf, fishing sandy-bottom rivers and streams, and on sandy beaches or flats. To prevent currents from digging you into a hole, or sinking you deeper into the water when you are up to your armpits in your waders, move occasionally before the sand completely erodes your position.
It’s always best to wade with a buddy, whether wet wading, in hip boots, or in chest-high waders. You and your friend should be within sight and earshot of each other. This is particularly true on big water.
It is good to have a friend around for help in netting a fish or taking a photo of a trophy catch, but also for safety. Wading can wrench ankles, get you wet, cause you to fall in, or cause other problems.
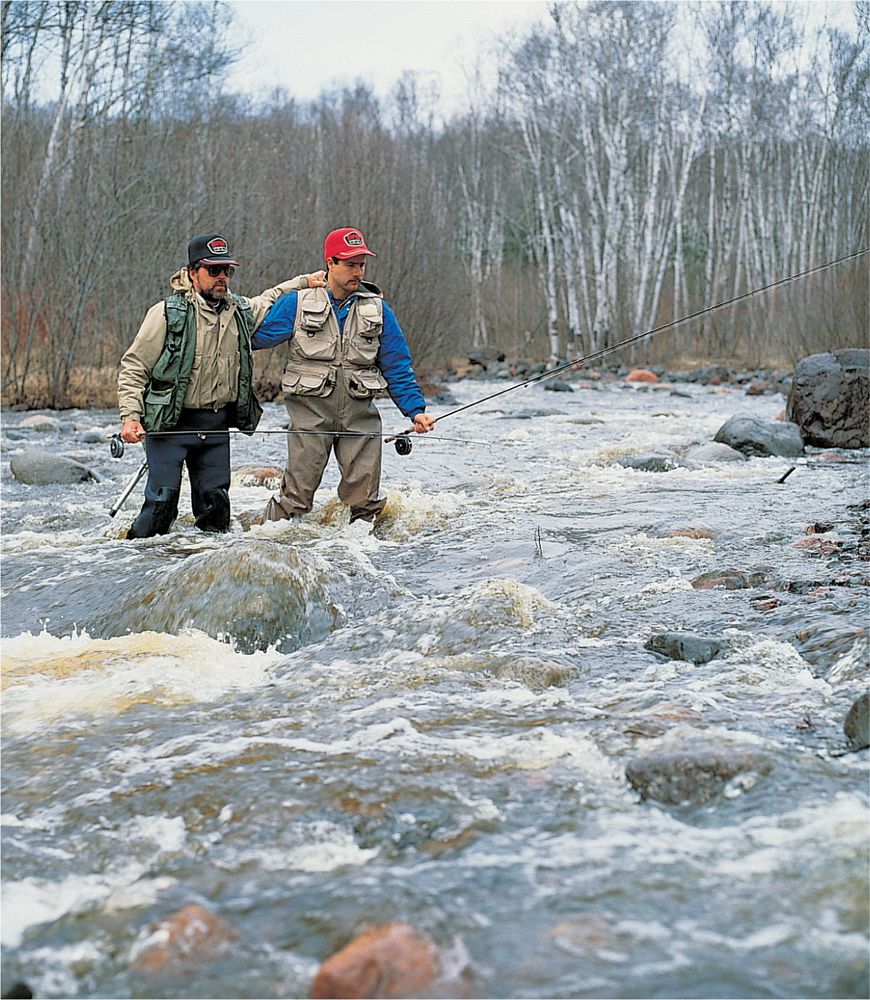
If you have trouble getting across a certain stretch of river, two anglers can lock arms, take baby steps, and get across by supporting each other and providing additional resistance to the current. This is true whether or not you use a wading staff. It is even better if you both have wading staffs. For the safest wading, each angler should alternate steps so that one provides a solid “anchor” for the other as he or she moves.
No one wants to fall in while fishing. But it can—and does—eventually happen to everyone. What you do next can make the difference in how wet you get. In extreme situations, it can save your life. First, expand your chest or pull on your wader belt immediately to reduce the amount of water getting into your waders. Sometimes you can reduce this to a small trickle. If you can regain your feet, do so immediately. Use your wading staff to help.
If you are in deep water and can’t regain your footing, position yourself so that your feet are downstream to fend off any rocks as you float down the river. Hang onto your rod and tackle if possible and try to get to shallow water or a quiet eddy where you can get out. If you take on a lot of water, you might not be able to stand up in shallow water with the weight of water in your waders. In this case, lower your waders and carefully wade to shore. Sit on the bank and raise your legs to pour the water out of each wader leg. Only then stand up, and get back to your camp or vehicle to change clothes.
If you are wet wading (pants, but no waders or hip boots), try to regain your footing, position your feet downstream if floating in deep water, and get out as soon as possible.
In all the above scenarios, a personal floatation device (PFD) such as worn by boaters or a CO2- or mouth-inflatable yoke air vest is a recommended safety device.
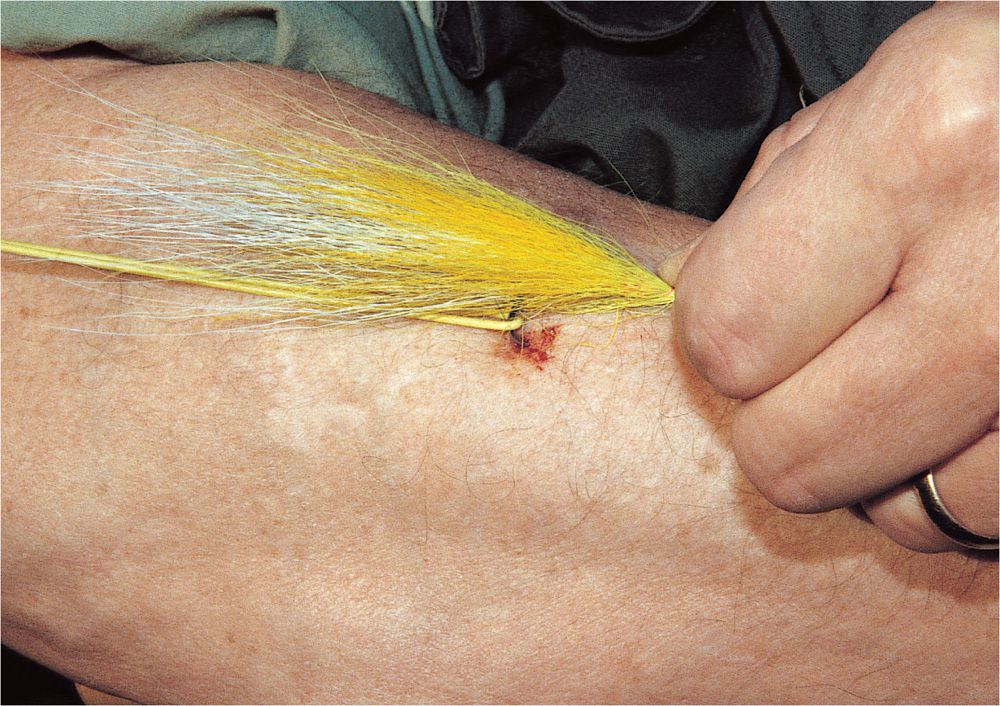
If you fish long enough, you might get hooked or be in a fishing group where someone gets hooked. If this happens with a barbed hook that penetrates past the barb, you can’t back the hook out of the flesh. After some barbaric methods of the past (push the hook out through the skin, cut off the barb and then back the hook out!) the best current method recommends pulling the hook out backward using a loop of string.
For this, first cut the fly from the tippet. Then use cord or a heavy fly line looped around the hook bend of the fly. Push down on the eye of the fly hook and then jerk the fly out backward with the loop of cord by pulling on the bend of the hook. If you have antiseptic, add it to the puncture, and cover the spot with a bandage. This is easiest (and sometimes only possible) if someone other than the “hookee” does it. This works well for all areas of the body, but avoid doing this around the neck, face, back of hands, or anywhere that you might have surface arteries, veins, nerves, or tendons.
If you hook a snag or tree with your fly and the fly wraps around the branches or tangles in the leaves, it is easier to snap the fly tippet, remove the fly, and pull the leader free. This is easier than holding the snag or tree while trying to thread the fly through the tangle. Once you have the fly and the rest of the tippet free, then you can check the leader for abrasion, make any necessary replacements, and retie the fly for fishing.
Another tip is to break off the twig or branch and then at your leisure, unwrap the leader and tippet from the foliage. This is also best to do if you are working from a boat that can drift around, making it difficult to hold position and get the fly free.

When walking through the woods or high grasslands with a fly rod tip first, you can easily poke the tip into a twig or brush and snap it before you realize it. To prevent this, pull the line and leader tight against the rod and carry the rod butt forward with the rod trailing behind you. In most cases, the rod will clear all of the brush and foliage, but if the rod does catch, it is easy to untangle without damage.
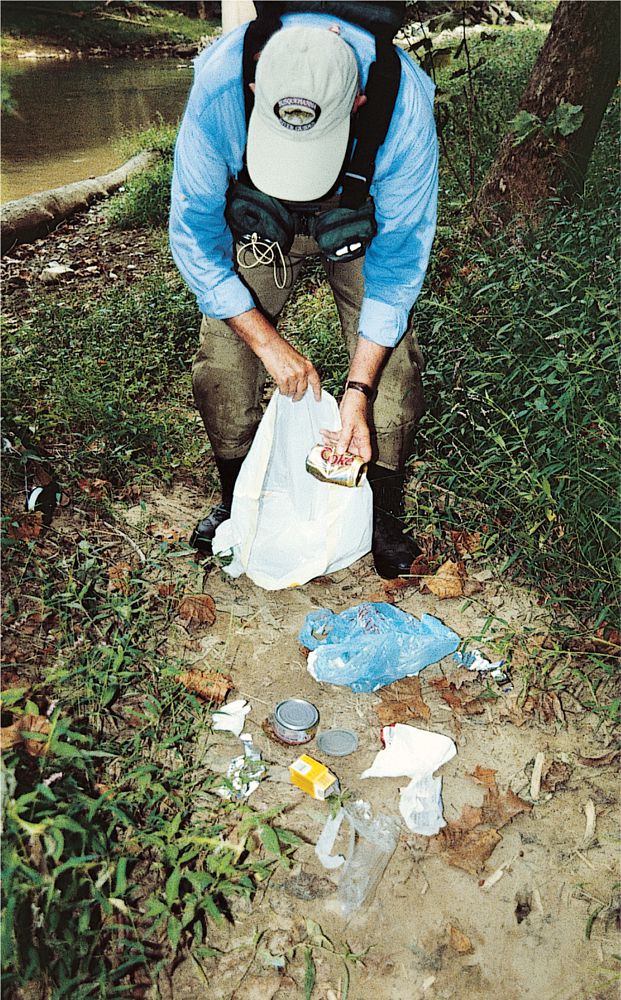
One way to help control angler litter is to carry a plastic trash bag with you and use it to pick up litter around boat ramps, shore fishing areas, and along streams. Since most anglers walk in one direction along a stream to fish it and then walk back to return to the car, use the bag on the return trip to pick up any litter you have encountered. Carry the trash home to dispose of it properly.
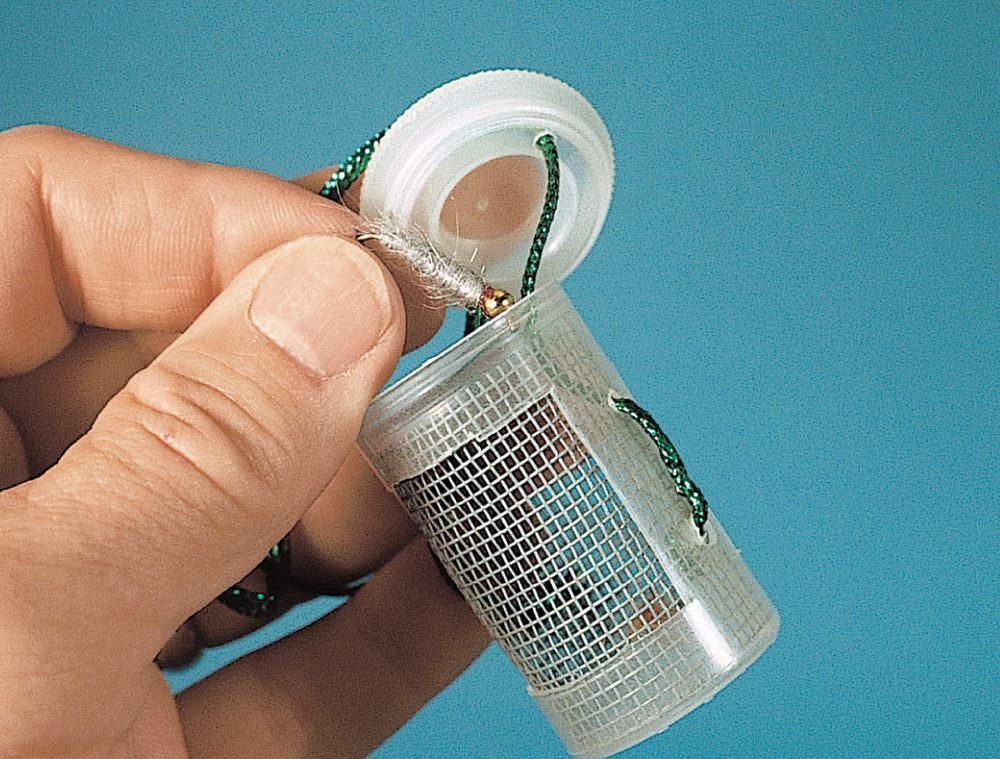
It is important to dry flies after use before placing them in a closed fly box. A simple way to do this is to make a fly-drying box for small flies. I first learned of this when fishing in Pennsylvania and a thoughtful fly angler gave me one.
This fly-drying box is nothing more than a plastic film can, with two large “windows” cut into the sides. The liner of the can is a small piece of plastic screening (available at any hardware store as a “patch” piece), coiled, and cut to fit inside the can to prevent fly loss. A cord loop through a hole punched in the side of the can, then through the lid, back through the lid, and into the other side allows the can to hang from your vest while preventing loss of the cap. The screening allows flies to dry as you fish.
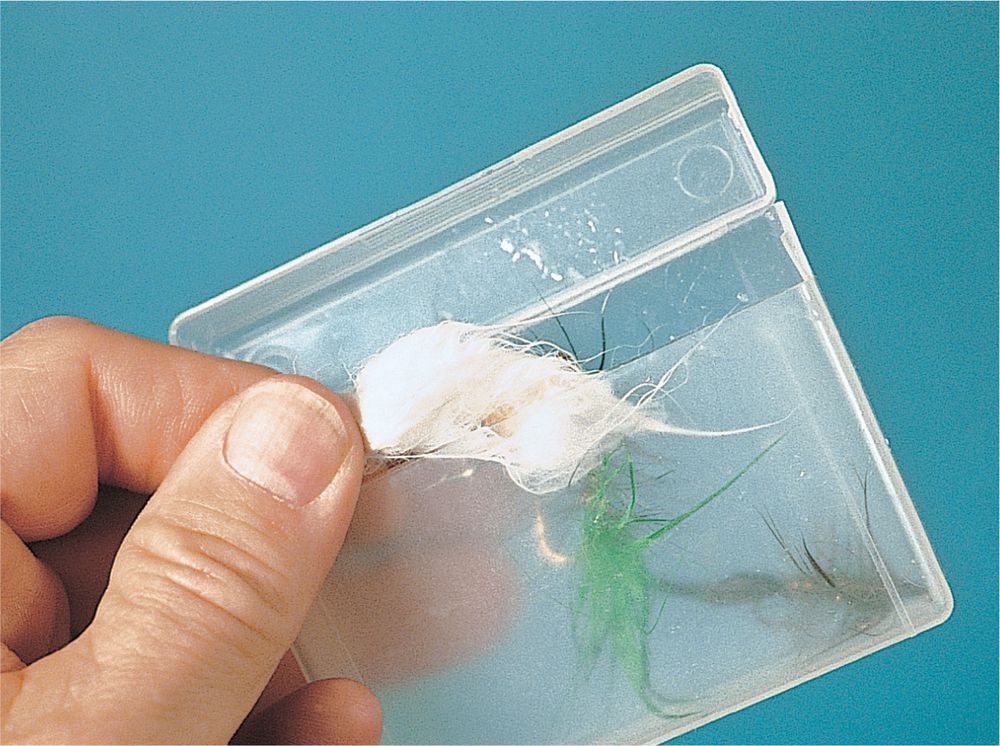
For larger flies or different fishing situations, place all used flies in a bag or box for later drying. If fishing in saltwater, rinse the flies in fresh water at home, dry thoroughly, and replace them in their boxes. A simple container can be anything, including a zipper-seal plastic bag, plastic zippered pencil case (such as what can be used for storage of large flies), or any of a number of small plastic boxes (such as Tupperware or pencil case boxes).