For good results, use bright light when tying flies. Good choices are fluorescent lights or the small strong halogen lights. These halogen lights can get hot so keep this in mind, especially for summer tying.
You can also use multiple lights to illustrate different parts of a fly for optimal tying results. These are most likely to eliminate shadows or distracting areas that can impair your ability to tie the perfect fly.
Today, you can also buy lights that are balanced for sunlight so that you can see your fly as you tie it in the exact same illumination as it will appear outdoors and to the fish.
There are several ways to prevent eye strain when tying flies. One way is to buy a background plate or easel from an art or office supply store. Most of these are clear plastic. Use a clip (banker’s clip) to hold to it plain colored poster board or matte finish blotter boards. Change these as desired, and use colors that contrast with the fly you are tying for maximum visibility and ease of eye strain.
You can also do the same thing just by using colors that contrast with your fly. If tying dark flies, try a light background. When tying light colored flies, use a dark background. For colored flies, a medium blue background is often good.
An easy way to do all this is to cover your fly tying bench with a matte finish blotter board as for a desk and change colors as required for different flies. Non-glare matte finish blotter boards do not reflect light and are usually best for these applications.
One way to keep a stacker (hair evener) from harming your fly-tying bench is to glue a patch of rubber gasket material to the base. Cut out the rubber gasket material to the shape of the stacker base and glue it to the bottom. Gasket material is available anywhere auto supplies are sold.
Alternatives to the gasket material are the thin foams available in craft and art stores, and inner tube patches. Use any flexible glue such as Pliobond, Ultra Flex, or contact cement. You can also use a square of gasket material on your tying bench as a pounding surface on which to hit the stacker to even hair and fur.

If you have trouble storing beads, check out the bins and containers at craft and art stores for this purpose. You can get racks of bins in several sizes, both as to the individual bin size and also the number of compartments that are in each rack. Most sell for only a few dollars and also allow stacking of the racks for those using a lot of beads in their tying.
If you tie lots of flies of one type and color, good body materials are available at any sewing, knitting, or craft shop. For the quantity that you get, the materials are far cheaper than similar materials from any fly shop. These shops carry yarn and other stranded materials in many sizes, materials, colors, and textures.
The one problem with these is that they are usually available only in large spools or skeins that would be more material than any flytier would ever use. One solution is to purchase materials with your fly-tying buddies, or a fly fishing/fly tying club, then divide the materials into manageable lengths and split the cost with those involved. You can all get a lot of material for a little cash this way.
Physical therapists may tell you that fly tying is not a good “job” to have, and that it is detrimental to rotator cuff muscles and posture, and can cause back problems. (The same goes for fly casting, but that is a different story.) To prevent injury, have a definite fly-tying work area with a comfortable chair, large work surface, and a vise at a comfortable position. Professionals tell you to place the vise jaws slightly above elbow height and about forearm length or less in front of you. Take lots of breaks when tying flies, and stretch and rotate your arms when possible.
To store natural materials and protect them from insects, place them in an airtight container, such as Tupperware. Make sure that there are no insects in the materials and add some moth flakes or mothballs when sealing them for storage.
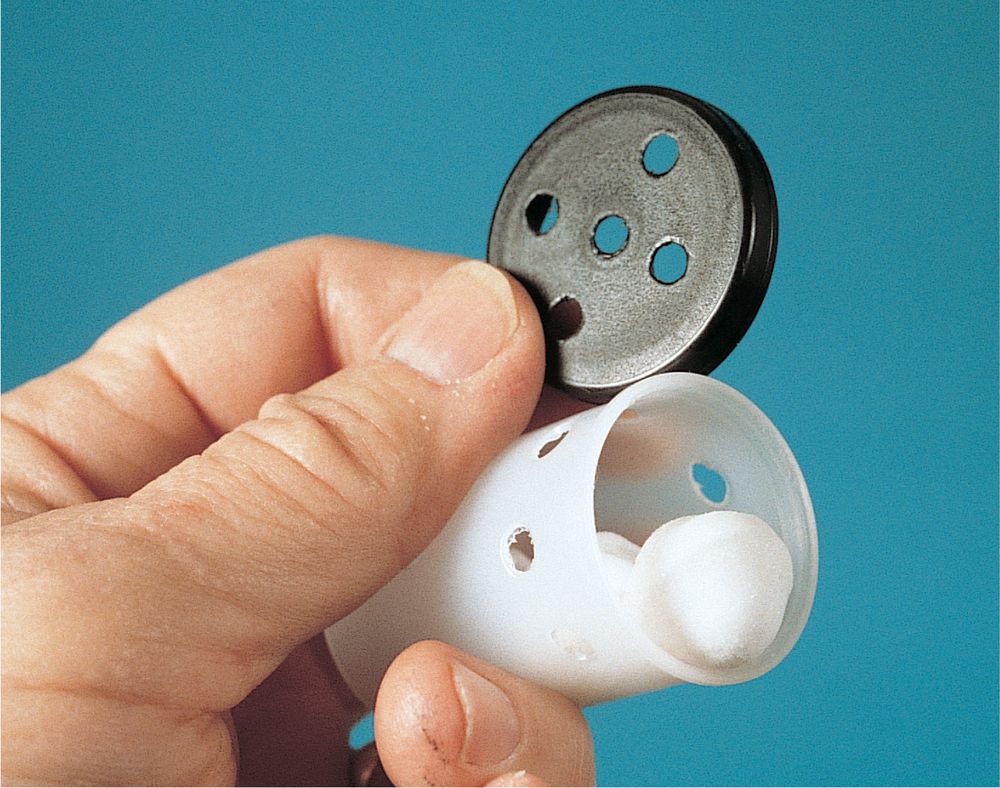
Mothballs or moth flakes can adhere to fly-tying materials, making them unusable. To prevent this, keep the moth repellent separate from the fly-tying materials, even when in the same airtight storage box. One way to do this is to keep the moth repellent in an open plastic bag next to the fly-tying materials stored in a box. This way they can’t come in contact with each other, but you’ve protected the fly-tying materials with the fumes. You can also place the mothballs in a small open cardboard box or mailing envelope. If you use an envelope, punch some holes through the envelope to allow the mothball fumes to escape and protect the materials. You could also use a 35mm film canister punched with holes. With mothballs in the closed canister, fumes escape through the holes to protect materials without direct contact.
If you plan to buy fabric, make sure that you do not overbuy. Most fabric that you use (vinyl, cloth-backed vinyl, suede, Ultra Suede, fleece, felt, etc.) is sold in bolts that are 36 to 54 inches (91.4 to 137.2 cm) wide. However, you do not need to buy an entire yard of cloth. Most stores will sell you an eighth of a yard (12 cm), reducing the cost of most materials to only a few bucks at most. You still receive 41/2 inches (11.4 cm) times the width of the material bolt—a lot of material for tying flies.
If you have a lot of bulk fly-tying materials, an ideal way to store them is in plastic containers such as shoeboxes and sweater boxes. These are readily available from general and discount stores. They are not airtight, so be sure to add mothballs to any boxes containing natural materials. To know what you have in each box, use self-stick labels from an office supply store to label each box with a black felt-tip pen.
If you like a particular fly-tying material, cut off a short length or piece of it and staple or tape it to a 3-by 5-inch (7.6- by 12.7-cm) index card. Label the card with the important information such as material, brand, color, manufacturer, supplier, price, etc., so that you can order more when you run out. Make sample cards for all materials that are unusual or rare and store the cards with materials in a plastic index card box or file.
Craft stores sell small plastic boxes with cards included for wrapping and storing stranded materials such as yarn, chenille, floss, etc. These are ideal for storing a large number of different colors of these materials. The cards fit into the compartments in the plastic box. You can re-spool any materials from their original packaging onto these cards to make a system with one box containing all the colors of a given material. Label the box to indicate the contents.
Tying up a bunch of the same fly in the same size? Streamline your operation by first preparing all the materials that you need—selecting the hackles, tail fibers, wings, etc., of the same size, and laying out the other materials—body, ribbing, tinsel, throat, etc.—that you use for that pattern. By having available all the materials for a quantity of flies, you streamline operations and save time selecting hackle, tails, body material, etc., each time for each fly. Commercial flytiers often use this trick when tying large quantities of one fly of one size. You can also use it for as few as a half-dozen flies.
Got a few more tails in your flies than on the natural insect? Got a few more legs than the six that insects are equipped with? Don’t worry—fish can’t count. What you want is a fair approximation of what their meals look like. When tying a dry fly, you want it to float well in the surface film. This often requires more tails than the natural insect has, and a far thicker hackle than is warranted by the six legs of an insect.
When you tie a new pattern of fly that you like, tie several and keep one as a sample for future reference. Keep these samples in a small plastic bag, and store with an index card listing the pattern recipe. To protect the fly, you may wish to keep dry flies, some nymphs, and similar structured flies in a container, such as an empty 35-mm film canister or empty hook box.
When tying flies smaller than you normally tie, you will need to shorten, slim, and scale down the materials. This requires smaller hackle, shorter tails, thinner dubbing or body material, and even thinner tinsel ribbing. It also means fewer bucktail or synthetic fibers in a wing, and fewer strands of flash on the side of a fly.
Examine each fly that you tie from both sides as you tie it to make sure that it is symmetrical. This is especially important if adding flash to wings, positioning a wing or throat, or similar steps. Mistakes are much easier to correct when the fly is still in the vise and the thread is still on the hook than after finishing and sealing the fly head. One easy way to do this is with a rotating vise that allows you to easily check both sides of the fly.
You can store fly-tying necks in a file cabinet. Place each neck in a clean plastic bag and then in a manila folder. If you like, you can even label the folder so that you have a filing and identification system. Then place several folders in a hanging Pendaflex folder to keep them flat and straight. Do not use a “box bottom” hanging folder, since this allows the necks to sag and bend, damaging them for fly tying.
If you use materials that you get from hunters or road kills (be careful and check local regulations for this), you should wash the materials and dry them before storage.
To do this, wash necks, furs, and skins in a mild detergent, rinse thoroughly, and then dry. Dry by hanging outside from a clothesline and make sure that they are hanging in the shade to prevent the sun from causing residual fat to liquefy. Once the materials are completely dry, store them flat with mothballs in a suitable container.
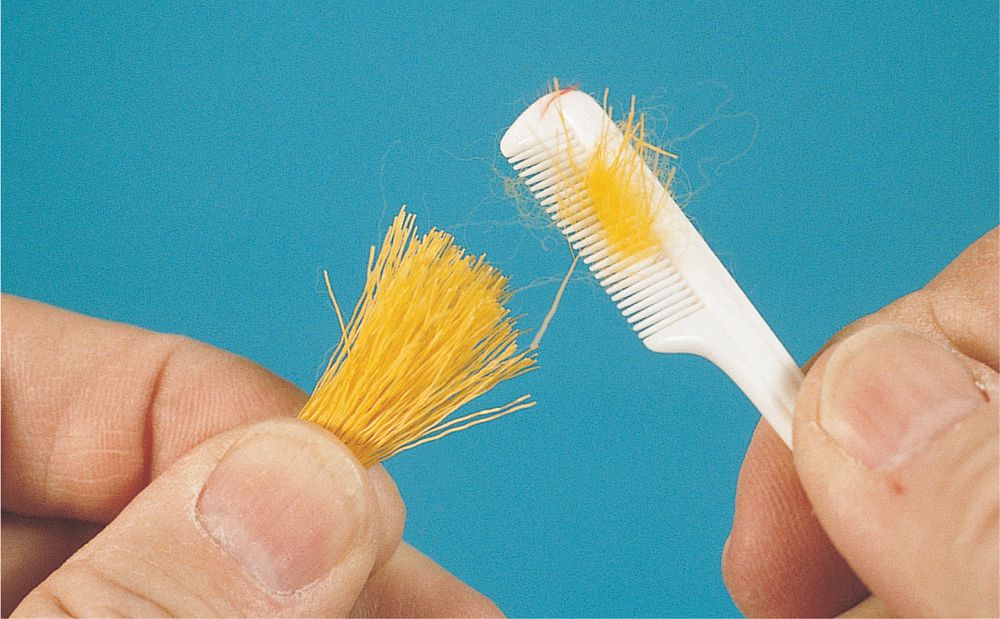
Use a moustache comb, available from any drug store, to comb out the underfur of deer hair and other natural furs from which you want the underfur removed. The moustache comb is ideal, not only for removing the underfur before tying with the guard hairs (bucktail streamers, deer body fur bass bugs, etc.), but also to collect underfur to use for dubbing. You can use underfur like this by itself for dubbing or mix it with other furs or synthetic materials to make a mixed dubbing.
Some anglers and flytiers get heavily involved in aquatic entomology; others do not. In any case, it helps to have on hand a few insects to use as examples when tying flies.
To do this, use a fine-mesh net to dip insects from the water, capture them while they are floating, or net them in the air as they are flying. To get nymph forms of insects, wade the shallows and lift over a few rocks to gather mayflies, caddis cases, and stonefly nymphs from the rocks. Turn the rock back to its normal position when finished so that you don’t harm the remaining insects.
You can also use your net to capture emerging insects along with mature insects flying and mating. Place all insects in small bottles with rubbing alcohol for future reference. Label as to time, date, and place captured. Later you can add further information as to type, or genus, and species.
Alcohol (and formaldehyde used by professionals) will fade the colors on the insects, so make separate notes as to color or check with books for suggestions when tying your own patterns.
If you have trouble tying small flies, start by tying some of the same pattern, but in larger sizes. After you are comfortable with tying the flies, move to tying them in the next size down until you reach the size you desire. This allows you to develop and perfect your skills gradually. Realize that each time you go to a smaller size, you also reduce the size of the materials incorporated into the fly.
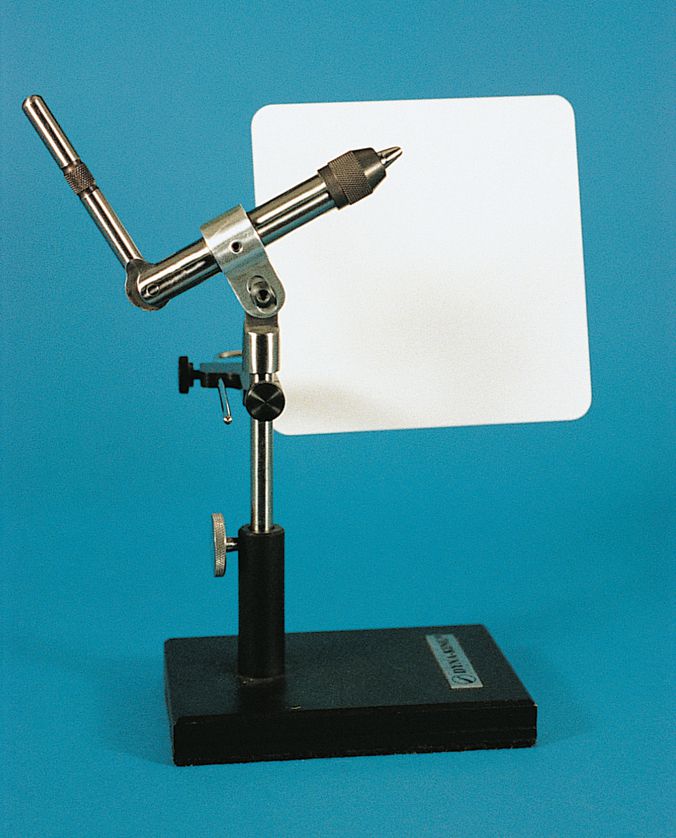
To prevent eyestrain, dull the highly polished metal finishes on the vise using fine steel wool or even gun bluing to reduce glare. This usually only works on ferrous metals—it does not work on stainless steel or certain brass fittings. A quick and removable substitute for this is to cover the post of the vise with a dull tape, such as masking tape.