If you are tying small flies and need more room for handling materials, try adjusting the angle of the vise (if possible) to a steeper angle. This allows more room for your fingers to handle materials and hold materials in position on the hook for tying.
If you do not have a rotating vise, but still want to check both sides of a fly as you tie it, keep a small-handled cosmetic mirror on your fly-tying bench. This allows you to hold the mirror up to see the far side of the fly without the time-consuming task of taking it out of the vise.
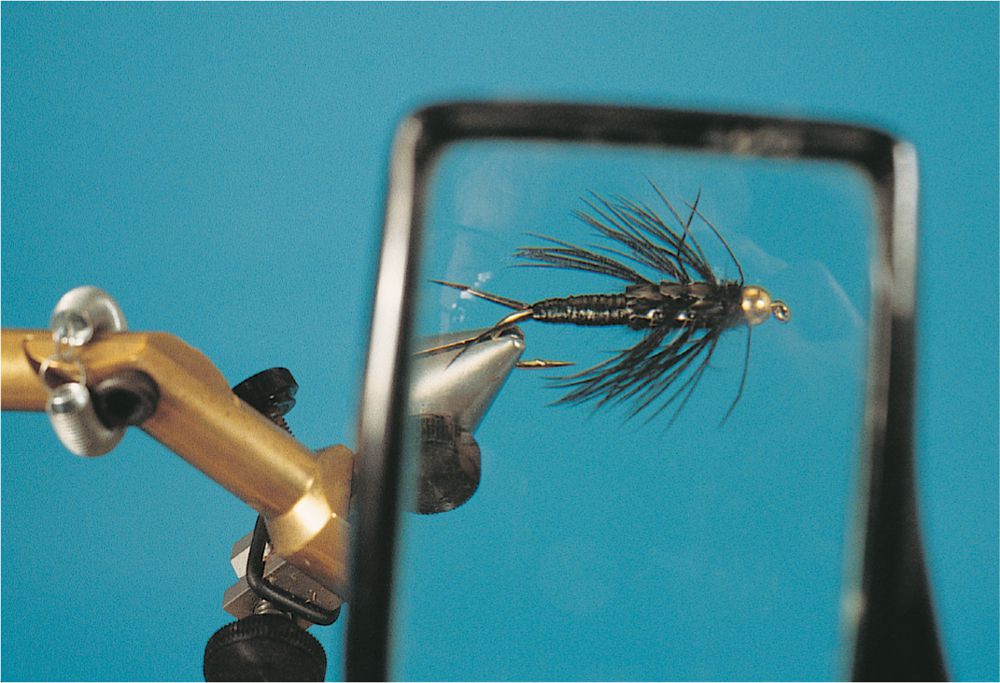
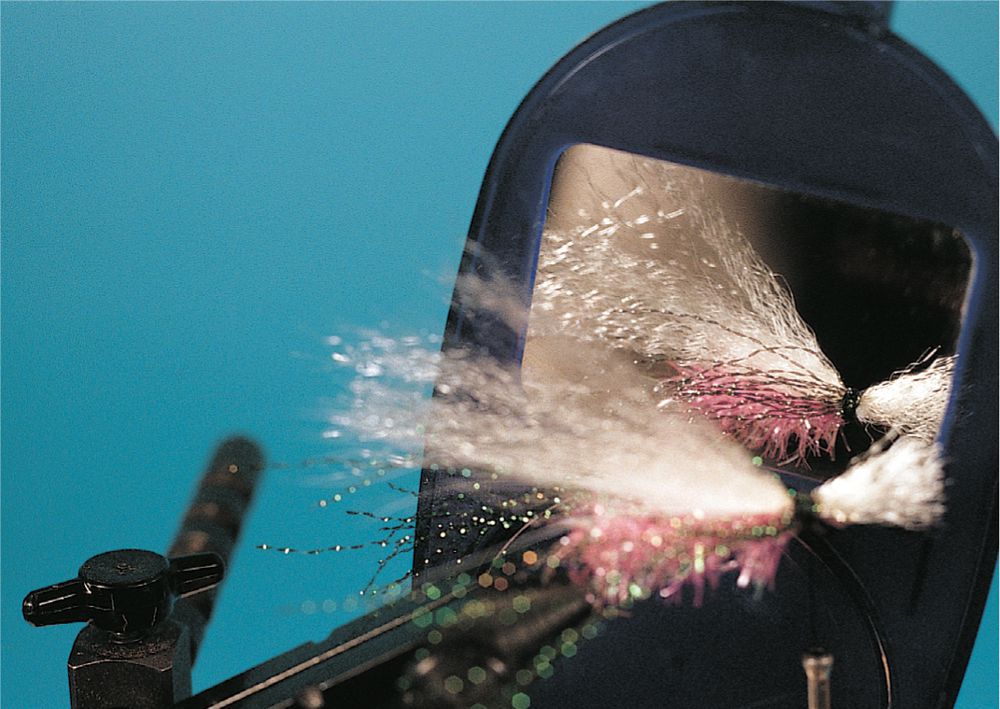
When tying very small flies, or if you have trouble with your eyes, consider using a magnifier. Fly shops sell magnifiers made exclusively for fly tying, but you can also get the same thing from office supply stores. Some magnifiers also have a built-in circular fluorescent rim light to provide lighting for the fly. The magnifiers that fit on your head are particularly useful. They move with you and do not add another piece of equipment between you and the vise.
To make a throat on a streamer fly or wet fly, use a rotary vise. Turn the vise jaws 180 degrees to position the fly hook point up. (If your vise does not rotate, remove the hook and replace it upside down.) This makes it easier to tie in a throat, since you will be using the soft loop method and pulling the thread down on the throat rather than up as if tying it without the hook reversed. This is far easier and makes for a more secure tie, while also allowing you to make sure that you line up the throat with the hook shank.
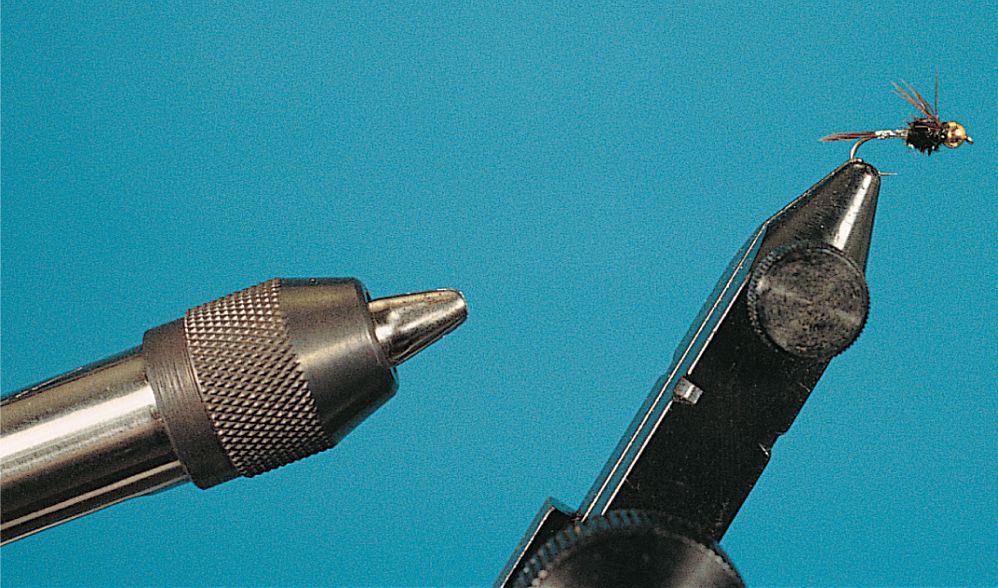
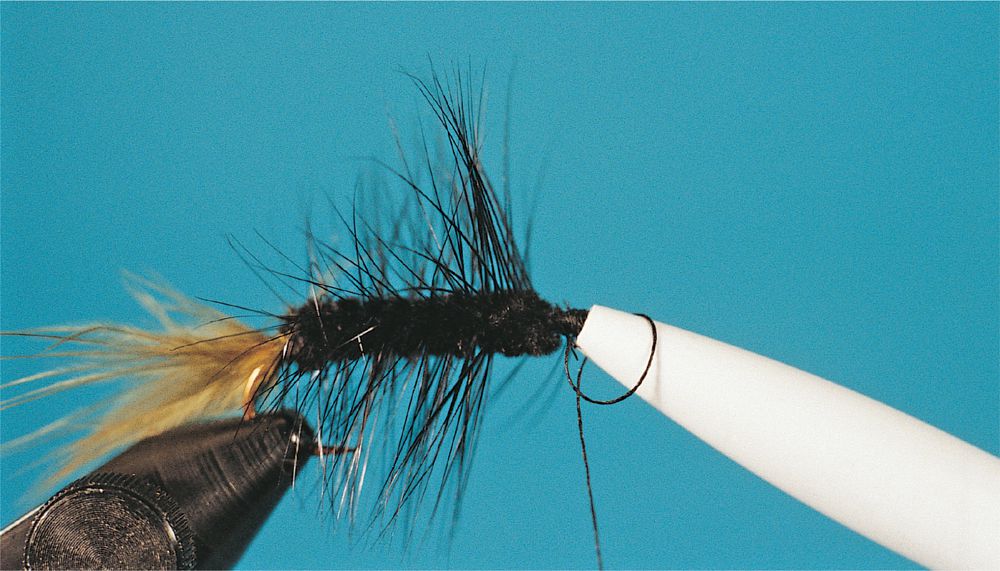
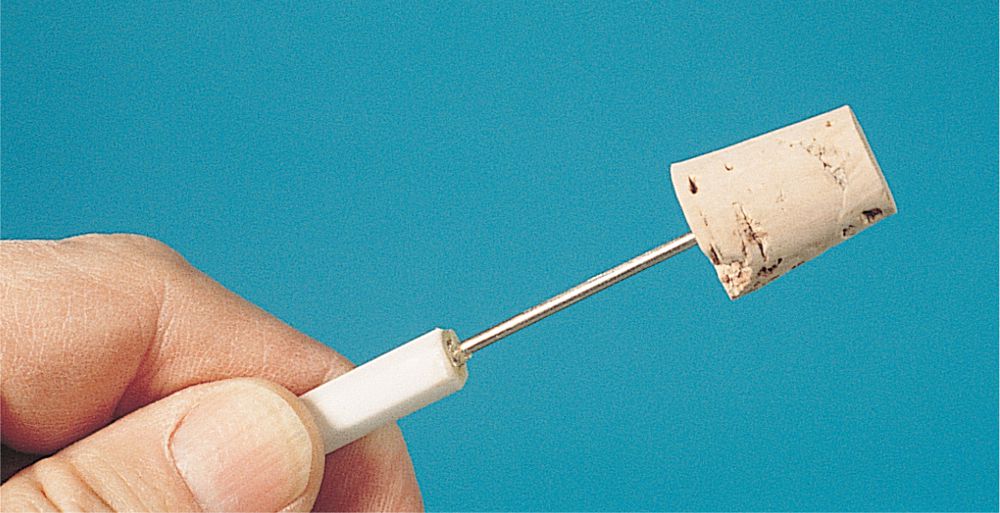
The front end of an inexpensive empty ballpoint pen makes a fine half-hitch tool. The best types are those with the clicker cap to extend/retract the ink point.
Unscrew the pen and discard all but the tapered plastic or metal end. The tip end fits over the eye of small flies and the taper allows you to easily slide off half hitches after you wrap the thread around the barrel of the pen. If you have several of these, drill out one or two to larger size holes to fit larger hooks.
To see flies easily, get reading glasses designed for the distance you work from your fly-tying vise. You might be able to use the inexpensive models available from most stores if you do not have any serious eye problems and if both eyes need about the same correction. Measure the distance from your eyes to the fly-tying vise at home, and then choose glasses that work well at that distance.
To make a fly float lower in the surface film, use scissors to trim the bottom hackle. The result is a fly in which the tail, body, and hackle are all floating in the surface film, thus more closely imitating an emerging mayfly. This is basically what Comparadun flies do.
If you don’t have a pedestal vise, but travel and take your clamp-on vise with you, you must have a way to clamp it to tables that are too thick for the clamp that comes with the vise. An easy way to solve this is to carry with you a small board and one or two larger “C” clamps.
The best board is shelving about 0.75-inch (19-mm) thick measuring about 4 by 6 inches (10 by 15 cm). To use, clamp the board to the table or bench using one or two “C” clamps and leave about 2 inches (5 cm) of the board extending over the edge of the table. Then clamp the “C” clamp vise to this extended part of the board and tie away.
To keep dry fly hackle from twisting while winding it in place on a fly, use one of the new rotary hackle pliers. You’ll also find them faster to use, since they don’t require rotating the hackle pliers with each turn to prevent hackle twist.
There are pros and cons to the kinds of vises you can choose from. Clamp-on vises are more secure and allow vertical adjustment of the vise. You must clamp them to a table that the clamp will not damage, and one that is not too thick—2 inches (5 cm) is about the maximum.
You can place pedestal vises on any table for use anywhere. You don’t even need a special table or work area for tying and you can place them on surfaces other than tables or countertops.
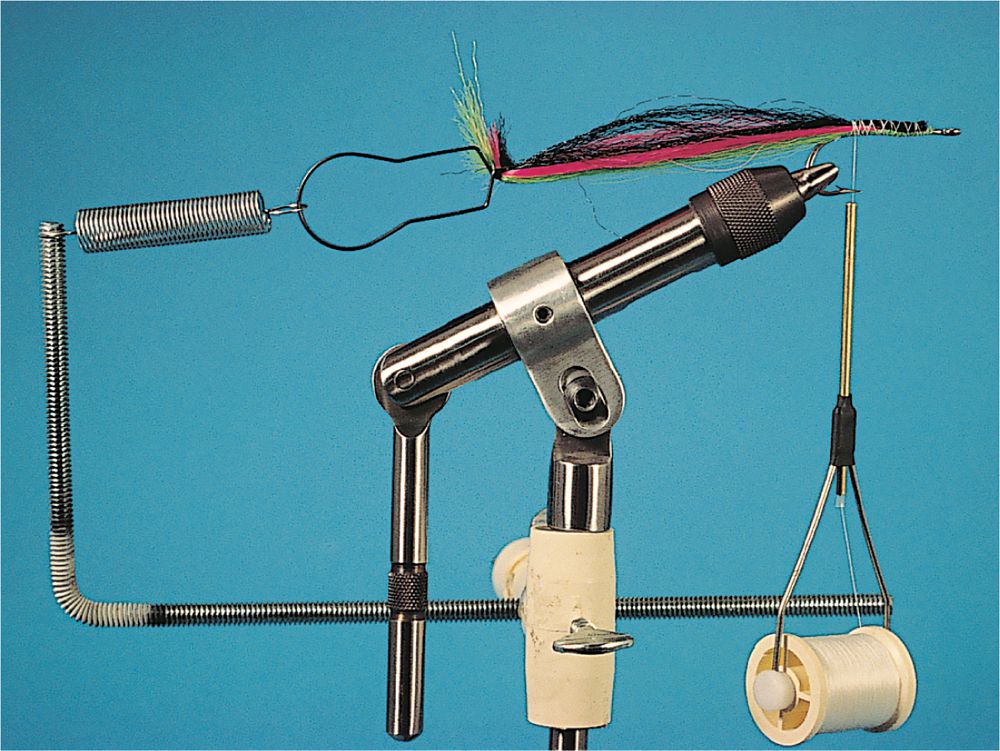
Bead-chain leeches, some ‘cuda flies, long pike flies, and tandem-rigged flies require a horizontal gallows tool, or some way to hold the tail of the fly so that it does not interfere with tying the rest of the fly. To do this, set up a clamp to hold a vertical post to the left of your fly-tying vise. Run a tension spring (available from hardware or home supply stores) from the vertical post to a hook or hackle pliers.
One easy way to hold bead-chain body out of the way when making bead-chain leeches is to bend a paper clip into a sharp “J” shape at one end and an eye (like a large hook eye) at the other end. Use the “J” to hook onto the last bead of the bead chain and attach the other end of this hook to the spring of the horizontal gallows tool. This allows holding the bead chain out of the way for tying materials to it to tie a weighted leech.
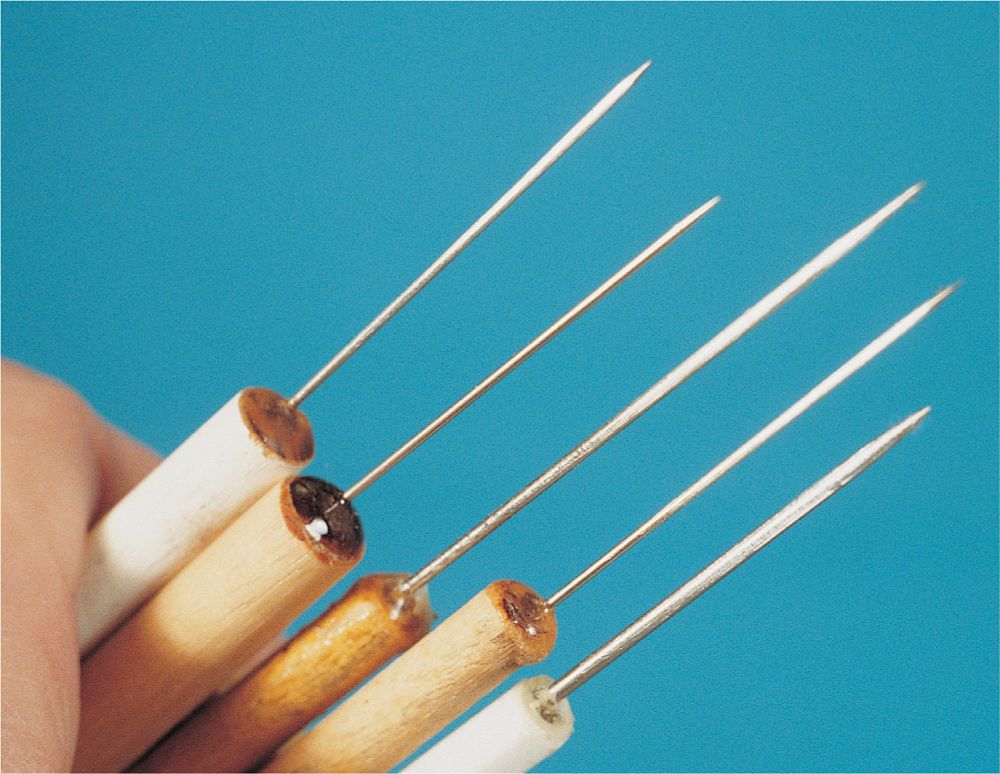
Get a large sewing needle (a darning needle is a good size), drill a tiny hole straight into the end of a 4-inch (10-cm) length of 1/2-inch-diameter (1.3-cm) dowel, and epoxy the eye end of the needle into the hole. Make a number of bodkins this way, since different sizes are handy for different tasks. Large, coarse bodkins are ideal for making pilot holes in foam bugs for inserting the hook; medium bodkins are best for placing head cement precisely on the head of a small fly; and small bodkins are good for separating fibers in wet fly and dry fly hackle.
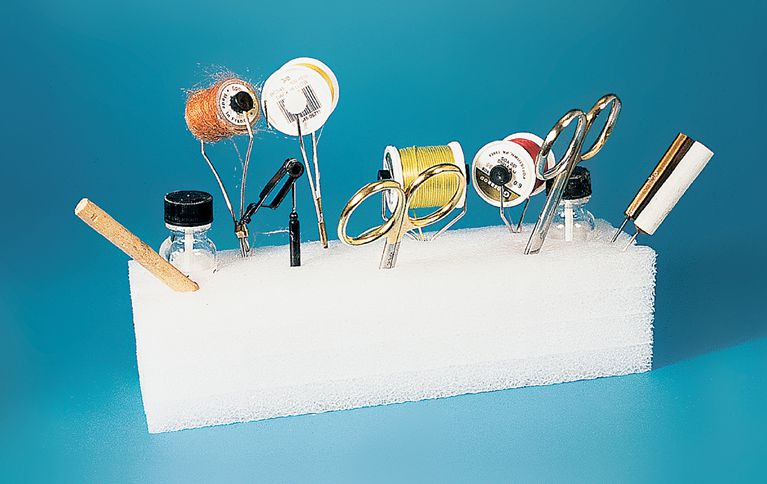
It won’t be neat, but you can make a simple rack for your fly-tying tools from a scrap block of shipping foam. Use a pencil to punch holes for bodkins, bobbins, whip finishers, dubbing spinners, scissors, etc. Use a piece of pipe or tubing to cut and make blind holes for stackers, bottles of head cement, and similar items.
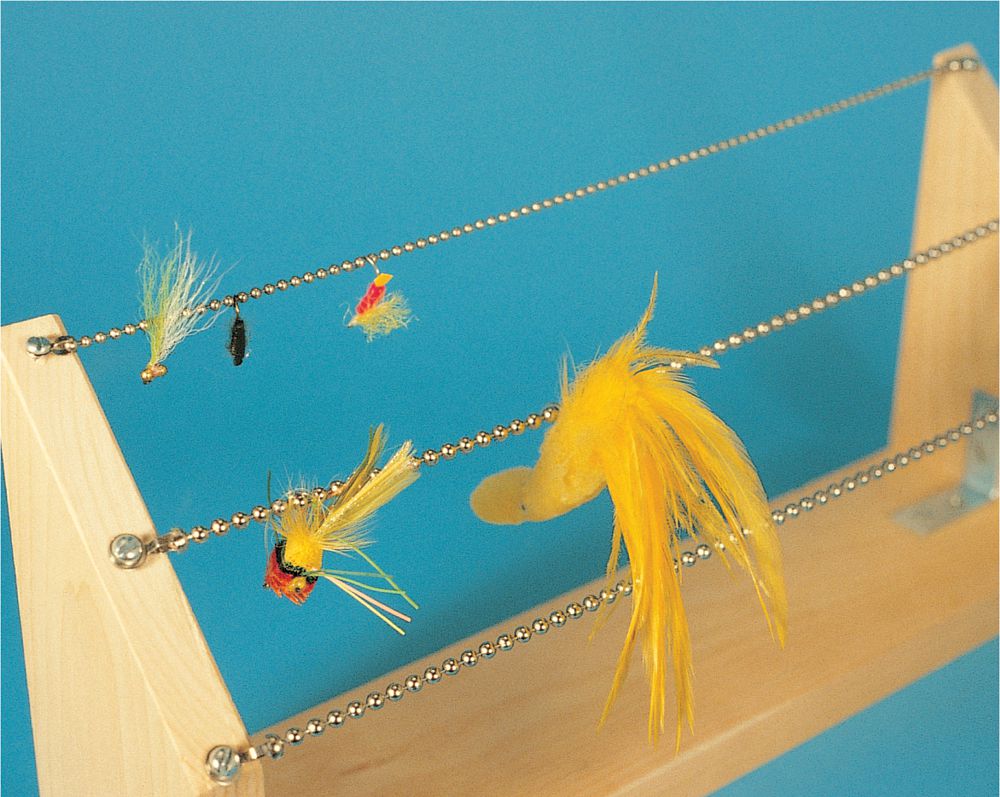
To make a rack for hanging flies while head cement cures or while paint on bugs dries, make a wide U-shaped wood bracket for a base and sides, and then string bead chain across the top, stapled to the top of the side supports. The bead chain keeps the flies from sliding together and being ruined, even if there is a little slack in the chain. Several sizes of bead chain are available, depending on the size of the fly that you need to hang. Bead chain is readily available through hardware and home supplies stores.
Stick pins—headfirst—into a wood board (drill a hole for each pin in a row) to make a rack that allows you to hang flies by the hook eye instead of the bend. This prevents head cement from clogging up the eye of the hook.
The best way to do this is to drill tiny holes in the board, add a drop of glue to each hole, and insert the head of the pin. Bend the pins into a hook shape so that the fly head does not glue to the board holding the pins. Place the board on a stand about 6 inches (15.2 cm) high, so that the flies can hang straight down.
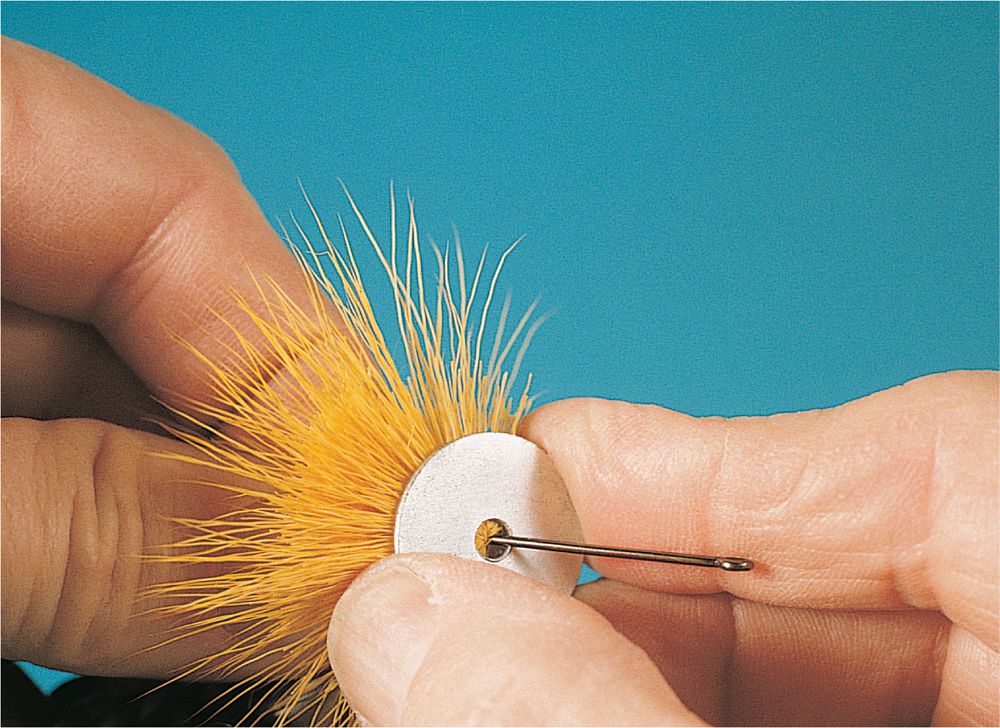
A fender washer is a good tool to use as a hair packer for pushing spun deer hair when making deer-hair bass bugs. These are large-diameter washers with small holes. Most external diameters are from about 1 to 11/2 inches (2.5 to 3.8 cm). The inside diameter of the holes start around 1/8 inch (3 mm). Get several of the smallest sizes to fit over different-size hook eyes. These are readily available from any good hardware store.
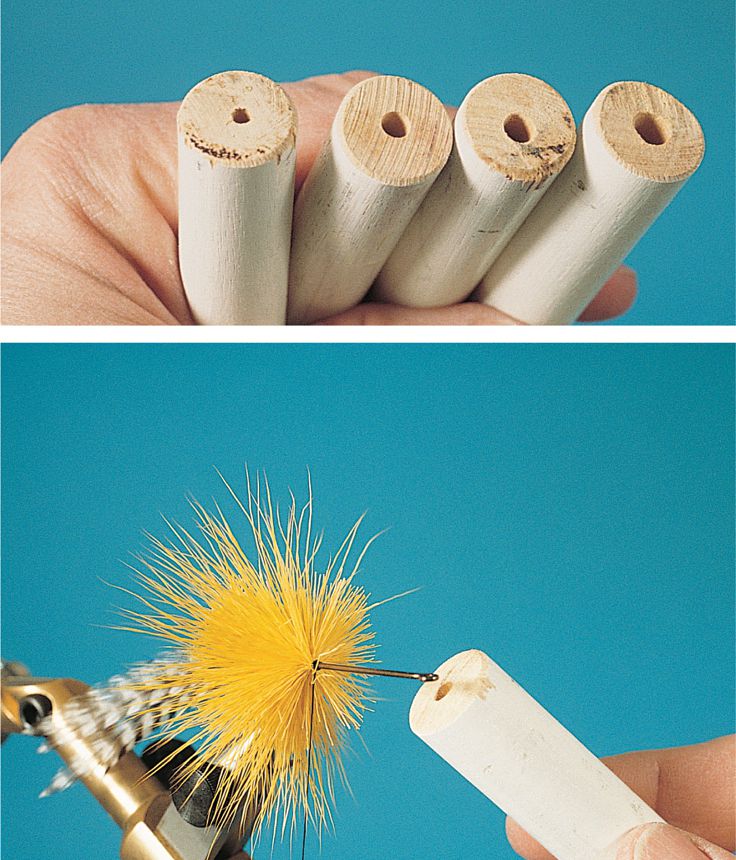
Another easy way to make a hair packer is to cut 3/4-inch-diameter (1.9-cm) dowels into 4-inch (10.2-cm) lengths, then drill straight into the end of the dowel. Make several, with holes ranging from about 1/16- to 1/4-inch (2- to 6-mm) diameter, to fit over the eyes of hooks on which you tie. Drill the hole deep so that you can slide it over any size hook shank. The dowel is easy to hold while pushing it over a hook eye to compact the hair on a bug.
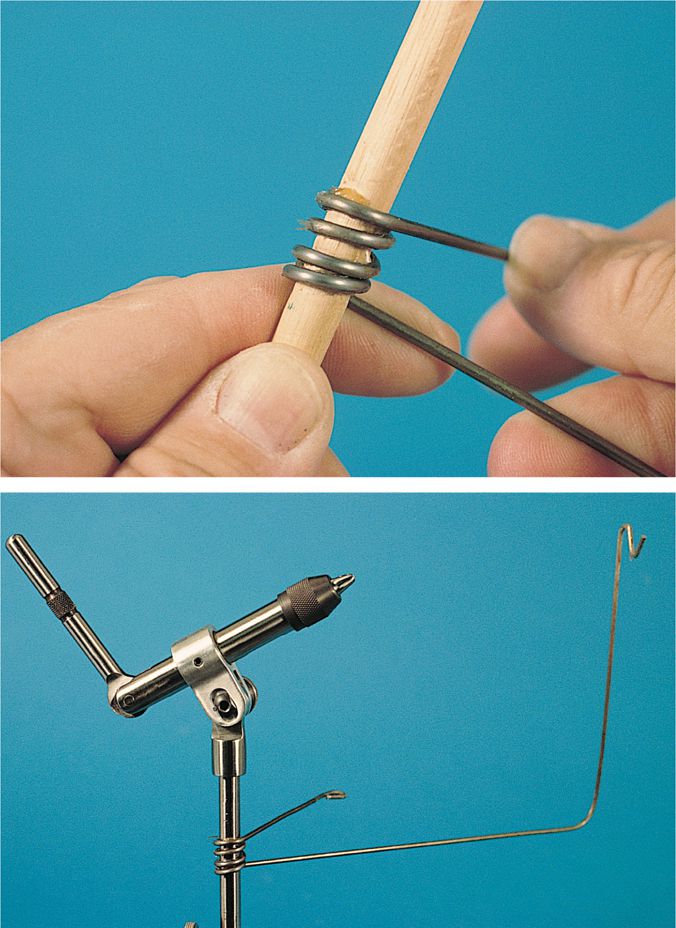
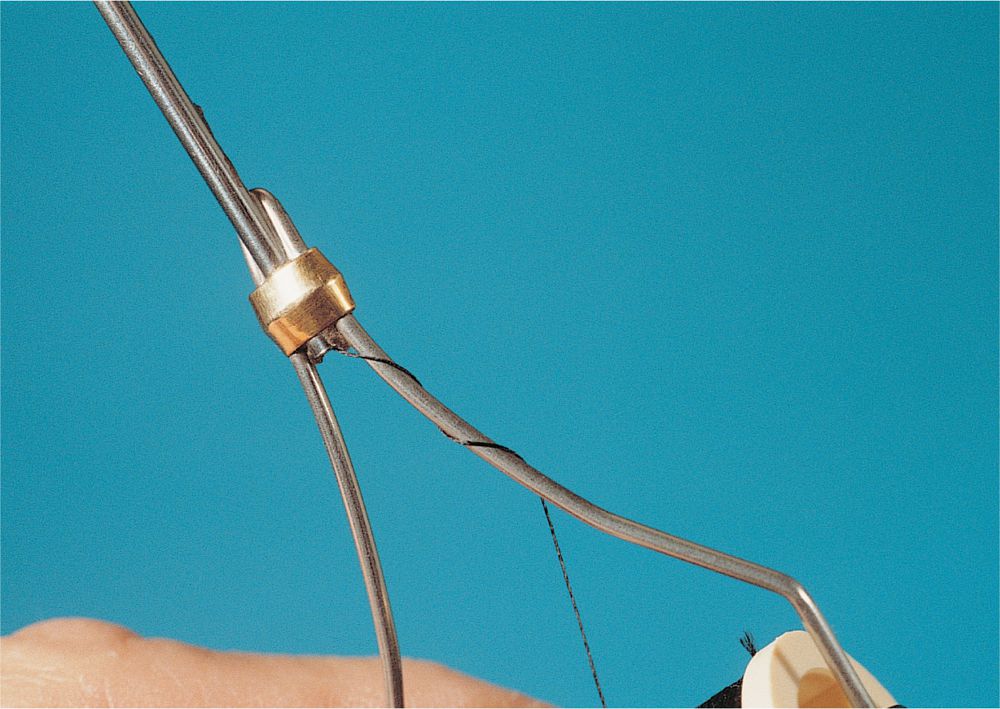
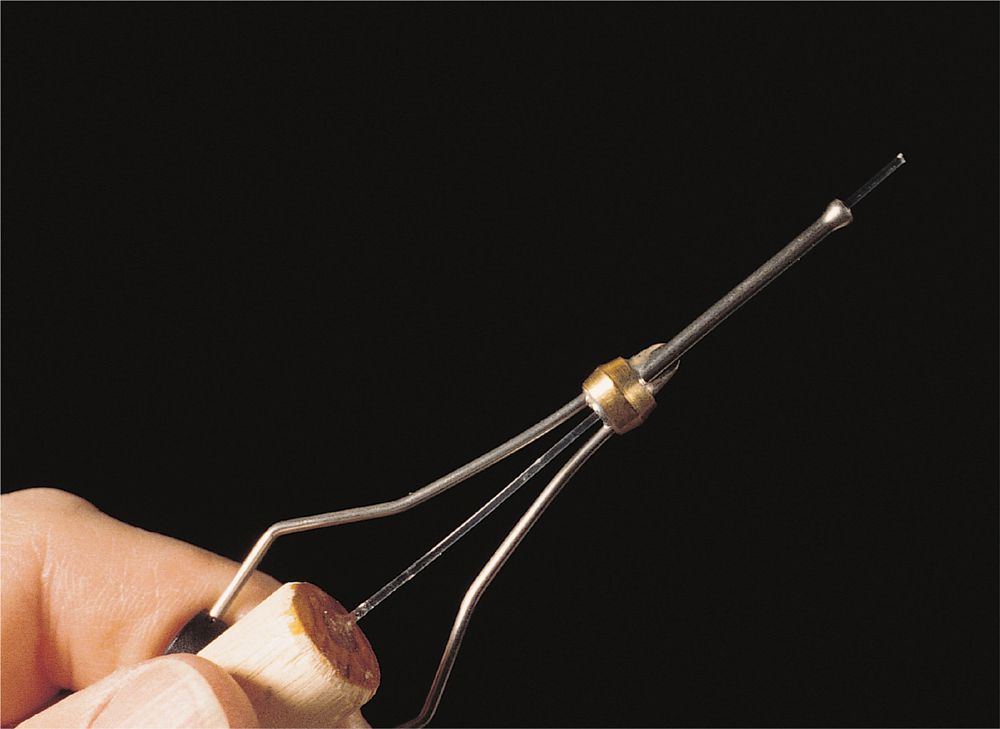
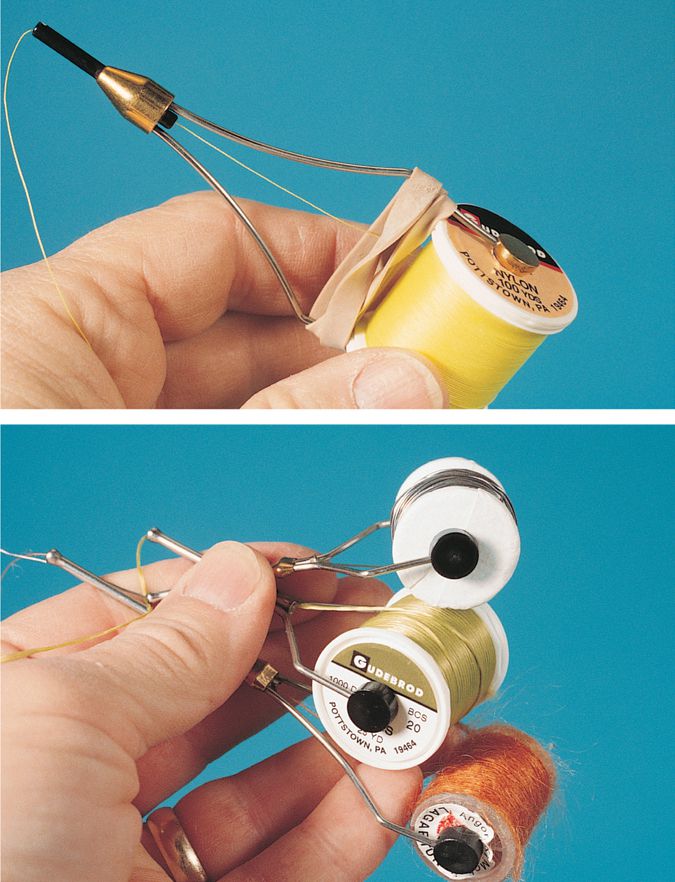
Sometimes it helps to have a bobbin rest by which you can extend your thread or bobbin to the side of the vise to complete certain tying operations. You can buy these or you can make your own temporary rest with a length of coat-hanger wire. First untwist and straighten the coat hanger. Then bend one end in a spiral several times around the post of your fly-tying vise.
Remove the coat-hanger wire and bend the end of the last coil into a slightly tighter wrap that “grips” the post. Re-attach the coil to the post, with the long end of the wire at the top. Then bend this out to the side, make a second right-angle vertical bend, and make any small U or V shape bends at the end with pliers to hold the thread or bobbin. Use wire cutters (wear safety glasses) to remove any excess wire.
The result is a simple, flexible rest that swings out to the side to hold your thread and bobbin. You can swing it back out of the way on the vise or remove it at any time. And the price is right.
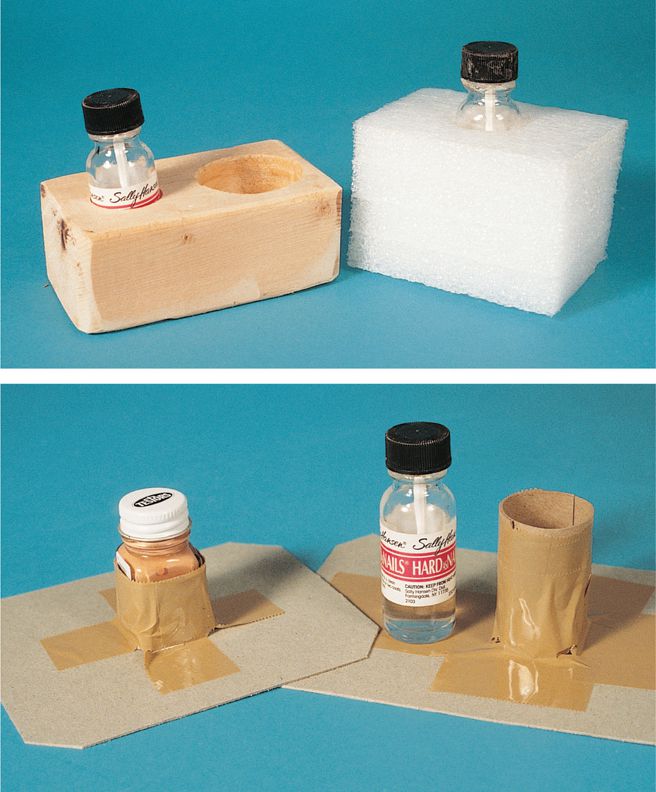
It is not uncommon to spill head cement or other bottled cements and finishes that can ruin flies and materials and even a workbench surface. To prevent this, use a small block of wood or foam shipping material with a hole cut to hold a bottle. For round bottles such as nail polish, use a spade bit to drill almost through a small block of wood for a hole sized to fit the bottle. You can use a small pipe to cut partly through a piece of shipping foam to accomplish the same thing.
Another way to prevent spills is to place your bottle in the center of a 4x4-inch board or cardboard, and use masking, duct, or shipping tape to secure the bottle to this base. If you plan to remove and replace the bottle, wrap a strip of cardboard around the chosen bottle, tape the strip together, and then tape it to the base.
Dubbing teasers fluff out dubbing to make any fly look more lifelike. To make simple dubbing teasers, take an old toothbrush and with a razor blade cut the bristles to about 1/8 to 1/4 inch long. These shorter, stiffer bristles make it easy to comb out the body or a yarn or dubbing fly.
Another way to make a simple dubbing teaser is to glue a strip of the “hook” side of a hook-and-loop fastener to a popsicle stick. The hooks on this part of the tool make it easy to comb out the fibers or any yarn or dubbing fly.
An easy way to mix a large amount of dubbing material is to use two small, fine-tooth dog combs to work the material back and forth to mix different materials. Add a little of the dubbing material at a time and mix the two or more colors and materials back and forth until there seems to be a complete homogenized mix of color and fiber.
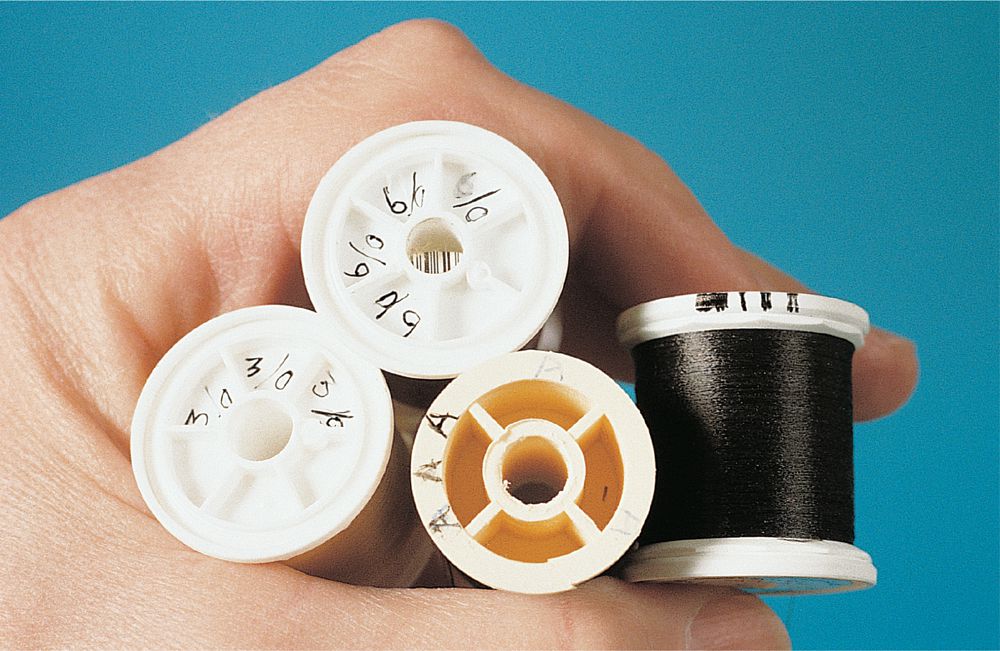
There are several ways to mark and keep track of thread bobbins used when tying flies. One method is to use a fine, felt-tip permanent pen to carefully write the thread size on the edge or rim of the spool. If the width of the spool edge is not wide enough to write the size (3/0, 5/0, 4/0, etc.), you can use the fly line designation of using a narrow mark for “1” and a wide mark for “5.” Thus, three straight marks or “III” can indicate a 3/0, and so forth.
With a computer, you can set the type to the smallest size and key in the thread sizes or other thread designations, which can be printed, cut out, and glued to the center shaft of the bobbin for that size thread.
Another way to mark thread sizes is to write the thread size on a small self-stick label and attach the label to one arm of the bobbin.
Lastly, you can use a fine felt-tip pen to write the size of the thread on a small plastic washer and slip the washer onto the one arm of the bobbin before adding the thread spool.
To create more tension to thread coming off of the spool when tying flies, try wrapping the thread once or twice around one arm of the bobbin to create more friction on the thread. This works best on bobbins with long side arms.
Another way to create more thread pressure is to use a bobbin on which you can place several wraps of a rubber band around the legs to press in the legs holding the spool.
Thread bobbins can be used for more purposes than just holding thread. They are also ideal for holding small spools or ribbon, floss, yarn, various types of wire, lead for weighting flies, chenille, etc. Bobbins make it easy to wind these materials onto a fly with no waste of materials.
Run heavy mono through the shaft or tube of a bobbin to push out collected wax residue that accumulates when using pre-waxed thread. 50- to 100-pound mono (22.7- to 45.4-kg) works well, as do some of the sizes of the Weed Wacker–style of weed cutters.
Push the mono through, remove the wax from the end, and then remove the mono. To make a permanent tool for this, glue one end of the heavy mono into a tiny hole drilled into the end of a 4-inch (10-cm) length of 1/2- to 3/4-inch (12.7- to 19-mm) dowel. Bright-colored Weed Wacker nylon shows up distinctly on your tying bench.
To use nail polish to seal the head or thread wraps on a fly, first trim the brush in the bottle cap. To do this, remove the brush and wipe it clean. Then use scissors to cut upward into the brush at an angle to taper and thin the brush end. Be sure to clean your scissors after doing this trick.
To keep a bodkin from stabbing you, stick it in a small bottle cork when not in use or stick it into a foam tool rack. If your tool rack is made of hard wood or plastic, glue or tape a section of foam to one side or the back to store bodkins.
Various types of racks are available for stacking dispenser boxes of dubbing, stranded materials, etc. These make it easy to have a lot of materials readily available for tying different flies, while taking up little bench space.
One main supplier of these items is Spirit River, whose products are available through fly shops and catalogs. They also make racks to hold a lot of these boxes in a vertical stack or on a rotary file system. You can also make your own racks from scrap wood or lengths of aluminum angle.
One way to thoroughly mix various furs and synthetic materials for dubbing is to use a mini-blender, like a coffee grinder. Beware that sometimes the fur floats up in the blender without completely mixing.
To solve this problem, make a “lid” from a plastic food container lid that fits snugly into the blender opening. Cut this plastic to size and then add a handle with a bolt and nut through an empty thread spool and a hole in the lid. Use this to push the material down to get it mixed properly. Take care that you do not overmix, which will cause knots and tangles.
Save those snap-cap lids that come on a lot of condiment bottles and jars, such as ketchup, mustard, mayonnaise, or hot sauce. Also save small bottles, such as the short and squat screw-lid spice bottles. When both are empty, match the snap-cap lids with the small jars or bottles. Clean both and use the bottles for head cement and other liquid products that you use for fly tying.
The snap-cap makes it easy to open by snapping the lid back and inserting a bodkin to remove a small drop of head cement. Don’t store a lot of head cement this way, since there is still some evaporation of solvent through these caps. In time, evaporation will cause the head cement to thicken.
If you are short of dubbing wax or want to try something different, use some of the warm-weather (soft) ski wax. Make sure that it is room temperature and add it to the tying thread, loop, or dubbing strand to hold the dubbing material prior to spinning it in place and then wrapping it on the hook shank.
To create the mottled appearance of nymphs, use a light-colored body of wool, yarn, dubbing, EZ-Dub, or similar body materials, and mark as desired with an appropriate color felt-tip marker. You can get felt-tip markers in various tip sizes from art supply stores. Colors to check out include olive, dark olive, brown, tan, gray, light gray, black, dark gray, wine, and dark green.
Before trying this on a just-completed nymph, try the marker on a piece of scrap material to check how it looks and also the degree of bleeding that occurs. Often some bleeding blurs edges and makes for a more natural-looking nymph.
Most baitfish for warm-water and saltwater species have unique markings. Yellow perch and bluegill have vertical bars; mackerel have spots and undulated markings on their backs; pinfish, striped killifish, Atlantic, and chub mackerel have thin vertical bars; sardines have a longitudinal line of dots; juvenile shad have a longitudinal line of large dots; and tomcod, toadfish, and sculpin have mottled sides.
You can easily duplicate these on simple flies by using light-colored soft materials such as Aqua Fiber, Neer Hair, and similar materials. Mark these flies with felt-tip markers to add the necessary lines, dots, stripes, and mottling. Tie these flies in the appropriate background or belly color, and then use permanent felt-tip markers of the right color to add the stripes, spots, dots, and mottled dark areas.
To do this, finish tying the necessary flies, then lay each on a sheet of cardboard or white paper, and mark each by patting the side of the fly with the felt-tip marker. Next, turn the fly over and repeat with similar markings on the opposite side. Make sure that you do not soil the finished side with felt-tip marker ink on the paper that transfers to the fly. Change the paper background often to avoid this problem or work on a clean section of paper each time.
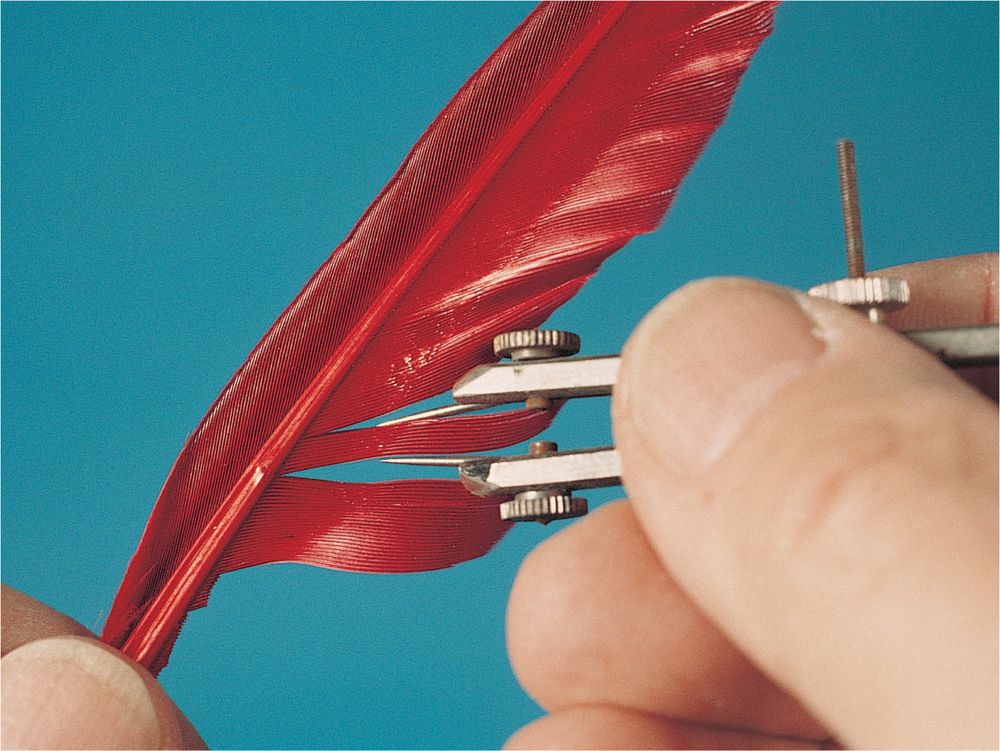
If tying traditional dry flies or wet flies where you are using barbs from duck-wing quills for the fly wings, there is an easy way to get equal wings.
Use a pair of compass dividers set to the distance for the width of the wing. For this, you want the type of divider that has two points, not one point with the other a pencil or pen nib. The two points allow separating the barbs to get the exact number for each wing.
Realize that you have to use paired quills for this, and select the same width fly wing area from each part of the two quills. Adjust the divider points to separate the quill fibers from the rest of the quill and then cut off the portion desired. If you can’t find, or do not want to buy, these compass dividers, you can do the same thing with a paper clip or stiff wire, bent straight and then folded in half to place the two ends at the distance required to measure the wings.
If you change the wing size, you have to slightly re-bend the wire to reflect this change.
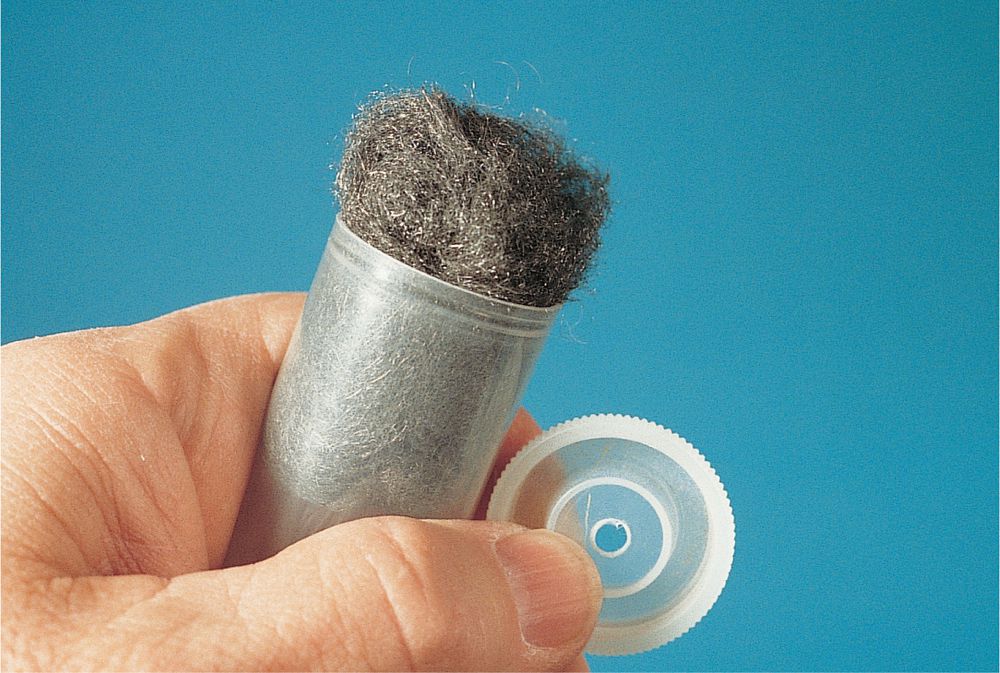
Bodkins are great tools for all sorts of fly-tying tasks. You can clear the head cement out of a hook eye, pull matted hackle out from a thread wrap, fussy-out a body material, add cement to a fly head, pull up a whip-finish without tangles. The only problem is that cement, glue, and goo can clog bodkins. To avoid this, drill a 1/4-inch (6-mm) hole in the top of an empty film canister and fill it with steel wool. Put the cap back on and then poke the bodkin several times through the hole into the steel wool to clean it of cement.