If making cork, balsa, or foam poppers or sliders, choose bodies that have a diameter approximately equal to the gap of the hook used. This creates the best proportion and balance on the finished bug. In some cases, you might even want to make bugs that have a body smaller than the gap of the hook, such as making bugs specifically for panfish and bluegills. These fish have very small mouths, so the smallest possible body that will still wake or pop, yet tied on a hook that hooks the fish, makes it easier to unhook the fish.
One way to shape foam bodies is to use a flame (lighter or grill-starter) to slightly heat the foam, and then roll it with your fingers (be careful to not burn yourself) to form the foam into a tapered or rounded shape. This works best with lightweight foam bodies or pre-cut foams used to make beetles, ants, jassids, hoppers, crickets, termites, and other terrestrial fly patterns. This tapering and rounding makes a more natural body appearance in any fly.
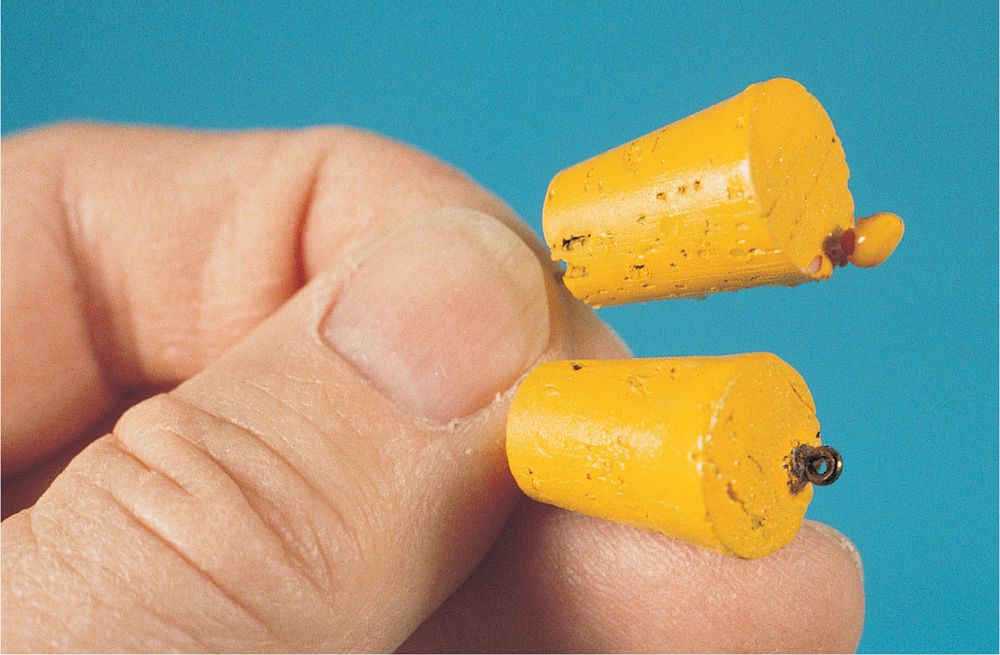
To hide the wrap of tail material on a foam bug body, use a triangle tapered cutter in a Dremel-type tool to make a tapered opening in the rear of the bug. Tie the tail, flash, collar, etc., on the hook so that the bug body buries these wraps.
Soak the hook and the tail thread wrap with CA glue (cyanoacrylate cement) and force the hook into the pilot hole in the bug until seated properly. Done properly, the foam body completely hides the wrap used to hold the tail.
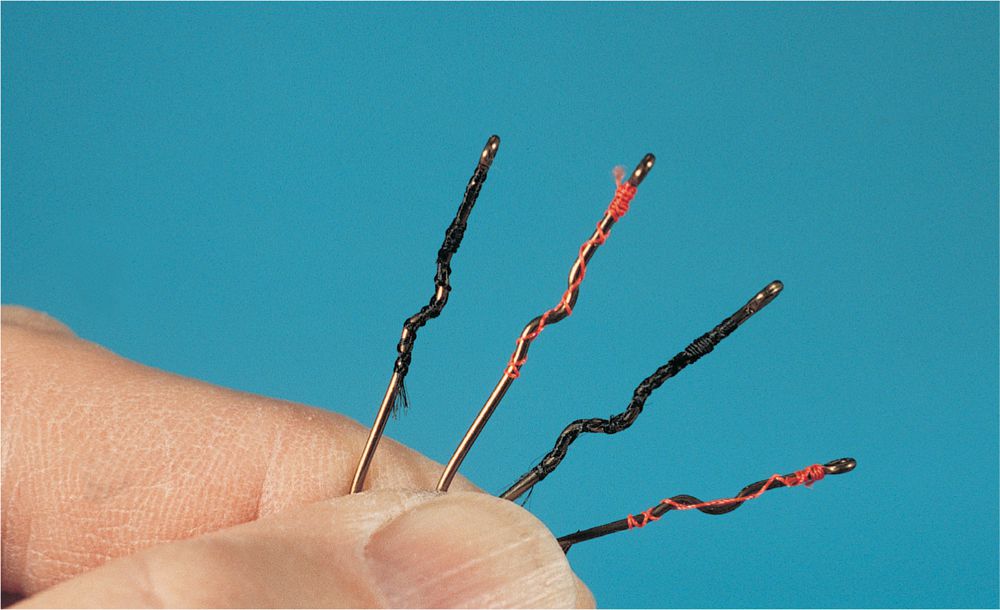
When tying bass bugs, the simplest way to make a tight glue bond of the hook into the cork or balsa body is to wrap the hook shank with heavy, coarse thread. Use size “D,” “E,” or “EE” thread (used for rod wrapping). Spiral wrap the thread up and down the hook shank and tie off with a whip finish. This is important even when using kink- or hump-shank hooks designed for bass bugs.
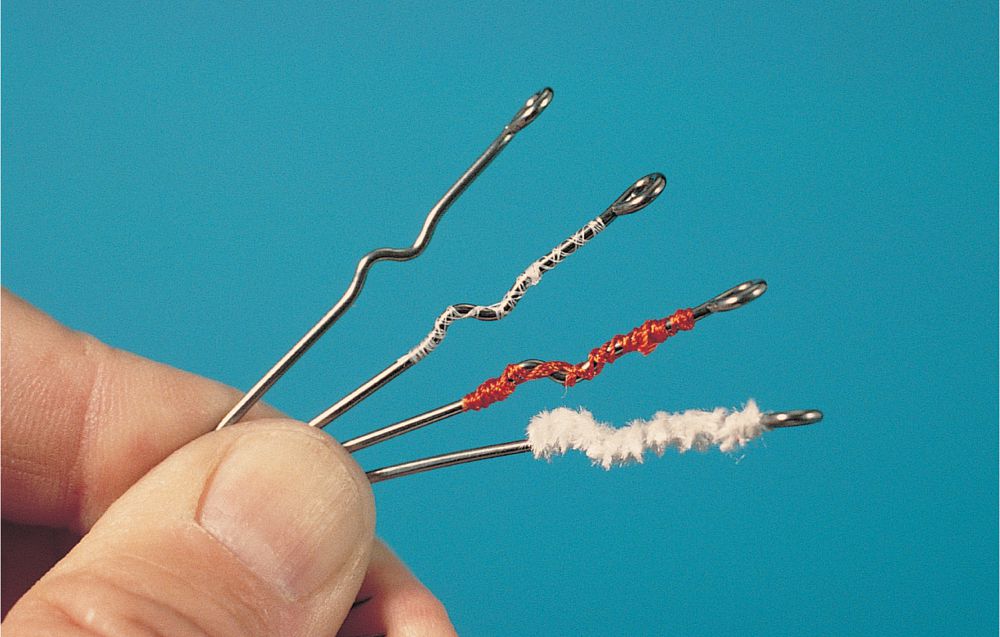
For the strongest bond of a hook in a cork or balsa body, first tie on regular fly-tying thread and then tie on and wrap the hook with chenille or yarn. Tie off with the thread.
Make a large slot in the cork or balsa body, and then soak the chenille/yarn-wrapped hook with five-minute epoxy, add some epoxy in the wide slot, and insert the hook. Add a little more epoxy on top of this and remove any epoxy that seeps from the two ends.
Tests have shown that this is the strongest of all possible methods of gluing a hook into a cork or balsa body, even though it takes a little more time to complete. This works well for both plain- and hump-shank hooks.
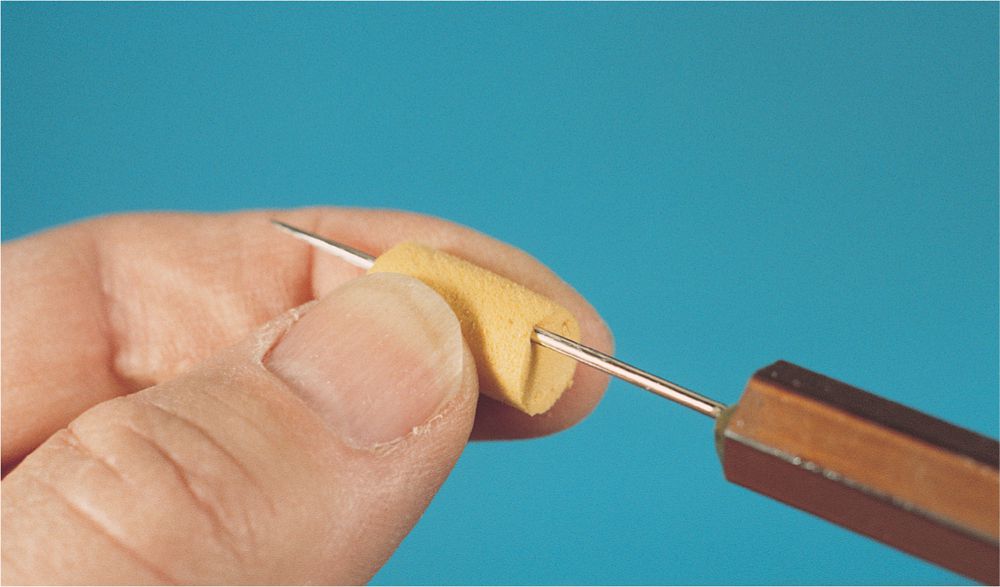
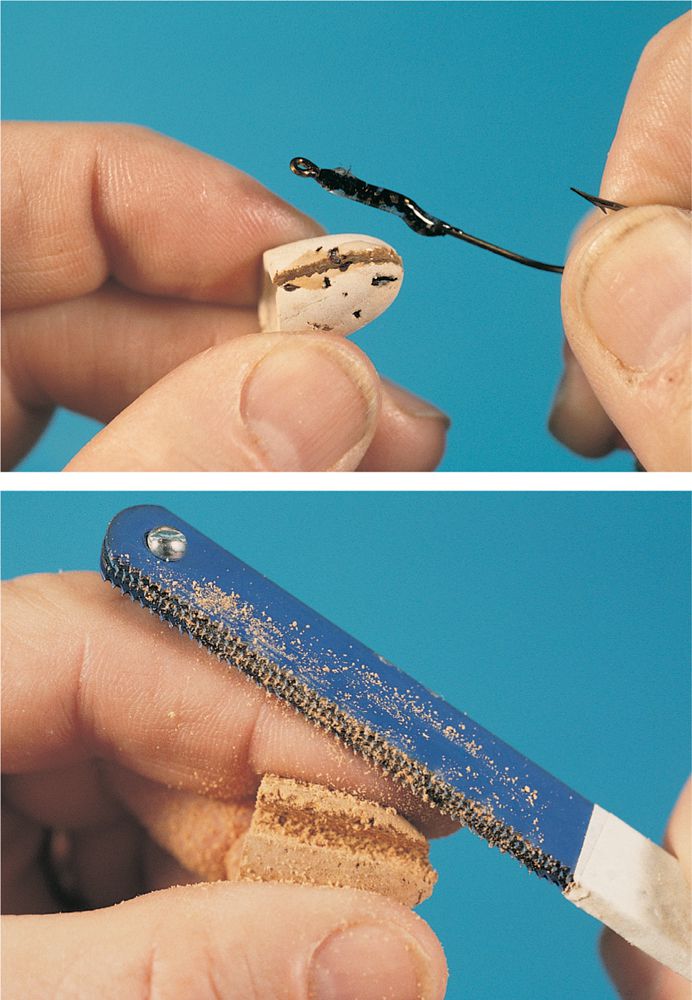
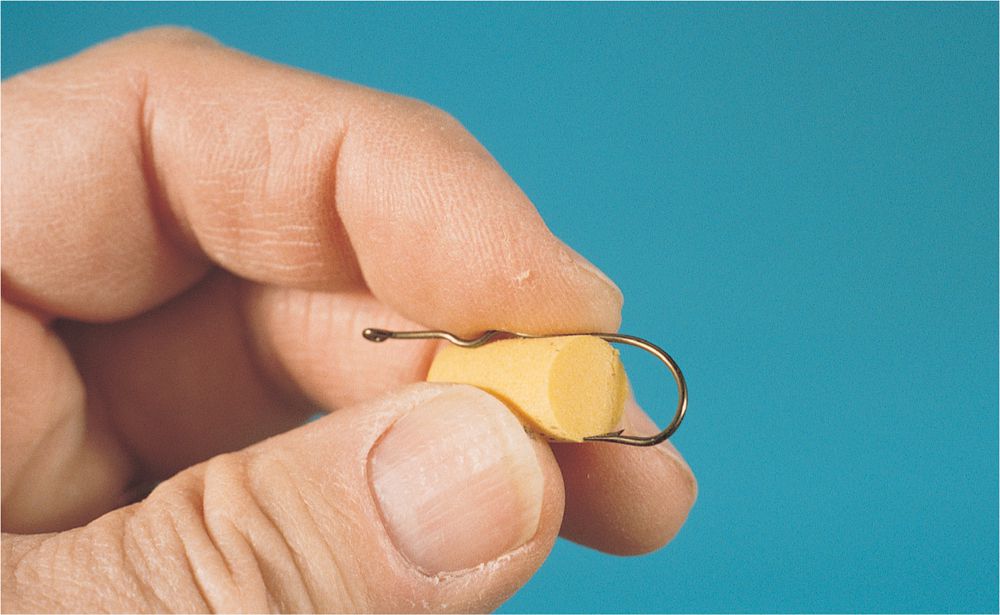
You do not need to make a slot to hold a hook in a closed-cell foam bug body. To secure the hook, use a bodkin to make a hole through the belly of the bug body to serve as a pilot hole for the hook shank. Make the hole as close to the skin as possible to preserve the hook gap of the fly.
To glue a hook shank into a foam bug body, spiral wrap the hook shank with thread and tie off. Coat the hook shank with CA glue (cyanoacrylate cement) and force the hook, eye first, through the pilot hole previously formed and into the rear of the bug. Align the hook with the bug body before the glue sets up.
The best way to make a slot in a cork popper body is with a hacksaw blade—not a knife or razor. Use a fine-tooth hacksaw blade to cut a blade-width slot into which you can glue (with waterproof cement) a thread-wrapped popper hook shank. This leaves adequate room for gluing, does not strain the cut slot, and makes for a more durable popper.
For even more strength in a popper, tape together several (three or four) fine-tooth hacksaw blades and cut a wide slot in the belly of the popper. Then wrap the popper hook with thread and tie in a wrap of chenille. Tie off and soak the chenille wrap with glue, and then glue and seal it into the wide body slot. Tests have shown that this is the strongest and most durable of the possible bonds of a hook into a cork body.
The best way to get a good, smooth coat of paint on cork or balsa bass bugs is to spray them using an aerosol spray can or a professional-style airbrush. However, this often sprays paint on the hook as well. To prevent this, you can “mask” the hook and hook shank area with a fold of cardboard that fits around the hook shank as you hold it.
If you wish to paint bug bodies in an assembly line, you can use a long strip of corrugated cardboard and slip a number of hook shanks into the corrugated cardboard where you can spray them all at once. You can also spray them from both sides with the hook point and shank completely protected.
Another option is to make up a slotted corkboard to hold the hook shanks for repeated assembly-line operations.
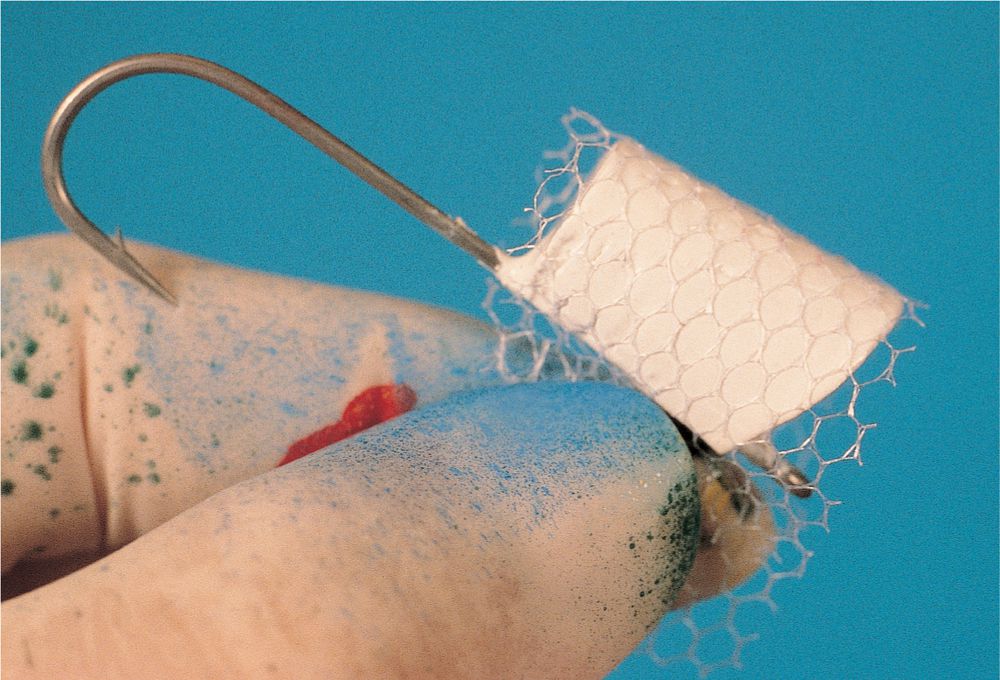
An ideal frame for holding the tulle or scale netting for spraying scales on bugs is one of the spray frames used to hold needlepoint work. These are available from craft and sewing stores in a number of sizes and shapes.
If gluing or painting cork, foam, or other materials to a hook shank to which you have already added rubber legs, do not let the paint or glue touch the legs. Often synthetic legs curl and bend from contact with liquid paint or glue, making them unnatural or unusable afterward.
When spray painting cork- or balsa-body bugs, use an inexpensive pair of needle-nose pliers to hold the hook. Best are long needle-nose pliers to hold the bug by the hook and allow spray painting without the risk of painting your hand. You can also use wide-jaw pliers to hold bugs by the hook, since the wider jaws help mask the hook and protect it from paint.
An alternative way to handle cork- and balsa-body bugs for spray painting is to wear inexpensive latex gloves. These are disposable and available in packs of ten or a hundred from discount or drug stores. Hold the hook while spraying to prevent getting paint on your skin and discard the gloves after each painting session.
When painting cork- or balsa-body bass bugs, it is always best to use a coat of primer and then two coats of white paint. This is absolutely necessary if painting a top or final coat that is pale, pastel, or fluorescent. Without the undercoat of white, lighter colors will appear muddy, dull, and unnatural.
Want scales painted onto your cork or balsa bug body? This is easy. Get some scale netting from a fly or tackle shop or buy tulle (a type of netting material) from a craft or fabric store.
First paint a base coat of the scale color desired. Then stretch and hold the netting over the bug, and spray a second time with a contrasting color of paint. The result is a scale finish.
If you want light scales, use a light or white base coat and then spray through the netting with a dark color. For dark scales, use a dark undercoat and spray through the netting with a light or white aerosol paint.
Since most bugs and lures are spray painted with scale finishes only on the sides (not the top or belly), the best way to do this is to mount the scale netting in a frame and hold it tight against the bug body when spraying.
When tying foam terrestrials, the color of the foam may not matter much. A trout or panfish looking at a bug from underneath almost always sees the bug in silhouette. Up close, they can distinguish colors if they take time to closely examine a bug. It is best to keep foam bugs to basic colors—black, white, yellow, brown, and green are popular.
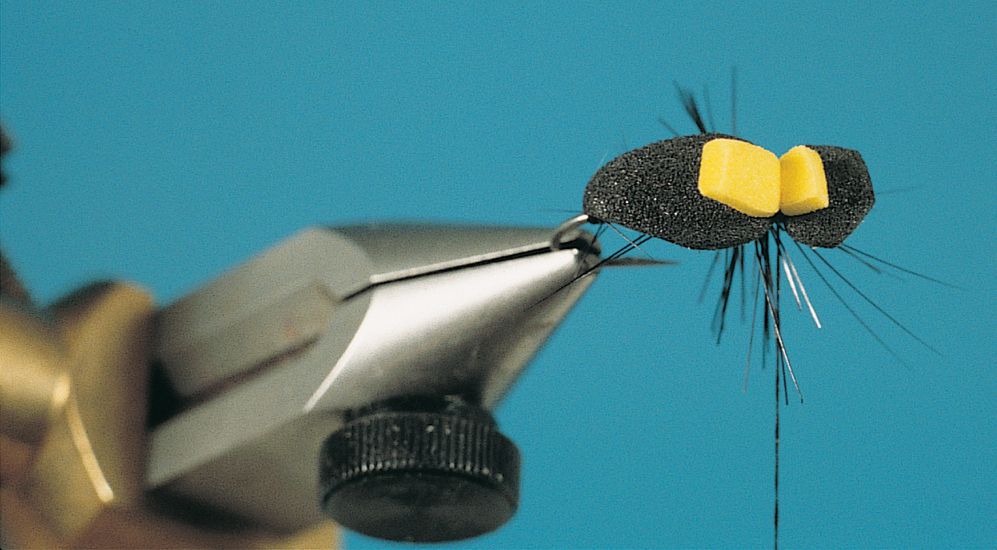
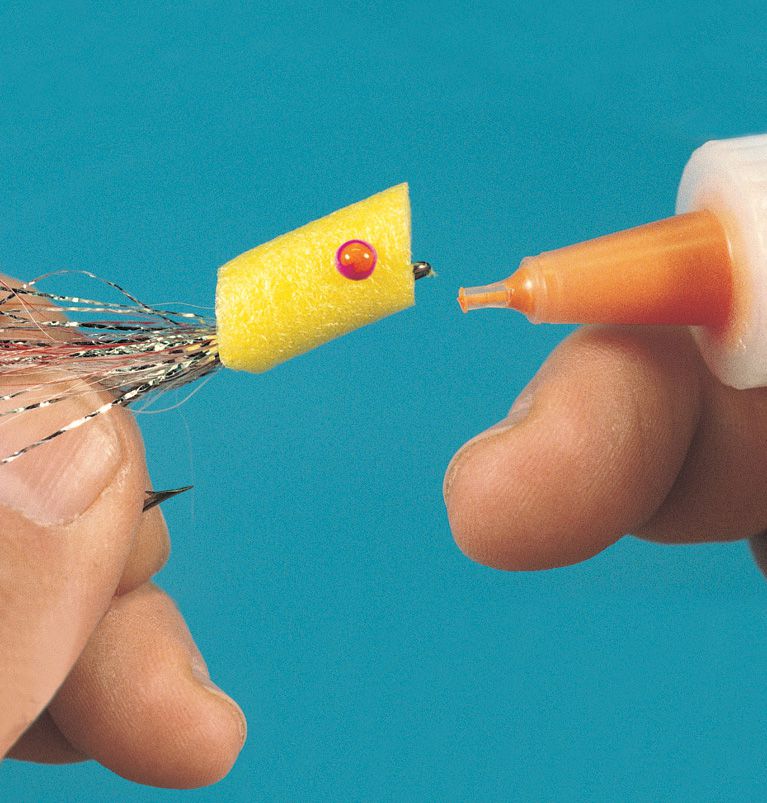
Although the color of your foam terrestrials might not make much difference to the trout or panfish, adding a square of color to the top of the foam allows you to track the fly better in rough water or where there is a lot of detritus on the surface. Consider adding a final wrap to secure a small square of bright red, orange, or yellow foam on top. The square of color does not affect your fishing, since the fish only see the underside or side of the fly, not the top.
To get the paint out of the eye of a painted bug body, use an “eye-buster” tool, designed to remove the paint from jig heads. These are available from most tackle shops.
For best results, do this shortly after the paint has cured, since it becomes harder and more difficult to remove with time. Also, the harder and older paint gets, the more likely it is to chip or flake.
If you add several coats of paint or enamel to your cork or balsa popping bugs, leave about 1/16 inch (2 mm) of bare shank in back of the eye as clearance for the paint buildup. If you seat and glue the popping cork to the hook with the head touching or right in back of the hook eye, subsequent coats of paint will clog the eye, making it impossible to clean without damaging the paint on the bug face. This 1/16-inch clearance allows for paint buildup on the face of the bug without clogging the hook eye.
You can make segmented tails of large insects, such as dragonflies, using a neat trick I first learned from creative flytier Bill Skilton. By this method, you can make segmented extended bodies or tails formed by wraps of thread around lengths of foam. This is not just spiral wrapping the thread around the body as is done on bodies formed on a hook shank.
To do this, prepare a long, thin strip of foam twice the length of the desired tail. Tie the working thread in the middle. Then fold the foam strip in half at the point where you tied in the tying thread. To make this step and following steps easy, fold the foam over a long needle placed in your fly-tying vise, with the fold/tied part next to the vise jaws. Then run the thread between the two foam strips, followed by making two wraps around both foam strips and the central hidden needle. Do this where you want the first segment.
Following this, again run the thread between the two foam strips and repeat the above at the junction of the next two segments. When you achieve the desired segmented length, pull the extended body from the needle. Remove the needle from the vise and add a hook. Tie the extended body to the hook shank. Continue the body and finish the fly. The end result is a beautiful body with clearly separated segments extending from the rear of the fly hook, as would the body on a dragonfly or damselfly.
You can make bugs by forming a “sandwich” of flat foam materials. These foam sheets are available from fly-tying shops as well as craft stores. If making sandwich bugs, glue the parts of the foam sheeting together using contact cement or a spray adhesive, such as 3M Super 77.
If you don’t like the idea of scraping or punching out paint from the eye of painted cork and balsa bugs, there is another way to solve this vexing problem. It adds another step, but many flytiers like the convenience it affords.
For this, coat the hook eye of the bug hook with wax before painting. To do this, first complete the bug body by gluing, sealing, and preparing the body for painting. Then dip only the hook eye into molten candle wax to coat the eye. Make sure that you cover only the hook eye, since you do not want wax on the cork or balsa body.
Next, paint the bug body by dipping, spraying, or brushing. The wax on the hook eye prevents any paint from adhering. You can easily scrape off any leftover paint with a fingernail. Then finish the bug by tying on the tail, collar, adding rubber legs, etc.
Another way to accomplish this is to use petroleum jelly on the eye of the hook. Test both systems first to make sure that they work with the paint formula that you are using, since different paints have different reactions with various products.
If you are tying cork bass bugs for your own use and only care about catching fish, you do not have to fill in the pits before painting them. You should still paint with primer, undercoat, and final coats, but the pits won’t bother the fish or keep them from hitting. Some very excellent fly anglers do not even paint their bugs, but only fish natural cork bodies glued on a hook and tied with simple tails.
If you wish to make cork bugs that look professional and do not have pits in them, first seal the bugs with Dap filler that is easy to wipe on with your finger. You can do this before or after you glue the bug onto the hook. It is easier after gluing, since the hook makes a little “handle” by which to hold the cork. Make sure that the body is smooth and allow the Dap to cure as per the directions before painting with a primer.