When tying on dry fly wings, tie them down with the tips facing forward. Then wrap the thread to the rear, tie on the tail and body material, and wrap the thread forward.
Wrap the body up the hook shank toward the eye of the hook, wrapping over the butt of the wings tied to the hook shank. This also builds up the body diameter slightly at this point to make a more natural tapered look.
Then wrap the thread forward, raise the wings with a bump of thread in front of the wings, and tie in the hackle.
The result makes a very lifelike look. It does not create the problems or lumpy look that would occur if tying on the wings butts forward.
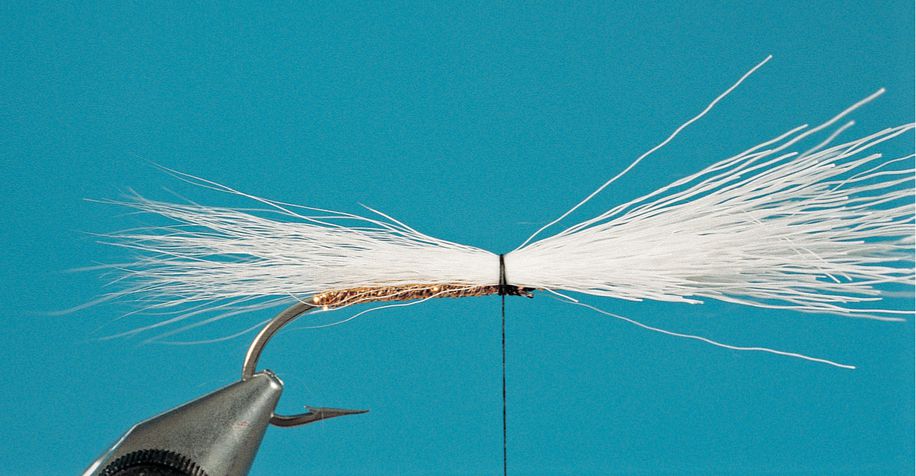
To make sure that you have even wings on flies when you make them from waterfowl wing quills, take matched sections from the longer or outside edge of each of the matched quills from the two wings. Pick the wing sections from the same part of each quill, and make sure that each wing section is the same width before joining them to the hook shank.
To protect dry fly hackle, run a few turns of working thread through the wound hackle. Work the thread in a zigzag path to prevent the thread from catching or binding down any of the hackle fibers while protecting and binding over the base of the wrapped hackle. Two or three turns of thread are about right and provide protection to keep the hackle from damage and becoming undone.
Use a bodkin to evenly separate the upright wing in a dry fly when making a divided wing. This allows you to look at the two wings and make sure that they are equal before you crisscross the thread between them to divide the wing permanently.
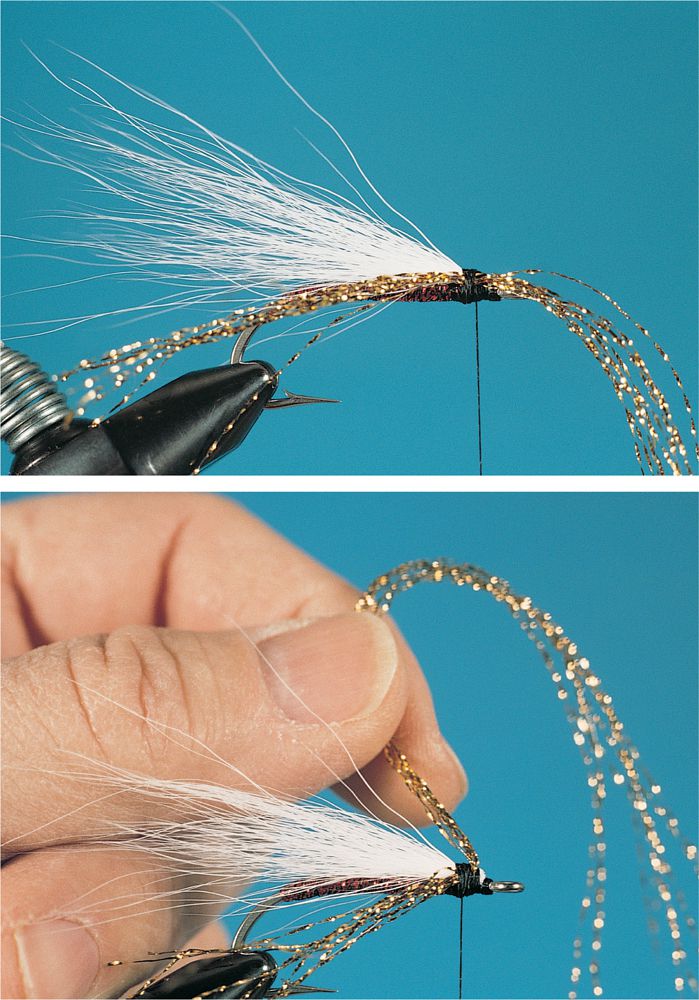
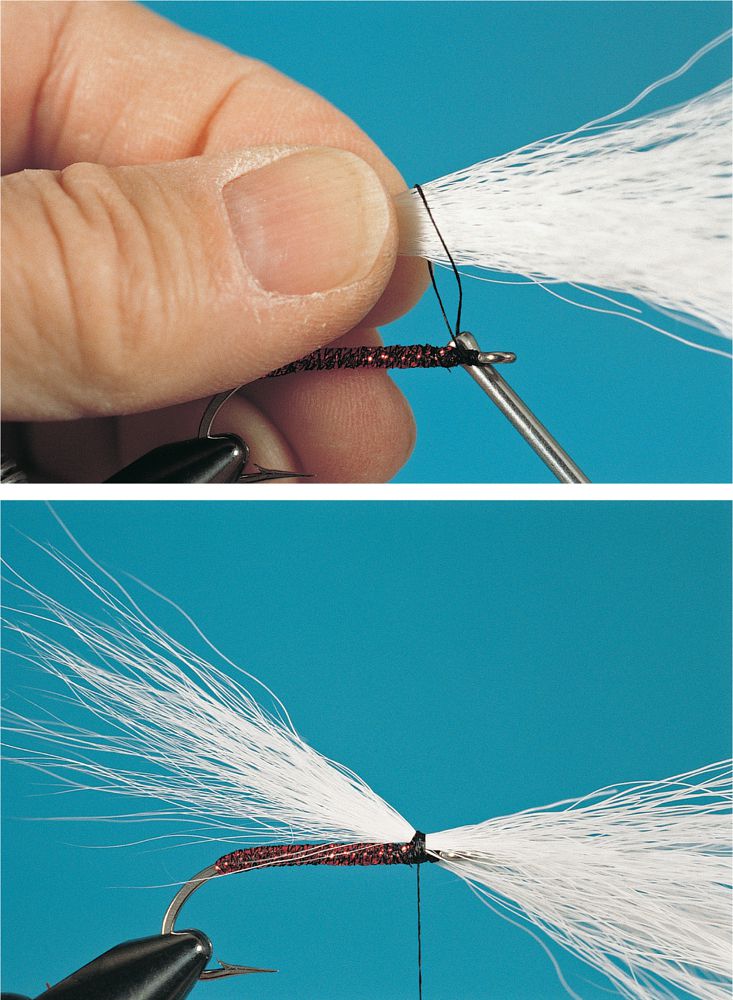
To get a streamer wing of bucktail or synthetics tied correctly to the top of the hook shank, hold the butts at an angle to and in front of the hook shank when wrapping the thread over the shank and wing.
Pulling down on the thread slides the wing up into the proper position on top of, and parallel to, the hook shank where you can secure it with subsequent wraps. The result is a properly positioned wing on top of and in line with the hook shank.
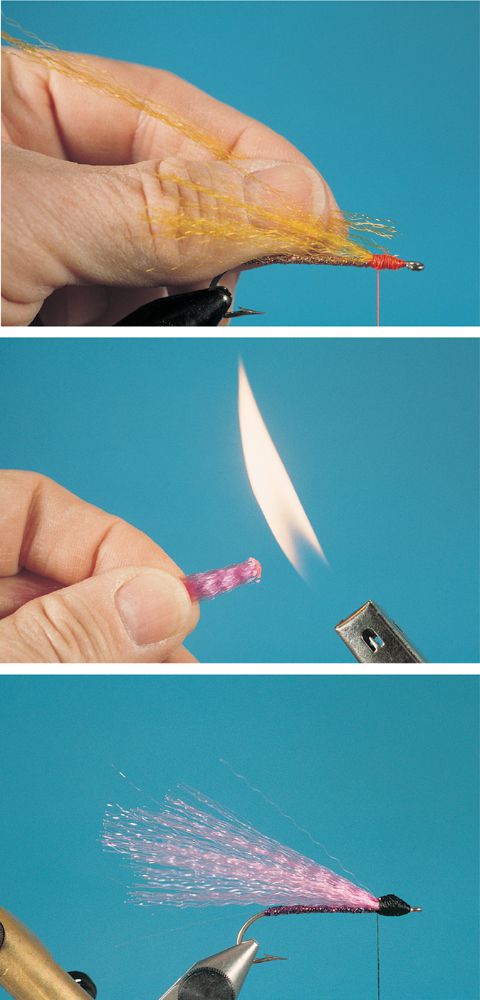
Synthetic streamer wing material is often slipperier than natural materials, making it difficult to get a good bond and secure tying. To avoid this, tie down synthetic materials in several small bundles rather than one large bundle. The result is that several wraps of thread are holding each small bundle, making for a more secure binding. You can also coat each bundle with head cement as you tie for a more permanent bond.
An alternative to the above is to tie the bundle of synthetic material down in one bunch after soaking the end to be tied in head cement or glue. By wrapping over the soaked bundle with tying thread, you both glue the synthetics together and also soak the thread to glue the synthetics to the fly hook.
A third way to secure synthetics is to lightly heat the end of the bundle with a flame. You want to just melt the strands together—not make a molten mess. Immediately tie down the bundle with thread to seal it and secure it to the hook shank. You may get a slight lump of the molten ends of the synthetics. This helps hold it in place, but it is also best to use only on larger flies.
To position a streamer wing, make two loose wraps over the wing as you hold it in place on top of the hook shank. Then pull the thread tight and straight down to secure the wing in position on top of the hook shank.
To make a streamer wing that encircles or “veils” the body, first position the wing on top of the hook shank with two or three light-pressure wraps of thread. Then use your left thumbnail to push down on the top of the wing base to spread the wing fibers around the hook shank and to veil the body. Check that the veiling is even, then wrap tightly.
To secure a streamer wing of bucktail or synthetics to the top of a hook shank and keep it in position, make a “reverse” loop wrap. To do this, bring the thread up in front of the hook shank, and then in back, up, over, and around the wing. Finish by bringing the thread in back of the hook shank (far side of the hook) and pulling tight.
This wraps like a figure-eight, or infinity sign, to secure the wing on top of the hook shank. Because of the figure-eight loop, the wing is not able to creep down onto the side of the fly and thus destroy the appearance of classic streamer flies.
Finish by making several more wraps of thread around the hook shank and base so that the wing will not twist from its position on top of the hook.
To divide upright wings when tying dry flies, use a thread harness, as I first learned from the writings of flytier Charles Meck.
For this, first tie down the wings by the butt end with the tips extending forward. Tie them to the upright position. Then take a separate length of tying thread, make a loop around the hook shank in back of the wings, and pull the ends straight up. Pull this thread harness forward and between the divided wings to separate them into two equal bunches of fibers. Pull down just forward of the wings, using enough tension to create the divided look you desire. Tie off this thread harness with the working thread.
You can also make this easier by twisting the thread harness before pulling it forward to divide the wings. This prevents an errant wing fiber from sticking straight up between the thread harness.
You can “make” your own specialty hackles using permanent felt-tip markers to color as you desire.
Today, we use a lot of plain hackle and grizzly hackle, but there are special hackles that have dark center vanes and/or dark outside fibers. You can mark plain hackles the same way, as well as to make grizzly feathers.
To do this, use a permanent felt-tip marker, a ruler, and some scrap paper. Lay each hackle that you want to mark on the paper, and lay the ruler along the part you want to mark. For the center, this would be alongside the main stem, while for the edges it would be along the edge. Then dot or pat the felt-tip maker along the area to be marked. You can’t stroke it, since this will only bend the hackle fibers.
For grizzly hackle, hold the ruler at right angles to the feather and mark each section in turn as you move the ruler up the feather. If you like, you can turn the feather over and mark in the same spots for a darker, more pronounced effect. You can do this with any light feather using any color of marker. Black, olive, and brown are the most favored.
Marabou is a great, soft attractor material for wings and tails in flies, but also difficult to handle. To make it easier to tie down, moisten the marabou slightly and then bundle the butt ends.
One way to handle the butt ends is to twist the butt end of the moistened marabou to make a tight, skinny bundle for easy tying. Don’t wet or soak it if you only want to control the marabou—adding water will rust the hook or make it difficult to handle.
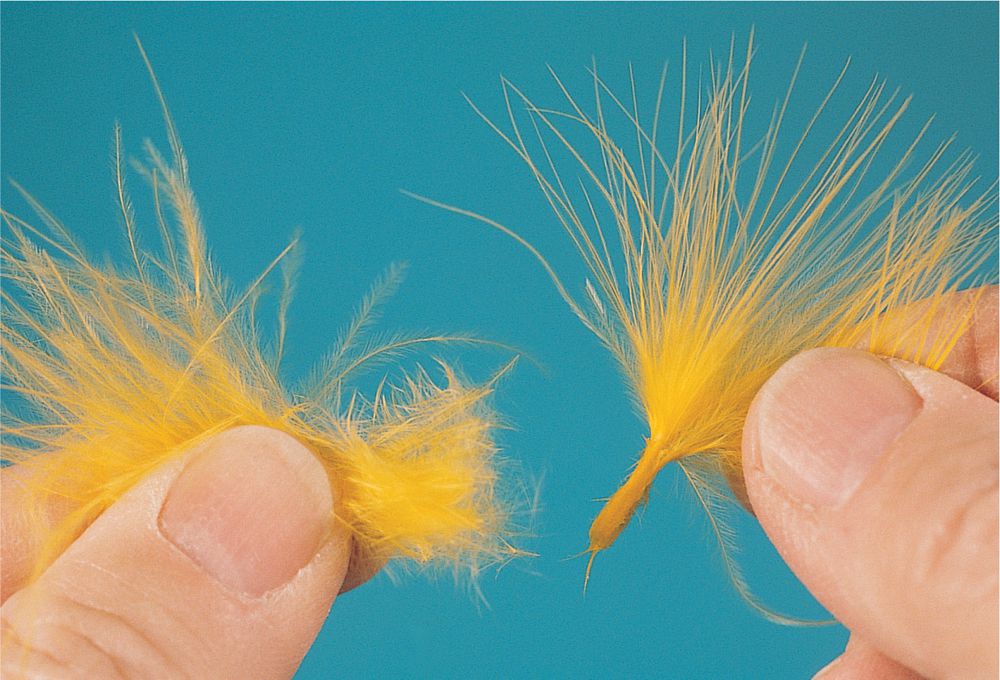
The blood feathers from the stem of marabou (turkey underfeathers) are generally uniformly the same length and thus easy to tie in as a streamer wing. When they are available, most flytiers prefer these to working with the longer marabou feathers where you have to cut the plumy part from the main stem and then carefully fold it into a bundle. To use marabou bloods, trim the butt end and then stroke the feather back as you tie the butt end into the fly.
More marabou is available as stems and feathers than as the smaller and easier-to-use blood plumes. These are harder to handle, since you must cut from the main stem and then craft it into a bundle.
To make these bundles for tying down as a streamer wing, first cut a section from one side of the main stem. Then carefully fold the section over once or twice, creating a bundle—or at least a more easily handled batch of marabou that you can twist or roll into a bundle.
This bundle is then easy to tie onto the hook to make a wing. If necessary, this can be done several times to create a large bundle for tying down one time, or several small bundles that can be tied on one at a time to make a thicker wing.
To keep marabou from tangling around the hook bend or hook shank, mix the marabou with stiffer material such as bucktail, calf tail, or synthetics to give it some structure while still retaining the fluffy movement of the marabou. Do this to create a mixed wing bundle before tying it down on the hook.
Good stiffening materials for this include calf tail or any of the stiffer synthetics such as Super Hair, Ultra Hair, and Fish Hair.
Add flash material (Krystal Flash, Crystal Splash, etc.) to the sides of a streamer fly wing by using one bundle that is double the length of the bundle you want on each side. Tie this down on the hook at the middle of the bundle on one side of the fly wing. Then cross the bundle of flash over the top of the hook to the opposite side and wrap with thread again to tie down this side. If necessary, trim the two sides to an equal length.
This method requires less time in preparing the flash on the wing for tying, and creates equal flash bundles for the two sides of the fly.
To make it easy to stack, or make even, bucktail fibers and similar materials when making streamer wings, add a little talcum powder to the bucktail bundle when adding it to the stacker. The talcum powder makes it easier for the fibers to slide against other fibers when using the stacker.
The best way to do this is to pour a tiny amount of talcum powder into your hand and brush the bucktail or other fur in this puddle of powder. This coats the fibers before adding them to the stacker to make it easy to even the ends.
To get a tapered look to a streamer wing of synthetic material (such as Super Hair, Ultra Hair, Unique, and others), use barber thinning scissors to thin the material to make the wing fibers different lengths. This will not taper the individual fibers, but makes the whole wing look tapered and thus more natural and lifelike.