Chapter 3: Basic Stitch Patterns
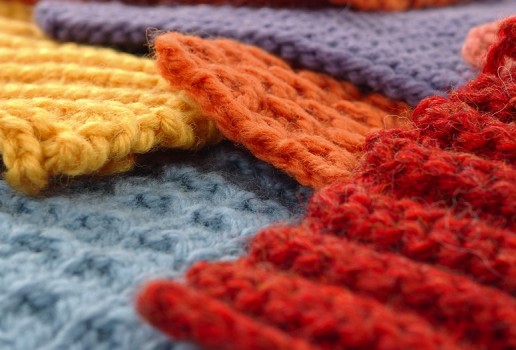
Now that you have accomplished knitting and purling, you’re ready to move on to learning some basic stitch patterns. You can create myriad patterns using just knit and purl stitches. Very simple stitch repeats can result in highly textured designs. Take some time to experiment.
Start with Simple Stitch Patterns
Try More Complicated Knit and Purl Stitch Patterns
Start with Simple Stitch Patterns
Here are a few basic stitch patterns that you can try. For some of them, you knit or purl different rows, and for others, you knit and purl in the same row. Many of these patterns are good for allover designs as well as for edgings and borders. Learning new stitch patterns will improve your ability to recognize which stitch is a knit and which stitch is a purl: You can recognize a purl stitch by the bump at the base of the stitch. In contrast, a knit stitch is smooth and has no bump.
Simple Stitch Patterns
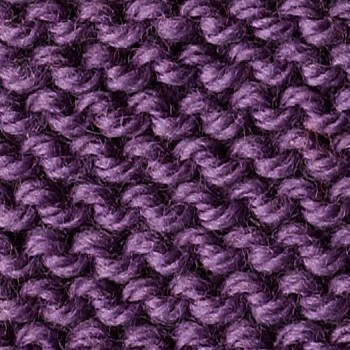
Garter Stitch
Garter stitch is the easiest stitch pattern, and what’s great about it is that it always lies perfectly flat. It looks exactly the same on both the front and the back.
1. Row 1: Knit.
2. Repeat row 1 for garter stitch.
After you knit several rows, you see horizontal ridges appear. Two knit rows form one ridge.
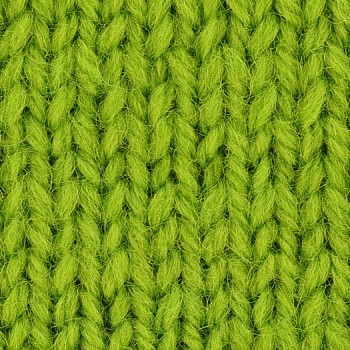
Stockinette Stitch
Stockinette stitch is the pattern most often used for sweaters. It looks like rows of flat V’s on the front, called the right side, and rows of bumps on the back, called the wrong side.
1. Row 1 (right side): Knit.
2. Row 2 (wrong side): Purl.
3. Repeat rows 1 and 2 for stockinette stitch.
Reverse Stockinette Stitch
Reverse stockinette stitch is the same as regular stockinette, only the bumpy side is considered the right side, and the smooth side is the wrong side.

1. Row 1 (right side): Purl.
2. Row 2 (wrong side): Knit.
3. Repeat rows 1 and 2 for stockinette stitch.
Garter Stitch Stripe
This pattern is essentially made up of two rows of stockinette stitch and two rows of garter stitch. It can be worked on any number of stitches. You can also vary the number of rows of stockinette stitch and garter stitch to create your own stripe pattern.
1. Row 1 (right side): Knit.
2. Row 2 (wrong side): Purl.
3. Row 3: Knit.
4. Row 4: Knit.
5. Repeat rows 1–4 for garter stitch stripe.
Reverse Stockinette Stitch Stripe
This pattern looks similar to garter stitch stripe, but because the bumpy stripes are done in reverse stockinette stitch, they are fuller and rounder. You can work this pattern on any number of stitches.

1. Row 1 (right side): Knit.
2. Row 2 (wrong side): Purl.
3. Row 3: Knit.
4. Row 4: Purl.
5. Row 5: Purl.
6. Row 6: Knit.
7. Repeat rows 1–6 for reverse stockinette stitch stripe.
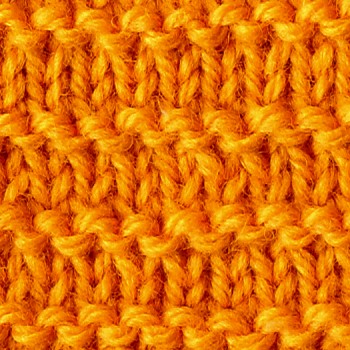
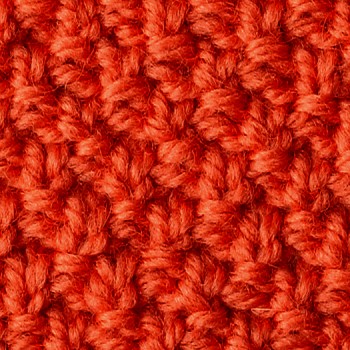
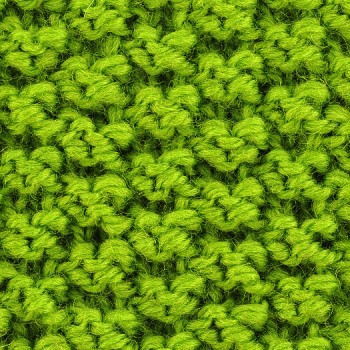
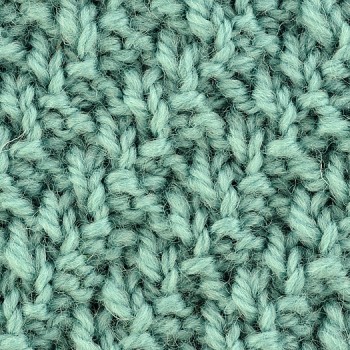
Seed Stitch
Seed stitch creates a nice bumpy-textured fabric that lies flat and looks the same on both sides. You knit the purl stitches and purl the knit stitches for seed stitch. You should cast on an even number of stitches.

1. Row 1 (right side): *Knit 1, purl 1; repeat from * to end of row.
2. Row 2 (wrong side): *Purl 1, knit 1; repeat from * to end of row.
3. Repeat rows 1 and 2 for seed stitch.
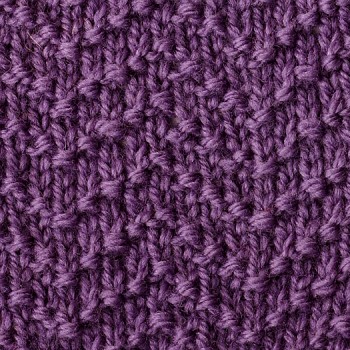
Double Seed Stitch
Double seed stitch is a four-row pattern that is similar to seed stitch in appearance but with a larger texture. You work it over an even number of stitches.
1. Row 1 (right side): *Knit 1, purl 1; repeat from * to end of row.
2. Row 2 (wrong side): Repeat row 1.
3. Row 3: *Purl 1, knit 1; repeat from * to end of row.
4. Row 4: Repeat row 3.
5. Repeat rows 1–4 for double seed stitch.
Simple Seed Stitch
Simple seed stitch is a good allover pattern for sweaters, vests, and dresses. You work it over a multiple of 4 stitches plus 1 (that is, 5, 9, 13, 17, and so on).

1. Row 1 (right side): Purl 1, *knit 3, purl 1; repeat from * to end.
2. Row 2 (wrong side): Purl.
3. Row 3: Knit.
4. Row 4: Purl.
5. Row 5: Knit 2, purl 1, *knit 3, purl 1; repeat from * to last 2 stitches, knit 2.
6. Row 6: Purl.
7. Row 7: Knit.
8. Row 8: Purl.
9. Repeat rows 1–8 for simple seed stitch.
Box Stitch
Box stitch looks the same on both sides and lies flat. You work this pattern over a multiple of 4 stitches plus 2 (that is, 6, 10, 14, 18, and so on).
1. Row 1 (right side): Knit 2, *purl 2, knit 2; repeat from * to end of row.
2. Row 2 (wrong side): Purl 2, *knit 2, purl 2; repeat from * to end of row.
3. Row 3: Repeat row 2.
4. Row 4: Repeat row 1.
5. Repeat rows 1–4 for box stitch.
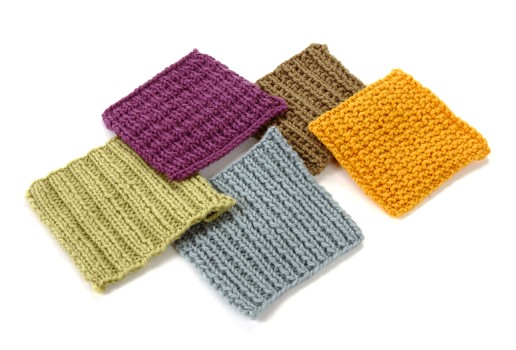
Learn Rib Patterns
Ribbing is used primarily for cuffs and hems because it is very elastic and won’t stretch out or lose its shape. But ribbing patterns don’t have to exclusively serve this purpose. They work very well as allover patterns on hats, pullovers, scarves, and blankets. You should try to get familiar with which stitches should be knit and which stitches should be purled.
Rib Patterns
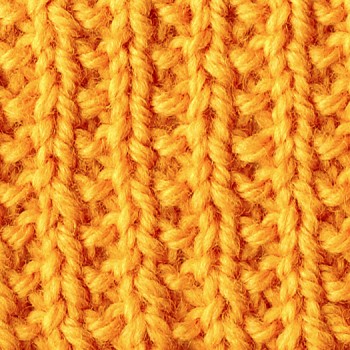
1 × 1 Rib
For this 1 × 1 rib, you need to cast on an odd number of stitches. To keep the pattern correct, be sure to knit the stitches that look like V’s and purl the stitches that look like bumps. This rib is commonly used on cuffs, and it also works well for scarves.

1. Row 1 (right side): Knit 1, *purl 1, knit 1; repeat from * to end of row.
2. Row 2 (wrong side): Purl 1, *knit 1, purl 1; repeat from * to end of row.
3. Repeat rows 1 and 2 to create 1 × 1 rib.
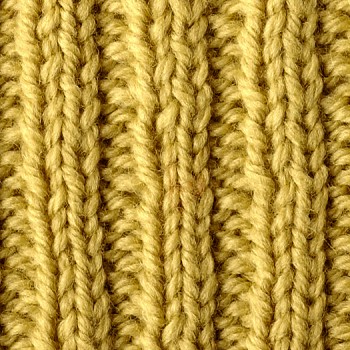
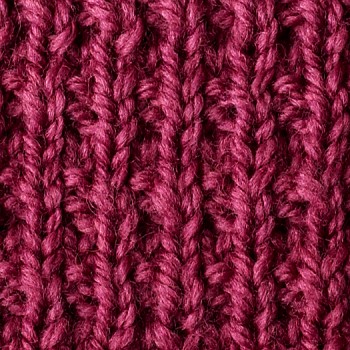
2 × 2 Rib
You need a multiple of 4 stitches plus 2 (that is, 6, 10, 14, 18, and so on) for this rib.
1. Row 1 (right side): Knit 2, *purl 2, knit 2; repeat from * to end of row.
2. Row 2 (wrong side): Purl 2, *knit 2, purl 2; repeat from * to end of row.
3. Repeat rows 1 and 2 to form 2 × 2 rib.
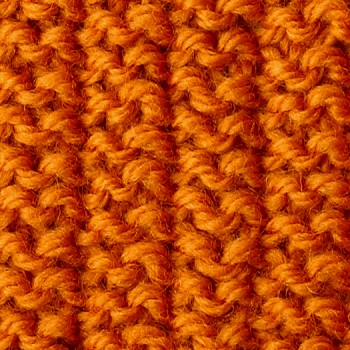
Broken Rib Stitch
This is an easy two-row pattern that looks very different on the front and on the back but is attractive on both sides. You work it on an odd number of stitches.
1. Row 1 (right side): Knit.
2. Row 2 (wrong side): Purl 1, *knit 1, purl 1; repeat from * to end of row.
3. Repeat rows 1 and 2 for broken rib stitch.
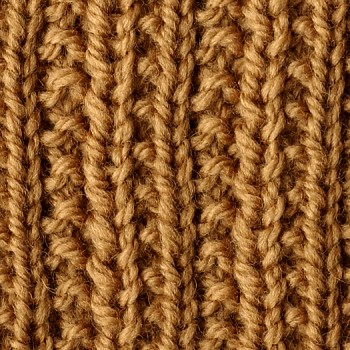
Rib-and-Ridge Stitch
This rib is not elastic, so it works best as an allover design. The right side looks like a rippled 1 × 1 rib, and the wrong side looks like an interrupted rib. You work this stitch pattern on a multiple of 2 stitches plus 1 (that is, 3, 5, 7, 9, and so on).
1. Row 1 (wrong side): Purl.
2. Row 2 (right side): Knit.
3. Row 3: Knit 1, *purl 1, knit 1; repeat from * to end of row.
4. Row 4: Purl 1, *knit 1, purl 1; repeat from * to end of row.
5. Repeat rows 1–4 for rib-and-ridge stitch.
Garter Rib
This one-row stitch pattern does not look like most other ribbing but does look the same on both sides. It’s very easy to do. You work it on a multiple of 4 stitches plus 2 (that is, 6, 10, 14, 18, and so on).
1. Row 1: Knit 2, *purl 2, knit 2; repeat from * to end.
2. Repeat row 1 for garter rib.
Seeded Rib
Seeded rib pattern is very attractive, and it results in a highly textured fabric. You work it over a multiple of 4 stitches plus 1 (that is, 5, 9, 13, 17, and so on).

1. Row 1 (right side): Purl 1, *knit 3, purl 1; repeat from * to end.
2. Row 2 (wrong side): Knit 2, purl 1, *knit 3, purl 1; repeat from * to last 2 stitches, knit 2.
3. Repeat rows 1 and 2 for seeded rib.
Twisted Rib
For twisted rib, you knit stitches through the back loops on right-side rows. You work it over an odd number of stitches.

1. Row 1 (right side): Knit 1 through back of loop, *purl 1, knit 1 through back of loop; repeat from * to end.
2. Row 2 (wrong side): Purl 1, *knit 1, purl 1; repeat from * to end.
3. Repeat rows 1 and 2 for twisted rib.
Twin Rib
Twin rib pattern looks the same on both sides, even though the two rows that make up the pattern are different. It is good for just about anything—from jackets, sweaters, and dresses to scarves and bags. You work it on a multiple of 6 stitches.
1. Row 1 (right side): *Knit 3, purl 3; repeat from * to end.
2. Row 2 (wrong side): *Knit 1, purl 1; repeat from * to end.
3. Repeat rows 1 and 2 for twin rib.
Diagonal Rib
Diagonal rib is a pattern that can be used not only as a decorative border but also as an allover pattern. You work it over a multiple of 4 stitches.
1. Row 1 (right side): *Knit 2, purl 2; repeat from * to end.
2. Row 2 (wrong side): Repeat row 1.
3. Row 3: Knit 1, *purl 2, knit 2; repeat from * to last 3 stitches, purl 2, knit 1.
4. Row 4: Purl 1, *knit 2, purl 2; repeat from * to last 3 stitches, knit 2, purl 1.
5. Row 5: *Purl 2, knit 2; repeat from * to end.
6. Row 6: Repeat row 5.
7. Row 7: Repeat row 4.
8. Row 8: Repeat row 3.
9. Repeat rows 1–8 for diagonal rib.
Try More Complicated Knit and Purl Stitch Patterns
You have already worked with some simple knit and purl combinations. Are you ready to try your hand at a few more? You can create some very intricate-looking patterns by following these simple instructions.

More Complicated Knit and Purl Stitch Patterns
Andalusian Stitch
This stitch, which creates a nice grid pattern, is easy to do. You work it on a multiple of 2 stitches plus 1 (that is, 3, 5, 7, 9, and so on).

1. Row 1 (right side): Knit.
2. Row 2 (wrong side): Purl.
3. Row 3: *Knit 1, purl 1; repeat from * to last stitch, knit 1.
4. Row 4: Purl.
5. Repeat rows 1–4 for Andalusian stitch.
Rice Stitch
This is an easy allover pattern that lies flat and looks like ribbing on the wrong side. You work it over a multiple of 2 stitches plus 1 (that is, 3, 5, 7, 9, and so on).

1. Row 1 (right side): Purl 1, *knit 1 through back of loop, purl 1; repeat from * to end.
2. Row 2 (wrong side): Knit.
3. Repeat rows 1 and 2 for rice stitch.
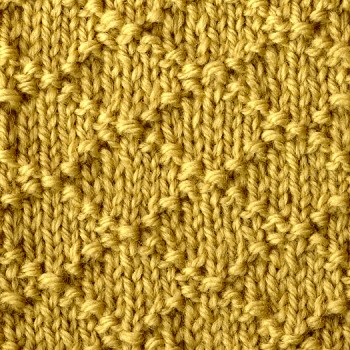
Basketweave
There are many forms of basketweave. This one is a small weave that you work on a multiple of 5 stitches plus 3 (that is, 8, 13, 18, 23, and so on).

1. Row 1 (right side): Knit.
2. Row 2 (wrong side): *Knit 3, purl 2; repeat from * to last 3 stitches, knit 3.
3. Row 3: Knit.
4. Row 4: Repeat row 2.
5. Row 5: Knit.
6. Row 6: Knit 1, *purl 2, knit 3; repeat from * to last 2 stitches, purl 2.
7. Row 7: Knit.
8. Row 8: Repeat row 6.
9. Repeat rows 1–8 for basketweave.
Checkerboard Pattern
This pattern looks the same on both sides. You work this particular checkerboard on a multiple of 8 stitches plus 4 (that is, 12, 20, 28, 36, and so on).

1. Row 1 (right side): Knit 4, *purl 4, knit 4; repeat from * to end.
2. Row 2 (wrong side): Purl 4, *knit 4, purl 4; repeat from * to end.
3. Row 3: Repeat row 1.
4. Row 4: Repeat row 2.
5. Row 5: Repeat row 2.
6. Row 6: Repeat row 1.
7. Row 7: Repeat row 2.
8. Row 8: Repeat row 1.
9. Repeat rows 1–8 for checkerboard pattern.
Diagonal Check Pattern
This pattern, worked over a multiple of 5 stitches, looks the same on both sides.

1. Row 1 (right side): *Purl 1, knit 4; repeat from * to end.
2. Row 2 (wrong side): *Purl 3, knit 2; repeat from * to end.
3. Row 3: Repeat row 2.
4. Row 4: Repeat row 1.
5. Row 5: *Knit 1, purl 4; repeat from * to end.
6. Row 6: *Knit 3, purl 2; repeat from * to end.
7. Row 7: Repeat row 6.
8. Row 8: Repeat row 5.
9. Repeat rows 1–8 for diagonal check pattern.
Diamond Brocade Pattern
This is an elegant allover pattern. You work it on a multiple of 8 stitches plus 1 (that is, 9, 17, 25, 33, and so on).
1. Row 1 (right side): Knit 4, *purl 1, knit 7; repeat from * to last 5 stitches, purl 1, knit 4.
2. Row 2 (wrong side): Purl 3, *knit 1, purl 1, knit 1, purl 5; repeat from * to last 6 stitches, knit 1, purl 1, knit 1, purl 3.
3. Row 3: Knit 2, *purl 1, knit 3; repeat from * to last 3 stitches, purl 1, knit 2.
4. Row 4: Purl 1, *knit 1, purl 5, knit 1, purl 1; repeat from * to end.
5. Row 5: *Purl 1, knit 7; repeat from * to last stitch, purl 1.
6. Row 6: Repeat row 4.
7. Row 7: Repeat row 3.
8. Row 8: Repeat row 2.
9. Repeat rows 1–8 for diamond brocade pattern.
Diamonds in Columns
You can repeat any motif in a series of panels. This one works well on sweaters, vests, and pillows. You work this pattern on a multiple of 8 stitches plus 1 (that is, 9, 17, 25, 33, and so on).

1. Row 1 (right side): Knit.
2. Row 2 (wrong side): Knit 1, *purl 7, knit 1; repeat from * to end.
3. Row 3: Knit 4, *purl 1, knit 7; repeat from * to last 5 stitches, purl 1, knit 4.
4. Row 4: Knit 1, *purl 2, knit 1, purl 1, knit 1, purl 2, knit 1; repeat from * to end.
5. Row 5: Knit 2, *[purl 1, knit 1] twice, purl 1, knit 3; repeat from * to last 7 stitches, [purl 1, knit 1] twice, purl 1, knit 2.
6. Row 6: Repeat row 4.
7. Row 7: Repeat row 3.
8. Row 8: Repeat row 2.
9. Repeat rows 1–8 for diamonds in columns pattern.
Linen Stitch
This stitch pattern has a woven look on one side and a grid of bumps on the other. It lies flat and is wonderful for sweaters, blankets, bags, and scarves. You work it over an even number of stitches.

1. Row 1 (right side): *Knit 1, slip 1 purlwise with yarn at front of work, bring yarn to back of work between needles; repeat from * to last 2 stitches, knit 2.
2. Row 2 (wrong side): *Purl 1, slip 1 purlwise with yarn at back of work, bring yarn to front of work between needles; repeat from * to last 2 stitches, purl 2.
3. Repeat rows 1 and 2 for linen stitch.
Vertical Dash Stitch
Vertical dash stitch works well as an allover pattern for sweaters, skirts, and dresses. You work it on a multiple of 6 stitches plus 1 (that is, 7, 13, 19, 25, and so on).

1. Row 1 (right side): Purl 3, knit 1, *purl 5, knit 1; repeat from * to last 3 stitches, purl 3.
2. Row 2 (wrong side): Knit 3, purl 1, *knit 5, purl 1; repeat from * to last 3 stitches, knit 3.
3. Row 3: Repeat row 1.
4. Row 4: Repeat row 2.
5. Row 5: Knit 1, *purl 5, knit 1; repeat from * to end.
6. Row 6: Purl 1, *knit 5, purl 1; repeat from * to end.
7. Row 7: Repeat row 5.
8. Row 8: Repeat row 6.
9. Repeat rows 1–8 for vertical dash stitch.
Single Chevron Stitch
Single chevron stitch is a playful pattern that works well on pullovers, cardigans, and vests. You work it over a multiple of 8 stitches.
1. Row 1 (right side): *Purl 1, knit 3; repeat from * to end.
2. Row 2 (wrong side): *Knit 1, purl 5, knit 1, purl 1; repeat from * to end.
3. Row 3: *Knit 2, purl 1, knit 3, purl 1, knit 1; repeat from * to end.
4. Row 4: *Purl 2, knit 1, purl 1, knit 1, purl 3; repeat from * to end.
5. Repeat rows 1–4 for single chevron stitch.