The Basic 16-Step Process Develops The Architectural Plan To Get The First Drawing On The Model Space
1. Draw Axes Gird Plan
2. Drawing Columns Gird Plan
3. Drawing Elevators (If Available)
4. Closing Axes Gird, Columns Gird, Elevators Into A Block
5. Drawing Walls (Cutting Of Walls)
6. Drawing Visible Lines (Glass Partitions, Stairs, Kitchen Shelves, Etc.)
7. Inserting Door Blocks
8. Inserting Sanitary Equipment Blocks
9. Notes The Function Of Rooms
10. Note The Areas To Be Extracted In Detail
11. Notes By Leader
12. Hatch Bath Floor, Hatch Concrete
13. Inserting High Blocks
14. Inserting Attribute Section Line Blocks (A-A, B-B, …)
15. Write Dimensions For The Whole Plan Drawing
16. Write Title Name For Drawing
Here are 16 basic steps, if you think you need to add something, then add more to the complete and turn it into your process.
For other Lists of drawings, you should also build yourself a standard process to work. In general, with any drawing, regardless of specialty, you follow the process as follows:
- Draw first
- Go dim and text later. Note before the Dimension, text, remember to set the ratio of Annotation Scale corresponding to the rate of that drawing and then dim, text offline.
Pay attention to objects related to text and use it many times, so use Attribute Block with Annotative attached to make drawing quickly. If you are still not familiar or do not yet have these Attribute Block attached to this Annotative, create a new or add Annotative attribute to it right away.
Chapter 4 - Build All The Remaining Drawings Lists In The Model Space With 1:1 Scale Drawing
- Plan drawing: After having FAP, we make other remaining plan drawings by copying and editing from FAP.
- Vertical and section drawings: You also build it from axes grid plan
- Similarly, we also draw Structure + Electricity + Water drawings: use only text with Annotative attached, use only 1 dimstyle with Annotative attached and use static Blocks without Annotative and use Attribute Block with Annotative attached to insert drawings according to Annotation Scale (corresponding to the scale drawing).
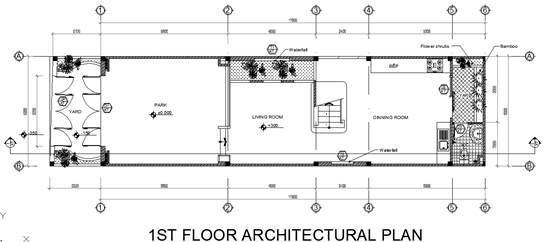
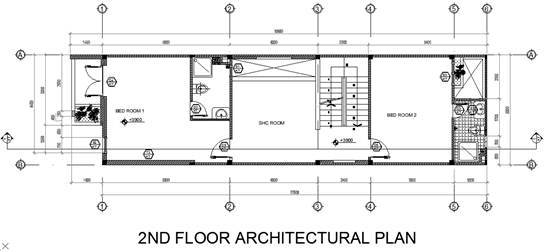
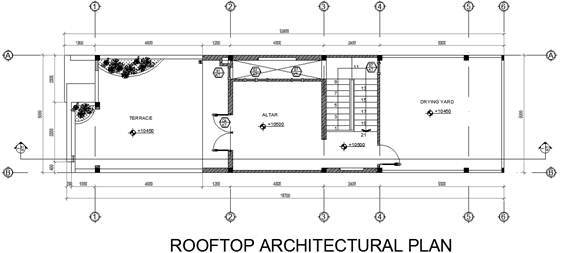
After drawing all the drawings, we get a series of drawings on the Model space side as follows:
Same for other drawings.
Note:
How much does a scale drawing (the ratio of the drawing after printing out the paper), we have to choose the corresponding Annotation Scale, then insert the Attribute Block, go Dim and Text with the Annotation Scale there and for that drawing. If other drawings have a different scale of the drawing, then they must proceed with another Annotation Scale. Blocks are not related to text, do not attach annotative
OK, got it. So, come here as you have ended the session with the Model space.
Do you feel any different from the way you are still doing the Model space?
It is also working with Model space, but what I aim to guide you is to apply Annotative to the Model (Dimensions, text, quotations, Attribute Block, ... are attached Annotative and zoom according to the Annotation factor, the scale of drawings). Your drawing will become neat, light and elegant, much easier to manage.
Starting with the next chapter, I will step by step guide you to use Layout, which is the main goal of this book. The Layout will only really work if you follow the Annotative rules as I have instructed from the beginning. You should remember the Annotative + Layout space.
Come on, let me explore the effective workflow in Layout space!