Elephant
and Pressure on the Wrist

This exercise, which is one of the basics of Pilates, generates repeated pressure on an area that is not able to support it.
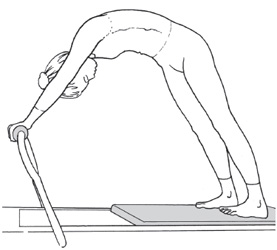
Starting Position
The feet are positioned on the carriage, either against the shoulder rests or more forward, depending on how flexible the ankles are. The hands are on the bar, supporting a lot of the body’s weight. The head is positioned lower than the trunk, which is in flexion. The hips are also extremely flexed.

The Movement
In the outward movement, the feet move away from the hands—but not too much. The flexion of both the hips and the trunk is reduced. This movement is made against the resistance of the carriage and springs.
The return brings the feet closer to the hands again, and the flexion of the hips and trunk is increased. The amplitude of the movement is minimal because it is limited by the tightness of the hamstrings.
Observations
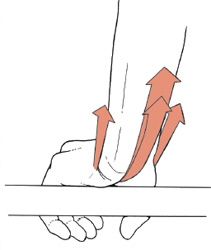
In this exercise, we put prolonged pressure on the front of the wrists. Sometimes this causes the bones of the wrist to feel stressed or creates a tingling feeling in the fingers. Why?
Because the many bones and tendons in the wrist are relatively exposed and vulnerable to damage.
The Wrist— a Joint with Many Bones
The wrist is not a joint that unites two bones (like, for example, the hip), but an articular region that joins fifteen very different bones:
- the two bones of the forearm—the radius and ulna
- the eight carpal bones, which are arranged in two rows
- the five metacarpals
The eight carpal bones lie in two rows. The first row is antebrachial and matches up with the forearm; the second row is metacarpal and matches up with the base of the metacarpals.
The Wrist Has Two Support Areas
When we put pressure on the wrists, there are two different places that are able to support the body’s weight for short periods of time.
The First Support Area— Close to the Forearm
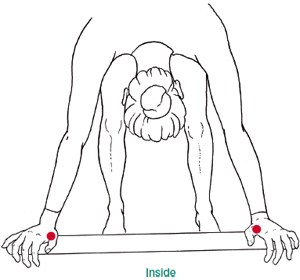
While doing the Elephant, we can put our weight on an area of support close to the forearm. To see this area on your own arm, bend the elbow and look at the palm side of your hand as you bend the hand slightly toward you (supinate). You will see several transverse folds in this area of the wrist.
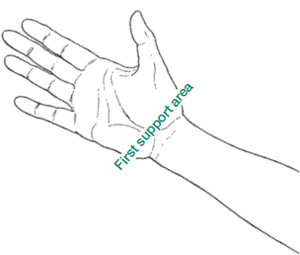
The first support area is the zone about one centimeter beyond the crease closest to the hand. Here, we are on the second row of carpal bones, which consists of six bones aligned from the ulnar (little finger) side to the thenar (thumb) side. These six bones are the pisiform, triquetrum bone, hamate bone, capitate bone, trapezoid, and trapezium.
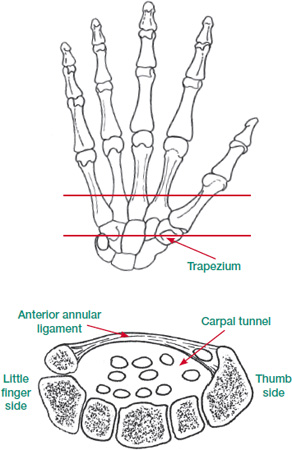
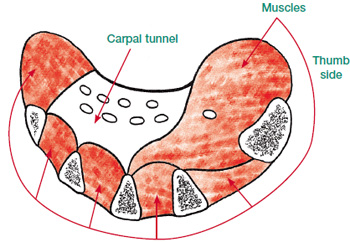
Carpal tunnel viewed in cross section (depending on the level of the cut, the groove is formed by four, five, or six bones, but no matter the number of bones, we will always find that the area is grooved).
Like the first row of carpals, this second row of bones forms a kind of gutter that is hollowed at the front. Nine tendons (detailed on page 47) and the median nerve pass through this grooved area and are held together by a ligamentous band called the anterior annular ligament. This entire hollow, narrow area is called the carpal tunnel.
Generally, the carpal tunnel does not provide very good support for the body’s weight. This area is delicate because it’s made up of many small bones and other varied components. Furthermore, the skin in this area of the body is thin, unlike other areas that are designed for more pressure, like the heels or the ischia, where the skin and underlying layers are thicker.
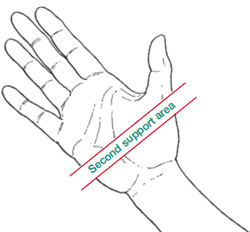
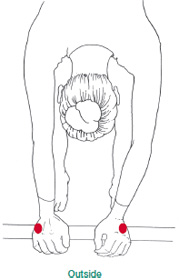
The Second Support Area— the Border of the Palm
While doing the Elephant exercise, we can support ourselves on a second area of the wrist that lies close to the palm.
When we bend the elbow and look at the hand in supination, we find this area just beyond the first support area, right where the palm starts. Here, the hand is a bit broader and fleshier. This is where the bodies of the metacarpals start. The tendons are less grouped here and have begun to separate toward their respective fingers. Here also are the branched endings of the median nerve, which serve the hand. The anterior annular ligament doesn’t extend into this area; rather, there is a fibrous web called the medial palmar aponeurosis.
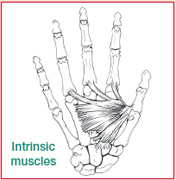
The muscle mass at the base of the palm is a group of small muscles, called intrinsic because they originate and terminate in the hand itself.
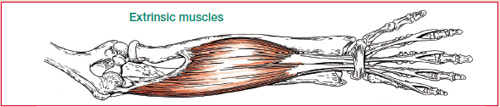
By contrast, the tendons that pass through the carpal tunnel in this area are called extrinsic because they belong to muscles that lie outside of the hand in the forearm.
This second area is a more suitable support for the weight of the body than the carpal bones discussed above, because the greater muscle mass of the palm lessens the impact of pressure on the structures below.
However, neither area is able to support the body’s weight for very long without creating problems.
Positioning the Pressure
In each of the two support zones of the wrist that we’ve discussed, we can shift the pressure to the inside, middle, or outside. In each position, we find anatomical elements that make the additional pressure more or less acceptable.
The Carpal Area: The Three Regions of the First Zone
The inside (little finger side), middle, and outside (thumb side) regions of the carpal zone each have their strengths and weaknesses.
Pressure on the Little Finger Side
On the inside (little finger side) of the wrist, we find the process of the hamate bone and/or the pisiform bone (depending on whether we are closer to the palm or the wrist), both of which can be sensitive.
The hamate and pisiform bones can cause problems for three reasons:
- These bones are almost directly under the skin.
- The annular ligament and two intrinsic muscles of the little finger are attached to them.
- The cubital nerve (which innervates the little finger) terminates on the external edge of this area. Repeated pressure on it can cause tingling in the little finger.
Pressure in the Middle
In the middle of the carpal tunnel, we find the tendons of four fingers bound in tight, superimposed layers. They are enveloped in a common sheath that is filled with a lubricating fluid.
Prolonged pressure on this area can cause compression of the tendons and of the fluid, which then can’t circulate properly within the sheath.
The median nerve runs through the most external area of this middle area. Its compression can result in tingling or pain in the palm and the last four fingers.

Details of the first zone of pressure
Here, we put pressure on the trapezium bone, which may not be desirable for four reasons:
- The bone is almost directly under the skin.
- The annular ligament is attached to it, as well as the intrinsic muscles of the thumb.
- The flexor tendon of the thumb—in its own sheath that contains a lubricating fluid— passes behind the annular ligament.
- The median nerve is found in the innermost part of this area; repeated pressure can compress the nerve and cause tingling in the palm and the first four fingers.
The Base of the Palm: The Three Regions of the Second Zone
In general, the areas of this second zone are somewhat stronger than those of the first zone and are better able to withstand the body’s pressure.
Pressure on the Little Finger Side
In this area, the bone is not directly under the skin, so pressure falls instead on the three small muscles that lead to the little finger.
Although pressure is better tolerated here than it is in the first zone, over time it can irritate the cubital nerve, which terminates between these muscles. Such irritation can cause tingling and numbness in certain fingers.
Pressure in the Middle
The middle of the second zone lies at the base of the third metacarpal, extending a bit on either side beneath the second and fourth metacarpals as well. In this area, the median nerve divides and leads to the fingers. The tendons are still in two superimposed layers, but they are not as tight, and the common sheath—filled with a lubricating fluid—is less restrictive.
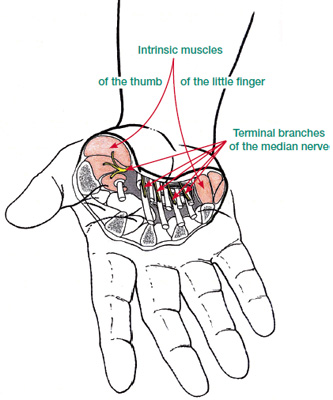
Details of the second zone of pressure
Prolonged pressure on this area can cause compression of the tendons and restriction of the lubricating fluid so that it doesn’t circulate as well in the sheath. Repeated pressure can also cause tingling and numbness of the muscles of the fingers. However, the area is more protected because of the thick fascia in this region, which surrounds the muscles of the little finger and the thumb.
Pressure on the Thumb Side
In this area, the pressure falls on the mass of muscles at the base of the thumb, which provides a level of protection. The terminal branches of the median nerve pass between these muscles, and here too, repeated pressure can cause tingling and numbness, even though the pressure is cushioned by muscle tissue.
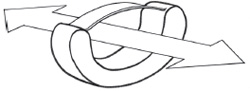
Shift the Body Weight Around
Because none of the support areas of the wrists are able to withstand pressure for very long, the key to preventing wrist problems is to continually shift the body weight around: from zone to zone, area to area, wrists to feet, etc.
1. Alternate Pressure between Zones One and Two
We have seen in the previous pages that the second zone is better able to withstand pressure than the first zone. Nevertheless, neither area can really support prolonged pressure. One solution is to constantly alternate pressure between the two zones.
The ability to switch between the two areas depends on the angle formed by the forearms and the bar that the hands are supported on. This angle is going to change depending on:
- the height of the bar, which is adjustable on many Reformers;
- whether the weight of the trunk is more over the feet or more forward over the hands; and
- the flexibility of the hamstrings.
It is therefore helpful to vary the position of the body in relationship to the equipment, even slightly, to change the point of pressure.

2. Switch Pressure among the Inner, Middle, and Outer Sections of Each Zone
Here, shifting the pressure depends on the angle formed between the forearms and the hands—not in the sagittal plane, but in the frontal plane.
We can modify this angle by separating the hands more or by bringing them closer together on the bar: when the hands are placed farther apart, the pressure is more to the inside, while placing the hands closer together brings the pressure toward the outside.
Note that it’s not necessary to move the hands very much to change the pressure, and that we can make these small changes constantly. We can even position the hands asymmetrically depending on what we feel in the wrists; it’s not necessary to maintain a symmetrical position to perform this exercise.
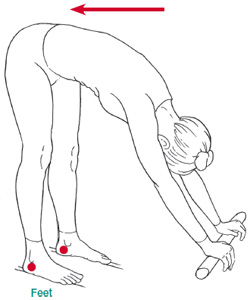
3. Alternate between Pressure and No Pressure
Between repetitions, or whenever possible, we can place the weight of the trunk more over the feet and let the tissues of the wrist take a break.
Actively Orient the Forearms to Find the Best Place to Put Pressure
The choice of where we place the wrist or the hand can be determined by actively orienting the wrist. The muscles have tendons that extend to the hand and act like “reins” that can be synchronized. The wrist is braced and held by its musculature.
Strengthen the Elbow, Wrist, and Hand Simultaneously
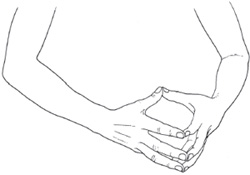
This exercise strengthens the muscles of the forearms—including those around the elbow and the wrist—and the hands.*8
With the fingers straight, place the fingertips of one hand on the fingertips of the other hand and press forcefully. To intensify the work, get down on your knees and place your fingertips on the floor, pressing them into the ground. If this isn’t enough, put the pressure on the hands and feet and lift the knees off the floor.
Release the Muscles of the Entire Arm
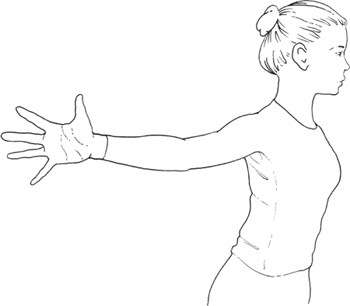
This exercise stretches all of the tissues and muscles of the arm from the sternum to the ends of the fingers.*9 It is a continuation of the stretch initiated in the Elephant and is contraindicated for those with shoulder problems.
Sitting on a stool, stretch one arm out behind you, extend the elbow and the wrist, open the palm, and separate all the fingers as wide as possible while placing them in extension.
Do the same thing with the other arm, then try it with both arms at the same time.
Other Exercises That Present Similar Challenges to the Wrists
Reformer Exercises
When using the Reformer, it is helpful to remember that all the exercises done with the hands in the straps make it possible to choose the point of pressure, because the weight of the body is not on the hands.
In addition, there are many other Reformer exercises where the weight of the body is shared by the wrists and the lower limbs, allowing the user to control the pressure on the wrists.
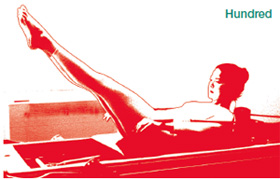
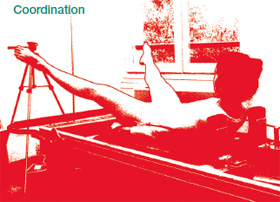
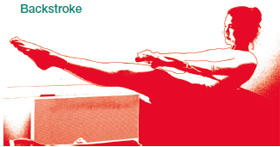
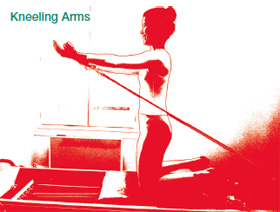
Exercises Done with the Straps: Hundred, Coordination, Backstroke, Rowing Series, Teaser, Kneeling Arms, Chest Expansion
As in all of the exercises done with the straps (where the pressure is not as great as with Elephant), we have the luxury of finding a good position for each movement, usually in the second pressure zone. This is an opportunity to explore different ways of holding the handles or loops and to modify the shape of the hand, depending on what feels best.


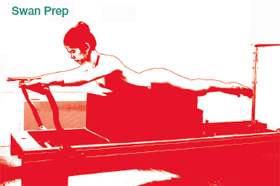
Exercises Using the Bar: Swan Prep, Stork
Lie prone on the box with your hands flat on the bar. Given that there is much less pressure on the hands when you go into spinal extension, you are at leisure to explore a variety of positions and to adjust your hands according to what you find. In Stork, which is a variation of Elephant with one leg lifted, you have the same position options that we’ve offered for Elephant.
Compared to the Reformer, mat work has fewer exercises that require supporting yourself on your hands. All of them are done with the hands in extension.
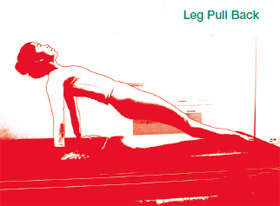
Leg Pull Back
Leg Pull Back (also called Leg Pull-up) is a variation of Leg Pull Front (also called Leg Pull-down) done with the back toward the floor. This exercise puts a huge demand on the wrists and requires good shoulder-girdle stability. In fact, because of the position, more of the body weight is supported by the hands than the feet.
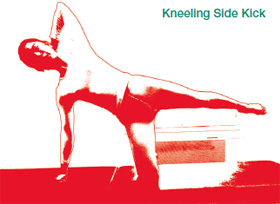
Kneeling Side Kick
This whole series is done with the weight on one hand and one knee. It calls for the same degree of control as Leg Pull Back, with the added challenge of maintaining balance.
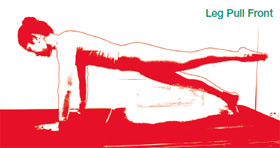
Leg Pull Front
This is a version of Push-up done with the weight on the hands and the feet. It calls for a high degree of shoulder-girdle stability in order to minimize the pressure on the wrists.