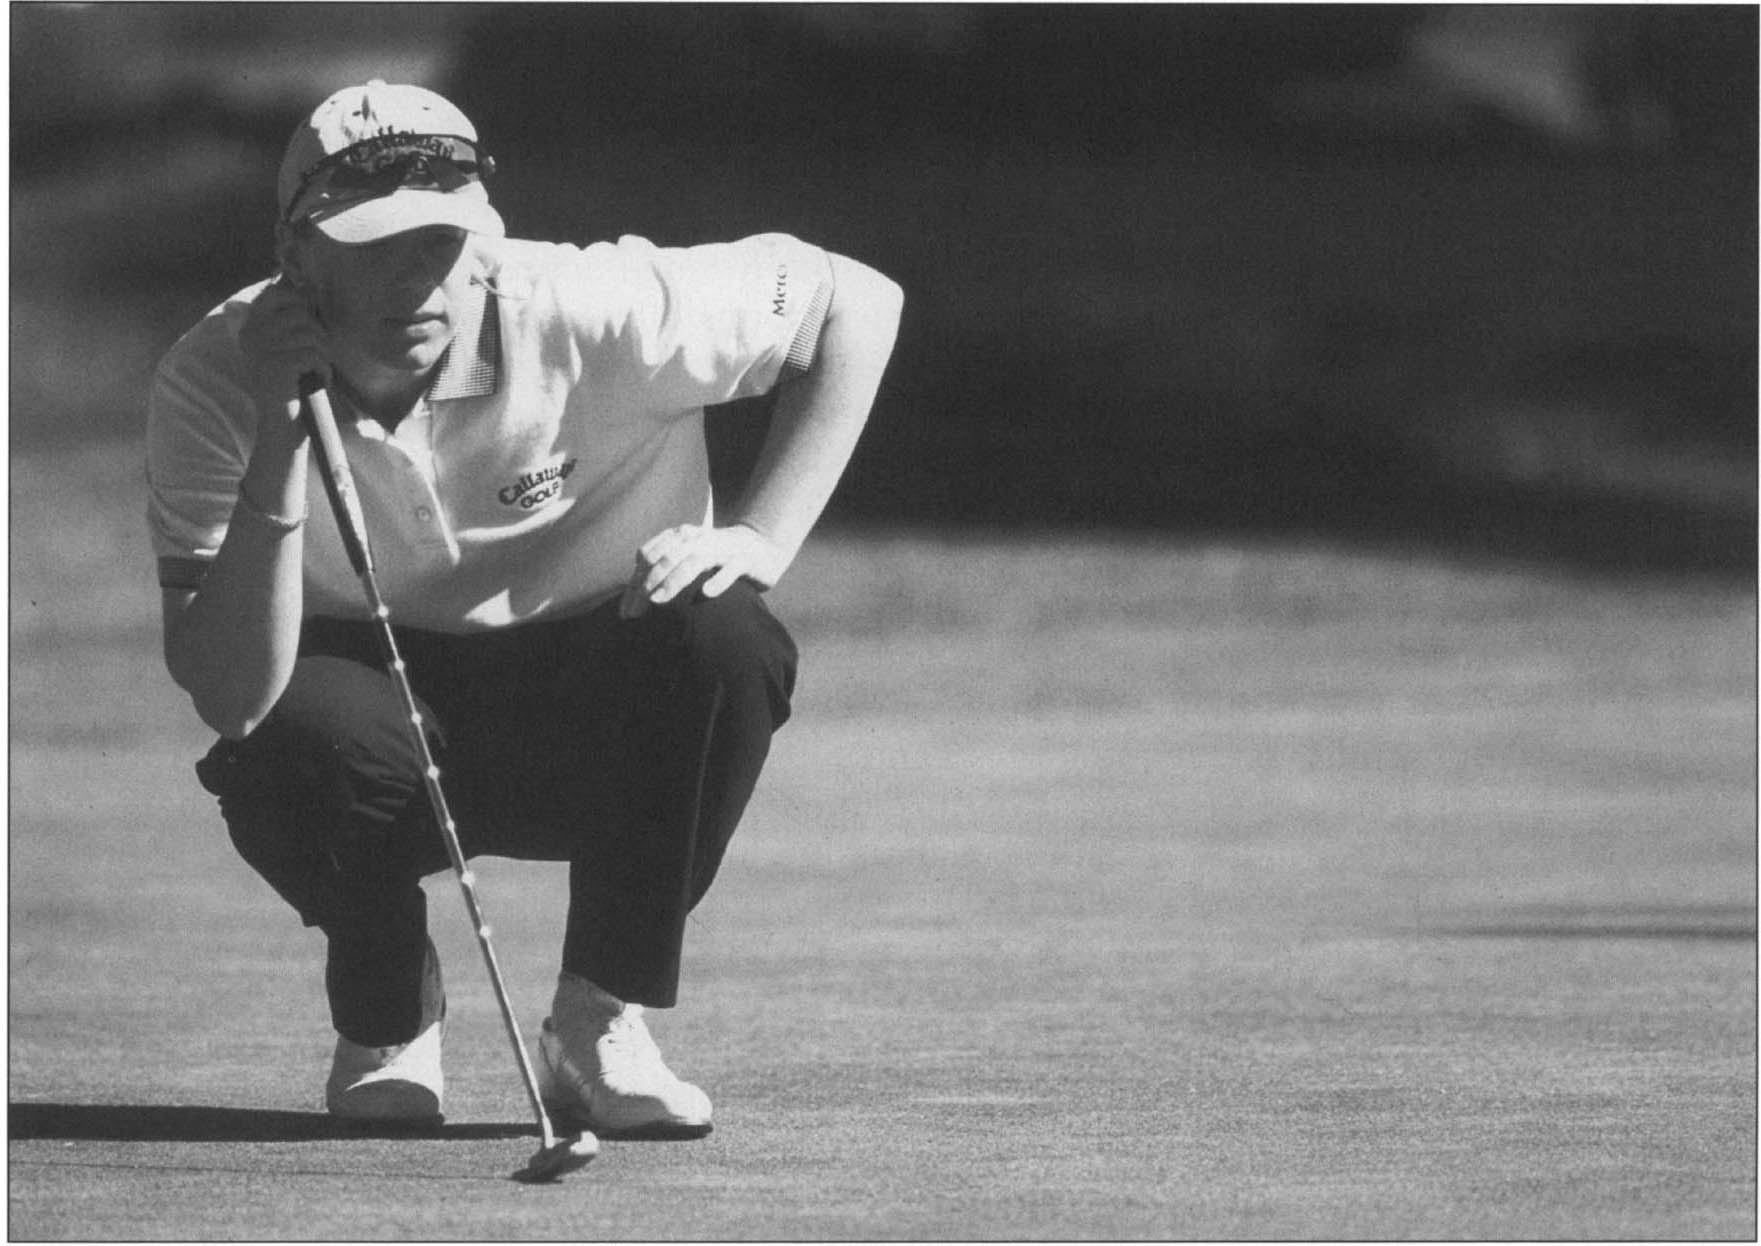
Annika Sorenstam preparing to putt. Professional golfers make golf look easy, a perception students may carry into their lessons.
TEACHING BY INCREMENTAL LEARNING
For coaches who have the background and knowledge, actually teaching the game is an integral and enjoyable part of their responsibilities. However, coaches who lack the proper qualifications should seek alternative methods to secure technical swing assistance for their students rather than risk giving bad advice. One obvious resource, of course, is the local golf professional. In most cases, the local golf pro is more than willing to lend a helping hand.
Whether or not you are able to teach swing techniques, you are certainly able to motivate and guide your students in their quest for a better golf game. There is no one way to attack a teaching challenge. You must be innovative and enthusiastic. Try to learn more about the instructional aspects of golf and keep abreast of the game by reading various instructional books and golf publications. It is, after all, never too late to become a serious student of the game. The National Golf Foundation offers a great deal of instructional resources, including audio-visual materials and a wealth of literature.
NAGCE encourages members to enroll in its Coach’s Certification Program. Certification consists of three one-day educational workshops conducted by PGA and LPGA staff instructors. Workshop participants earn 30 of the 40 hours required for NAGCE certification. (The NAGCE Web site offers online programs that supply the remaining 10 hours.) These workshops offer every unit of instruction you need to become a qualified coach. An outline of the curriculum taught in tier I of the certification program appears in the appendix of this book.
This instructional section covers the techniques and skills development exercises that incrementally create a full swing. At each level of development, students achieve an accomplishment level that I call HOME. This is where students are comfortable, capable, confident, and unintimidated. They can produce what they are thinking. For example, suppose a student has a 12-foot putt and thinks, “I want this in or close.” She putts the ball and, nine out of ten times, it’s either in or close. She is HOME. Or suppose another student is within 100 yards of the green and, with the club of his choice, eight out of ten times he can put the ball somewhere on the green. He too is HOME. A final example is a student who, given a choice of clubs, can drive the ball with sufficient distance onto seven out of ten fairways. All of these students have found HOME.
As you work through these instructions with your students you will ask them to leave HOME. Leaving HOME simply means attempting skills that they are not yet comfortable with or cannot do at the frequency described. The optimum use of this instruction would, therefore, be for students to venture out from HOME to develop new skills and capabilities, yet return HOME to avoid frustration and deterioration of they skills they have developed. Each segment represents a venturing out. Once students accomplish each new skill, it becomes their new HOME.
Annika Sorenstam preparing to putt. Professional golfers make golf look easy, a perception students may carry into their lessons.
In this instructional section you will find skill challenges. When students successfully complete these challenges, they raise their HOME level. Do not be surprised at your students’ HOME levels. These skill challenges are based on those techniques and skills possessed by an expert golfer capable of playing par golf or better. An expert golfer could execute these skills and score a ten on a scale of one to ten. It is safe to assume that anyone who rates a seven is probably an accomplished amateur capable of shooting in the 70s on a regular basis. Anyone who rates a five is probably capable of mid to high 80s and low 90s. Someone who rates a three is probably struggling to break 100.
This reality check is imperative: students must understand their physical capabilities so their attitudes are commensurate with their aptitude. Students who cannot get past a level or skill challenge should go back and evaluate their HOME positions. They may have compensating errors that allow them to complete A, B, and C but prevent them from getting to D.
Unfortunately, two wrongs can mean a right in the golf swing. For example, a student may have the face open at impact but have the club traveling left of its proper path; therefore the ball goes straight. Two wrongs made a right.
COMMITTING TO A PLAN
I am not suggesting that my way is the only way. I can guarantee you, however, that the incremental learning approach provides you with the plan and tools to develop and measure your students’ growth as golfers. In addition, your players receive a complete education regarding the building blocks of a correct swing.
The single most deciding factor in whether golfers succeed in their quest for a better and more repeatable swing is their commitment to a specific plan. Many golfers realize they must practice, but only a few recognize the need to stay with one system or plan.
Problem # 1: Perception
When students watch golf on television they see it played at a level few golfers are capable of! The expertise of professional golfers, gained through years of professional guidance and training, makes golf look rather easy. Even though students realize they are not professionals, their expectations for their own performance are affected by how they see it done by the world’s best.
Problem #2: Time and Education
Most amateurs cannot devote sufficient time and effort to play at the level they desire. Those who do not set aside the time never truly become students of the swing and do not understand how to build sound fundamentals. In today’s world of golf instruction, you must hold students’ hands while they sift through all the available information.
Problem #3: Physical Capability
Most amateurs have not developed the golf-specific muscles required to execute the swing repeatedly. The trunk, leg, and forearm muscle groups support golfers’ efforts to swing at great speed with a full range of motion. The solution is a simple, clear, valid, and attainable plan that leads students to perfect understanding of what they must practice. When the mind is right, the body follows.
ACHIEVING CONTACT
When students begin to develop, and as they pursue their golfing careers, the first order of business is to achieve constant contact. Standing still while in motion seems contradictory! However, one of the most important elements of a proper swing is that the students not raise, sway, or lower their bodies while swinging. The students must feel centered and maintain knee flex and spine angle throughout the impact area. They should not feel frozen; they should simply stay still. Give your students these simple instructions when they swing:
• If they hear air, they need to keep their spine angle and knees low.
• If they feel or brush grass, they should maintain their spine angle and keep their knees level.
• If they hit dirt, they need to bring their spine angle and knees up.
Remind students that they are trying to accomplish contact, direction, and distance.
If students have contact problems, work on vertical management. Try to establish a constant spine angle through the impact area. Compare the feeling to sitting on the edge of a stool, then not getting off the stool until after impact. Staying down through the shot feels exactly the same.
If students have directional problems, check grip and grip pressure. Review alignment and remind the students to swing their arms to the target and to swing before turning. Often students begin body rotation before their arms have had a chance to get down from the top of the backswing, forcing the arms to follow the body rotation. Make sure the students’ hands are relaxed, passive, and neutral.
If students have distance problems, be sure the target shoulder is over the trail knee when the students are at the top of the backswing. Remind them not to lift their arms. Wherever the turn and momentum put them is high enough.
Students should build the motion incrementally.
Answers to Infrequently Asked Questions
Is there a lot to learn? Yes! However, by using the “build the motion” approach in this program, the amount of information will not overwhelm students. Although a golf swing has many elements, they are not mystifying; actually, they are quite easy to understand. It’s the assembly of the elements that requires so much effort.
What are some of the elements? Stance, grip, alignment, plane, centering, wrist activity, centrifugal force, balance, and rhythm, among others.
How are elements identified and measured? A qualified instructor using video analysis will help pinpoint how well players are doing. Understanding ball flight also will help students recognize any weaknesses in their swings.
Why does a good golf swing work well only sometimes? A successful golf swing is the result of each element functioning at nearly 100 percent with the assembly of the swing properly sequenced and executed. Or the player had compensating errors and was just lucky!
How can a player improve these elements? Applicable drills will make motions or positions desired a habit.
What causes problems when a player has practiced and developed optimum elements? A player may still have a lack of confidence and trust in his or her swing. Continued play and practice will help the player gain confidence.
What if a player can’t perfect an element or even execute it reasonably well? If the player has eliminated all possible interferences—such as misinterpretation of the objective, lack of proper practice, and poor physical conditioning—then have the player try modifying the element to fit his or her style of execution. You can be an accomplished player, even a national champion, with modified elements.
Can a player’s swing improve without it being completely overhauled? The answer to this question is tied to the player’s goals. However, a good instructor will spoon-feed a player so the player doesn’t suffer paralysis from analysis. The whole swing should never be completely torn down and reassembled.
What are the average fairways hit, greens hit, and putts per round for a touring professional? Touring professionals hit approximately 9 or more fairways, 12 or more greens, and 30 putts.
During a round of golf, what percentage of a player’s time is spent on woods, irons, and around the green? The driver and fairway woods take up about 25 percent. The long irons (2, 3, and 4) take 3 percent, the medium irons (5, 6, and 7) take 4 percent, and the short irons (8, 9, sand wedge, and pitching wedge) take 7 percent. Pitching shots make up 13 percent, putting makes up 43 percent, and the remaining 5 percent is used for trouble shots, unusual lies, and such.
What is the number one reason for a player missing 2-, 3-, and 4-foot putts? Misalignment of the putter face.
What percentage of 8-foot and longer putts will be missed if the player doesn’t hit the sweet spot on the putter? A player can expect to miss about 98 percent of these putts if he or she misses the sweet spot.
Mind over body—is that the proper order? Yes! Great players and teachers know that achieving the physical is really a matter of finding a method that works and refining and repeating it until it is more reflex than conscious effort. Finding a method is far more mental than physical. Learning is strictly mental. Movement of hands, arms, shoulders, hips, legs, and feet comes from thought. The brain does it all. Once students get their brains right, they can spend the rest of their lives making the swing reflexive. So, which is first, the physcial or the mental? The mental comes first, with mechanics that become a habit.
After a player has found a method, what is the best way for the player to use his or her time? Selective practicing, then play, play, play! If the player cannot get repeatable, consistent flight patterns, get advice and help from a qualified instructor who uses video analysis.
What should players practice most? Players should practice the elements they have not yet developed to their highest level. Then they should DIWIPI—drive it, wedge it, putt it.
GETTING STARTED
For the grip alignment and pre-shot routine, have students follow this process: set up, aim, and align. To aim, students should set the clubhead directly behind the ball with the face toward the target (“club down”), assume the grip (“hands on”), and look at the target while setting the feet (see figure 8.1). Students can use the acronym CHEF to remember: club down, hands on, eyes on the target, while setting your feet (see chapter 6). Swing arms away from the target, then swing arms to the target.

Figure 8.1 (a) Club down; (b) hands on; (c) eyes on target while setting feet.
After setting up and aiming, align to the target. Keep feet somewhat together; do not attempt to finalize foot position at this time. Keep body perpendicular to the line of putt or ball flight. After setting the club to the ball, assume the grip (hands on). Look directly at the target and set feet apart.
It is imperative that students look at the target while setting the feet. Most golfers look at their feet. This is wrong! Foot-eye coordination works just like hand-eye coordination and is very dependable. Students can set up to an intermediate target if they must (tee, divot, etc.).
The Seven Common Errors
Inconsistency in beginner and intermediate golfers (and even some professionals) can be blamed on one or more of these seven common errors:
• incorrect grip;
• poor posture and misalignment;
• improper swing plane and wrist cock;
• collapsed lead wrist at impact;
• misuse of upper body versus lower body (arms and shoulders versus legs and hips);
• lack of centering and dynamic balance; and
• interrupted motion due to ball-boundness or hit impulse.
Make your students aware of these common errors. If a player is struggling with consistency, analyze his or her technique, looking for one or more of these errors.
Grip
Help each student attain a proper grip. A right-handed golfer begins by extending the left hand (back of hand facing the target) and placing it on the grip of the club below the cap. As the student soles the clubhead, make certain the clubface is squarely aligned with the target (figure 8.2).
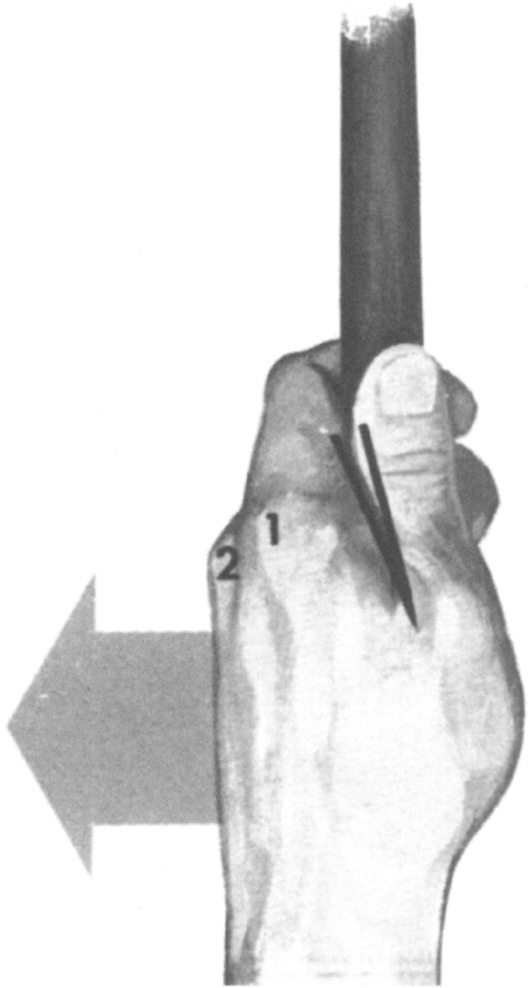
The golfer closes the fingers so that the shaft lies diagonally across the second joint of the index finger and the palm to form a combination finger and palm grip (figure 8.3). The golfer closes the hand with the thumb positioned on top of the shaft or slightly to the right. The index finger is positioned underneath the shaft as if it were pulling a trigger (figure 8.4). The right hand moves over to the shaft with the palm squarely facing the target and the fingers outstretched (figure 8.5).

Figure 8.2 Back of left hand toward the target.

Figure 8.3 Shaft lies diagonally across palm. Last three fingers exert pressure.
Figure 8.4 Two knuckles visible. Thumb is slightly right of the center of the shaft. The index finger and thumb form a V that points slightly right of the center of the shaft.
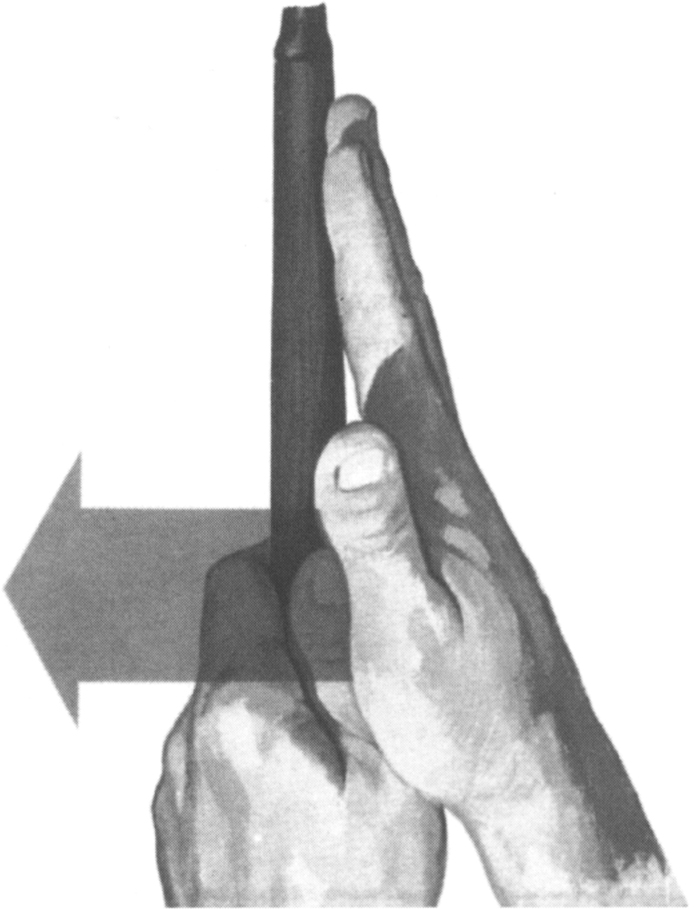
Figure 8.5 Right palm faces target.
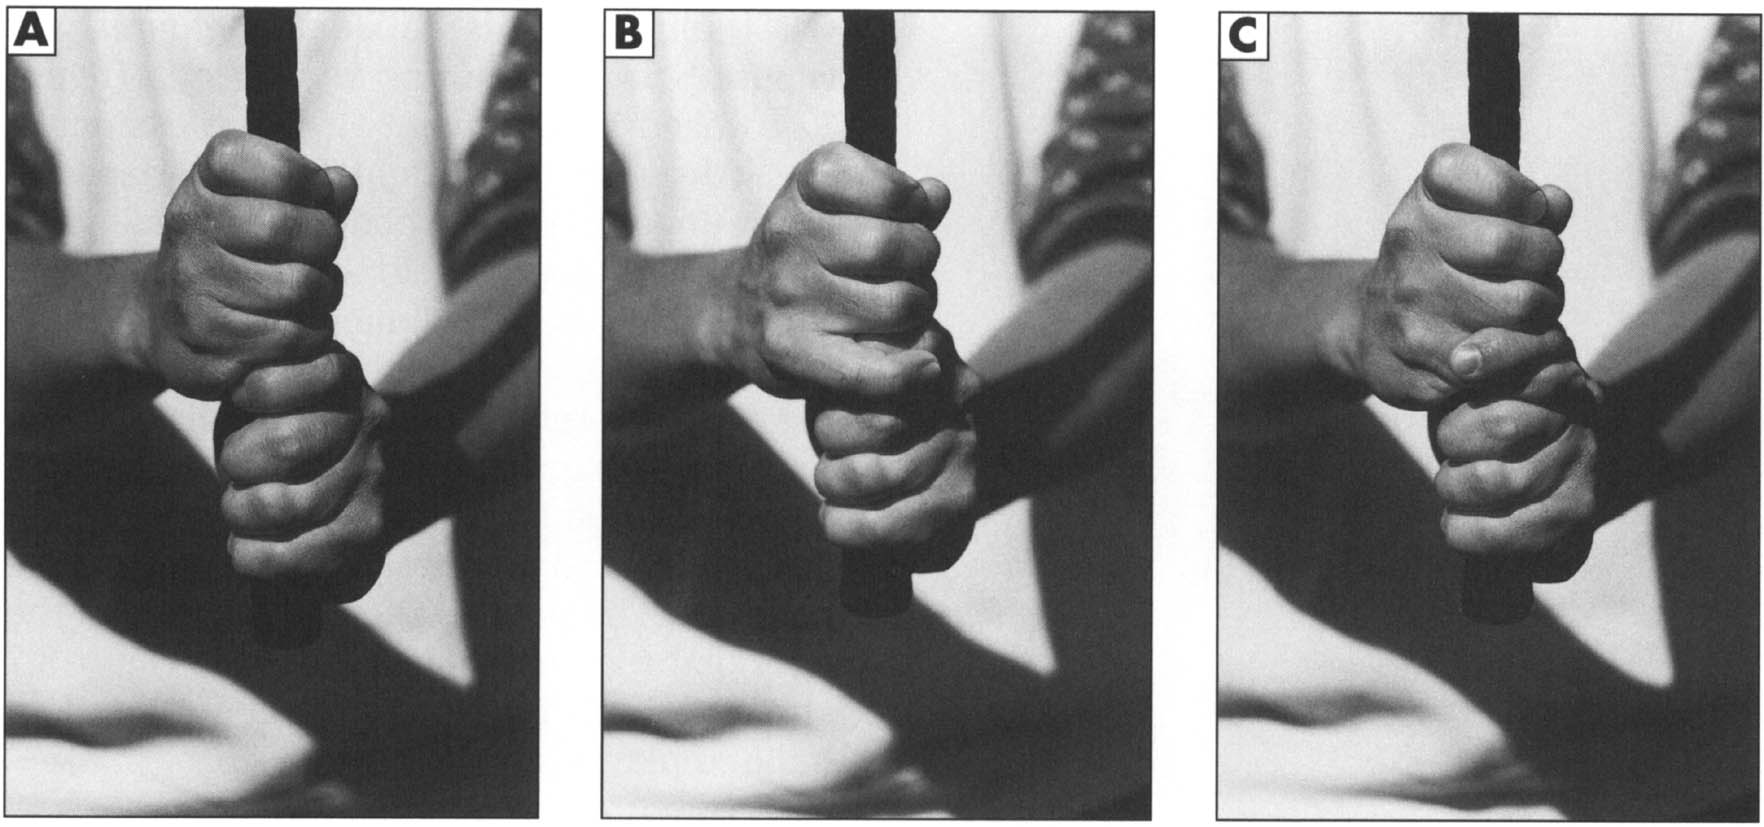
The golfer closes the fingers around the shaft so that the little finger touches the index finger of the left hand. The palm rests slightly to the right of the shaft and then covers the left thumb. This is called the natural grip (figure 8.6a). In the overlapping grip (figure 8.6b) used by the majority of professionals, the little finger of the right hand overlaps the index finger of the left hand, thus placing the hands closer together. In the interlocking grip (figure 8.6c) the little finger of the right hand interlocks the index finger of the left, removing the left forefinger from the shaft.
Whichever grip students use, make sure they keep their hands firmly together, though not rigid, and properly aligned with the clubface. The palm of the right hand and the back of the left hand face the target. Figure 8.7 shows proper hand placement for the left-handed player’s overlapping grip.
Address Routine
Help each student follow these steps to build a proper stance in relation to the target:
Start by imagining a straight line through the ball to the target (target line) and a perpendicular line from the ball to the student’s feet (ball line). Have the student place the club behind the ball so that its face is square to the target line. Use figure 8.8 as a guide.
Start with the student’s feet together. Move the target foot a short distance away from the ball line toward the target (moving along the foot line parallel to the target line) and turn the toes outward slightly. Then move the rear foot along the foot line a greater distance from the ball line away from the target. These moves automatically position the ball forward of center and form a square stance.
For the full swing, the student’s feet should be approximately shoulder-width apart. A stance that is too wide restricts proper body motion; one too narrow results in a loss of balance. Weight should be evenly distributed between the balls and the heels of the feet and between the legs.
Keeping the back straight, the student should bend at the hips and let the knees flex slightly. The hips should be set back far enough so that the student’s rear extends out over the heels. The arms should hang naturally in a relaxed manner. The student should not reach for the ball (figure 8.9).

Figure 8.7 Left-handed grip. Palm of left hand and back of right hand face target.
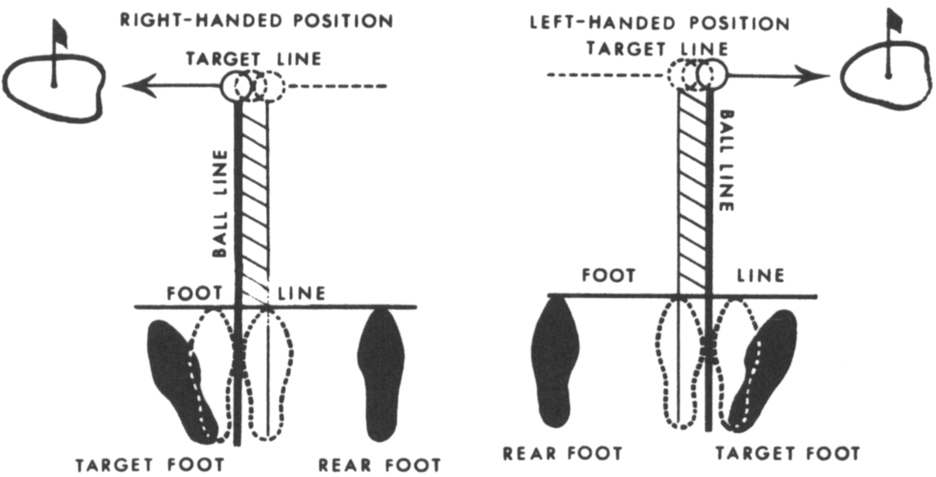
Figure 8.8 Foot position in stance for right-handed player and left-handed player.
Figure 8.9 Setup position for right- and left-handed players.
Have your students repeat the CHEF sequence: club down, hands on, eyes on the target, while setting your feet. Have each student set two clubs on the ground or carpet, one club across the toes and the other club along the target line. The two clubs should be parallel to each other.
If students need to put the clubs down first, then go through the sequence, that’s okay. As they set their feet, they should look up and down from the target to their feet while making the final adjustments.
Now have them swing their arms back and brush the grass when swinging through. Back and through, back and through. They should not bump the ground or miss the grass. As they stand level and swing their arms, they are developing the two-position motion: back to position one, forward to position two. As the club swings through the ball area the swing path should stay quite close to the target line.