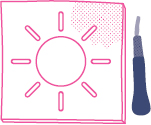
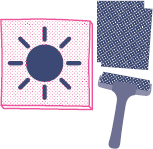
Although there are five main types of printmaking (relief, monotype, intaglio, silkscreen and lithography), relief printing is the best place to start, as it is the most accessible and least intimidating.
Relief printing is when the ink sits on the surface of a plate or block that has been carved. If you ever made a potato stamp as a child, you are already one relief print down! You can print in relief on a variety of surfaces, though the two most common are linoleum (lino) and woodcut. If you are a beginner, lino is best to start with: wood can be more challenging as you have to make sure you carve in the direction of the grain in order to get smooth lines, which takes time and experimentation. Lino is inexpensive and durable, and has a smooth surface without grain or direction.
A quick google of ‘lino printmaking kit’ will return several good results of ‘starter packs’ to get you going with the essential equipment. These should include a cutter or ‘burin’ with several different cutter-heads that you can swap in (based on the effect you’d like to achieve), a few sheets of lino, an ink roller, an ink tray, some printing ink and a hand guard for when you are cutting.
You will also need some paper. Lightweight paper is best for printing at home (without a press) as you won’t need to apply too much pressure to get a good impression. Matt finishes are also good as the ink won’t run or smudge. Don’t go for anything too textured (for example, some handmade papers) as the fibres and flecks within the paper can make the surface quite rough and this causes problems when trying to get a consistent or solid impression of your linocut. If you’re starting out, you could use something as basic as a matt, 120–150gsm printer paper – the lower cost will mean you have more opportunity for experimentation and getting it right! Once you feel more confident, move up to a slightly more expensive paper – a lot of printers recommend Japanese paper.
The joy of printing lies as much in the fact that you can make multiple copies of your design as it does in the actual design, so don’t panic too much about producing an intricate or complex design on your first go – just enjoy the batch production of it! Start with a simple line drawing or a bold geometric pattern. As a beginner, your style will be fairly heavy and a bit wobbly, so embrace this: don’t try and be too delicate. Once you’ve got your technique down, you can start producing some more intricate designs that could be used for greeting cards, wrapping paper, or limited edition prints for friends and family.
HOW TO MAKE A LINO PRINT
PREPARE THE DESIGN.
On a piece of paper the same size as your print, use a pencil to draw a simple black-and-white design. When ready, place the pencil drawing face down on to the lino. To transfer the drawing onto the lino block, rub the back of the paper with your fingers or, if that doesn’t work, use a pencil or pen to shade in the area that covers your design. With this method, you don’t need to worry about reversing the image, as it will happen naturally when you transfer it from the paper to the block. If you are drawing directly onto the lino, and not using the paper method, you will need to reverse the image first.
CUT.
Before you start cutting your design out, practise on a separate piece of lino. Your cutter will have come with a range of different heads, varying from shallow U-shaped cuts (good for cutting out big chunks) to more defined V-shaped cuts (good for detail). Get to know the feeling and effect of each head, and how to handle the cutter. Short cuts are easier than long ones; and you’ll get a better result if you don’t dig the cutter into the lino but try to keep it flat on the surface of the block. Always cut away from yourself and always use the hand guard!
When you feel you’ve had a few good practice rounds, start cutting out your design. Remember that you are cutting away the areas that will NOT take up the ink (the bits you cut away will be white or blank on the paper).

INK.
Once you’ve finished cutting, roll out your ink on the ink tray. Roll the ink in different directions to get an even amount on the roller. When you’re ready, apply the ink to the raised surface of your lino cut.

APPLY THE PAPER.
Place your chosen piece of paper on top of the inked image and apply some pressure to transfer the ink onto the paper. Some printing kits will come with a baren (a disc-shaped hand-press that you can use to distribute the pressure evenly). If you don’t have one of these, your fingertips or your palms.
REVEAL.
Once you’re sure you’ve applied even amounts of pressure around the paper and the print, slowly peel the paper off the lino block to reveal the printed image. Don’t be discouraged if the first print is a bit blotchy. Sometimes it takes a few goes to get the right amount of ink and pressure.

REVIEW AND REPEAT.
Now that you have your first print, check if there are any areas that need more cutting (perhaps you didn’t cut deep enough or you missed an area) and, once you’re satisfied, get batch producing!
REMEMBER.
Embrace the chunkiness! The more it looks like a handmade print, the better – so don’t worry about little mistakes and blotches, they will make your prints more unique.