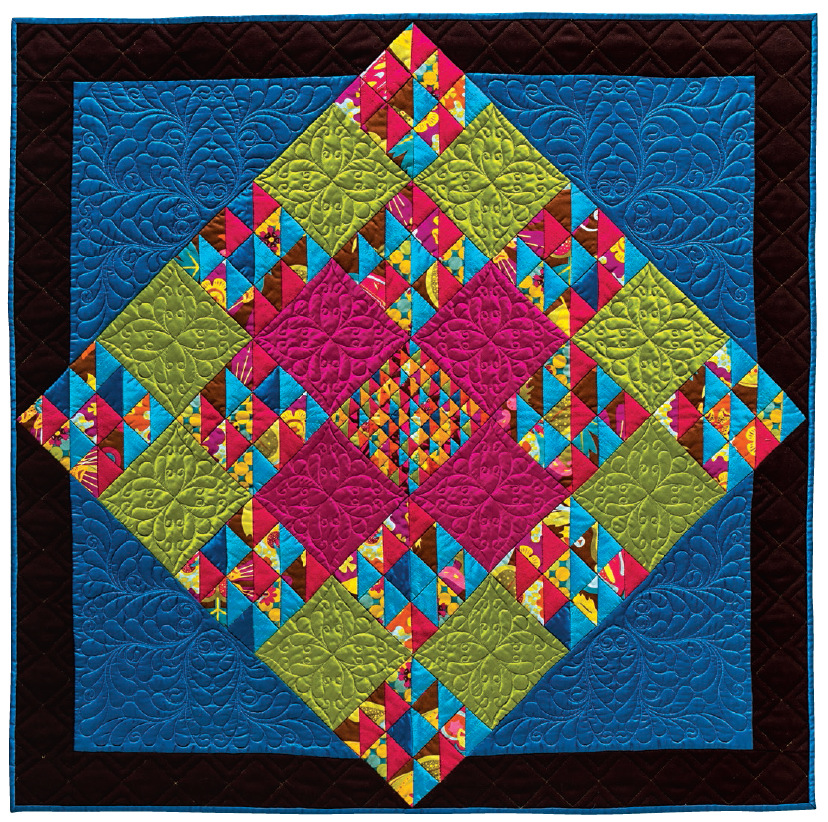
Dividends Table Topper
Finished block: 6˝ × 6˝
Finished table topper: 42⅜˝ × 42⅜˝
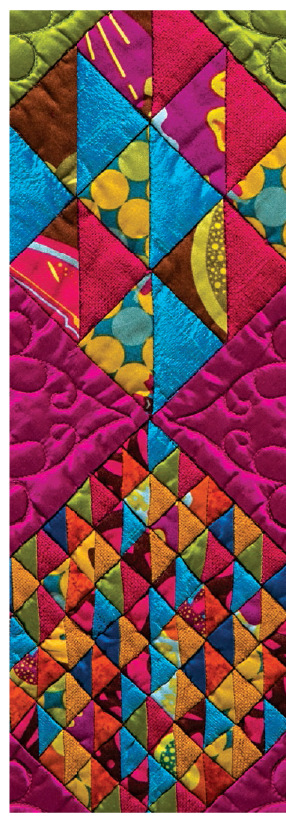
The Dividends Table Topper also uses both sizes of the dividend half-square triangle units. The distinction in this project is that the units are sewn into blocks and then set into the top. This was also a quilting experiment: The silk/cotton blend fabric, called Radiance, is amazing when quilted—I wanted to showcase what this fabric could do. The shine and the depth of color it lends to a project are wonderful.
Read Exploring New Textiles: Eclectic Fabric Guidelines before beginning.
Note: Interface all the silk dupioni before cutting. Also test any other loose weaves to determine whether they would benefit from interfacing before you begin.
Materials
Dividend units: 64 smaller dividend half-square triangle units for center block and 108 larger dividend half-square triangle units for Nine-Patch blocks
Fuchsia Radiance silk/cotton blend: ¼ yard for alternate squares
Green Radiance silk/cotton blend: ½ yard for alternate squares
Teal Radiance silk/cotton blend: ⅝ yard for setting triangles
Brown wool flannel (54˝–60˝ wide): ½ yard for outer border
Backing: 2¾ yards
Binding: ½ yard
Batting: 50˝ × 50˝
If you are constructing the half-square triangle units and not using dividend half-square triangle units, you will also need these materials:
Scraps: Approximately 1 yard total of mixed eclectic textile scraps, such as silk dupioni, silk matka, silk/cotton blends, batiks, and mixed cottons
Cutting
DIVIDEND UNITS
• Trim 64 smaller dividend units to 1¼˝ × 1¼˝.
• Trim 108 larger dividend units to 2½˝ × 2½˝.
FUCHSIA RADIANCE SILK/COTTON BLEND
• Cut 4 squares 6½˝ × 6½˝.
GREEN RADIANCE SILK/COTTON BLEND
• Cut 8 squares 6½˝ × 6½˝.
TEAL RADIANCE SILK/COTTON BLEND
• Cut 2 squares 16˝ × 16˝; cut in half diagonally.
BROWN WOOL FLANNEL
• Cut 4 strips 3¾˝ × 18˝.
• Cut 4 strips 3¾˝ × 21˝.
BINDING
• Cut 5 strips 2½˝ × width of fabric.
Note: Follow the remaining cutting instructions only if you are not using dividends from previous projects.
SCRAPS
• Cut 108 squares 2⅞˝ × 2⅞˝.
• Cut 64 squares 1⅝˝ × 1⅝˝.
Construction
If you do not have dividend units, construct half-square triangle units as instructed below.
HALF-SQUARE TRIANGLE UNITS
1. Draw a diagonal line from corner to corner on the wrong sides of 54 scrap 2⅞˝ squares.
2. Randomly pair these squares with the 54 remaining scrap 2⅞˝ squares, right sides together.
3. Sew a scant ¼˝ seam on either side of each drawn line. Cut on the drawn lines. Each pairing yields 2 half-square triangle units measuring 2½˝ × 2½˝. Press the seams in one direction. There will be 108 larger half-square triangle units.
4. Following the same process, construct 64 smaller half-square triangle units with the 1⅝˝ scrap squares. These units will measure 1¼˝ × 1¼˝.

Half-square triangle units
NINE-PATCH BLOCKS
1. Sew 9 of the larger half-square triangle units into 3 rows of 3 units each. Press the rows in alternate directions.
2. Sew the rows together. Press. Make 12 Nine-Patch blocks measuring 6½˝ × 6½˝. They will finish at 6˝ × 6˝.
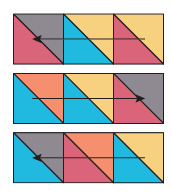
Nine-Patch rows
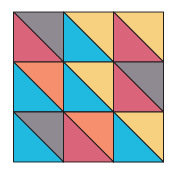
Nine-Patch block
CENTER BLOCK
1. Sew the 64 smaller half-square triangle units into 8 rows of 8 units each. Press the rows in alternate directions.
2. Sew the rows together. This center block will measure 6½˝ × 6½˝.

Center block
Assembly
1. Following the quilt center assembly diagram, arrange the Nine-Patch blocks, the center block, and the 6½˝ fuchsia and green squares into 5 rows. Sew the blocks into rows. Press the rows in alternate directions.
2. Sew the rows together. The center will measure 30½˝ × 30½˝.
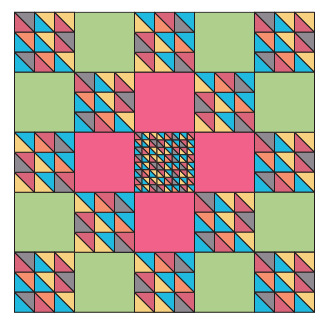
Quilt center assembly
Note: The setting triangles for this project were designed using the teal Radiance fabric to showcase the quilting. They are large and open, leaving lots of room for the quilter to play! I also wanted the points of the center piecing to extend to the outer edge. That meant designing a pieced setting triangle. It’s a little more of a challenge but opens up a world of design possibilities.
3. Sew an 18˝ wool flannel strip to each of the 4 teal Radiance setting triangles along one short side. Press the seam open.
4. Add the 21˝ wool flannel strips to the 4 setting triangles along their other short sides. Press open. The edges of the outer border strips will extend beyond the edges of the setting triangle.
5. Following the diagonal cut edge of the setting triangle, trim the border strips.

6. Sew the pieced setting triangles to the quilt center. Press toward the setting triangles.

Quilt assembly
Finishing
1. Layer, baste, and quilt as desired.
2. Add binding.