

Primer is more important to the paint process than most enthusiasts realize. It is not only the first layer to cover and protect the surface to be sprayed, it can directly affect the final finish coat and its longevity.
Over the years, primers have become much more complicated than the old lacquer and enamel primers that everyone used “way back when.” There are numerous types of primers on the market today and it is easy to get confused. It’s just as easy to get mixed up when selecting a spray gun for primer, too. It is important to select a spray gun that has a large enough orifice to apply the primer without too much reducer being added. With all the different possibilities in mind, it is time to get started.
This article assumes that the surface is ready for primer. This means all metal work has been done and the surface has been sandblasted, sanded (abraded) or scuffed. Regardless of the type of surface, it must be clean. A wax and grease remover is a good choice for cleaning surfaces. This comes in water-based and petroleum-based versions. (A water-based version is good for aluminum; a petroleum-based remover is good for steel.) Apply the remover liberally and sop it up with clean, lint-free towels or rags. The idea is to lift contaminates off the surface rather than rub them around. When working with a surface that has existing paint, soap and water makes a fine initial cleaning solution, as well.
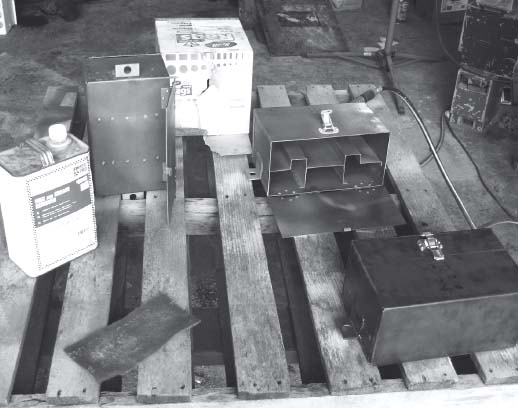
Wax, grease remover and lint-free towels are essential for cleaning freshly blasted metal or new parts.
In selecting a primer, it is important to recognize the properties of both the primer and the surface to get the right primer for the right job. For bare steel, the options are self-etch, epoxy and phenolic primer. For aluminum, self-etch or epoxy makes the best choice. For painted surfaces and fiberglass, a 2K urethane or epoxy primer are good selections. There’s really no good time to use acrylic lacquer primer or enamel primer. Neither of these products have the adhesion properties of the aforementioned primers.
Once the primer has been selected and the surface is clean, it’s time to get ready to spray. Depending on the time of year, the temperature of the metal and air can be a problem. Activated primers are sensitive to temperature and will not dry properly when it is less than 60 degrees. If primer is applied to metal that is substantially colder than 60 degrees, it can cause primer failure by de-lamination.
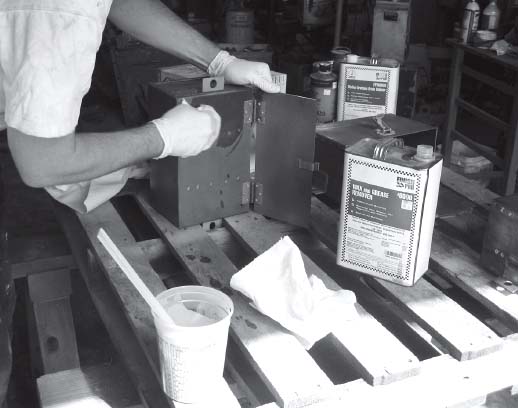
Cleaning a part with wax and grease remover is a simple and basic step toward ensuring a long-lasting result. Substituting other solvents can lead to poor adhesion, “fish eyes” and a generally substandard paint job.
Epoxy primer
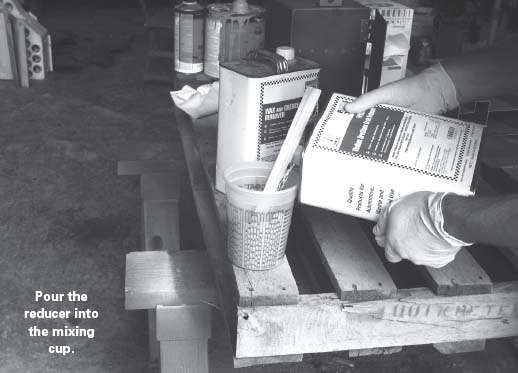
Epoxy primers provide the best adhesion to bare metal and generally give the longest-lasting finish. Epoxy primer generally mixes four parts primer to one part activator, and one-half to 1 part urethane-grade reducer (the variation is for larger/smaller tip sizes on the spray gun).
Once the epoxy primer is mixed, it needs to induct for 30 minutes. This isn’t optional. Induction is required on just about all epoxy products, regardless of brand. While a five-minute mechanical agitation is great, most enthusiasts won’t have a paint shaker, so regular stirring throughout the 30-minute induction period is necessary. Once the primer has completed the induction period and is thoroughly stirred, it can be strained into the paint gun. Straining is required, because once the filters in the paint gun clog, it’s too late to keep it from affecting the panel being sprayed.
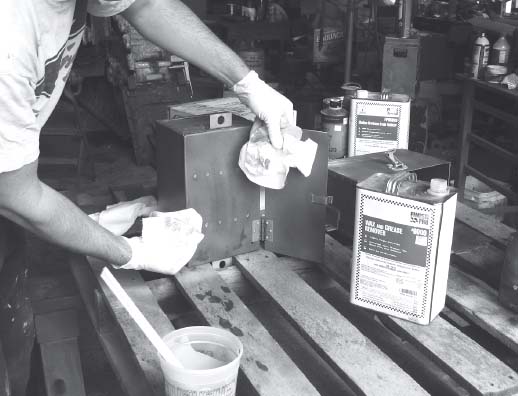
These parts may have appeared clean already, but the residue on the rags shows otherwise. Use cleaning products in accordance with manufacturers’ instructions and you’ll get good results.
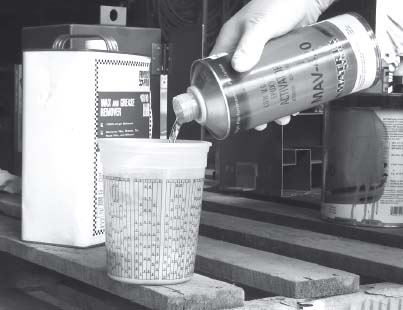
When pouring the epoxy, use the scales — don’t guest or estimate, regardless of your experience.
Using a top-feed (HVLP) gun, a good starting point pressure is 28-35 lbs. at the base of the gun. This will give about 10 psi at the air cap. If the paint gun is a bottom-feed (suction-style), it will take more air pressure, probably 35-45 lbs. to get the primer on the surface. The downside of bottom-feed guns is that more primer is wasted, because the material is lost in overspray due to the higher air pressure required to draw the paint up through the gun. Regardless of gun type, a disposable filter should be installed on the end of the air hose where it attaches to the paint gun. This will ensure that moisture from inside the air hose does not get in the gun.
With the primer gun filled and ready to spray, it’s time to set the pattern. Using the knobs on the gun (two or three, depending on the gun), adjust the spray pattern and fluid needle for the best performance. Spray a test panel to ensure the fan pattern isn’t too wide or narrow and the fluid isn’t set too high. As a side note, don’t try to compensate for too much fluid by cranking up the air pressure; just adjust the fluid knob so that the trigger won’t come back as far. Epoxy applies best in one to two medium, wet coats. It has a medium build so it can fill some imperfections in the surface. For the most part, two good coats are better, although that increases the dry time quite a bit. When re-coating the surface, wait one hour for one coat or overnight for two coats of primer (assuming about a 77 degree F temperature). One good feature of epoxy is that it can be sprayed “wet on wet” with a top coat and still have a good chemical bond. This means putting down the primer and applying color over the top of the primer without sanding. This is really handy when spraying cast parts that are hard to sand.
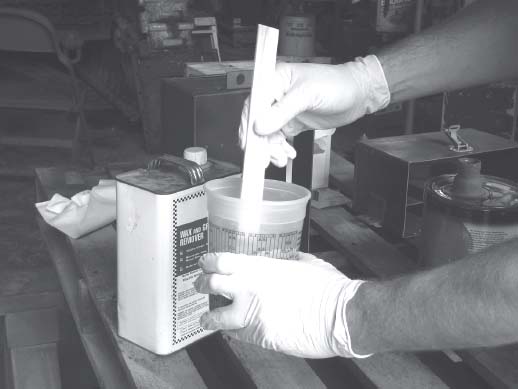
Stirring the epoxy according to the directions is critical.
It’s worthwhile to consider just how versatile epoxy primer is when working with vehicle parts. It is all but impossible to sand the inside of some areas, but with epoxy, it’s no problem. Clean it, primer it and color it, and it’s done. Sanding is not necessary between the primer and color, which really helps on oddly shaped pieces. However, if epoxy is applied before body filler, then the epoxy does need to be sanded. Make sure the primer is fully dried (24 hours) before applying body filler.
If epoxy primer is applied and allowed to fully dry, then it needs to be sanded lightly before applying a top coat. This ensures a good mechanical adhesion between the primer and the top coat. Epoxy primer can also be used as a sealer by adding extra urethane-grade reducer (up to three parts). This makes the primer much thinner so it can go on smoother.
Once the priming and sanding is completed and all the repeated steps with body filler and blocking are complete, an application of sealer over the whole job gives the paint a better surface to bite to. After the spray work is done with the epoxy, it cleans up with lacquer thinner or urethane-grade reducer. Don’t wait too long to clean up the paint gun, because once epoxy sets, it is there to stay.

Regardless of gun type, a disposable filter should be installed on the end of the air hose where it attaches to the paint gun. This will ensure that moisture from inside the air hose does not get in the gun.
Self-etch primer and 2k urethane
Self-etch primer and 2k urethane primer go hand in hand. Self-etch primer will adhere directly to bare metal and works well on aluminum in addition to steel. Unfortunately, self-etch doesn’t have any filling capacity, so it has to be followed with a 2k urethane primer for “build.”
There’s a lot of variety in self-etch primers as far as mix ratios go. Some are one to one, some are two to one, and a few are four to one. Be sure to get a technical data sheet from the paint supplier that clarifies the mix ratio for the self-etch primer. Since one to one is pretty common, that will be the example here. Simply mix the self-etch primer one to one in a mixing cup and stir it well. There’s no induction time and mechanical agitation isn’t as important as it is with epoxy primer.
Once the self-etch is mixed, strained and in the gun, it is ready to be sprayed. In most cases, self-etch primer is thinner than any other primer and seldom gets reducer. Because of this, it will use a little less air pressure than epoxy or high-build urethane. One good coat with about a 75 percent pattern overlap is the sweet spot with self-etch primer. A second coat is OK, but it is seldom needed, because the self etch must be top-coated with another primer or sealer before applying paint. The main goal with self-etch is to get great adhesion to bare metal. Self-etch will even stick to stainless-steel, but the surface must first be sanded with 180-grit paper. Because of its acidic nature, self-etch does not work well with body filler. If there’s going to be a lot of filler involved, use epoxy instead of self-etch.
After the self-etch is applied, give it about an hour to set at 77 degrees F before spraying it over with 2K urethane primer. There are many brands of 2k urethane on the market, and they are available in many colors with gray, white, black and yellow being the most common. The 2k urethane primers are thick and should be sprayed with a paint gun that has a 2.0 or larger tip size. With smaller tips, it becomes necessary to thin the primer with urethane-grade reducer to get it to flow out well, and then it requires more coats to get a satisfactory build. When using reducer in primer, it’s best to use a slower reducer than a fast reducer. This keeps the primer from drying in the air before it hits the surface as dry-spray primer kills adhesion.
When using 2k urethane primers, two to three coats often gives plenty of build for sanding and blocking. All 2K urethane primers will need to be sanded before top coating for a slick surface. The 2K urethanes are body-filler friendly and sand easily, giving a smooth surface for top coating. High-build primers can require longer flash times between coats. Technical data sheets will give the recommendations for each particular brand of primer. Once the 2k urethane has dried, it can be sanded and blocked. To get a good finish with high-build primer, it is common to spray more than once. It is also necessary to repeat the prime, sand and block process until the surface is smooth. When body fillers are involved, it can mean more sanding and blocking to hide the areas that have filler.
One quick note on filler — modern body fillers are remarkable products that can do almost anything. Don’t be afraid of using filler where it’s needed. Between good filler and good primer, the surface can be mirror-smooth with enough effort.
High-build 2K urethane primers shine when used on fiberglass parts. It is hard to get fiberglass looking good, but high-build is the best bet. Be ready for a lot of blocking and re-spraying to make the fiberglass surface look smooth.
Phenolic metal primer
Another primer that has a lot of value in automotive applications is phenolic metal primer. It has the added advantage of being a red oxide that mimics primers used around the period of World War II and after. Phenolic metal primer is a direct-to-metal primer that doesn’t use an activator, but is still durable. It normally thins with Xylene, but urethane-grade reducer works better, because it gives some temperature control. Phenolic primer can even be brushed on, which is great for the inside of a differential or transfer case. When applying the phenolic red oxide with a paint gun, it is best to go with a light coat initially (sometimes called a tack coat) and then come back with a heavier second coat. Don’t thin the phenolic any more than necessary to get it through the gun. It’s not as versatile when it comes to multiple coats as high-build primer. Once the phenolic is sprayed on a panel, it requires one to two hours of dry time before top coating. Since it is a red oxide, it will be much harder to cover with color than gray or green primers, but in many cases, it is the original material used.
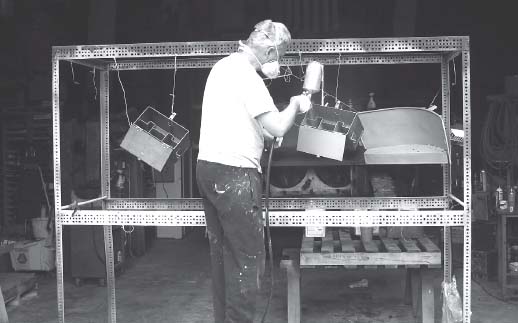
When spraying the primer — or any paint product — the only thing more important than a quality job is a safe one. This painter is wearing a respirator and rubber gloves, but chooses not to wear modern safety equipment. We recommend a full paint mask, quality respirator and other safety equipment to protect the eyes, skin and lungs.
Phenolic read oxide is also harder to sand than 2K urethane primer. This product probably shouldn’t be used on surfaces that need to be really slick, as it is definitely an industrial-grade coating and requires more effort to make smooth than typical automotive products. Phenolic primer cleans up best with urethane-grade reducer or Xylene, lacquer thinner will work in a pinch. The red is nasty, so be sure to wear gloves!
Safety gear
Gloves are just part of the safety equipment that is necessary when spraying primer. A good disposable respirator is required. Dust masks aren’t good enough to protect a painter from the chemicals involved. Also, be sure to work in a well-ventilated area and follow all precautions listed on the primer’s container by its manufacturer. Decent gloves for mixing and cleaning are also very important.
Additional project preparation
Quality mixing cups will have good mix ratio charts on the sides and make mixing the primers, activators and reducers much easier. Water traps on the air compressor and inline filters on the paint gun are critical items that need to be used. Be sure to have plenty of sticks and strainers on hand. It’s seldom a good idea to reuse either while mixing primer.
It’s also important to plan for clean up after the product. Most of the products discussed here will clean up with lacquer thinner. Have a good paint gun cleaning kit on hand with a wide variety of brushes, because primer is surprisingly resilient and once it dries inside the paint gun, the tool is toast. Local paint stores can suggest environmentally safe disposal methods for any waste products left over. Most garbage companies will not take paint cans that have paint in them. While at the paint store, don’t forget to get all the pertinent tech sheets. They won’t be available for every product, but get all that are available. The cans will also have instructions on them, but paint is often spilled over the instructions, and the print is small and hard to read even before it’s covered by primer.
Take every opportunity to discuss the project with the local paint supplier. Each project is different, and there are loads of variables that can affect selection of primers, paint guns and accessories. A local paint supplier will have insight into what works and what doesn’t much more than the occasional internet chat board.
Don’t be afraid to ask questions. Articles like this are a guideline more than direct instruction. Think about the different techniques involved when it comes to priming large parts and small parts. After a while, adjusting the paint gun will be second nature, but at first, the average hobbyist isn’t prepared for the knobs and dials involved. These are things learned with practice. Pay close attention to the instructions and pay close attention to the results and the job will come out like it is supposed to.
For more painting and priming tips and advice, check out
the Automotive Paint Handbook, available at
www.shopoldcarsweekly.com.