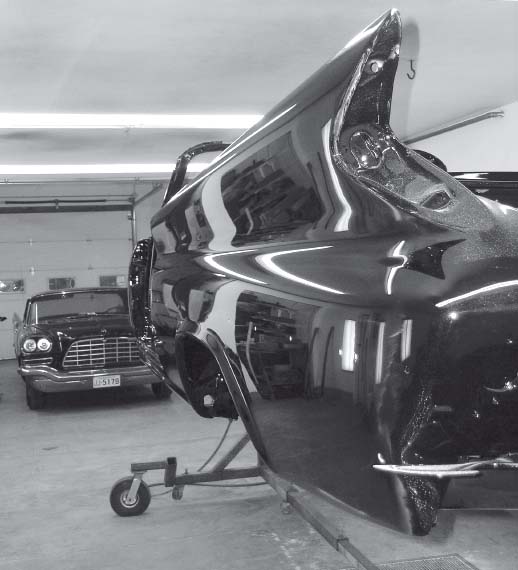

Multiple sanding steps to a paint surface will achieve this mirror finish, which is especially important on a black car.
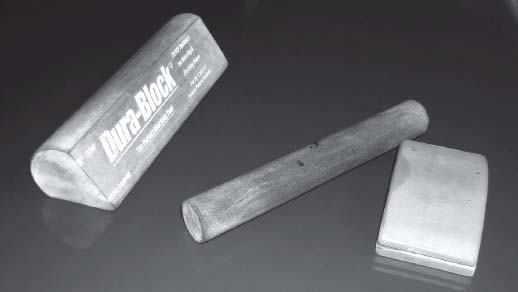
Rubber sanding blocks of different shapes and sizes are used on the various surfaces of the body.
One of the most obvious signs of a quality restoration is the condition of a car’s paint. Many people paint cars, but a small few do so with a mind toward judging, and in those cases, the restorer’s reputation is on the line. As paint evolves, these esteemed restorers develop new techniques to achieve the show-stopping results they have perfected with other products. Among those who has evolved with paint is Jerry Kopecky of Kopecky’s Klassics in Iola, Wis.
Kopecky restores finned MoPars, many of which have achieved record prices at big-time auctions. To maintain this high level of restoration, Kopecky has had to develop new methods when presented with new paints mandated by the EPA. He concedes that restorers will each have their own method of applying and working the paint for show-quality results, but he shared his secrets for obtaining ocean-deep paint on owner Randy Guyer’s black 1960 Chrysler 300-F convertible, the last such car built that year.

The following sanding method is shown on PPG Concept acrylic urethane with a high solids polyurethane clear.
The process Kopecky uses to achieve perfect paint boils down to leveling the paint through sanding for a smooth, even surface before its final polish.
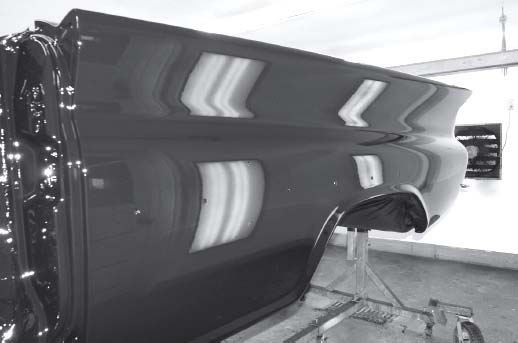
It’s difficult to show, but this fender has plenty of orange peel and a few bumps from dust in the freshly applied paint. The sanding method covered here will eliminate these imperfections for a smooth, level show-quality finish.
“In the old days, you could go from 1,000-grit to polishing with a heavy-grit compound, but you can’t with new products,” he said. “You’ll get swirl marks.”
Since paint is only as good as the metal work beneath it, the subject car received quality metal work and a thoroughly dried primer coat before the final painting began. In fact, the primer was cured four to six months to allow all of the solvents within it to dry out the surface. This prevents the paint coat from trapping uncured solvents. Many shops are not equipped to allow such drying time, but Kopecky has developed his business to accommodate such a schedule.
On top of the dried primer coat, Kopecky sprays two coats of PPG Concept acrylic urethane for the color and two coats of PPG Concept high solids polyurethane clear with one coat of a 50⁄50 mix of these two products between. The mixed coat is sprayed as an alert if Kopecky sands too far into the clear, although he has not encountered that situation thus far. Like the primer, the paint coats are allowed to dry four to six months after they are sprayed.
“I like the long cure,” Kopecky said. “It makes it harder to sand, but that’s what you want.”
Regardless of the gun or the experience of the painter, new paint will have light orange peel and bumps, which Kopecky refers to as “dust nibs.” Most painters combat these imperfections with the minimum of a light sanding and polishing. While this works on a driver-quality vehicle, it’s not enough for a high-end show car.
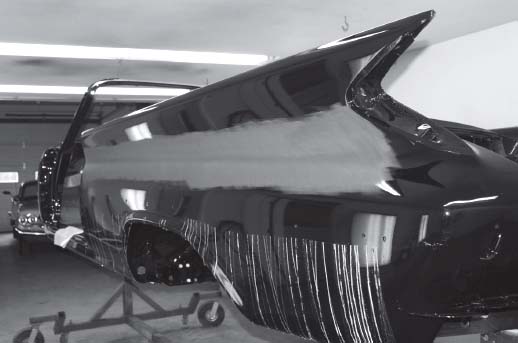
Jerry Kopecky’s sanding method involves sanding the length of the fender. Here, his consistent sanding direction is illustrated. Since he’s sanding a clear coat, the high-solids paint surface turns white after sanding. Sanding with 800-grit is the first step and is the “leveler” that removes all paint surface imperfections. The following sanding steps will remove the previous step’s sanding marks to a mirror finish.
“A high-solids clear doesn’t go on as smooth as you’d like,” Kopecky said. “Each coat adds chances for flaws and for most, regular clear is fine.”
Once the paint has cured, its smoothness can be addressed in the sanding process, but not before the paint is thoroughly and carefully cleaned of any dust or other debris that may have settled on the surface. For this task, Kopecky doesn’t use a hose and old rags, but a sealed squirt bottle to mist the surface and a clean, lint-free towel to dry the surface without contaminating it with dust or other debris.
“If there’s one grain of sand, the party is over,” Kopecky warns.
Once the surface is completely clean, it’s ready for Kopecky’s sanding method. Although paint manufacturers recommend working in two-foot areas, Kopecky sands the length of a panel, although he divides it in sections from top to bottom at natural body lines.
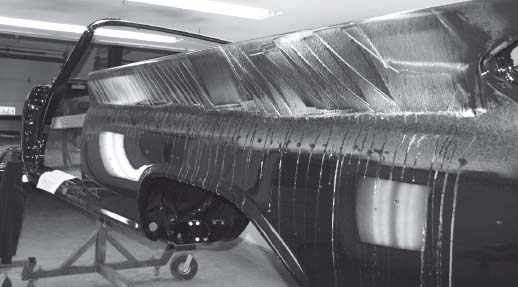
After sanding the middle section with water-soaked 800-grit wet or dry automotive sandpaper, Kopecky repeats the process the length of the fin. Along with moist sandpaper, he uses a spray bottle to keep the painted surface wet while sanding.

The same sanding direction is carried through from top to bottom, even though sanding is done in sections. Each area that is sanded overlaps adjacent sections to ensure an even finish.
His first pass uses 800-grit water-soaked wet or dry automotive sand paper attached to contoured rubber sanding blocks on the painted surface, which has been made wet with a spray bottle. He picks a comfortable angle in which to sand the length of the panel. Once he completes the pass, he cleans the surface again, then repeats the sanding at an opposite angle (90 degrees) from the first pass in a method he calls cross-cutting.

A second pass with 800-grit sandpaper is completed at an opposite angle in a method Kopecky calls “cross-cutting.” Each time Kopecky starts sanding a fender, he sands at an angle opposite to his previous pass.
“The 800-grit does all the work — it’s working the imperfections out,” Kopecky said. “You have to pay attention most at this step... It’s the leveler.”
After passing over the panels with 800-grit wet or dry automotive sandpaper, the paint imperfections should be gone. The next steps remove the sand marks from the previous sanding step by using finer-grit sandpaper. When changing the sandpaper between grits, Kopecky makes sure the sanding marks from the previous direction are also gone by examining the panel when it’s dry. With each move to a finer grit of paper, the sand marks should decrease. With each step, Kopecky sands with a medium pressure.
Next, Kopecky repeats the previous step that used 800-grit sandpaper, but moves to 1,000-grit water-soaked wet or dry automotive sand paper. He begins by sanding 90 degrees from his previous pass and repeats the cross-cutting method. The 1,000-grit is the last paper with which he makes two passes with the same grit.
After two passes with the 1,000-grit sandpaper using the cross-cutting method, Kopecky moves up to 1,200-grit wet or dry paper. He starts sanding 90 degrees against the previous direction, but only makes one pass with this grit before moving to 1,500. A single pass against the direction of the 1,500-grit sand marks is then made with 2,000-grit sandpaper.

Once he works through 800-, 1,000-, 1,200-, 1,500- and 2,000-grit sandpaper using sanding blocks, Kopecky switches to a random orbital sander for sanding with a 3,000-grit disk. He installs a thick pad beneath the 3M Trizact 3,000-grit sanding disk so the pad flexes without digging into the paint while he sands with medium pressure at a low to medium speed.
“At 1,500-grit, you’ll think it’s really a drag, but it’s worth it,” Kopecky said.
After a pass with 2,000-grit, Kopecky is ready to move to 3,000-grit and a new sanding tool: a random orbital sander. A 3,000-grit 3M Trizact disc is installed on the sander with an intermediate pad between the sander and the sanding pad to allow the 3,000-grit pad to flex without digging into the paint. He then sands the panel with medium pressure at a low to medium speed.
Finally — after sanding with 800-, 1,000-, 1,200-, 1,500-, 2,000 and 3,000-grit sandpaper — the panel is ready for polishing. Kopecky uses a three-step process with 3M Perfect-It foam compound pads. The first step polishes with a white Perfect-It foam pad and the company’s No. 1 rubbing compound with a variable speed polisher. The second polish uses a Perfect-It gray foam pad and the company’s machine polish rubbing compound No. 2. The final polish is made with Perfect-It Ultrafina SE No. 3 with 3M’s softest blue pad to remove swirls.
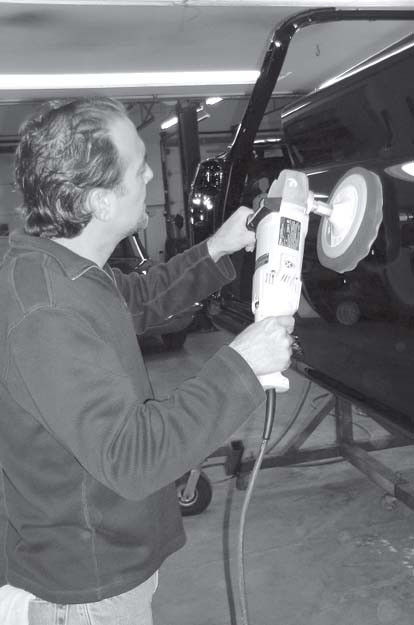
Kopecky applies the final polish with a 3M Perfect-It Ultrafina SE foam compound pad and Perfect-It Ultrafina SE polish using a variable speed polisher.
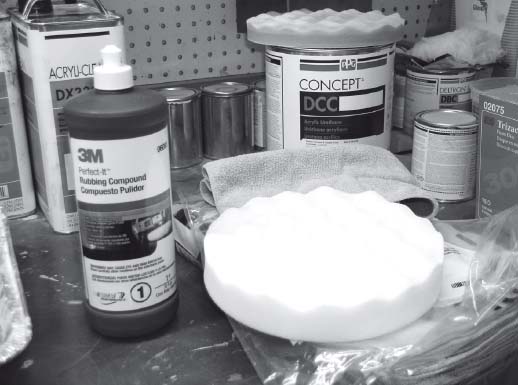
There are three polishing steps Kopecky undertakes after sanding with a 3,000-grit sanding disk. The first step uses this 3M Perfect-It foam compound pad and matching Perfect-It rubbing compound. The second step uses a machine polish rubbing compound while the final step uses a softer 3M Perfect-It Ultrafina SE Perfect-It polish.
At this point, a perfect surface worthy of any show field has been achieved.
Clearly, such a process involves a great amount of patience, skill and labor. For a single rear quarter panel illustrated in this article, Kopecky estimates 15 hours were spent from sanding to polishing. The result is relatively costly, but certainly worthy of a 300-F convertible.
Unless you’re doing the sanding, don’t try this on your mom’s six-cylinder Biscayne sedan.
SOURCE:
Kopecky’s Klassics
P.O. Box 473, Iola, WI 54945
715-445-4791