

Upholstery professional D. Chase begins removing the convertible top of a 1984 Buick Riviera, noting how the top was originally installed in order to reinstall it in the same manner. The location of holes, staples, studs and glue are all noted and photographed.
Not all cars are equal, nor are their convertible tops. No-frills cars are likely to have relatively simple tops, but luxury cars often have more complicated tops, such as the roof covering on the featured 1984 Buick Riviera convertible. Like their blueblood Cadillac Eldorado counterparts, Buick Riviera convertibles of the 1980s were built for General Motors by American Sunroof Corp. (ASC). Ironically, ASC built a top that, when in the up position, mimicked the steel roof it cut off to make the convertible. Although this in itself is complicated, ASC also trimmed the convertible top with a full headliner that made Riviera convertibles feel and appear as fully closed cars when the top was raised.
Required materials
Sewing machine
Staple pullers
Staple gun
Measuring tools
Squares
Upholstery pencil
Scraping tools
Spray adhesive
Rawhide hammer

The headliner was carefully removed from the interior. The owner requested the original headliner be saved and reinstalled.
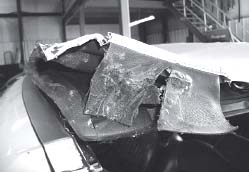
The top and side flap were removed from the convertible top frame.
Installing one of these tops is no easy task, so replacement of this top was trusted to a professional, D. Chase of Chasin’ Perfection. She noted this top was one of the most difficult she’s tackled because of its size, shape and because the convertible top and curtain had to be installed in one piece. While the principles of replacing a convertible top are shared by this Riviera with other convertibles, the addition of a headliner and a healthy amount of layering in this convertible top made it more complicated and added steps to the process. However, if you can follow the steps to replacing this convertible top, you’re equipped to replace a more simple convertible top on a car such as a 1960s Camaro or Firebird.
Initial inspection
Before removing the top, Chase inspected the roof to determine what parts required replacement. In addition to the top, the material that makes up the convertible top well, the top boot, the pads and the cables were inspected. Convertible top parts that needed replacement were then ordered.
As in any project, organization is key. All old parts were kept, whether or not they were replaced, and those parts were organized with labels and photographs to show where they were originally installed. This ensured the original screws, nuts and other parts were returned to their original position on the car. The location of screw holes to aid installation of the new top were also marked.
Top removal
On this Riviera, the headliner was removed first, starting at the front and working from the header bow rearward. Any screws were removed and safely stored for reuse, and glued areas were carefully separated.
The top was then elevated from its closed position so glue and staples could be removed, thus lifting the top from the framework beneath. The weatherstrip on the header bow was then removed, and unlike most convertibles, this top did not have a metal insert in the header bow weatherstrip. As such, it would be reinstalled this way. The weatherstrip was also removed from the glue strips that attached it at the front and rear convertible top rails. This car had extra metal pieces in the rear quarter rail of weatherstrip to remove.

The convertible top was pulled away from the side rail to remove the top moldings. Also visible in this image is the end of the convertible top cable.
The Riviera had a “wire on” trim piece on the rear bow, and to detach it, screws and staples had to be removed.
At this point, the cables that run the length of the roof were unscrewed from the top frame. The metal strip in the top at the second and third bows were removed, although they can be removed with the headliner. Screws were removed at the rear of the well and replaced after the well material was removed. The rear window defroster was also disconnected.
Beneath the top is a formed metal bar with a tacking strip on its outside known as a trim stick. The trim stick holds the top to the framework. At this step, the nuts holding the trim stick to the top frame were removed. The trim stick is a three-piece unit on most cars, and the location and orientation of these trim sticks was photographed and marked so they could be returned to their original position when the new top was installed.
With the trim stick freed from the studs that hold it in place, the top could be peeled back to expose the rear bow. This allowed access for the removal of staples that hold the curtain and rear pads in place.
The convertible top was now free of the top frame. Chase found a large, clean work table to lay out the original top. The curtain containing the rear window and the rear top pads were still attached to the top with the trim stick. Where the original pads and curtain attached to the trim stick was carefully measured and marked on the trim stick. Once the locations of these top components were marked on the trim stick, the staples holding the pads and curtain were removed.
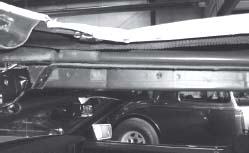
These hidden bolts in the side rail were removed after their location was photographed and documented.

Another view of the convertible top pulled away from the side rail to remove the top moldings. The end of the convertible top cable is again visible.

Staples were removed from a tacking strip and the part was reused. If the tacking strips are in poor condition, they should be replaced.

The bottom of the rear curtain, which holds the back glass, was photographed so it could be reassembled correctly.
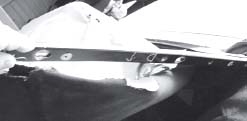
This trim stick fastened the material that makes up the convertible top, rear curtain, rear pads, headliner and top well (the area behind the rear seat into which the top folds) to the rear of the body. When this “keystone” piece was removed, its orientation and the location of other top components that attach to it were marked.
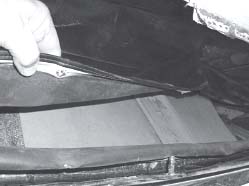
To help make the roof taught, this Riviera had small elastic tabs deep in the body, by the top well. The new top did not include these parts, so new tabs had to be made using the originals as guides.

Staples were carefully removed from the top. Although a new top will be installed, the original top was kept for reference during installation of the new top.

Even the boot was photographed to ensure it was correctly reattached.
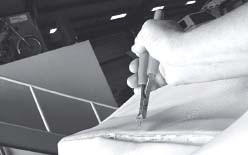
The original convertible top (white material), pad (black material) and tacking strip (shown with staples along its length) were photographed near the rear curtain to ensure the new top was correctly installed. The placement of this tacking strip and all the parts attached to it were marked so the new top was placed in exactly the same location on the strip.

The cable ends were removed with an electric drill.

The end of the cable was photographed in the old top before it was removed and run through the new top. To the left of the cable end is a sleeve in the top where the cable runs through.
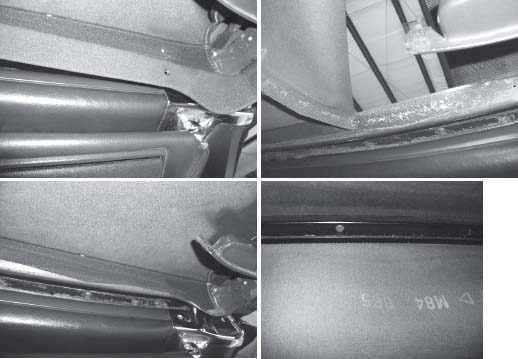
The many layers of trim and material are shown in these views. To reveal each layer, screws and other fasteners, including glue, were carefully removed and labeled to preserve the original materials and to label their original location. Old glue was removed from parts that were reused to ensure the new adhesive bonds.

A rear view of the original rear and top pad, which run front to back, shows the marks made on the material to ensure it was reinstalled in the same location from which it was removed. This image was taken from the rear bow, the most important point in the framework for aligning the new top. The height of the rear bow is critical, and its original measurement is available from convertible top sources.

The original top was pulled back onto the car’s rear deck to expose the rear window panel, called the rear curtain.
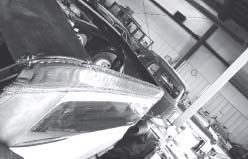
With the original rear curtain on a workbench, the alignment of the pad and tacking strip that attach to it were measured and marked. The center of the rear window and curtain on the tacking strip were also measured and marked to aid installation of the new rear curtain. The many alignment marks showing where the top was attached to the trim stick are barely visible.
The owner of this car requested that all of the original top and rear pads and cables be reused so they were set aside. The condition of the original tacking strips that mate the convertible top to the frame were inspected and any that required repair or replacement were addressed.
Installing a new top
Although a new top and rear window curtain were ordered, it required inspection for size, shape and other characteristics to ensure it matched the original. While working with the rear curtain, its glass rear window, which is tinted with a built-in defroster, was protected with bubble wrap. The wires for the defroster were also taped to the glass to keep them from harm.
While the new top was on the work bench, the original cables were taped to thin but stiff wire and strung through the top. Due to the size of this car’s top, the rear pads and curtain were attached to the original trim stick at the table, because of the top’s overlap of the rear curtain. For this step, the center of the top and the rear curtain were determined and marked. Then the trim stick’s three pieces (driver side, middle and passenger side) were laid out and attached with the original corner brackets. When necessary, tape was used to reinforce the corner brackets of the trim stick during the top’s installation. Once the center of the middle trim stick was determined, the original marks and measurements from the old top were referenced to align and staple the new rear window curtain to the trim stick.
At this point, the rear pads were laid on the new curtain and lined up using the original measurements and marks. The rear pads and curtain were then stapled to the trim stick. The top was then laid on top of the curtain and rear pad assembly. Using the measurements from the old top, Chase drew a removable thin line to follow the body line of the car. This line was in the location of the trim stick, as it determined where the top was stapled to the trim stick. This area was critical to a tight fit of the convertible top, which will help it stay sealed. Once the top was properly aligned with the marks, it was stapled to the trim stick. All excess material from the curtain, rear pads and top were cut away at this point, and all the holes were cut for studs to pass through the trim stick.
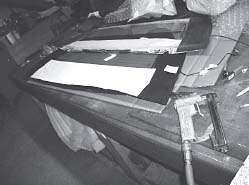
The glass of the new rear window was covered to protect it during the measuring and installation stage. Here, the old curtain is shown next to the new curtain. Measurements for the pad and old curtain were transferred from the trim stick and new curtain to ensure the back window was centered on the car.

Measurements transferred from the original rear curtain to the new rear curtain show where the trim stick has been stapled in place.
To protect the car’s finish, Chase covered the body and taped the cover in place to prevent it from moving. Then the new top was placed on the car’s roof bows. The trim stick was put back into place by aligning the center of the trim stick with the center stud using marks placed on the trim stick before it was removed, then the trim stick was tightened using the original hardware.

Directional arrows and lines marking the locations of holes and attachment points for the rear curtain and pad are visible on this view of the trim stick. This is a “before” image of the following image that appears at top right.

Once the trim stick is aligned with the line on the new rear curtain, they can be stapled together. The rear pads and convertible top can now be attached to the trim stick on the bench, in this sequence, due to the top’s enormous size.

Here, Chase located the center to install the trim stick.
Then, she adjusted the rear bow height to the factory specification and installed the rear curtain to the rear bow.
Fastening the top to the car began with the rear window curtain at the rear bow. Using manufacturer guidelines, the proper rear bow height was established and any adjustments were made to make the measurement match the guidelines. This step was critical to making the top fit and look correct. Now the center of the rear bow and the rear curtain containing the back window were determined. The protective covering for the back glass was removed and once the centers of the rear curtain and top bow were aligned, the curtain could be stapled into place. Chase first stapled the center, then worked outward toward each side until the top was completely stapled to the rear bow.

Once the top is centered and the wrinkles were removed, “wire on” was attached to the rear bow to cover the staples that attach the top to the rear bow. The “wire on” was then folded over the staples and hammered smooth with a rawhide hammer.

The header bead fits at the front of the convertible top (at the header panel) and acts as a seal. It had to be cut and sewn to fit the car.
The sewn line (a.k.a. dart) in the convertible top was then aligned over the rear bow and stapled in place. Particular attention was paid to making the sewn line and the rear bow mate up to ensure staple coverage of the trim piece.
Now the top was pulled forward to the header bow. Both ends of the cables — already installed in the convertible top — were attached to the convertible top frame and the top was completely raised and locked. At this point, Chase could sat back and surveyed the progress. If the top and curtain were fit to her satisfaction, Chase would have moved on to the next step. Given the complicated nature of this convertible top, Chase tweaked the top to improve the fit after checking her work. Adjustments began by unlatching the top from the header bow and propping it open with a sturdy, soft object. The trim sticks were removed and the staples were removed so the alignment line could be redrawn. Chase tweaked the top about 1⁄4 inch each time and checked the fit until it was exactly where she wanted it. Once the top fit tightly and without wrinkles, the trim stick was reinstalled and fastened into place and the top was re-stapled.
The top was then pulled tight again and locked to the header bow and lines were marked for gluing and stapling while the top was released (this will give that “bounce a quarter off it” look). After the lines ware marked, the top was opened three-quarters of the way and spray adhesive was applied to the side glue flaps and the top header bow, then glued into place, making sure the side glue flaps were tight to the frame and the top was centered. Spray adhesive was also applied to the glue flaps at the quarter windows and glued into place.

Chase reinstalls the headliner after the convertible top was completely installed.

Voila! The finished product. In this view, the complexity of the Riviera’s sail panel, large but only partially exposed rear window and complicated body lines can be seen. These features add up to a challenging convertible top installation.
A new header strip had to be made using a molded plastic bead and a matching vinyl strip, which Chase had to sew in place. Then the underside of the flap at the front of the top was stapled to the front tacking strip. The excess material was trimmed and the header strip was then stapled to the tacking strip. It was imperative the header strip was snug against the top to ensure a smooth fit.
It was now time to button up the top. The weatherstrip was then installed and the wires for the defroster were connected. The liner for the well was also fastened into position, and metal strips were slid into position on the second and third bow top sleeves. The headliner was also reinstalled, as were the interior trim pieces of the convertible top.
As a finishing touch, a new “wire on” was stapled at the top of the rear bow and gently hammered into position with a rawhide hammer. Chrome finishing tips were then installed at the ends of the “wire on” trim piece.
Finally, the top was steamed inside and out to remove any minor wrinkles and the Riviera was ready for top-up cruising.
SOURCE:
Chasin’ Perfection
Custom Automotive Interiors, Tops and Trim
715-281-5939
chasinperfection@gmail.com