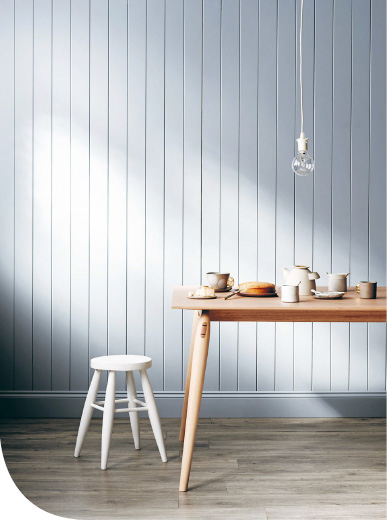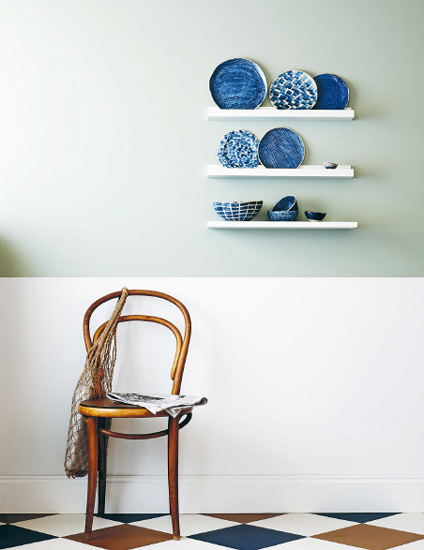
Ceramics in a space are most often associated with sharing meals or honoring flora. Both acts can be incredibly beautiful, personal, and memorable, as can the ceramics that facilitate them. I clearly remember being given a modern ceramic vase that had been hand-built and sold by a Sydney ceramicist at a local design market for my sixteenth birthday. It was the first vase I ever owned and I recall its shape and glazed pattern distinctively; it took a place of pride in my bedroom and paved the way for an addiction to ceramics that is alive and well today. Not a week goes by when I don’t buy fresh cut flowers and spend far too long choosing a vase from my collection in which to display them. The ceramic piece itself, the act of filling it with flowers and the energy that emanates from that area in my home bring me the simplest joy.
The act of making ceramics is just as significant as the enjoyment of the finished piece and I have fond childhood memories of learning to throw clay on the potter’s wheel on Saturday mornings. Making ceramics is an ever-evolving experiment and, in the words of many ceramicists, a roller coaster of emotions. More than any other making medium, ceramics allows your personality and that of the piece to shine through, warts and all. The ceramicists whose work I’ve focused on in this chapter cover techniques such as hand-built, wheel-thrown, and slip-cast pottery, using stoneware and porcelain clay bodies, and illustrate a process that’s incredibly individual and organic with a set of rules that any maker should break—once they’ve spent some time learning them!
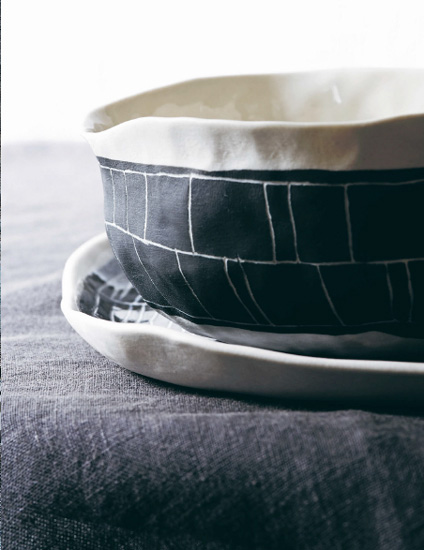
“My plates and cups are hand-built with porcelain, and then etched with patterns—patterns that usually repeat, or reappear, elsewhere, depending on where they take me.”
SUZANNE SULLIVAN, CERAMICIST
(NEW YORK, USA)
Hand-built, etched and glazed porcelain tableware
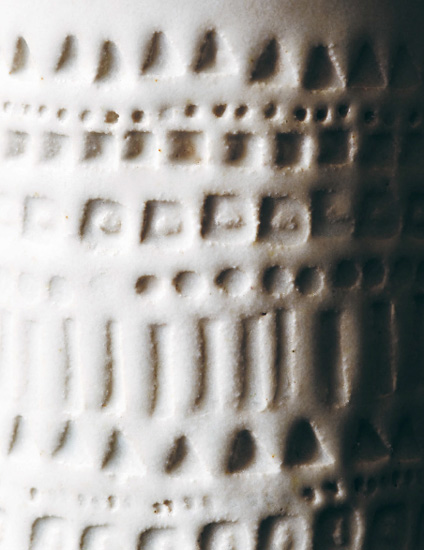
“I often feel as if I’m illustrating in clay: I make shapes and then stamp or draw into it using carved wooden pegs. If it’s not working, I can smooth it over again.”
STELLA BAGGOTT, CERAMIC DESIGNER & MAKER
(LONDON, UK)
Hand-built Staffordshire stoneware vase with matte white glaze
“We make together, using locally supplied clay in ways that highlight its natural properties. It’s interesting how each maker’s technique is visible in the final pieces.”
THE FORTYNINE STUDIO, COLLECTIVE OF DESIGNERS & MAKERS
(SYDNEY, AUSTRALIA)
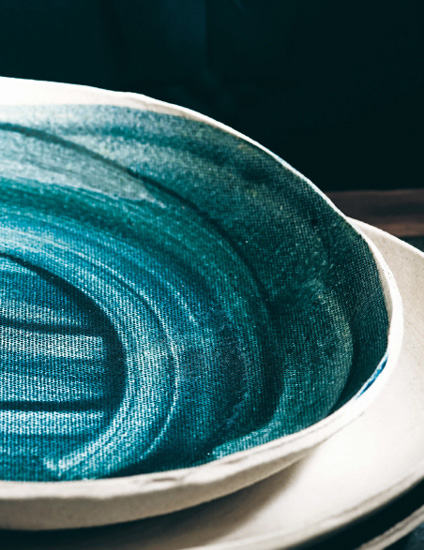
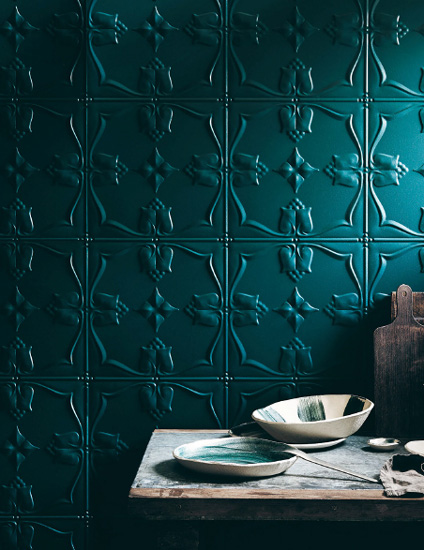
Flop-molded glazed stoneware tableware
Maker to Maker with...
Alison Fraser, ceramicist
(Southern Highlands, Australia)
TM: Alison, describe your textured ceramics.
AF: These bottle forms are hand-built with a heavily grogged stoneware clay and finished with shino glaze.
TM: What is your process and how do you achieve such a distinctive glaze?
AF: I roll the clay into slabs and then cut and shape them to create the form. I don’t use a potter’s wheel at all. I mix the matte shino glaze myself; it responds beautifully to the iron in the clay, hence the rust.
TM: Why did you become a ceramicist?
AF: After a career in graphic design I longed to do something more self-directed and tactile. I enjoy the process and feel of the clay.
TM: What happens when you make?
AF: I go into “the zone,” with thoughts of the outside world dropping away. There is little planning and the forms usually spring forth spontaneously. I do have a warehouse in my head of structures, colors, and textures that I would like to explore and they take turns to leap out and have control of my hands.
TM: Does your “warehouse” include a bond with the makers of the past?
AF: I enjoy the link to my creative forebears and hope that this ancient connection extends into the contemporary homes my pieces go into.
TM: What do you think ceramics bring to a modern space?
AF: Warmth, humanity, and, most importantly, stories.
TM: Where do you make?
AF: I started out on the dining room table, lounge room floor, and in the garden. Then I had a studio that was packed up every time we had a house guest, then a tiny cobwebby old garage, but now I am about to “graduate” to a 42-square-meter purpose-built studio space that will be all mine, mine, mine. . .
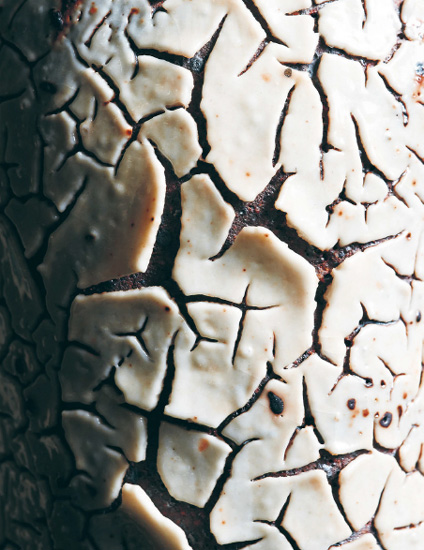
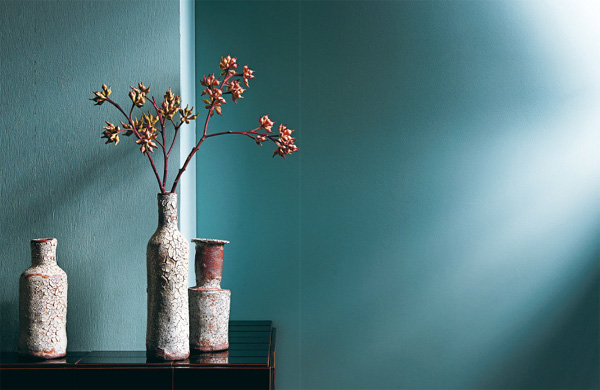
“These bottles use a ‘crawling’ glaze that clumps during firing. Many potters would reject such severe crawling, but I like it”
ALISON FRASER, CERAMICIST
(SOUTHERN HIGHLANDS, AUSTRALIA)
Hand-built stoneware bottles using shino glaze
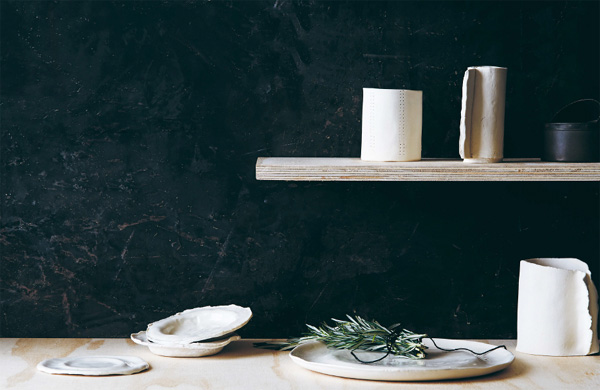
Wheel-thrown, hand-built stoneware tableware with hand-dipped glazes / Bridget Bodenham
“Making gives me a purpose in life. It is the most humbling gift to create a cup and then offer it to a loved one to drink from.”
BRIDGET BODENHAM, POTTER (HEPBURN SPRINGS, AUSTRALIA)
“Working with clay is one of the most peaceful, grounding things I have known. There’s just something about it. It grows on you very quickly…”
LARA HUTTON, STYLIST, ARTIST & CERAMICIST
(SYDNEY, AUSTRALIA)
Hand-built porcelain tableware & vessels
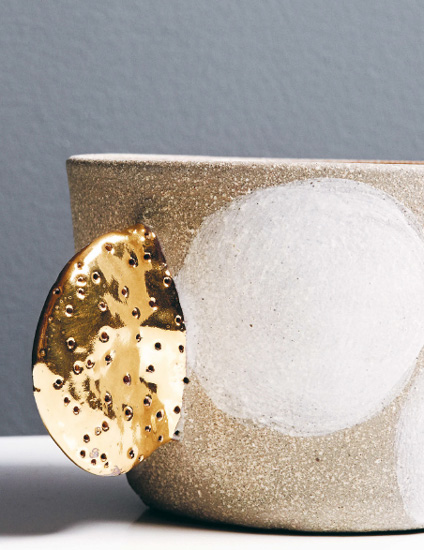
“Handmade pottery brings a unique personality to a space. Sgraffito and wax-resist techniques combine with my favorite bright blue, cobalt oxide, to create one-of-a-kind pieces that have my fingerprint on them, literally.”
LAUREN BAMFORD, PHOTOGRAPHER & MOONLIGHTING CERAMICIST
(MELBOURNE, AUSTRALIA)
Hand-built & slip-cast stoneware & porcelain tableware
“My studio is in a small forest, completely surrounded by the very nature that inspires my ceramics. The exterior is painted a smoky shade of blue/black that blends in with the surrounding landscape. The interior is bright white combined with natural wood and varying shades of blue furnishings, all handmade. It’s a truly inspirational space to work in.”
MICHELE MICHAEL, CERAMICIST
(MAINE, USA)
“I like to keep my studio fun and inspiring, so it feels more like a play space than a work space.”
SALLY ENGLAND, FIBER ARTIST
(MICHIGAN, USA)
“I work in a sunny light-filled room stacked full of molds and sculptures. High shelves hold rows of my plaster busts, who keep their eagle eyes on me while I make.”
KATHY DALWOOD, PLASTER SCULPTOR
(LONDON, UK)
Making in general can be a messy affair, but making ceramics is downright dirty work. Remember making mud pies as a kid? Well, take that memory, clean it up with some adult awareness and bring it indoors. Suffice to say that, like any maker, a ceramicist can make anywhere but will eventually require and be forever grateful for a delegated workspace of some description—one that is easily cleaned or ok to remain covered in clay. This doesn’t mean every ceramicist needs an idyllic outdoor studio flooded with natural light, decked out with floor-to-ceiling shelving and a kiln. This would be incredible, of course, and certainly something to aspire to, but the reality for most of us just starting out is a corner of the kitchen in the still of the late evening, or a crumbling garden shed that’s shared with undesirable wildlife. Oddly enough, this is often part of the joy of making.
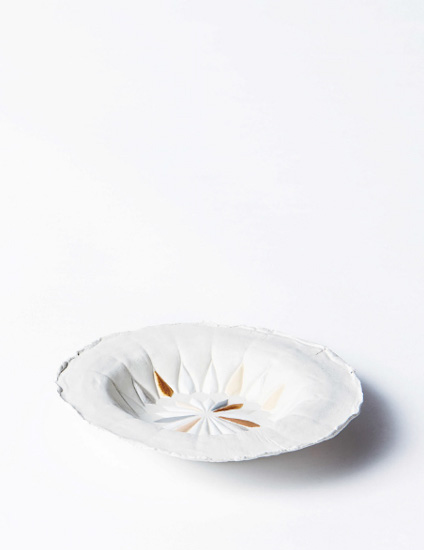
PROJECT No 4
no-fire clay vessel
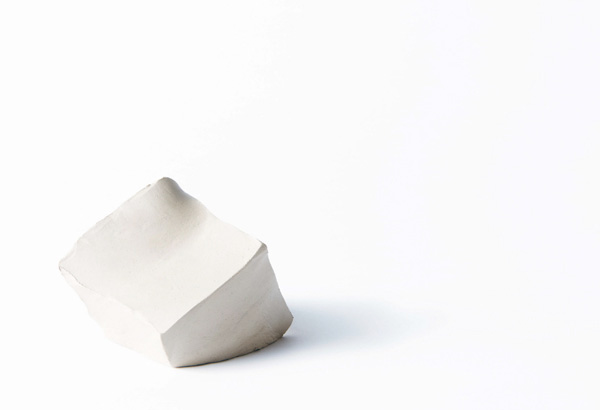
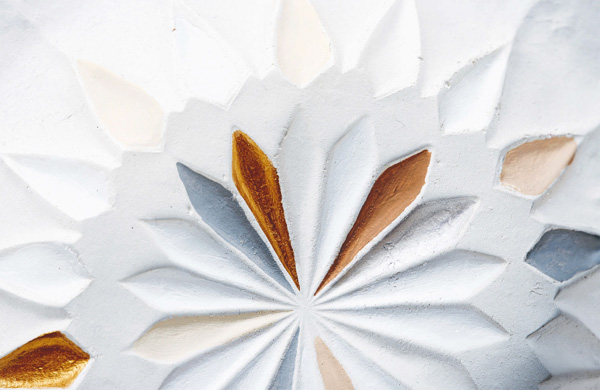
This ceramic project uses no-fire, air-dry clay, partly because it’s a great alternative to kiln firing (and, let’s face it, not every aspiring ceramicist has access to a kiln). Air-dry clay has excellent plasticity, making it very easy to work with. The downside is that your finished piece won’t be waterproof or food safe, so you will only be able to produce decorative pieces. A word of warning regarding color: fresh from its packaging, white air-dry clay will almost always appear a shade of gray putty, but it does transform to a beautiful warm white the longer it is left to dry. It is available from pottery supply stores, art stores, and online and, as with any raw material, it’s wise to spend as much as you can afford to achieve the best result. Having said that, even the best air-dry clays are usually very reasonably priced.
You probably already own the tools for this project, so no real sourcing or outlay is necessary. What you will have to get your hands on is a faceted cut-glass bowl (or something similar) with a raised pattern on its surface that can be imprinted into the clay. Second- hand shops usually carry them by the truckload.
When working with clay, be prepared for your work area, and yourself, to get dirty. Keep water on hand because you may well lose yourself in the process and your clay might start to dry out before you’ve finished forming it.
› 1 lb 2 oz (500 g) white air-dry clay
› Acrylic paints in white, cream, nude, gray, caramel, gold, & silver
› Spray-on clear matte sealant
TOOLS
› Knife
› Rolling pin
› Clean, untextured working surface (check the clay manufacturer's recommendations to prevent sticking)
› Faceted cut-glass bowl, dust-free
› Cooling tray
› Artist paintbrush
PREPARE
1 / To prepare the clay, slice a handful from the block and re-seal it so the remaining clay doesn’t dry out. Knead the clay on the working surface until it’s soft and workable (like dough) to remove any air bubbles. Work into a smooth ball, wetting your hands just slightly to keep the clay moist if necessary. Use the rolling pin to work the ball out into a 1/4 in (5 mm) thick, flat, smooth circle.
2 / Place the cut-glass bowl upside down on your working surface.
MAKE
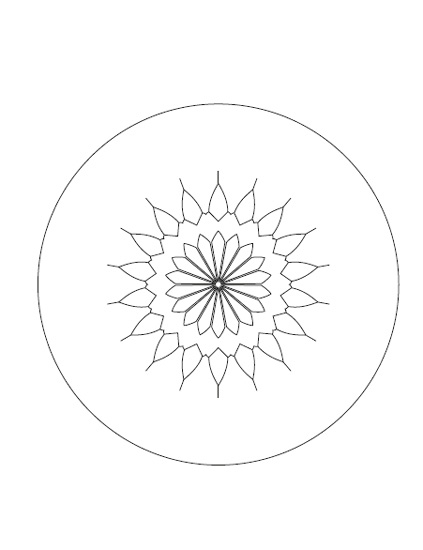
1 / To imprint the clay, peel the rolled-out clay carefully off the working surface and lay it over the upturned bowl. Press the clay gently but firmly onto the faceted surface of the bowl so the pattern is imprinted evenly.
2 / To form the shape, gently peel off and remove the imprinted clay from the upturned bowl. Turn the bowl over and lay the clay inside the bowl, pattern facing upwards. Carefully maneuver the clay, without disturbing the imprint, so that it sits centered and flush inside the bowl.
3 / To finish the shape, use the knife to cut cleanly through the excess clay around the top edge of the bowl, or leave as it is, if you prefer. Smooth the cut edge and any small cracks or imperfections with a wet finger.
4 / At the first signs of drying, gently peel away the clay from the glass bowl and then place it back in. This will allow air to get between the clay and the bowl. As the clay continues to dry, repeat this step regularly to allow more air in. Finally, once the clay feels dry enough to hold its new shape, remove it from the glass bowl and leave it on the cooling tray for at least one week until completely dry.
5 / Decorate the imprint using the paintbrush and acrylic paint. Once the paint is dry, spray the surface with sealant.