Lighting is the mood maker (or breaker if you’re living with fluorescents) of every home. It is responsible for much more than just illuminating a space—it influences the ambience, which in turn affects our state of mind.
I did not realize how enthusiastic people were to explore making lighting until I designed my downloadable DIY Quilt Light template in 2011. Inspired by patchwork and supercyclers (an ever-growing international collective of designers focused on transforming perceptions of waste materials), its choice of materials and finish are left to the maker. Innovative in its approach, the template has been very successful and, in addition to being featured in many publications, it was exhibited by invitation at both London and Milan Design Weeks. Of course, there are many DIY lighting projects on the market now, so in that department we are spoiled for choice, but what about coming at lighting with a genuine maker’s eye—from the aspect of making something that is one hundred percent yours, using your practice of choice?
You may not consider yourself a lighting maker, or be thinking of focusing exclusively on this aspect of a space, but whatever your practice, there is an opportunity to explore its possibilities. The following pages include the work of some wonderful makers, some of whom have ventured into lighting through further investigation of their craft and/or material. Illustrating some of the different ways lighting can be approached, these works span such outputs as ceramics, weaving, macramé, and wood turning. In my opinion, apart from the electrical and safety side of things, making lighting is perfect if you want to experience a kind of experimental practice where no rule book exists. Lighting really is the modern maker’s domain and your space has the potential to be all the more distinctive for it.
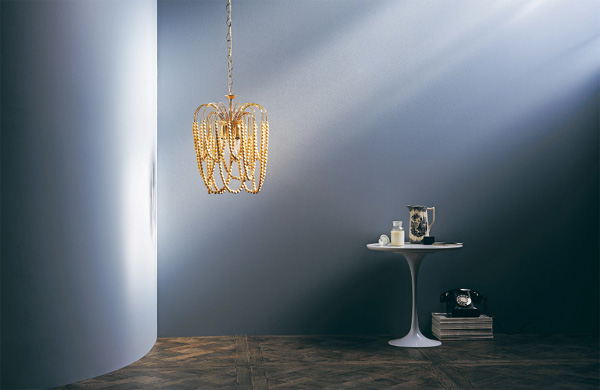
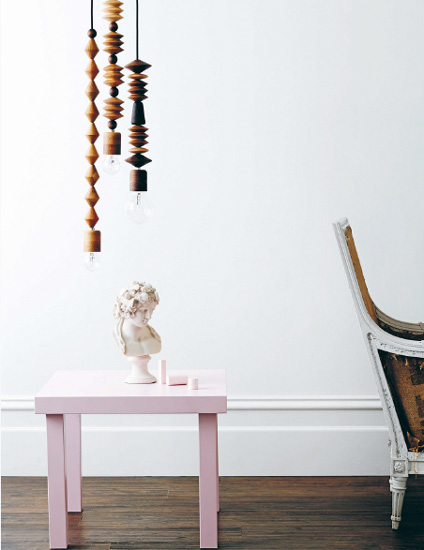
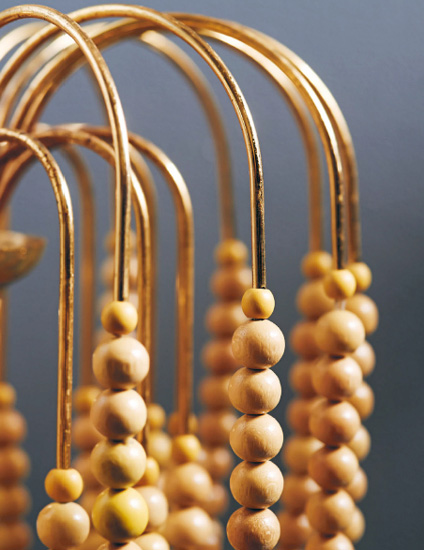
“I come across a lot of vintage lighting that I love. Reworking previously glitzy crystal chandeliers with unexpected materials, such as simple wood beads, adds a new chapter to their story and forms a special bond between us in the process.”
TAMARA MAYNES
Reworked vintage brass chandelier strung with turned wood beads
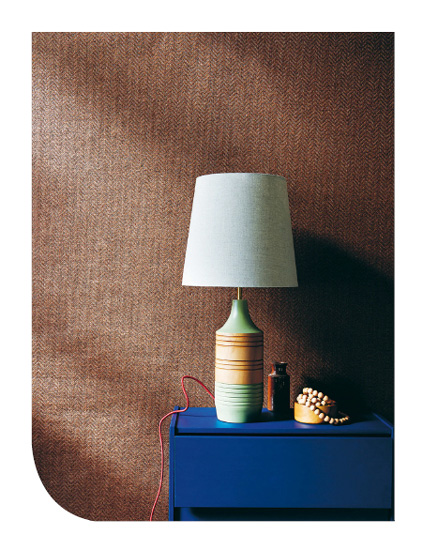
“Our wood lamps are hand-tuned and painted; each one is individual. Making lighting is very enjoyable: I love creating ambience and warm, comforting environments.”
BEC DOWIE & DOUGLAS SNELLING, FURNITURE & LIGHTING DESIGNERS & MAKERS
(AUCKLAND, NEW ZEALAND)
Hand-turned kauri wood lamp, hand-painted and finished with wax
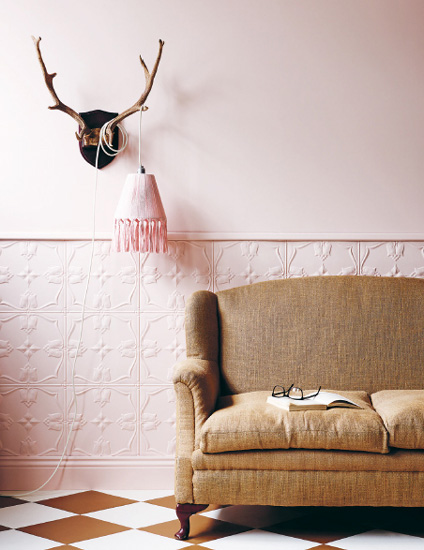
“I love that the options offered by weaving seem endless, allowing me to draw on outside inspiration. It can lead to exploration of other areas, such as lighting, to create something unique.”
KATE FARRELL, STYLIST & MOONLIGHTING WEAVER
(MELBOURNE, AUSTRALIA)
Steel lightshade frame wrapped in cotton yarn and finished with tassel detail
Maker to Maker with...
Moya Delany, lighting designer & maker
(Melbourne, Australia)
TM: Moya, every shade you make is unique. Describe this piece.
MD: When I make a shade it is a one-off work of art. This bell shade is made from cargo parachute and Japanese kimono silk and is hand-stitched and stretched over a hand-bound frame. I have a friend who is a genius metalworker and makes all my custom frames.
TM: Some might imagine there’s only so much that can be done with lighting. What’s your secret to keeping your output so unique?
MD: Discovering new materials, designing new shapes, and evolving is what inspires me.
TM: Your output spans many media. How did you get into lighting?
MD: Studying Fine Art and majoring in sculpture introduced me to working across all media, so when I was approached by an interior designer about lighting work it was an easy step.
TM: What do you think lighting brings to a space?
MD: Lighting brings life to a space.
TM: Where do you make?
MD: I make mainly at home, sometimes on site when the size requires and I also take projects with me on beach holidays.
TM: So, it’s safe to say you love making?
MD: Making things is the major focus of my life. If I’m not creating, then I’m not at my happiest. When I make a beautiful thing there is no greater satisfaction.
TM: Any advice for aspiring makers? MD: Be prepared for blood, sweat, tears… and joy!
“I loved making jewelry as a child, threading beads onto string to make necklaces. In the same way, my turned sustainable wood beads are designed to be assembled over the humble lighting cord, similar to a necklace.”
COCO REYNOLDS, LIGHTING & FURNITURE DESIGNER
(SYDNEY, AUSTRALIA)
Turned wood pendant lights using oak, walnut, ash, and maple
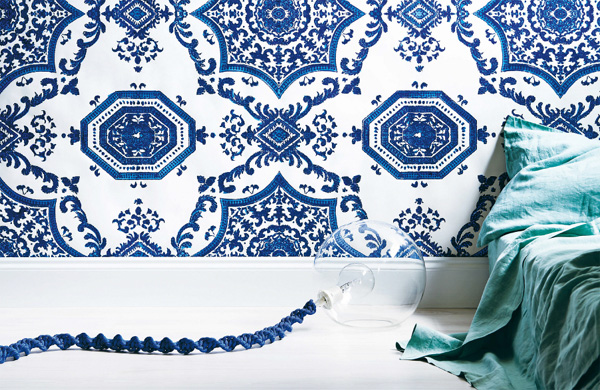
“Rope is such a basic material. I love that I can manipulate it via a series of rudimentary knots to create something unexpected, incredibly beautiful, and seemingly intricate.”
TAMARA MAYNES
Macramé lighting cord made with polypropylene rope
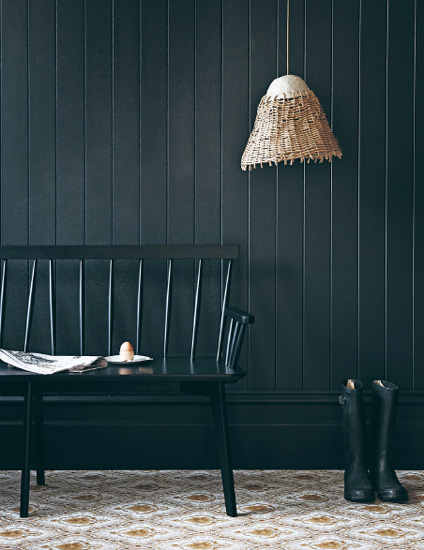
“We started collaborating when our studio spaced merged and ideas began to bounce. When we make we focus on balance, not symmetry and bringing interesting shadow play, moody illumination, and Wabi-sabi beauty to a space.”
HARRIET GOODALL & NATALIE MILLER, COLLABORATING FIBER ARTISTS (ROBERTSON, AUSTRALIA)
Glazed clay pendant light with woven paper cord shade
“Making a prototype and then resolving the design is the best part for me. It’s all about the process.”
COCO REYNOLDS, LIGHTING & FURNITURE DESIGNER
(SYDNEY, AUSTRALIA)
“We find it best to design based on intuition. It’s important to look to the great designers for inspiration, but it helps to not be overly influenced by any specific one.”
STEVE NASKER & CHARLOTTE STONE, FURNITURE DESIGNERS & MAKERS
(LOS ANGELES, USA)
“Making and designing should be inextricable. The one should inform the other in a reciprocal feedback loop. I like to move freely between the computer screen and my workshop; my computer is often found balancing precariously on my sliding table saw – I think that image sums up my design approach and philosophy.”
ADAM MARKOWITZ, FURNITURE DESIGNER & MAKER
(MELBOURNE, AUSTRALIA)
When a maker discovers design or vice versa, that’s when real magic happens. Without design, the maker’s output is void of vision and full of gaps. The process of designing something before it is made allows the maker to establish intention, tailor aesthetics, and troubleshoot functionality. Without making, the designer’s output is based on an inexperienced understanding of materials and technique that will always challenge authenticity. In the past, designers were designers and makers were makers: both had a distinctive role and relied on the other in order to practice their craft. Today, however, it’s a different story and the designer/maker is on a roll. With the power to see a piece through from its sketchbook conception to a beautifully crafted physical form, understanding and including the foundations of good design is the only way to immerse yourself in the complete making experience.
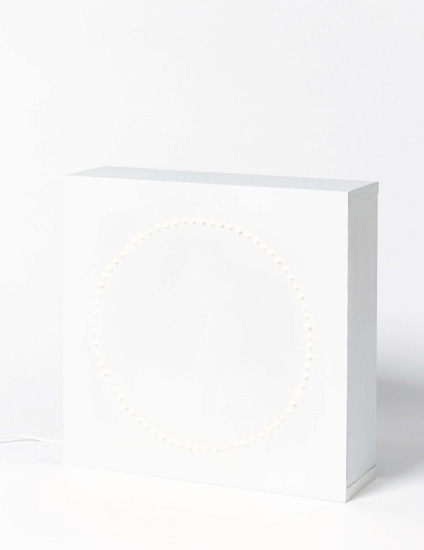
PROJECT No 5
woodworked light box
The template on the following pages is a guide only and not to scale. A complete ready-to-print template and layout guide can be found at www.tamaramaynes.com.
This is a simple yet super-effective lighting project for the aspiring woodworker: a versatile light that can be used on the floor or table, or hung on the wall. The technique used to form the lightweight pine box is a simple reinforced butt joint frame with countersunk screws (meaning they sit flush with the pine surface) and glued MDF face. Drilled into the face is a circular pattern of holes through which string lights protrude. The technique, along with the materials, is deliberately basic to ensure the maker is able to craft a quality, affordable light. All tools and materials can be found at large hardware stores, except the template, which will need to be downloaded online and printed out at home or an office supply store.
For cutting the pine, a table or band saw is best, although a circular saw or jigsaw will also do the job if you use a cutting guide. Failing that, you can have the pine and MDF cut where you buy them, but this will detract from your overall woodworking experience.
It’s important to consider safety when working with power tools such as drills and saws, so for this project be sure to follow all manufacturers’ instructions and requirements and wear protective glasses. It is also important to wear a dust mask when cutting, drilling, or sanding MDF. I also highly recommend you read and follow the manufacturer’s instructions for the string- lighting component and, as always, once lighting is made and in operation, do not leave it unattended while lit.
› Printed template online: www.tamaramaynes.com
› Masking tape
› 1/8 in (3 mm) thick MDF sheet
› 51/2 in (140 mm) wide x 3/4 in (18 mm) thick dressed pine length no shorter than 70 in (1.8 m)
› Sandpaper with fine grit
› Wood glue
› 11/4 in (30 mm) 8-gauge Phillips head wood screws
› Wood putty filler
› Spray-on undercoat
› Matte white spray paint
› 100-bulb strand of white LED or incandescent string lighting
TOOLS
› Pencil
› Paper scissors
› 24 in (60 cm) steel ruler
› Stanley knife & cutting mat
› Dust mask & protective glasses
› Table saw (or jigsaw if more accessible)
› Combination square
› Drill & 8-gauge wood drill/countersink bit
› Drill bit to match globe size
› Phillips head driver bit
› Band clamp & 8 in (20 cm) clamps
› Cloth & painting drop cloth
› Wood offcuts
PREPARE
1 / To prepare template, download and print out onto plain 22 x 34 in poster paper at 100%. Ensure the printed circle measures 14 in (35 cm) diameter before cutting out the template.
2 / To prepare the MDF face, mark out an 18 in (450 mm) square in pencil. Place the MDF on the cutting mat and cut out square with the Stanley knife, using the steel ruler as a cutting guide. Lightly sand cut edges.
3 / To prepare pine pieces for frame, measure and mark out two 18 in (450 mm) lengths for the top and bottom and two 16 in (414 mm) lengths for the left and right sides. Cut with a table saw (or any available saw suited to making accurate crosscuts—cuts that go across the grain of the wood). Lightly sand cut edges.
MAKE
1 / To make the pine frame, place the four cut pieces up on their sides and butt the left and right side pieces between the top and bottom pieces to form a square. Place wood glue between the corner joins, using the combination square to check that they are at exact right angles before securing with the band clamp while the adhesive sets.
2 / To secure joins, remove band clamp and measure and mark out eight screw points, as indicated on layout guide. Attach a drill/countersink bit to the drill and make pilot (starter) and countersunk (a recessed area for the head of the screw to sit in) holes at marked points. Replace the drill/countersink bit with the Phillips head driver bit. Drive a screw into each of the drill holes.
3 / To attach MDF face to the pine frame, lay it face down, spread adhesive around its perimeter, and sit the pine frame on top. Ensuring all sides and corners of face and frame line up exactly, use the 8 in (20 cm) clamps to secure the top, bottom, and side joins while the adhesive sets.
4 / To transfer template to MDF face, lay template on top of face, smooth down, and, when perfectly aligned, secure around perimeter with masking tape.
5 / To drill circular pattern of holes into the MDF face, remove driver bit from drill and replace with a drill bit that matches the size of the globes on the string of lights. Next, with the box lying flat, supported underneath, and with the template-covered face up, drill holes into every point around the circle, as marked on the template. Remove the template when finished.
6 / To prepare the box for painting, fill in the small areas in recess between the screw heads and pine surface with putty filler to conceal the screws. Leave to set. Lightly sand the drill holes on both front and back of face and over the dry putty, where necessary. Wipe down entire box with a damp cloth.
7 / To paint box, lay out drop cloth, put down some wood offcuts, bricks, or even tin cans, and sit box on these to raise it slightly. Undercoat according to manufacturer’s instructions and, once ready, paint matte white top coat. Leave to dry completely.
8 / To install lighting component, guide individual globes gently through drill holes from the back of the face until every hole is filled. Bundle together and tie remaining loose globes, sitting them inside the box at the back.