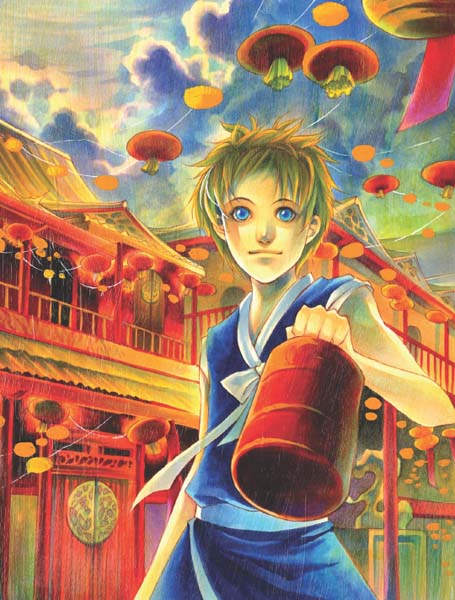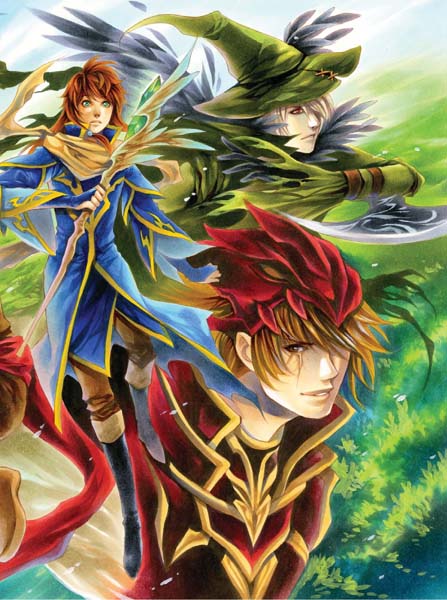

When you have a beautiful setting, you need dynamic characters to fill it. This section covers fantasy costumes and gives you some ideas to help spice up your imagination. Whether your inspiration is from nature or history, don’t limit yourself to the choices in this book. Use all aspects of your life to imagine and create fascinating costumes for your characters.

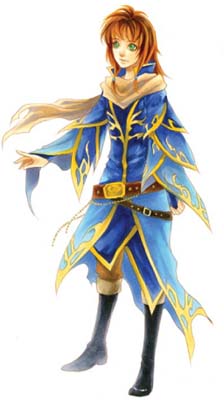
Fantasy costumes can be inspired by anything. Elaborate patterns and rich colors make clothing look lively, while torn fabric and deep colors tone down the character and give a mysterious feel. Remember that costumes always reflect your characters’ personalities, culture and heritage, so keep those things in mind when creating their attire.
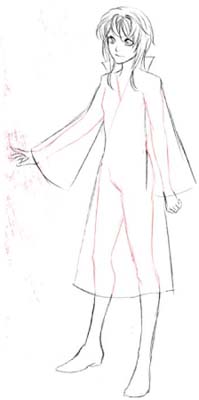
1 START WITH THE BASIC
SHAPES
Rough out the shapes the clothes will make over the character’s frame. Use the shapes as a guideline for the overall look for the character.
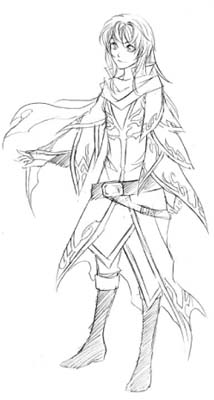
2 DEVELOP THE DETAILS
Design the shapes to be more complex. Asymmetrical shapes will help the clothes look lively. Add to or reduce the shapes as necessary. Refine details and add extra accessories on the clothing to make it look fancy.
3 FINALIZE AND COLOR
Rich colors provide contrast and provide insight into the character’s social status and personality.
Designing fantasy costumes is like working on a scrapbook—you pull all ideas together into one big place. Here are some brainstorming ideas to help you open your mind and think up some cool fantasy costumes!
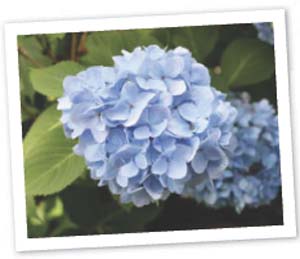
Mother Nature is one of the best sources for fantasy inspiration. Flowers, leaves, wild animals and all natural creatures are great subjects to base your costumes on. Think about the most recognizable trait of the subject and apply it to your character’s costumes. You can simplify, alter or exaggerate the trait to create unique costume details.

Take pictures of things in nature to use for inspiration. The baby blue color and poofy shape of these hydrangeas are a perfect mix for petite faeries and little girls.
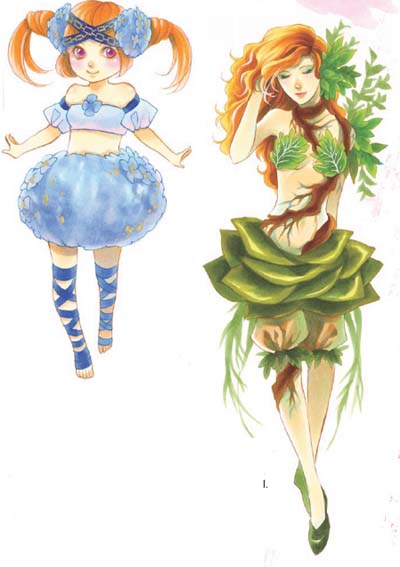
For an earthy character, branches and leaves work well. The rose-shaped skirt gives this dryad an organic, natural feel.
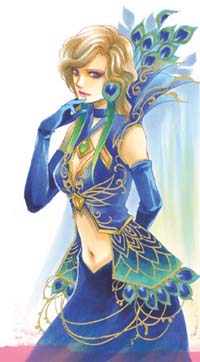
Peacock feathers are elegant and sophisticated. Use them as part of a dress along with a golden pattern on the fabric.
Traditional costumes in different nations or cultures can effectively represent a character’s background or setting. Research patterns, colors, styles and types of fabrics used in different cultures and use them to inspire your fantasy costume designs. You can borrow or modify specific styles or even combine different cultural aspects to enhance your characters’ backgrounds.
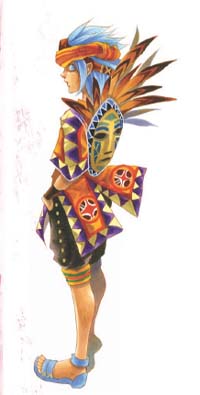
Here I paired Thai-inspired military armor with elven traits for a cool ornamental look.
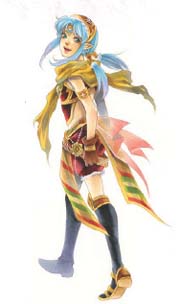
Bright colors go well with tribal-inspired patterns. I used feathers and a mask to depict the occupation of a shaman.
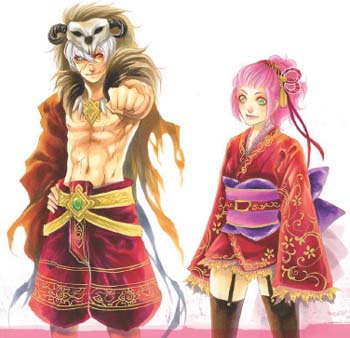
Here I combined a creepy ram skull and torn cape with gold patterns and embroidery inspired by ancient Thai culture. The elaborate details within the patterns give our king a mysterious vibe.
Here I added lace and played around with the patterns to make the kimono-inspired look more stylish.
You can spice up a simple outfit with any number of accessories—fancy, elegant, elaborate or plain. Use real accessories you see in magazines or create your own—have fun and be creative.
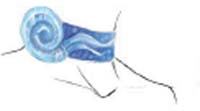
Wreaths made of natural elements such as branches, leaves, petals and roots make great headpieces.


Neck adornments can be thick or thin, simple or embroidered with beads and seashells. Chokers can be accessories for all ages and genders since they go with most costumes.


Heroic or evil, the color of the helmet should match the overall costume. Unmatched designs and colors can confuse the story you’re trying to convey.
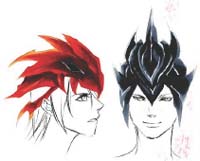
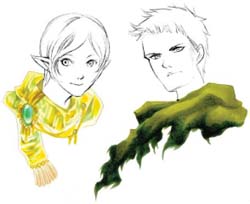
Luxurious or torn scarves can imply different moods and backgrounds.
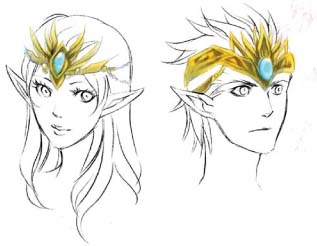
Elven headdresses can be inspired by crowns and tiaras. They are ornate with decorative structures and natural gems.
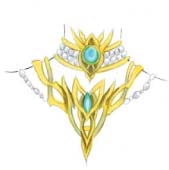

Gems and pearls commonly adorn necklaces, but don’t be afraid to create your own with other materials.
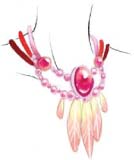
Unlike crowns and tiaras, headbands mix in more materials. Styles can be simple with colorful patterns, or super marvelous with beads and feathers.
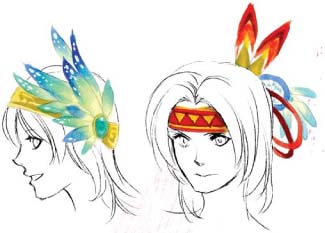
Select the fantasy costume elements and colors by thinking about what kind of materials would be available to your characters. For example, this wild and free-spirited warrior might create his clothing from the feathers and hides of wild animals to show his prowess in hunting and fighting, and to blend into his environment.
COPIC MARKERS
0-Colorless Blender, B24-Sky, B28-Royal Blue, B63-Light Hydrangea, BG01-Aqua Blue, BV00-Mauve Shadow, BV000 Iridescent Mauve, BV11-Soft Violet, BV23-Grayish Lavender, C2-Cool Gray No. 2, E11-Bareley Beige, E15-Dark Suntan, E18-Copper, E19-Redwood, E21-Baby Skin Pink, E30-Bisque, E31-Brick Beige, E33-Sand, E34-Orientale, E43-Dull Ivory, E44-Clay, E49-Dark Bark, E57-Light Walnut, E59-Walnut, E97-Deep Orange, E99-Baked Clay, R08-Vermilion, R14-Light Rouge, R27-Cadmium Red, R89-Dark Red, RV99 Argyle Purple, V93-Early Grape, V95-Light Grape, Y17-Golden Yellow, Y23-Yellowish Beige, Y28-Lionet Gold, YR14-Caramel, YR24-Pale Sepia
DRAWING TOOLS
cardstock paper
pencil
eraser
brown or sepia 005 (0.2mm) waterproof, fine-point technical pens (Pigma Micron or Copic Multiliner)
white acrylic paint and a no. 2 round brush (or white gel pen)
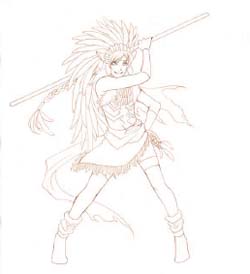
1 CREATE THE POSE
Lionel is confident and straightforward, and even when his stance is relaxed he is ready for battle.
With a pencil, sketch a pose and costume based on his personality and fierce demeanor. Make his headdress cascade to his waist. Use a brown or sepia 005 (0.2mm) waterproof technical pen to ink the sketch, then clean up the lines with an eraser.
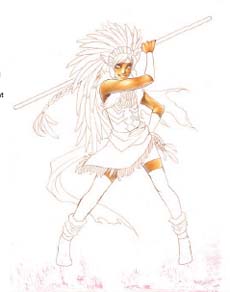
2 PAINT THE SKIN
Lionel lives outdoors and engages himself with nature. Because of that, there’s no light or pale tones in his skin tone. Use Bareley Beige on the shadowy areas. Then apply Baby Skin Pink as the middle tone and coat with Bisque. Darken the deepest shadows with Early Grape. For reflected light on his skin, paint Iridescent Mauve on the left side of his face, the bottom of his arms, and the right side of his legs.
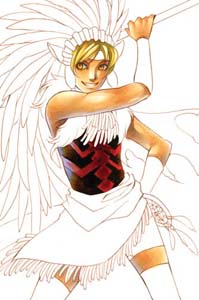
3 START THE HAIR, EYES AND BREASTPLATE
To depict his golden hair, paint shadowy streaks with Lionet Gold. Apply Yellowish Beige as the second layer and leave shiny highlights at the center of the strands. Use Yellowish Beige for his irises and Pale Sepia for the pupils.
The costume doesn’t need to be overly elaborate. In fact, Lionel prefers easy functionality and movement, along with simple patterns and colors. For his breastplate, paint Dark Bark and soften the color with Colorless Blender. On his left side, coat the area with Baked Clay. Meanwhile, for his right side, blend Baked Clay outward with Light Hydrangea. Use Dark Red for shadows on the pattern, and coat on top with Vermilion. Blend the edge of Vermilion at the right side with Mauve Shadow.
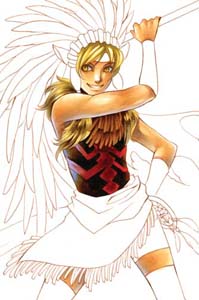
4 PAINT THE FUR AND FRINGE
Create long strokes with Light Walnut on the fur and soften the strokes by painting another layer on top with Dull Ivory. This second layer will make the fur look soft and sleek. To give the golden shine, coat the fur with Yellowish Beige. The woven fringing on his chest is simple in color. Paint Light Walnut at the top of the fringing, and blend colors downward with Dark Suntan and Sand.
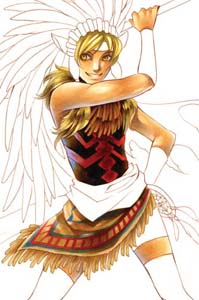
5 COLOR THE SHAWL
Add to the shadows on the shawl and fringe and create wrinkles and creases. Soften the color with Colorless Blender, then coat the hide with Brick Beige. Refine those wrinkles with Light Grape. Add Light Grape to intensify the creases. After this dries, add the red stripe patterns with Cadmium Red. Use Sky to add lines along the sides of the reddish stripes and another extra line at the top.
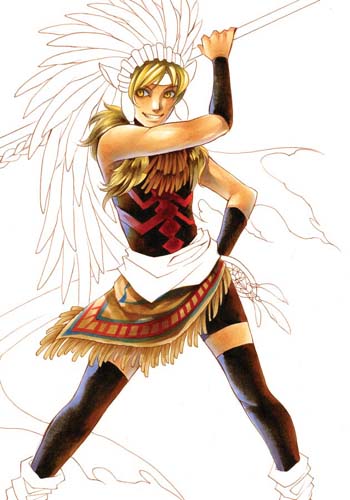
6 PAINT THE SHORT PANTS, LEGGINGS AND
ARMBANDS
Apply Dark Bark at the center of his pants, leggings and armbands. Soften the color with Colorless Blender and be careful not to overdo until the color spreads off the areas. Paint Baked Clay on top of the left side. On the right side, use Light Hydrangea instead.
7 BEGIN WORKING ON THE HEADDRESS
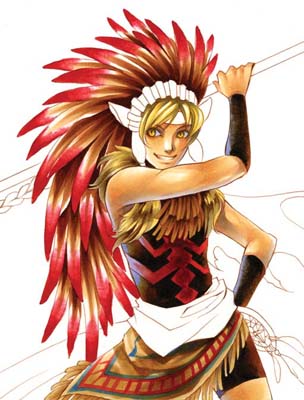
Use strong but earthy tones for the headdress, starting with the feathers. Paint Cadmium Red at the tail of each feather. Make single strokes with Copper, and smooth them with Dark Suntan. Leave the middle of the feathers unpainted.
8 FINISH THE HEADDRESS AND ACCESSORIES
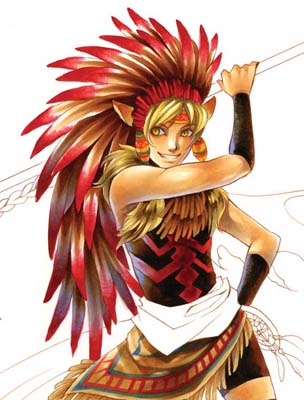
To suggest shadows and distance for the feathers, paint Light Grape and Early Grape on the feathers at the bottom. Use Dark Red to create fine shadows on the cap, then follow with Light Rouge on top. Blend Caramel and Brick Beige on the lion ears that stick out from the cap. With Sand, paint shadows on both his headband and decorative beads. Coat the areas with Golden Yellow. Design stripes and zigzag patterns on both objects with Light Rouge and Sky.
9 PAINT THE SCARF AND CAPE
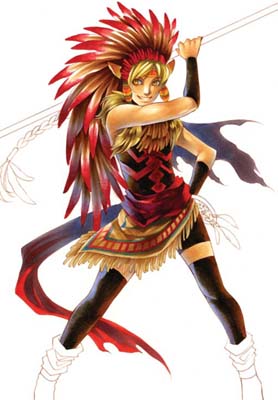
For the scarf, start working on the part that wraps around his waist first. To make creases, paint shadowy streaks with Argyle Purple and soften the edges with Colorless Blender. Use Light Rouge to coat on top. Leave some room at the right for the reflected light, and then paint Soft Violet. Start from the area that is close to his waist. Blend Grayish Lavender, Light Grape, and Light Rouge together on the scarf at the back. For the cape, blend Grayish Lavender and Light Grape on the area.
10 PAINT THE BRAID,
DREAMCATCHER AND
ACCESSORIES
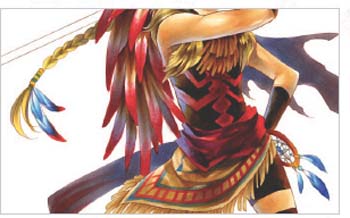
Use Lionet Gold to paint shadows on his braid, and then coat on top with Yellowish Beige. To portray the braid in the distance, paint Early Grape on a few sections of braid, starting with the sections closest to the feathers.
Paint Golden Yellow on the beads and make bluish stripes with Sky. The feather colors can be different from those in the headdress. Paint the tail with Light Rouge and follow with Sky and Aqua Blue. Leave the bottom parts unpainted.
Paint Redwood and Deep Orange for the ring. Apply Royal Blue at the tail of the feathers and blend with Sky and Aqua Blue. Apply Sky and Aqua Blue for the beads.
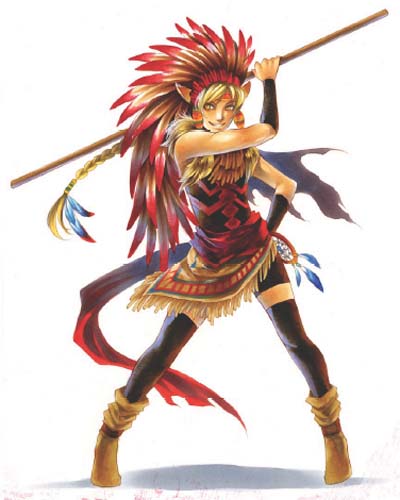
11 FINALIZE THE DETAILS
Use Sand to paint shadows on his boots. Apply Brick Beige on top and darken additional shadows with Light Grape. Pick deeper tones for the boot straps. Paint Walnut at the center of the straps and coat the entire area with Dark Suntan. For his staff, add Clay at the center. Apply Orientale on top as its highlight and Soft Violet at the bottom for reflected light.
Finally, paint Cool Gray No. 2 on the ground to indicate his cast shadow. With a no. 2 round and white acrylic paint or a white gel pen, refine the finishing details such as reflecting light in his eyes, some single strands of hair and fur at the collar.
In the fantasy realm, there’s a difference between pixies and elves—and that difference is the way they dress. Playful pixies wear casual costumes while elves dress more elegantly to depict their noble personalities. Even their props or weapons carry that sense of grace, so don’t be afraid to embroider elven attire and props with extra delicate patterns because that’s the way elves like to be.
Belen’s pose should remain elegant and the design minimal yet luxurious enough to portray her as an elf.
COPIC MARKERS
0-Colorless Blender, BG18-Teal Blue, BG49-Duck Blue, BG72-Ice Ocean, BG99-Flagstone Blue, BV20-Dull Lavender, BV23-Grayish Lavender, C2-Cool Gray No. 2, E11-Bareley Beige, E29-Burnt Umber, E30-Bisque, E42-Sand White, E50-Egg Shell, E99-Baked Clay, G20-White Wax, G21-Lime Green, G82-Spring Dim Green, G85-Verdigris, G94-Grayish Olive, RV93-Smoky Purple, V93-Early Grape, Y000-Pale Lemon, Y00-Barium Yellow, Y17-Golden Yellow, Y23-Yellowish Beige, Y28-Lionet Gold, YG00-Mimosa Yellow, YG11-Mignonette, YG23-New Leaf, YG25-Celadon Green, YG95-Pale Olive, YG99-Marine Green, YR0000-Pale Chiffon
OTHER TOOLS
cardstock paper
pencil
eraser
gold marker pen (Sakura Pen-touch Gold 0.7mm)
brown or sepia 005 (0.2mm) waterproof, fine-point technical pens (Pigma Micron or Copic Multiliner)
white acrylic paint and a no. 2 round brush (or white gel pen)
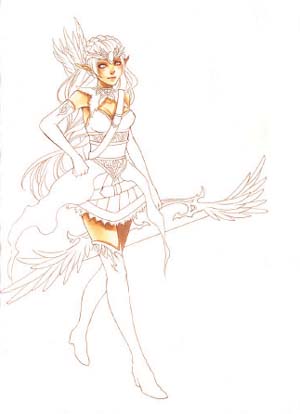
1 SKETCH THE FIGURE AND
COLOR THE SKIN
Sketch the figure and use a brown or sepia 005 (0.2mm) waterproof technical pen to ink the sketch, then clean up the lines with an eraser. Elven skin is usually pale and luminous. Paint her blushing cheeks and lips with Pale Cherry Pink and soften the color with Colorless Blender. Add Bareley Beige on shadowy areas. Then apply Bisque and coat with Pale Chiffon. Emphasize the deepest shadows on her receding left thigh and under her neck by painting Smoky Purple.
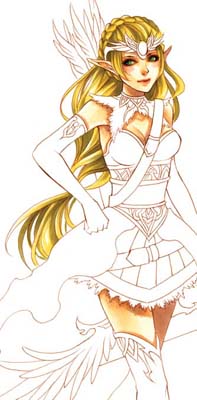
2 PAINT HER HAIR AND EYES
Add Lionet Gold on the hair for shadowy streaks, then apply Yellowish Beige and leave shiny highlights at the center of the strands. If there’s any area you’d like to push the shadows, repaint Lionet Gold. For her emerald eyes, use New Leaf for the irises and Teal Blue for the pupils.
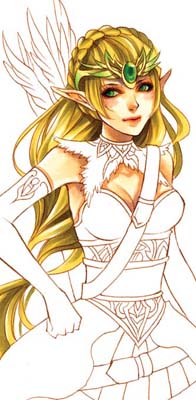
3 FINISH THE HEADDRESS
The jewel on the headdress can be matched to Belen’s eye color. Darken the center and the side of the jewel with Teal Blue. Add New Leaf on top of that and leave the top of the jewel for the highlight. On the golden metal parts, add Spring Dim Green at the tip of the points. Layer Barium Yellow on top, then smooth the green shade together with the yellow. Apply Lionet Gold for shadows.
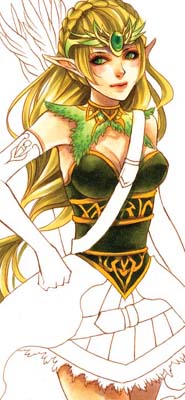
4 PAINT HER BODICE
From the scalloped edges of the lace, blend Spring Dim Green, Mignonette, and Barium Yellow. With Ice Ocean, apply a bunch of dots to create the lacy effect. Darken the shadowy areas under her breasts, the blank spaces in between the decorative patterns and the center of her belly with Marine Green. Soften the color with Colorless Blender, then coat with Pale Olive. Add Golden Yellow on the decorative patterns and apply shadows with Lionet Gold.
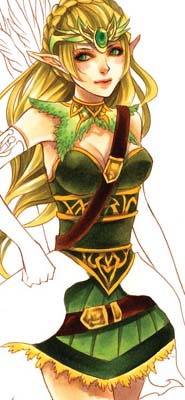
5 COLOR THE SKIRT AND BELTS
On the skin, blend Grayish Olive downward with Lime Green. Darken shadows on the pleats and under the belt with Verdigris. For the stripe at the bottom, blend Flagstone Blue and Grayish Lavender. Blend Yellowish Beige and Barium Yellow together for the lace trim at the skirt’s bottom.
Apply Burnt Umber at the center of the belt, then layer on top with Baked Clay.
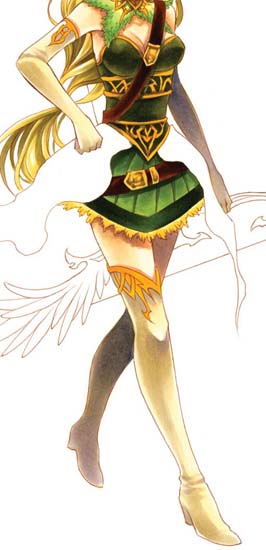
6 PAINT THE GLOVES AND BOOTS
Start with her right glove and boot. With Sand White, paint selective shadows and make sure you leave enough highlights. Coat with Egg Shell. Afterwards, color the decorative patterns with Golden Yellow and darken shadows with Lionet Gold. For the left side, use Sand White to paint the whole areas without leaving blank spaces. To suggest distance, layer on Grayish Lavender and Early Grape.
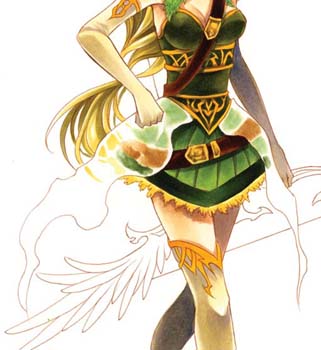
7 WORK THE SEE-THROUGH FABRIC
The see-through fabric covers up parts of her skirt and some strands of her hair. To depict colors underneath, paint Lime Green at the top of the see-through fabric, and leave some space away from the corners. Follow the same method with Sand for the belt, Verdigris for the darker stripe at the bottom, and Barium Yellow for the lace. Use Colorless Blender to blend the paints. Be careful not to soften the colors too much.
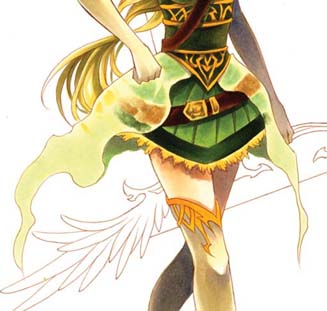
8 PAINT THE SEE-THROUGH FABRIC
Blend Pale Lemon and White Wax together over the fabric. Paint the additional parts at the back with Lime Green and Early Grape. Blend them together.
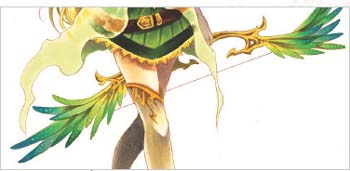
9 COLOR THE BOW AND
ARROWS
Blend Duck Blue and New Leaf on the longest feathers on the bow. For the medium and shortest ones, gradient Celadon Green and Mimosa Yellow. Use Yellowish Beige to paint on the handle. After the color dries, refine shadows and elaborate details with Lionet Gold. With Colorless Blender, put a bunch of dots on each feather to create extra texture.
Paint the arrows with Lime Green on the tips of the fletching. Add another layer of Dull Lavender on top. Use Grayish Lavender for the quiver behind her back.
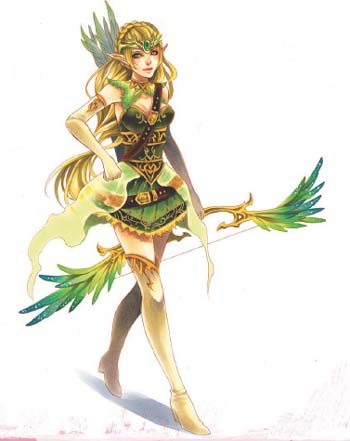
10 FINALIZE ALL DETAILS
To add more decorative patterns, draw swirls on her attire with a gold marker pen. Paint Cool Gray No. 2 on the ground to depict the cast shadow. With a no. 2 round and white acrylic paint or a white gel pen, create reflecting light on her nose, cheeks, lips and eyes.
