
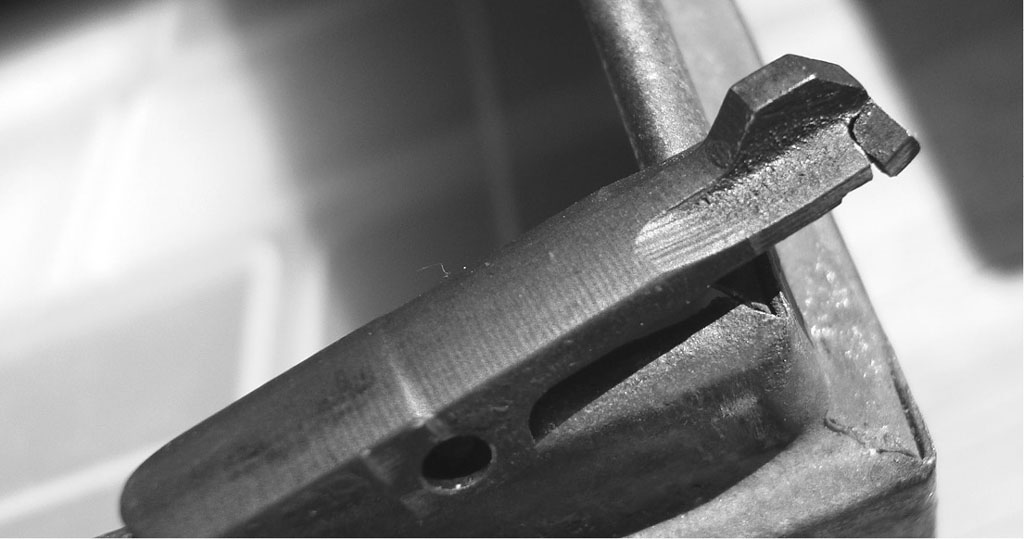
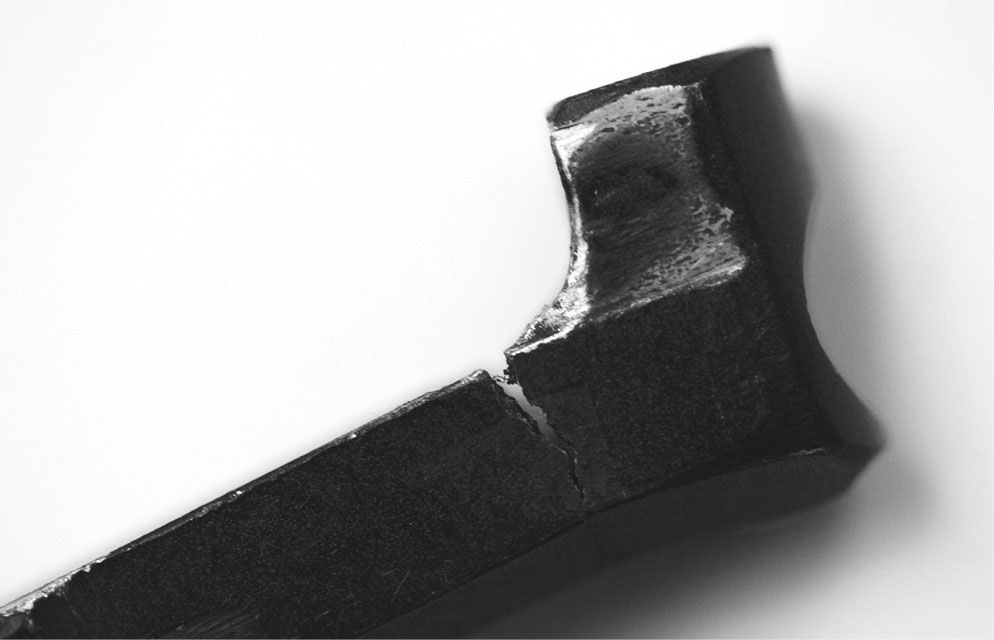
If someone got overly vigorous in malfunction drills, they could bend the charging handle. You want to know this before buying.
This may seem simple, but it isn’t. In the course of teaching and being a gunsmith at a number of law enforcement classes, I’ve learned that you cannot simply assume that everything is there, and everything is tightly attached. More than once, and even with big-name brand rifles, I or one of the other instructors has started in on solving “the problem” only to find that the real issue is that something is missing, loose, installed backwards or otherwise wrong.
Also, you may be inspecting a rifle to buy it. The gun shop, or the gun show guy you’re working with, has a rifle, but you want to make sure it works before you plunk down cash. Fair warning, some shops and some gun shows won’t let you cycle the bolt or do things like let the bolt crash home. Just be sure of what the return policy is, before you buy and leave.
So, here’s the rundown for checking out a rifle, short of actually stepping to the line and firing it. This could be your pre-purchase inspection. This could be what you do to a rifle that has just been handed to you for use on duty, in a match, or “the zombies will be swarming over that ridgeline in thirty seconds. Gear up.”
If the rifle is loaded, unload it before proceeding. If it is unloaded, check. (Check anyway.)
If someone got overly vigorous in malfunction drills, they could bend the charging handle. You want to know this before buying.


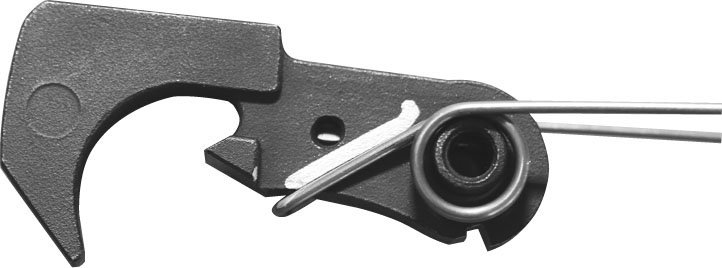
Top: The hammer sear hook needs to be clean, un-altered and left alone. Polishing it to “improve” trigger pull is asking for trouble. Bottom: This hammer hook has been heinously altered, in search of an improved trigger pull. The owner may have learned something along the way, but the biggest lesson was the cost of a new hammer.
Here’s the basic, “you’ve just been handed a rifle” inspection. The idea here is to make sure that what you are about to sign for, or pay for, is as it should be.
Check to make sure all the expected parts are there, sights, optics or irons or both. If optics, and they are battery-driven, turn on the sight and see if there is a dot or if the reticle lights up as expected. Flash hider, handguards, stock, pistol grip. Are the lower and upper a good fit to each other, or does it feel as if it will fall apart just from handling?
Next, take a closer look at a few details.
Are the sights vertical? A tipped front or rear is a bad sign. Is the rear sight centered, and is the front sight at the correct level? That is, are they mechanically zeroed, or close to it?
Are the hammer and trigger pins flush on both sides?
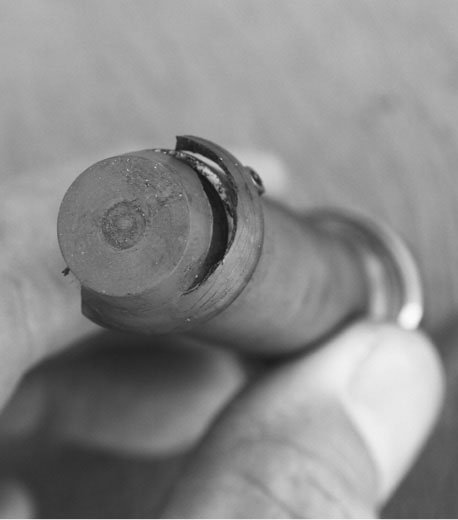
Extractors can break, bend, crack, and wear. And, you can buy one that was too cheap, too much of a good deal. Inspect and replace if needed.

This buffer not only broke the plastic butt end, but the roll pin that was supposed to hold it together started drifting out.
Above: Yes, shaving off the offending ring of plastic with your Rambo survival knife might be a short-term solution. A better one would be to replace it with a good one, and not buy parts so cheap again. Below: The poorly-made magazine catch, on the right, held magazines so marginally that they could be yanked out without even having to press the magazine release button.

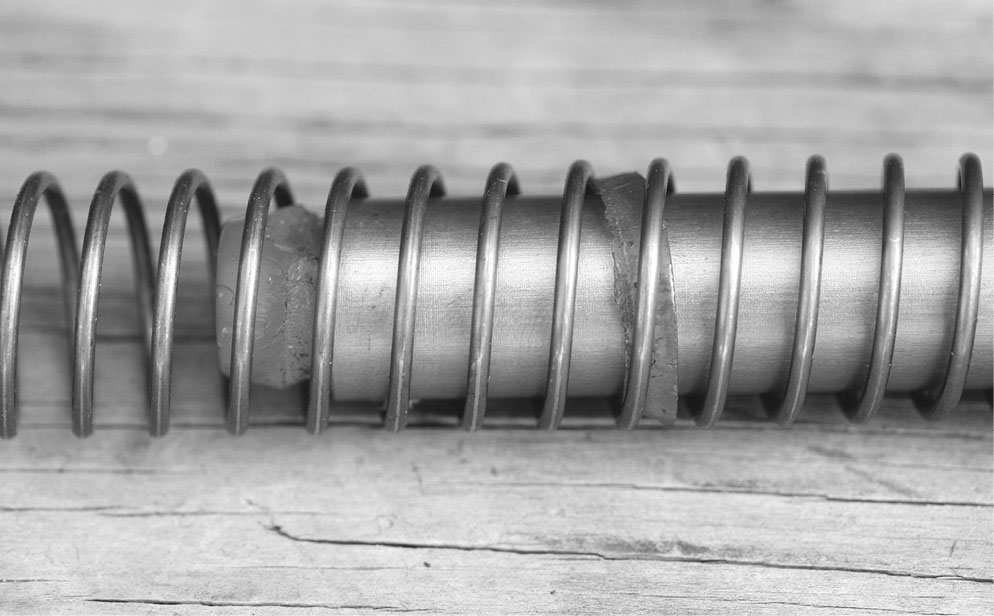
The plastic pieces, getting tied up with the buffer spring and causing problems.
A poorly-fitted buffer tube allowed this buffer retainer to escape. The parts rattled around in the lower until they managed to bind the action, and the rifle stopped working.
If the stock is fixed, is it tight? If it is a tele-stock, does it slide smoothly, without a gritty sound and feel?
Next up, the fire controls. Work the bolt. Does it move smoothly, or is there a gritty, grinding or “catch-y” noise or feel? Did the ejection port cover pop open when you worked the bolt? Does it latch back up, when you press it back into place?
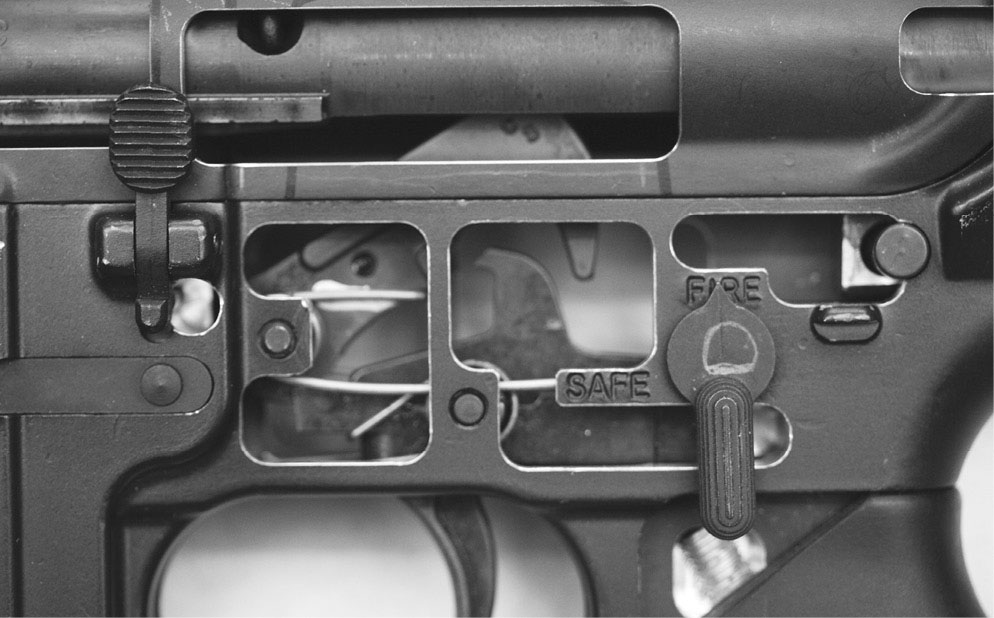
With the chamber empty, close the bolt. Work the safety lever. Does it click back and forth with crisp precision, or is it muddy in feel, unsure in setting?
The correct orientation of the hammer spring, on the hammer.
Close the bolt on an empty chamber. Set the selector to Safe. Press the trigger. It should not move, or move only a small (very small) amount. Let go of the trigger.
Flip the selector to Fire, and press the trigger. The hammer should fall. Keep the trigger pressed back, and cycle the bolt with the charging handle. Slowly (as slowly as you can) ease the trigger forward. You should hear a light “click” as you get near the end. This is the disconnector letting go of the hammer, and handing it off to the trigger sear surface. The trigger should not move much farther after this click.
Leave the selector on Fire and press the trigger. The trigger pull should feel the same as it did before.
Leave the selector on Fire. Either lock the bolt to the rear (which is the first test of the bolt hold-open), or pull the charging handle fully to the rear and let go. If you have locked the bolt back, press the release button. Let the bolt crash home while the selector is on Fire. Then press the trigger again. The hammer should have stayed cocked, and the trigger pull should be the same as it was originally.

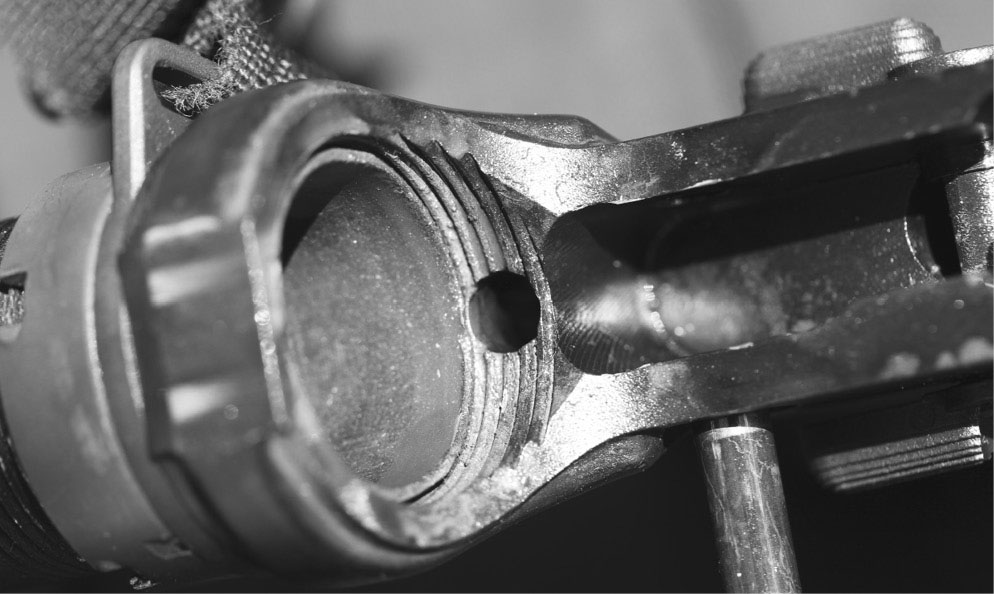
Once found, the buffer retainer had to be pried out from under the hammer, which was attempting to smash it into the trigger.

The buffer retainer was damaged in all this and had to be replaced, along with the mangled buffer retainer spring.
The rifle this buffer was in was giving problems. Until we stripped it and inspected it, the problem was mysterious.

This buffer retainer is doing its level best to escape. This is marginal engagement.

Here we have a buffer weight that is not only poorly assembled, but badly made. It should not be a single steel weight on the inside. It should be a series of steel and tungsten weights.
Don’t be too worried about wear on the buffer weight face. It happens, and it takes a lot more than this to make a buffer weight unserviceable.
If the rifle won’t fire, try turning the selector.
At this point one of two things will happen. You either can or can’t push the selector to Safe. If you can, the trigger mechanism has worked as it is supposed to. If you can’t, the hammer has probably followed the bolt down, and is right back where it started, pressed against the firing pin. This is bad.
Again, send it back.
At this point, at least one of you is grumbling, “This is an AR gunsmthing book, tell me how to fix it.” Again, you paid good money for a rifle that was supposed to work without needing extra gunsmithing on your part. There will be plenty of time to practice your gunsmithing skills, just not now.
OK, you know the safety works when it is on, and the hammer and disconnector work when you slam-cycle the action.
Let’s back up and re-run the tape.
Work the charging handle and cock the hammer. Put the safety on Safe. Pull the trigger. Nothing happens. Let go of the trigger, and press the selector to Semi. Pull the trigger. The hammer should fall.
Hold the trigger all the way back. Cycle the charging handle again, cocking the hammer.
Now, slowly ease the trigger forward. Do it as slowly and incrementally as you can. What if the trigger never catches the hammer? Or, the disconnector never releases it?
Now, the bad result is if the disconnector releases the hammer so soon that the trigger has not yet pivoted up to catch it. You’ll know that happens when the result of this test isn’t a “click” but a “crash” of the hammer slamming into the rear of the bolt and the firing pin. If it does this, you know what to do: return it. If the disconnector never releases, then it also needs to be returned.

Run a class, and you see a lot of extractors. Run a lot of classes, and you see more than a few broken extractors.

Buy cheap, and you risk this. However, even the best will sometimes do this, as even the best gear will break once in a million times.
Work your gear hard, and you’ll break stuff.
Fail to inspect it, and you’ll miss something like this.
Here you see the correct assembly of the hammer and trigger and their springs, in the lower.

A correctly-built buffer weight will have separate internal weights in it, some steel, some tungsten if it is an “H” or heavier weight.
The most staggering piece of “what the….?” Gear we’ve ever seen.
Open the action and remove the bolt-carrier assembly. Remove the upper from the lower.
Inside the lower, look to see that the springs (hammer, trigger, disconnector) are all there. Confirm that the legs of the hammer spring are outboard and present, and that the hammer spring is correctly installed on the hammer.
Check the buffer to see that it is present and relatively free from wear.
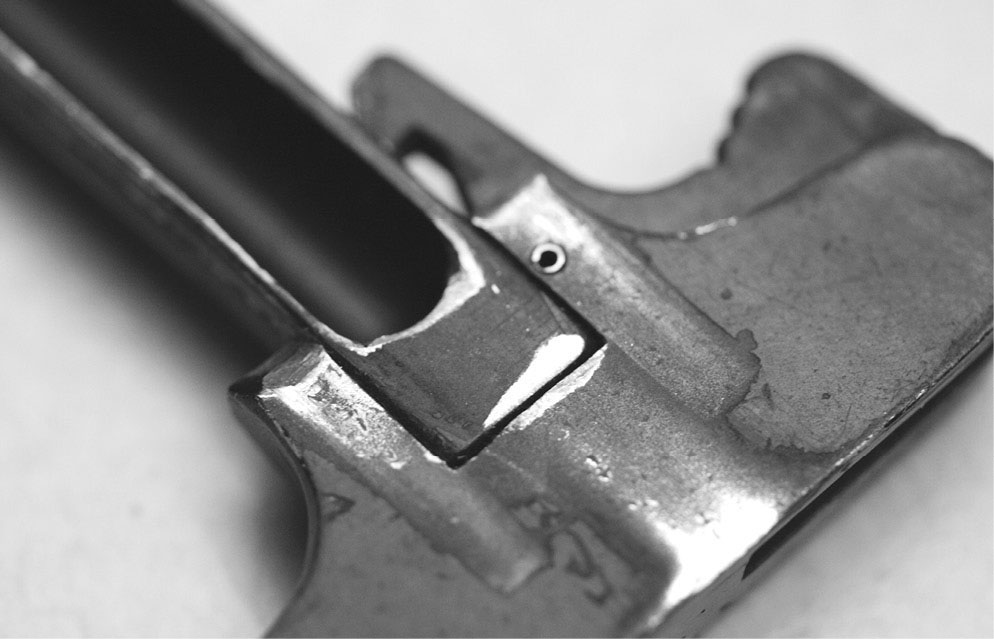
Inspect the bolt and carrier. Is the gas key tight? Is the cotter pin correctly installed, and the firing pin retained? Inspect the bolt lugs. Are they all present? Look closely for cracks, and inspect the extractor to ensure it is not chipped or broken. Look at the ejector to make sure it is above the boltface.
Look at the breech and make sure there is no debris, gunk, lost parts or broken fragments of parts in the locking lug area. Look down the bore. Is there daylight? Is there rifling?
For this you need a selection of known-reliability magazines. Use only the lower. Insert each of them and make sure they lock in place. Then press the button and see that they fall out of their own weight.
Reassemble the upper and lower.
With the bolt forward, insert your magazines again. Can they be pressed up to lock without undue pressure? Do they fall free?
If you have time, pull the bolt out of the carrier. Inspect the cam pin to see if there is heavy wear.
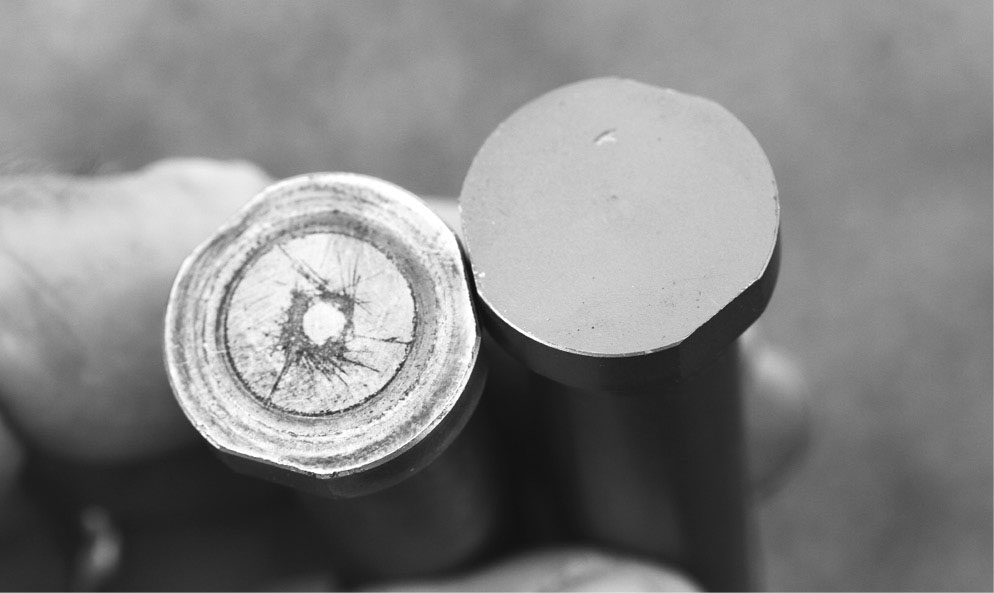
Inspect the gas rings to make sure there are three of them.
Look at the cam pin hole in the bolt, to see if there is a crack or if it might already be broken.
Pull the buffer and spring from the lower, and inspect the buffer. Make sure it isn’t cracked, that the synthetic bumper on the rear is intact, and that the spring is correct and has the right number of coils.
Beyond this, you have to test-fire to know anything more.

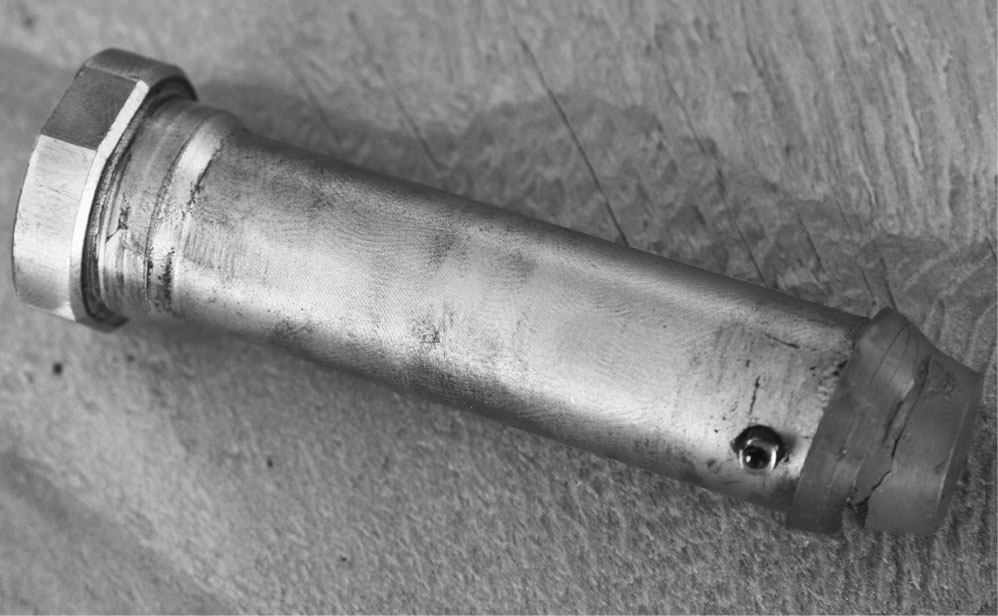
Not only is this castle nut not staked, it is assembled backwards. The small notch side should go against the retaining plate. The large notches are for the castle nut wrench.

Here is a correctly-assembled, and properly staked castle nut. If yours doesn’t look like this, you should correct it. Tighten and stake.

Yes, this bolt does have three gas rings. And yes, it passes the stand-up test. But you really can’t say it is properly assembled, can you?