
If you are going to do this right, you will need tools. On the left, a chamber brush, to start your chamber check. On the right, the M-Guns 223/556 gauge.
If you try to navigate your way through the digital swamp known as the internet, you will find plenty of places where you will be told, “No, you didn’t.” If you did not buy a rifle that conforms in every detail to the hive/collective’s idea of what is “best,” from name brand uppers and lowers, to mil-spec barrels, to purchasing a bolt/carrier assembly that came wrapped in gold-plated titanium foil, you have bought junk.
The advocates of each type will, if pressed, tell you that the sure way to acquire a good rifle is to make sure you buy only known, top-quality brands, and that by doing so you are safe from low-quality gear. There are a couple of problems with this. First, while there is still a bunch of bad stuff out there, it isn’t like the “bad old days” where there were a whole lot of crappy parts to be found. I remember sorting through a box of disconnectors back in the 1980s, ditching the ones that were poorly stamped and keeping only the ones that could be made to fit, before buying what I grabbed. Back then, it was good gear/parts, or utter crap. Today, we have the premium, top-quality stuff, then we have lots and lots of good-enough stuff, and a little bit of crap, and the really bad stuff is easy to spot once you have a bit of experience.
The second problem is what the top-quality parts people do; they inspect and hand-fit. Now, as we discussed earlier, there are some tests you can’t do. For instance, you probably can’t high-pressure test and magnetic particle inspect your own bolt. You can, however, do the inspection that the name establishments do, and ensure your rifle is as up to snuff as it is going to be.
If you are going to do this right, you will need tools. On the left, a chamber brush, to start your chamber check. On the right, the M-Guns 223/556 gauge.
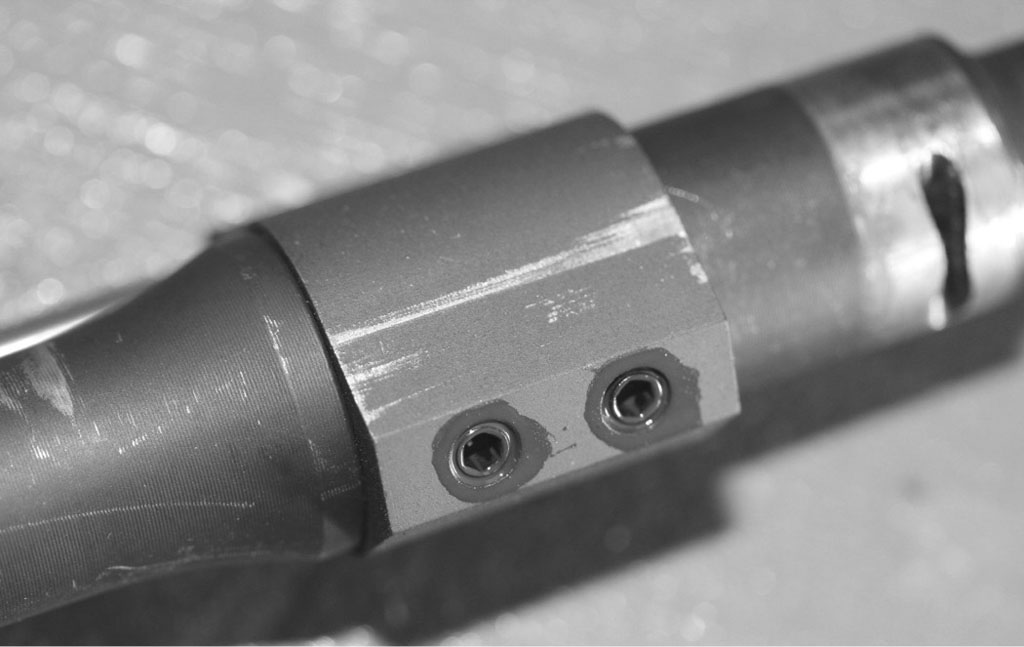
Some gas blocks are held on by friction and set screws. Once you have it straight, and the screws tight, paint them in so you can see if they move.
In some instances inspection is not correction. A case in point, my friend Ned and I once worked on a particular rifle at a class. The officer involved worked for a department that had tried to get patrol rifles for the cars at the absolute lowest cost. Not surprisingly, the rifles just didn’t want to work. We went through the list of usual problems and solved the issues we could, one after another, but two rifles refused to cooperate.
We finally tracked down the problems by swapping uppers and lowers from (other brand and build) rifles of known performance. What we found was stunning; the cylindrical bore of the upper, the tunnel the carrier rides in, had been machined off-spec. That, and the location of the bottom of the upper, the part that bears against the lower, had been machined in the wrong place.
There was nothing to be done but replace the upper, installing all the old parts into new uppers.
Inspection will tell you that is the problem (in this example), but inspection won’t correct it. However, there are things you can inspect and correct on your own.
A rifle assembled from decent parts, that you have subjected to the following inspection and correction process, is the equal of a name-brand rifle in performance. Your choices in specs may hinder that. If you select, for instance, a 1/12 barrel that is made of bare steel, it won’t stand up to as much abuse (or be as happy with heavy bullets) as a chrome-lined 1/7 barrel. And, to a top-end competitive shooter, your rifle may fall a bit short in some areas. Again, a less than premium barrel in the hands of an NRA High Power High Master may not shoot as well. However, we’re talking points and X-count at 600 yards. Just to make High Master you have to shoot over 97%, and in that rarified air, every point counts.
How do I know this works? Because I’ve taken unreliable rifles, rifles that at the start of our classes won’t even work 100% of the time, and by applying this process I (or the officer who brought it to the class) shoots a passing or perfect score in the qualifications and drops a satisfying number of targets out to 300 meters on the computer pop-up course.
Here’s the process.
You’ve got a brand-new, or a new-to-you used rifle. What do you do? Clean it. Unload and disassemble for a field cleaning. Run a brush and swabs down the bore. Get a chamber brush in the chamber, then a mop. Pull the bolt out of the carrier, and clean and lube everything. Give all the various external parts a look, and then hand-wrench them to make sure they are tight. If they are not tight, tighten them.
Simple things like the pistol grip, or a fixed stock, being loose, are not reason to box it up and send it back to the manufacturer. They are, however, a reason to be suspicious.
Check the flash hider, pistol grip, stock and forearm/handguards to make sure they are tight. Or, in the case of the handguards, not more loose than they should be. If they are loose, tighten them. Last, inspect the sights. The rear sight should be vertical (if it is a bolted-on BUIS) or not bent or tilted. The front sight should be vertical, and not at all tilted to one side or the other.
A front sight that is tilted is cause for alarm. If it is a front sight secured to the barrel, this can be cause to send it back. A pinned-on sight, tilted, can only be fixed by the factory or a gunsmith with the right tools. This is not an occasion to show off your hand-held power drill skills.
If it is bolted to a handguard/free-float rail, then the handguard/rail may be installed not-square. This is a dicey situation. It could be easily re-installed to be square, but why should you do this, when the maker should have gotten it right?
Once you have checked it all, it is time to load up. Set aside a range day. Take only good ammo, ammo that is either factory, or reloads you have loaded and know for certain are 100% proper. Take only your best, fully-functional magazines. You’ll need about 200 rounds.
Oh, and do not, I repeat, do not, start bolting on gear, scopes, lights, accessories and such. If your testing determines that you will have to get your rifle serviced, you’ll have a double task – determining if the gear caused the problem, and un-bolting it all. Leave it as-is for the first sessions.
Now, in this day of expensive ammo, that much ammo may seem like a lot. And it is a hit to the wallet. Also, your barrel has a limited service life. Depending on how you use it and what you expect of it, that service life could be as little as 5,000 rounds, and as many as 15,000. At the low end, you are using four percent of your barrel’s potential service life, just checking to see if it works. That’s life.
This is not a blasting/plinking session, this is work, and detailed work, at that. The good news is that you can do all this in conjunction with your iron and optics zeroing, and your magazine and function test live-fire checking. It isn’t just mindless blasting into a hillside.
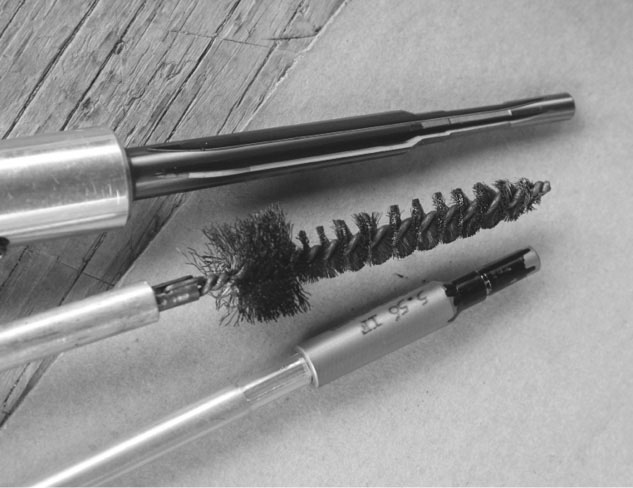
The brush is for cleaning, the gauge is for measuring, and the reamer is to correct a leade that was 223 to 5.56.
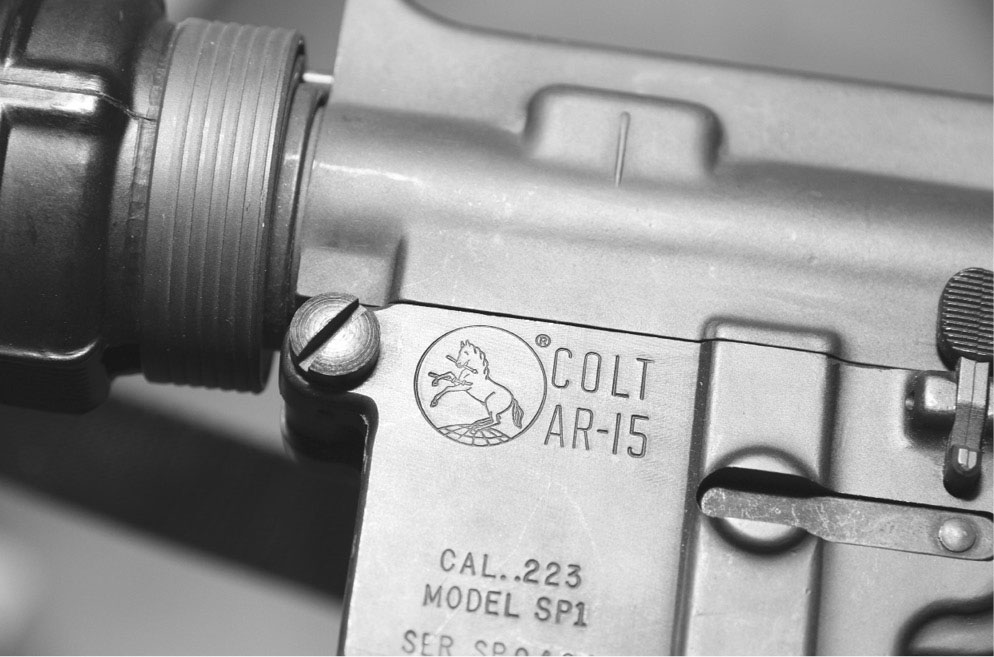
Only Colt can call their rifles “AR-15” and you’d better believe it that they protect it. Oh, and this is an early SP1, with the two-screw front takedown pin.
First, load only five rounds in each magazine. Use a target, 25 yards is a good start, and shoot from the bench. Your check points are simple: does the rifle lock open when each magazine is empty? If not, you’ve got a problem. If it does, move on.
Next, load up your magazines full, and fire five rounds each. A thirty-round magazine is working hardest when it is full, and if your rifle has a gas problem or a feeding problem, it will likely show up from full mags. Each five, pull the magazine out, top off, and repeat. If you have feeding problems, you can diagnose, or simply note and ship back.
Oh, and while you’re doing this, check groups on paper and adjust your sights to zero the rifle.
If, at this point, you’re saying to yourself, “This sounds a lot like what we just did in Chapter Twelve,” you’re right. Gold star for paying attention. Except here, instead of learning about yourself, you’re learning about your new rifle.
If, at 25 yards, you cannot shoot a group smaller than an inch (and you are a good shot), this could be bad. It may be that your rifle just doesn’t like that ammo. It happens. At 25 yards, from the bench, you should be able to, with good ammo, shoot a group you can cover with a thumbnail. If, despite your best efforts you cannot get factory ammo to shoot that well, and you paid for a good barrel, one that was supposed to do better, try one more thing: get a better shooter. If the best shooter at your gun club can’t do any better, then you need to ship it back.
Also, you should be able to zero your rifle at 25 yards without having to crank the sights too far. If you find you cannot get it centered despite adjusting the rear sight hard against the inside of the sight housing, your front sight is installed tilted, or the barrel alignment pin is in the wrong spot, or the slot in the upper to align that pin is in the wrong spot. None of these are things you can easily fix, nor should you. Save a target, box up the rifle and ship it back. Unless, of course you want to fix it yourself.

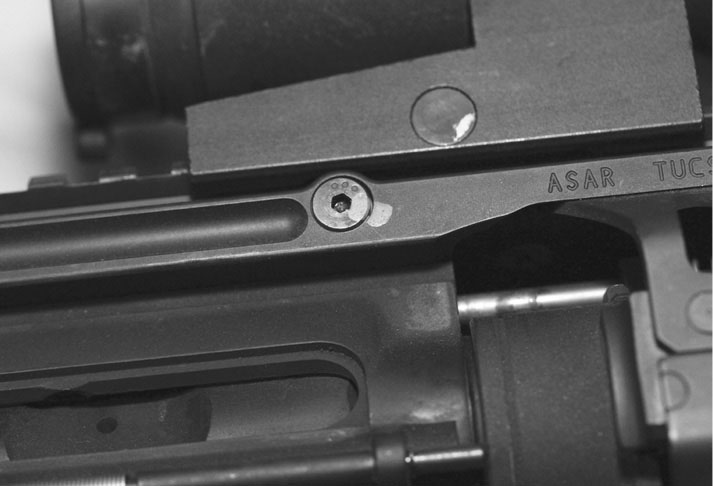
Screws do not belong on rifles. If you have to use a screw-secured part, paint the screwheads once you have made it all tight. It helps lock the screw in, and offers evidence of movement.
If you cannot get a vertical zero without turning your front post so far up it risks falling out, or so far down if is almost hidden in the housing, you have the wrong one on the barrel. It is either an M4 on a non-M4 upper, or a non-M4 in an M4 upper. Or, it is a gas-block folding front sight installed on a free-float handguard, or vice-versa.
Needless to say, failures to feed, from stubbing rounds or rounds stopping angled, sideways or bent in the feedway, are all cause for shipping it back.
And then there are the things you can fix. Before we jump right into fixing things, why should you? And why are we going to all this trouble? Fixing in a lot of instances is faster and easier if you do it, than if the factory does it. Yes, they will not get the feedback that lets them correct the problem in-house (if they care) but that’s not your problem.
Shipping a rifle back costs time and money. You have to find a box (hopefully you saved the cardboard sleeve the rifle came in), pack the rifle, seal it, label it, schlep it down to the local shipping hub, and then explain to them that yes, you can ship a rifle, and no, they don’t need to inspect it. Then after you’ve educated them on their own regs, you pay them to ship it.
Doing the fixing yourself saves the time and money, and ensures it gets done right.
As an example, we’re still struggling with manufacturers over the carrier gas key problem. The key needs to be staked, and staked securely. Some still do a lackadaisical job, and if yours is poorly done, shipping it back may not get you satisfaction. If that’s the job they do, they’ll just ship it back with a note that says, “That’s the way we do it.”
If your rifle works 100% through the tests, then you can go right to the final touches part of this chapter.
Every rifle I own has had the following things checked and if need-be, tended to.
Chamber check for 5.56 leade, with Mguns gauge. If not 5.56, it gets Mguns 5.56 reamed. (I long ago gave up checking headspace, as the problem has not been a problem for so long, it wasn’t worth the effort. Someday that will “bite” me, but until then….)
As explained previously, AR-15 rifles with .223 Remington leades have caused more problems than anything else with the exception of the next step. The only barrels not to be reamed are those which have treated to the Melonite process. This makes the steel surface so hard it will take the edge off the leade reamer.
The carrier key is staked, double-staked, and if I thought it would help and still had the tools, I’d tack-weld the thing on. Gas blow-by from the carrier key is the cause of many other problems, problems that have in the past been erroneously attributed to other sources. This calls for use of the MOACKS, after disassembling, cleaning and then applying Loctite.
If the stock is a fixed stock, A1 or A2, I make sure it is tight. The A1/A2 gets the screw removed and checked. If it has a nylon locking section, great. If it has a smear of blue Loctite, fine. If not, I use blue and tighten it down. If it is a tele-stock, I make sure everything is tight and aligned, and I then stake the castle nut.
I take of the pistol grip, remove the spring that activates the selector plunger, and apply a small wedge/diamond of masking tape to it. I then jam the spring back down into the pistol grip, tape end first. The tape makes sure the spring doesn’t fall out when next I disassemble the pistol grip.
I do all the inspections I’ve described, to make sure all the parts are there, tight, straight, and properly secured. I then paint-in the various parts that might try to move, such as BUIS, and then I’m done. Well, done until the next round of experimentation, adjustment, trying-new-gear, etc.

Left: Gas keys have to be tight, and the best way to make sure they stay tight is to stake the screws in. That means a MOACKS. Right: This forearm uses a top rail, clamped on the flat-top, to hold on tight. The locking screw, in addition to being Loctite-d, is painted in.