CHAPTER 4
February
By February, you can finally start sowing seeds again, albeit only indoors. It’s also a good time to make yourself some self-watering containers, ready for a couple of months’ time.
My Balcony at the Start of February
Plants still alive and growing:
Herbs: rosemary, thyme; bay, oregano, chives, and parsley (both flat and curly) in the cold frame. Basil plant inside.
Salad vegetables on the railing: sorrel, bronze arrowhead lettuce, rocket.
Salad vegetables in the other cold frame: bronze arrowhead lettuce, rocket.
Pak choi perking up a bit.
Several pots of small broad bean and pea plants.
Two mint plants doing well.
Seeds and cuttings: none.
Things to Do in February
- Start broad beans and early peas.
- Start first sowings of lettuce and rocket inside.
- Make self-watering containers.
Sowing Time and Succession Sowing
As I’ll discuss below, there are some early vegetables that you can start sowing now to add to anything you’ve overwintered. However, if you sow all your early vegetables now, then they’ll grow early, crop early, and finish cropping early too – leaving you with nothing later.
To avoid this, you can succession sow. This means that instead of sowing all the seeds you want of a particular vegetable at the same time, you spread the sowing out over a period of a few weeks (or even a couple of months, depending on sowing season of the plant), and therefore spread the cropping season out over that time as well.
So you might sow a couple of early peas every week throughout February and March. Peas take between 12 and 15 weeks from sowing to harvesting, so your first lot, sowed in early February, will start producing peas in early June. The ones you sow at the start of April will start producing peas nearly two months later, at the start of August. Plants will keep producing peas for two to three weeks if you keep picking, which means that you’ll get your first peas at the start of June and your last peas at the end of August – whereas if you were to sow all your seeds in late February, you’d get a glut of peas for the last couple of weeks of June and nothing outside that.
In fact, it’s usually a bit more complicated than this. Seeds sown very early will take a bit longer to mature (although they will still start cropping early as well); seeds sown late may suffer in an unusually hot late spring and stop cropping a bit sooner (this has happened to my peas for a couple of years in a row). Different types of peas also naturally crop at different times (you can get early, mid, and late varieties). But you’ll still extend the season at least a little. The other thing to bear in mind is that (if you’re growing a small number of plants) your daily crop will be smaller with succession sowing, because it is spread out. What you prefer depends on whether you want, say, peas to nibble over a long time, or peas for dinner for four once or twice.
Even for cut-and-come-again plants such as (some types of) lettuce and rocket, succession sowing can be a good idea. You’ll get early leaves alongside the more mature leaves, and the early plants will last a little longer before bolting. You can also do two sets of sowing: rocket does well in spring, and in late summer, but bolts immediately in mid-summer. So you can take a break from sowing it in late May/early June, then start again in early August.
Not all plants are suitable for succession sowing. Tomatoes, courgettes, and peppers for example, need quite a long time to produce fruit, so need to be sown as early as possible to give them a long growing season. (Tomatoes will also keep fruiting, if you’re lucky, into October.) However, it may still be worth making a couple of sowings, separated by a week, in case something unfortunate happens to your first batch of seeds (a late frost, a marauding cat or dog...).
Early Vegetables
There are a few plants that can be started off as early as February:
- Broad beans do very well started early – you can even start them in November and leave them to overwinter. Plants will grow a little, then start off in earnest as the weather improves.
- Early peas also do very well started early (hence the name) – but you do need to grow specifically early varieties. Again, like broad beans, they’ll be very slow until the conditions change, but then they’re ready to shoot up the moment the weather improves. Snow peas can be sown in the autumn or in very early spring.
- Lettuce and rocket can be started now as well, for a very early crop. Succession sow from now onwards.

My collection of seedpots on the windowsill. Old fruit juice cartons are useful to protect the windowsill from water dripping.
Plants can be started off either outside, in the pot you wish them to end up in, or inside, in a smaller pot on a sunny windowsill. Hardy early vegetables such as broad beans and early peas needn’t be started inside; but you may find that they germinate a bit faster that way. Sowing inside and hardening off is discussed below.
Frost dates
If you’re starting to sow in February, you need to think carefully about frost dates. Make sure that you don’t move a plant outside that isn’t ready for it.
Broad beans, as discussed above, can be started off outside and will survive frost. If starting them off inside, make sure to harden them off first by leaving them outside for a few hours in the middle of the day for a couple of days (then taking them in overnight) before moving them outside permanently. Failing to do this will stunt the plants’ growth as they recover from the sudden shock of the change.
If in doubt, keep plants inside on your windowsill until you’re certain that they’re tough enough to survive or that the danger of frost is past. Even then, keep an eye on the forecast, as sudden late frosts are by no means unheard of even in southern England. If you’re further north, this is even more important.
Starting seeds
In most cases (carrots and other root crops are the main exception), it’s a good idea to start seeds off in a small pot, then transfer them to a larger one once they’ve got their first couple of sets of true leaves. This makes them more transportable, and means that you can start them off inside on a protected windowsill, in your sunniest/most protected position outside, or in a portable greenhouse. You can fit a much higher number of baby plants in small pots into the space available for starting seeds off than if you sow directly into the larger pots you’ll use later.
You may be able to get small seed pots from gardener friends (they seem to proliferate at a great rate at my allotment, and there are always piles on the give-away table). Alternatively, you can make your own out of paper or newspaper. Rip the paper into strips slightly taller than you want the seed pots to be, wrap each strip around a suitably sized round thing (a 500ml water bottle, or a rolling pin if you want very small pots), and tape it to hold it closed. Remove the cylinder from whatever you wrapped it around, and fold over and tape one end to construct a bottom. Fill with compost, and insert your plant.
These seed pots won’t survive for all that long, but they should last for long enough to get the plants started. In theory, when you transplant the plant you can put the whole thing, paper and all, straight into the compost, and the paper will decompose as the plant grows. However, in my experience, plants do much less well this way than if you carefully remove the paper, as their roots struggle to escape. It may be that it depends how tough your paper is, so actual newsprint might be more successful; or it may be that the paper decomposes more slowly in pots without the insect assistance that you’d get in soil. I have found that it’s much better to gently remove the paper before carefully putting the baby plant into its new home.
Self-Watering Containers
As discussed in the Introduction, one of the big problems for container gardeners is making sure that their plants are watered often enough and well enough, as otherwise your plants just won’t do as well as they might. One way of helping ensure that thirsty plants such as tomatoes never run out of water is to make self-watering containers.
The basic idea is that you have a main container, which has earth and the plant in, and then underneath that there is a reservoir of water. A wick between the two (a piece of string or cloth, or ideally a small holey container, a bit like a colander, filled with earth and hung into the reservoir) brings the water up to the plant. Refill the reservoir regularly, and the plant will never go thirsty. I’m told that SWCs can massively increase plant yield, although with my own small space it’s hard to test that properly. My tomatoes in SWCs did seem to do a little better than the others, though, and my best-producing plant was in an SWC as well as against a south-facing wall.
Two-litre or three-litre plastic bottles can make single-plant SWCs for small plants. Alternatively, you can use larger containers – I’ve made several SWCs from 30cm plant tubs, as described overleaf.
When you water the pot, water it very thoroughly. The excess water will drain through the plant pot at the bottom, into the bottom tub, creating a pool of water. As the earth further up dries out, water will be wicked up via the earth in the plant pot, as the plant needs it.
Plastic Bottle Self-watering Container
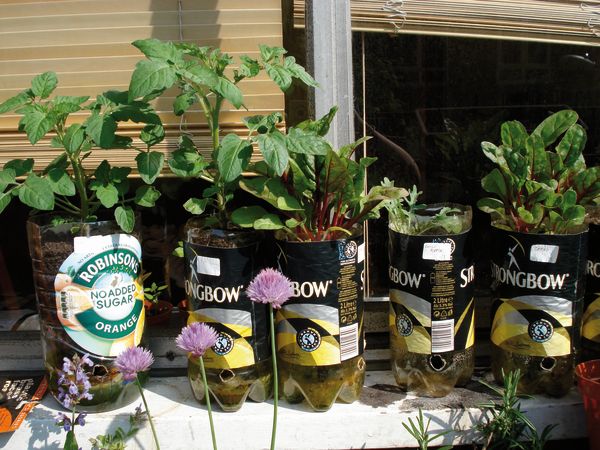
A row of bottle SWCs. The tomatoes were a bit too restricted in these, but the chard did well.
Materials:
2 litre plastic bottle.
Piece of an old cotton T-shirt, around 20 x 20cm.
Compost.
Sharp knife.
Sandpaper (for sharp edges).
Marker pen (to mark fill line).
Steps:
- Cut the plastic bottle in half 13cm from the bottom. It doesn’t matter if the line is a bit wavy. The top half (with the neck) will be the planting container; the bottom half will be the water reservoir.
- Sand down the cut edges, then wash off the bottles to remove any plastic dust.
- You can if you want paint the top half of the bottle (which will be the planting container). Some people reckon that this helps protect the roots. (I have never bothered, as I have never had paint lying around.)
- Take the cotton wick, and push it through the neck of the bottle so half is inside the bottle and the other half is outside. Wet it all down (to help it start wicking).
- Put the planting container, neck-down, into the water reservoir. They should fit neatly together.
- Add the compost, a little at a time, to the bottom of the planting container. Pull the wick up as you put the compost in, so it’s surrounded by the compost, and damp the compost down as you put it in.
- Put in your plant at the appropriate time (or fill it all the way up then add the seeds), just like you normally would when repotting or sowing seeds.
- Water the plant in and tamp down the compost.
- Look at where the neck of the bottle is in relation to the water reservoir. You should be filling to about halfway up the neck, so that the wick is allthat’s in contact with the water. Mark this on the outside of the reservoir with the marker pen.
- Take the planting container out, fill up the reservoir to the mark with water, and put the container back in again. You can also water by watering from the top and letting the water drain through.
- Make sure you check the water reservoir regularly and refill when needed!
Florists’ Tub Self-watering Container
A basic and cheap style of self-watering container, suitable for one tomato plant, can be made using florists’ tubes, as follows.
Materials:
Two florists’ tubs (my local florist will sell them off at 10 for £1).
They should be the sort without drainage holes in the bottom.
A small plastic plant pot (5-10cm across, and significantly smaller than the width of the base of the florists’ tubs).
Sharp knife.
Empty plastic bottles (or anything else that will suit the job they’re doing – see below).
Steps:
- Cut a round hole in the centre of the base of one of the florists’tubs. The plant pot should sit just inside the hole (sticking out through the bottom of the florist’s tub, but not falling through), so the diameter of the hole needs to be just smaller than the diameter of the top of the plant pot (see photo).
- Punch or drill a few holes around the base and sides of the small plant pot, to allow water to soak through. Drilling may work better, as the holes should be a couple of mm across.
- Cut the base off two water bottles. The height of the cut off bases should be slightly greater than the height of the small plant pot.
- Take your second florist’s tub (the one that doesn’t have a big hole in the bottom), and place the water bottles inside its base. These will provide something for the first tub to rest on, so that when you stack the two tubs together, there’s a space between their bases for the water to live in. Stack the first tub in on top, so it rests on the water bottles.
- Push the plant pot into place inside the hole cut for it in the first tub. You now have two florist’s tubs stacked together, with a space between them to act as a water reservoir, and a plant pot which drops down into that space and which will soak up the water from the reservoir as needed, through the holes you drilled in it.
- Depending on the design of the florists’ tubs, you may need to put a little packing material around the edge where the tubs are stacked in each other, to prevent the top tub from wobbling. Cardboard will do for this (although may disintegrate over time); or a rolled up piece of scrap plastic. On one occasion I found that the top of the cut up water bottle fitted very neatly; basically, see what you can fish out of your rubbish bin! See the photo below.
- Carefully pack compost down into the plant pot, before filling the rest of the tub (leave filling the whole tub until you actually have a plant to put in it).
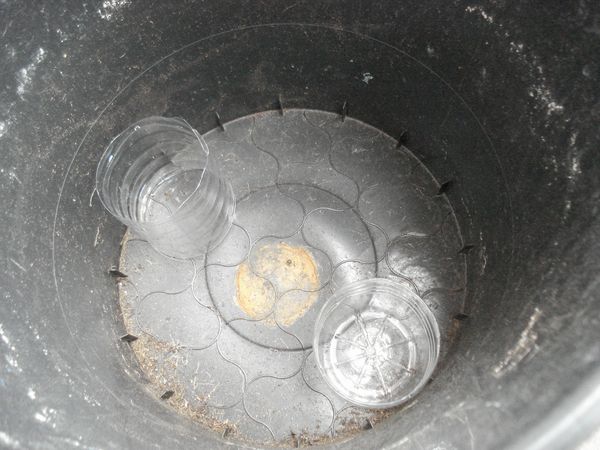
Bottom half of the SWC, with the plastic bottles to hold the top half up.
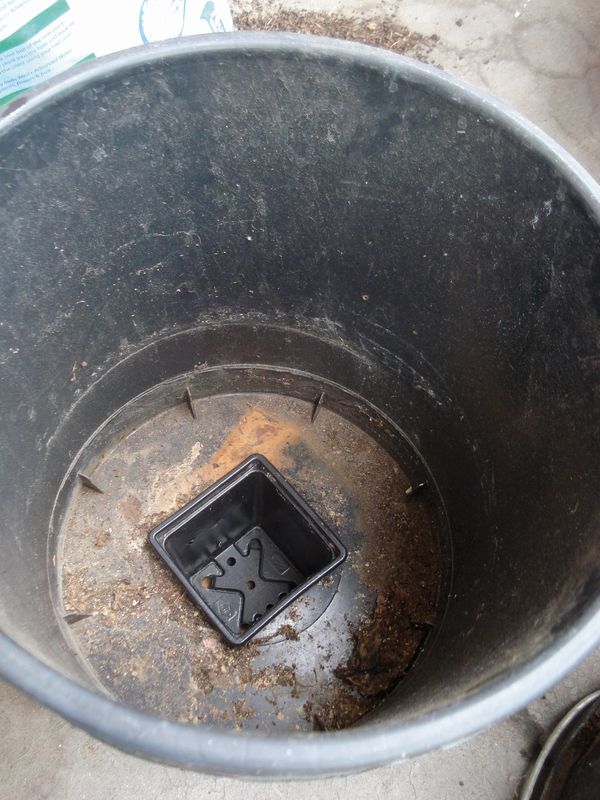
Top half of the SWC, with the holefilling plant pot sitting at the bottom.
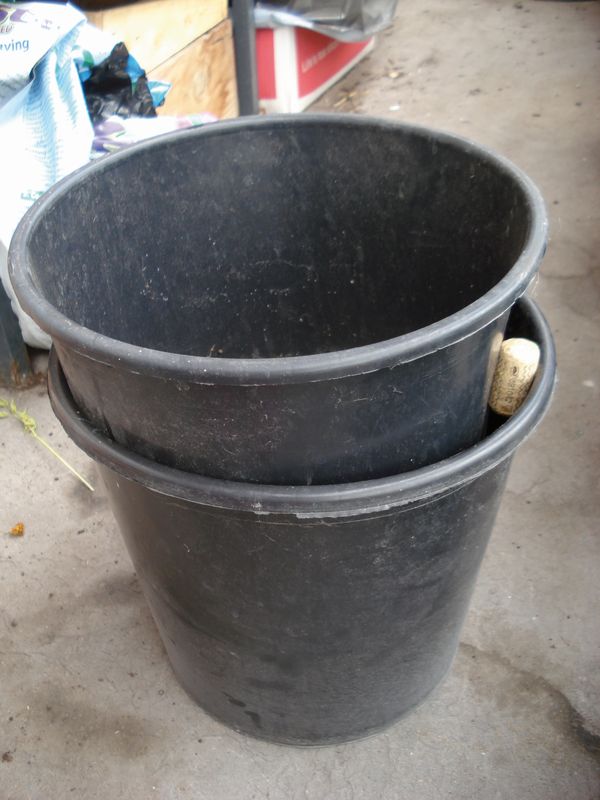
The two halves put together, with a cork to wedge them so they don’t shift around.
It’s important that the base of the plant pot should be very nearly sitting at the bottom of the bottom tub, so it can wick up all the water sitting there. Another option when watering is to fit a spout that will directly feed the reservoir, but I’ve never found that to be necessary.
My experience is that water-hungry plants like tomatoes do incredibly well in these – it means that you can get away with only watering every couple of days, rather than every day, even in very hot weather. Every time a tomato plant loses enough water to droop, you’re affecting its growth and the growth of the fruit. Using self-watering containers means that (if you keep watering regularly) the plant will never run out of water, and you’ll get higher yields and tastier fruit.
There are far more complicated versions of self-watering containers available to buy, or you can look online for more complicated patterns involving Rubbermaid plastic tubs. The important parts, though, are a space to act as a reservoir, and some way of wicking up the water from that reservoir. Experiment with your own structures on this basis!