YOUR NOOK TABLET’S 16 gigabytes of memory goes a long way. You’ve got twice as much room for books, periodicals, files, and apps than with any competing eReader. But sometimes that 16 GB doesn’t go far enough and you want more.
Unlike other eReaders, your NOOK Tablet has a built-in slot for a microSD card, which means you can expand its storage, and add lots of it. There’s plenty you can do with that storage, adding space for music, Office documents, video, and more. This chapter tells you how to do that, from installing an SD card, to transferring files and then learning how to manage them.
Most of the storage built into the NOOK is for Barnes & Noble content and for the NOOK’s Android-based operating system. 1 GB is available for non–Barnes & Noble content. That’s where the NOOK’s SD card comes in. You can put an SD card with up to a whopping 32 GB of memory in it, with room for literally thousands of books, magazines, newspapers, and files.
How many you can actually fit depends on what you put there. Figure that an SD card can store about 1,000 books for every gigabyte of storage space, so a 32 GB SD card can hold an astounding 32,000 books! Even if you’re a nonstop reader, that should last you several lifetimes.
Of course, you’ll likely store more than books on the SD card. You may store magazines and newspapers as well. And that’s where your mileage will vary. Highly interactive magazines with plenty of high-resolution photos can weigh in at an astounding 1 GB each. And if you store music files, they can add up as well.
When buying an SD card, make sure you buy one of the two formats that the NOOK supports—microSD or microSDHC. What’s the difference? It’s right there in the name. The HC in microSDHC stands for high capacity. Cards 4 GB or over are called microSDHC, while cards under that capacity are microSD.
Since microSDHC cards can hold more than microSD cards, and the cost difference isn’t enormous, there’s little reason not to spring for the HC variety. You can generally find a 32 GB microSDHC card for $40 or under, so that size gives you the most bang for your buck.
Make sure when buying a card that it is formatted with the FAT32 file system. As a general rule, most or all are, but it doesn’t hurt to check.
Note
MicroSDHC cards are rated by their class—Class 2, Class 4, and Class 6. Class 2 is the cheapest, and Class 6 is the most expensive. If you don’t see a class rating on the packaging, it’s a Class 2 card. The higher the class, the more quickly you can transfer files to it, but the class rating has absolutely nothing to do with how quickly you can display books from the card. Class 6 cards tend to be significantly more expensive than Class 4 cards, and some people have had problems with them. To be on the safe side, stick with Class 4.
If you haven’t installed a microSD card before, don’t fret—it’s a piece of cake. Here’s how:
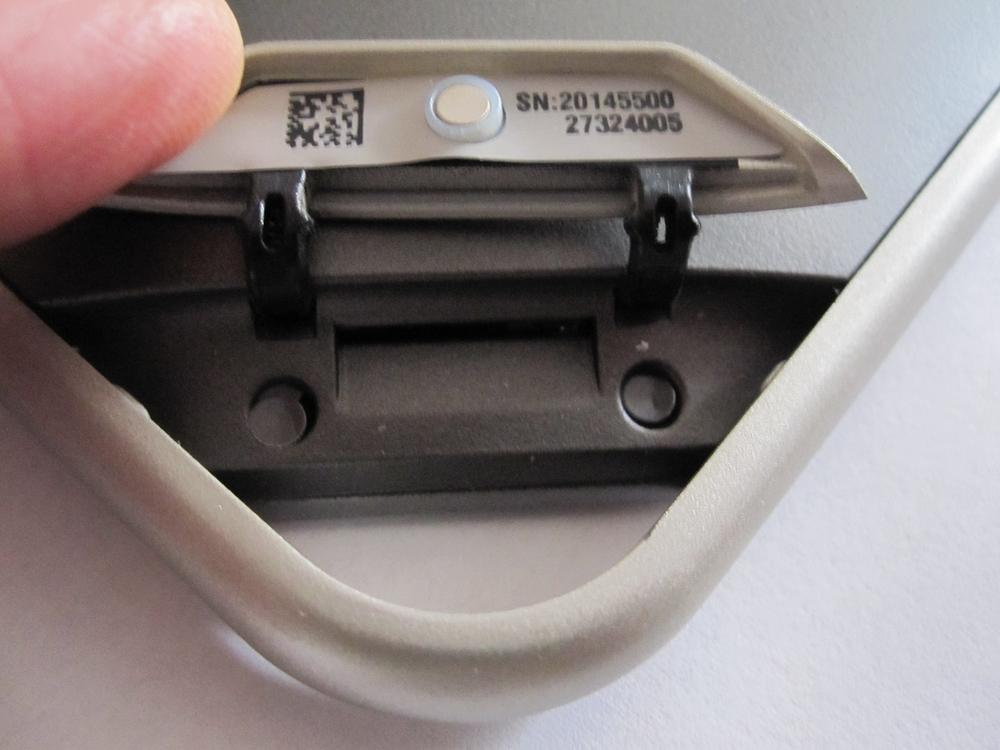
Put your NOOK face down on a clean surface. Look down at the bottom right of your NOOK near the curved notch for a gray diagonal lid labeled Nook.
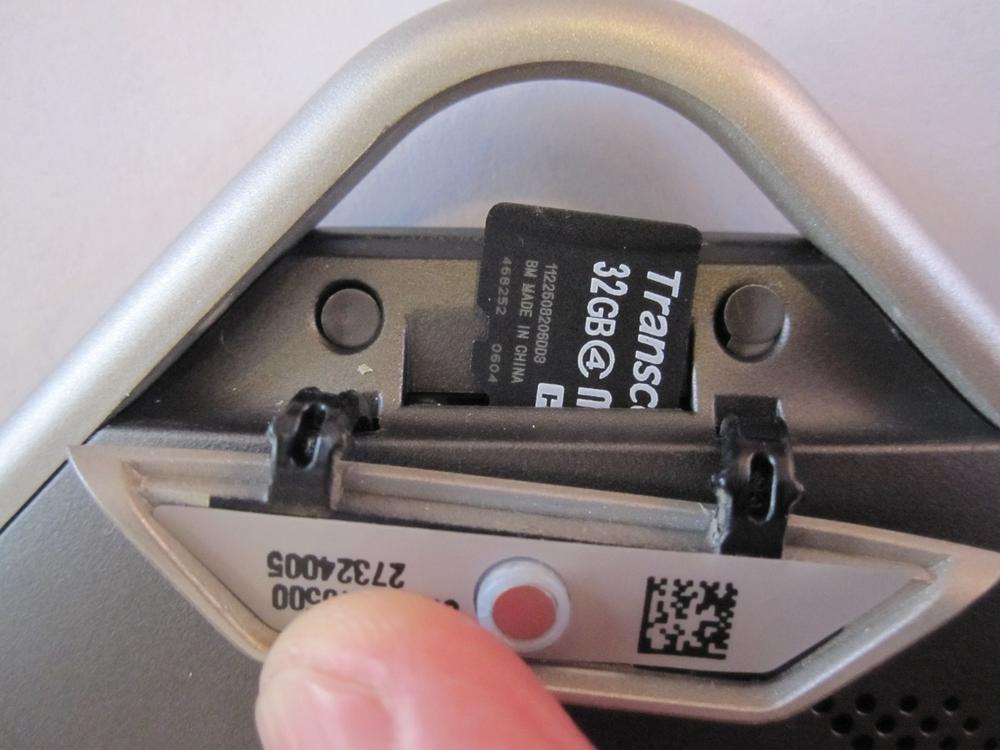
Pull the lid open gently with your fingertip and fold it against the back of the NOOK. You’ve exposed a small slot.
Holding the card between your thumb and forefinger, with the logo side up, insert it gently into the slot.
Snap the gray lid back into place.
If you haven’t used the card before, you may need to format it before you can use it. If that’s the case, you’ll see a dialog box telling you that the card needs to be formatted. Tap Format Now. You’ll get a warning, telling you that formatting the card will delete all its contents. Tap the Format Now button again, and the NOOK formats the card. (If you don’t get the alert telling you that the card needs to be formatted, don’t worry—that just means it’s already formatted and you’re ready to go.)
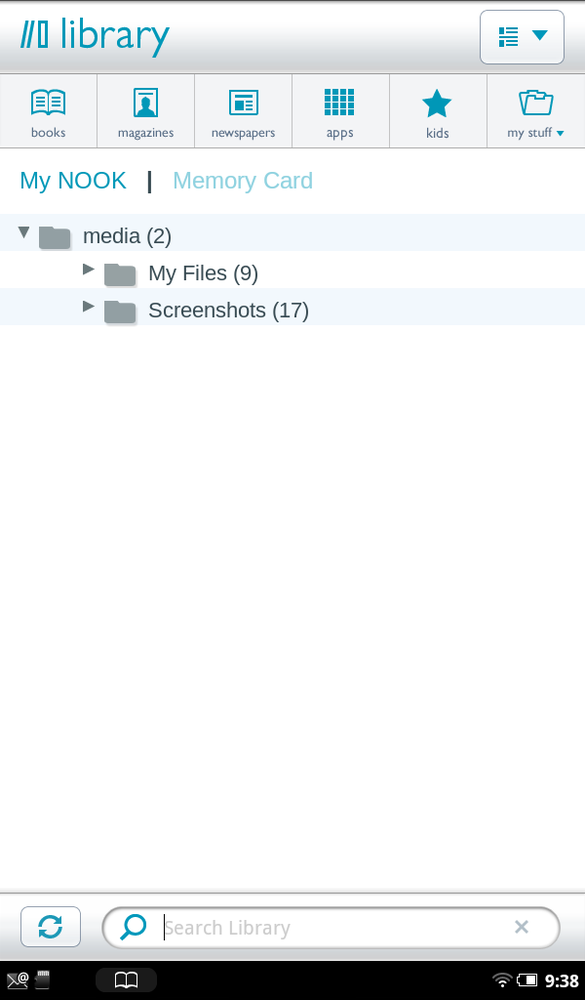
Once the card is installed, you’ll see two new links in the Media bar of your Library, one labeled My NOOK, and one labeled Memory Card. Tap the Memory Card link to see and use its contents.
Removing an SD card is as easy as installing one. Place your NOOK face down and open the card slot as described in the steps in VividView Color Touchscreen. Push gently against the memory card with your fingertip and then release it; part of the card pops out. You can then slide the card out of the slot and snap the gray lid back into place.
Table 11-1. You don’t want to waste your time transferring files that will merely sit on your NOOK, unloved and unused. This table details what kinds of files work with it.
BOOK FILES, MICROSOFT OFFICE FILES, AND MULTIMEDIA FILES |
EPUB (the main book format for the NOOK) |
Word (.doc, .docx, .docm, .dotx, .dotm) |
Excel (.xls, .xlsx, .xlsm, .xltx, .xltm) |
PowerPoint (.ppt, .pptx, .pptm, .pps, .ppsx, .ppsm, .pot. potx, .potm) |
Plain text (.txt) |
HTML (.htm, .html, .xhtml) |
Comic book archive (.cbz) |
MUSIC FILES |
.aac |
.amr |
.mid |
.midi |
.mp3 |
.mp4a |
.ogg |
.wav |
PICTURE AND PHOTO FILES |
.jpg |
.gif |
.png |
.bmp |
VIDEO FILES |
Adobe Flash |
.3gp |
3g2 |
.mkv |
.mp4 |
.m4v |
Note
Want to hear some real techie talk about your NOOK Tablet’s multimedia prowess? It supports MPEG-4 Simple/Advanced Profile up to 1920x1080 pixels, and H.263 up to 352x288. It also supports H.264 Baseline/Main/High Profile up to 1920x1080 pixels, and WEBM VP8 up to 640x480 pixels. What does all that mean? If you have to ask, you don’t need to know.


