Note: As you continue the rolling and tucking started on the previous pages, you will find that it is more effective to begin to work with the dough by hand, but you may find it easier to start with a bowl scraper. Remember to incorporate the reserved flour bit by bit when the dough sticks to your hands or the work surface.
Start by coaxing the dough into a somewhat rectangular shape, with a short end facing you. Slide your fingers (or scraper) under the first 3 inches (8 cm) of the part of the dough and lift it up (A).

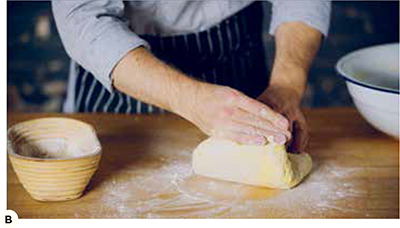
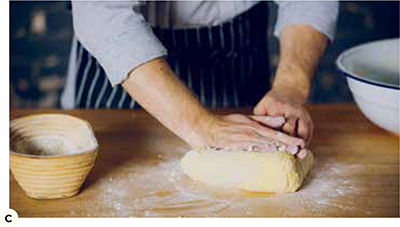
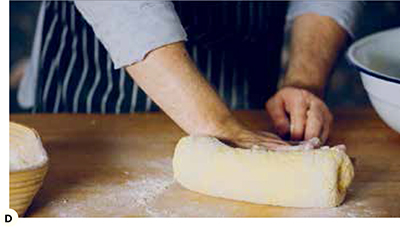
Roll it towards you, then push down lightly with the side of your hand, tucking the folded end into the mass of dough (B–D). Repeat several times until the dough is all rolled up, giving a slight push down on the last roll to leave the rolled dough seam-side down. Rotate the dough 90 degrees so the short side is once again facing you. Flip it over seam-side up, and press gently on the seam with your palm hand (or the flat side of a scraper) to create a roughly rectangular shape measuring about 4 by 10 inches (10 by 25 cm).


Repeat the process as before, ending with the dough seam-side down. At this point, you will have completed one full roll and tuck. You can now rotate the dough 90 degrees and begin the next roll and tuck.
Note: Experienced bakers may be able to accomplish four rolls while working down the length of the dough; those who are less experienced may manage only three rolls. Don’t worry about it. If the dough is quite sticky at first, have patience; it will strengthen and become more manageable with each roll and tuck. When the dough strengthens, you’ll notice that it begins to resist further rolling. A general rule of thumb is that when the dough becomes difficult to fold and begins to tear, it’s time to stop.
Transfer the dough, seam-side down, to a clean bowl at least 12 inches (30 cm) in diameter. Cover it with a clean kitchen towel and let it rest.