
Most commercially manufactured yarn comes in machine-wound oblong skeins. You do not need to take off the label, also called the ball band, to use the yarn. It will pull from the middle of the skein. If the label indicates which side to pull from, follow those instructions. If not, you will have to find the correct end, tucked into the skein. Reach inside with a couple of fingers (kind of like you are pulling the giblets from a Thanksgiving turkey) to feel for the end. Pull gently. If the yarn pulls cleanly from the center, you have found the right end. If the yarn starts to tighten the skein around the outside, you are using the wrong end. Don’t worry if you pull out a small clump along with the working yarn. Simply stuff the excess back in after you find the end.
Always save the labels. They contain washing and care instructions and will be useful if you want to make another project with the same yarn. A good way to store them is in a photo album. Slip them under the clear pages along with any notes you have about the yarn or the project.
Cotton crochet thread comes on cardboard cylinders or cones. The thread unwinds from the outside in. Locate the end of the cotton, which is usually tucked under a few of the outer strands, and use it from there.
Hanks of yarn are large circular loops folded into a figure-eight and tied to hold them in place. Hand-dyed yarns and natural fiber yarns made in small batches are often wound this way because being made into skeins could crease the yarn permanently. You should not crochet directly from a hank; make it into a ball first.
It is worth it to take the time to make a ball. A tangled mass of yarn can take hours to unsnarl, or it can become so knotted that it must be discarded.
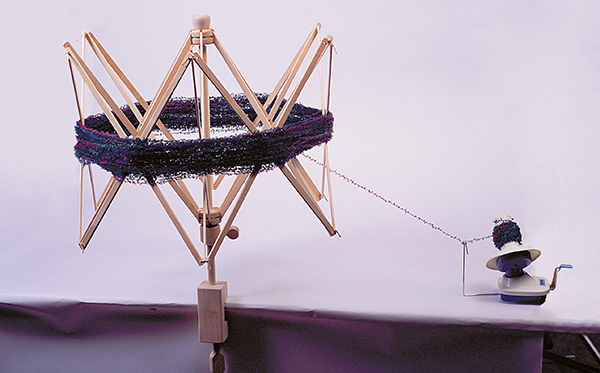
Ball winder/yarn swift
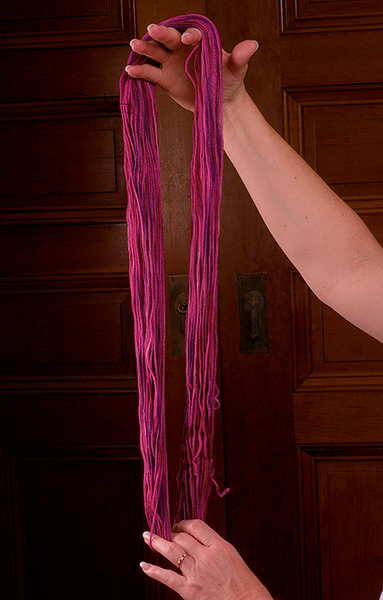
1. Remove the small ties and untwist the hank into one big loop. Put the loop over the back of a chair or have a friend hold the loop around both of his or her outstretched hands
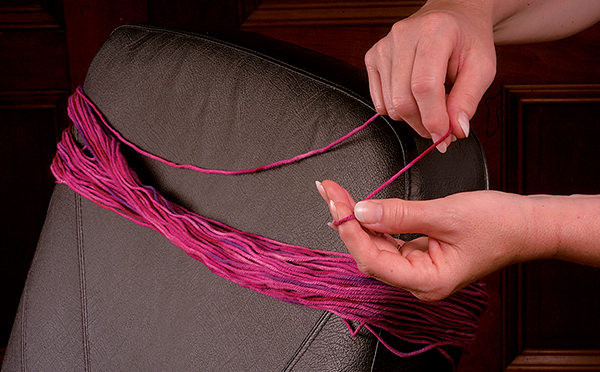
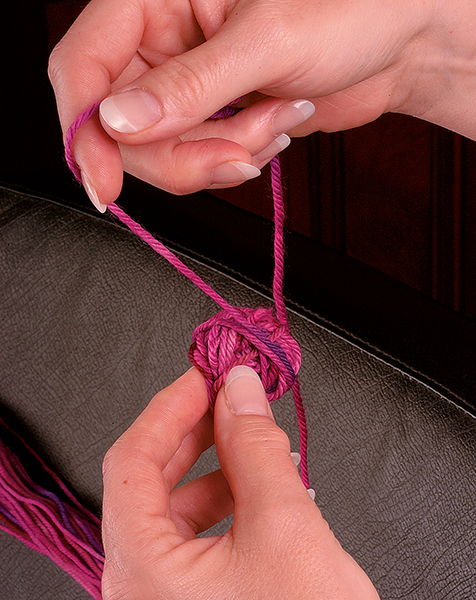
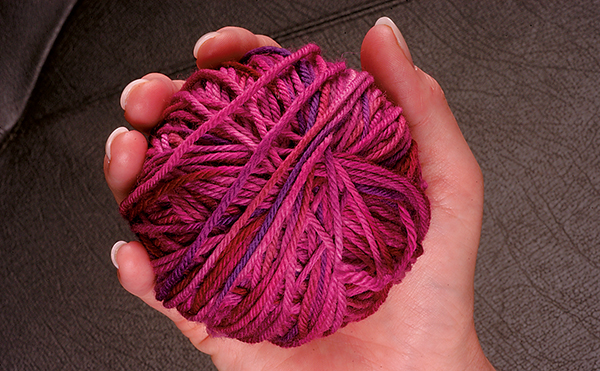
2. Take the end of the yarn and start winding it into a ball. Wind it around your fingers for the first few rounds, then wind the yarn around the growing ball. Turn the ball as it grows so the yarn forms a nice round shape as you wind it.
Keep the yarn nice and relaxed as you wind it. Do not pull or stretch it. The ball should be slightly squishy, not rock hard.
An alternative is to use a ball winder and yarn swift, designed to wind hanks into balls. Yarn shops usually have these for sale and may even offer to wind your yarn into balls at the shop for free on their own equipment.
You can hold a crochet hook like a pencil or a knife. The following photos show the hand positions for a right-handed crocheter. Left-handers can look at any instructional drawings or photos in a mirror to see the proper position for them. Another alternative is to scan an image and flip it left to right. When working with and learning from a right-handed crocheter, sit facing each other. Your work will be a mirror image of hers or his.
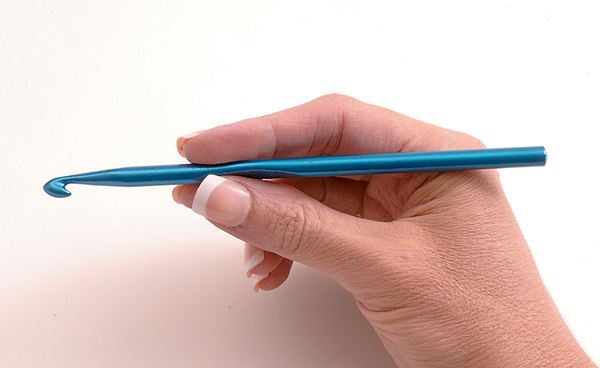
To hold the hook like a pencil, put your thumb and index finger over the flat section of the hook. The end of the shaft rests on the top of your hand.
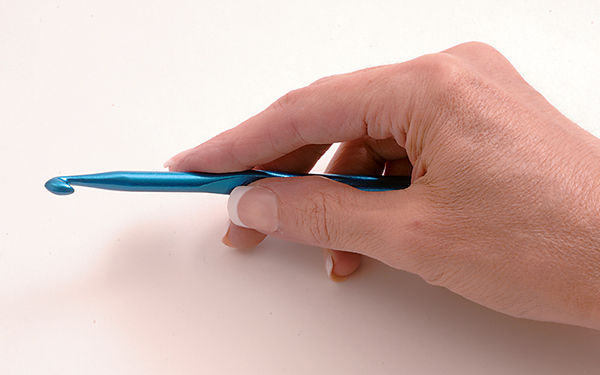
To hold the hook like a knife, grab the hook from the top. Slide your index finger toward the hook end. The end of the shaft is under your palm.
Healthy Crocheting
Crocheting is not strenuous, but it is physical and uses repetitive motions. To avoid strain and injury, it is important to work comfortably and not to do too much, especially at first. Here are some guidelines for healthy crocheting:
A slip knot attaches the yarn to the hook so you can begin to crochet. It is different from a “slip stitch.” Start all of your projects by attaching the yarn to the hook with a slip knot.
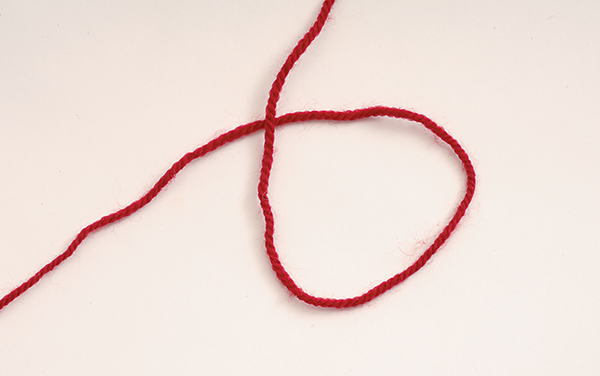
1. Make a loop of yarn with the working end on top.
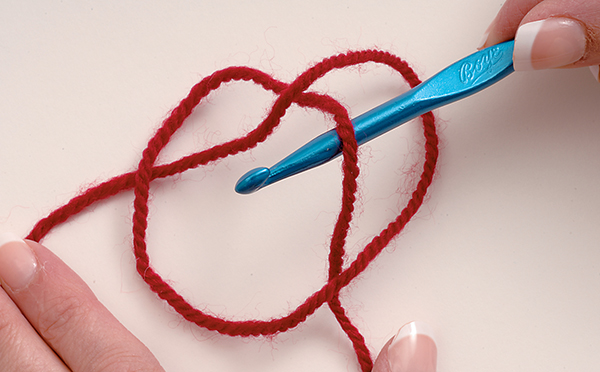
3. Using your hook, go over the pretzel’s top loop, then put the hook under the center yarn to grab it.
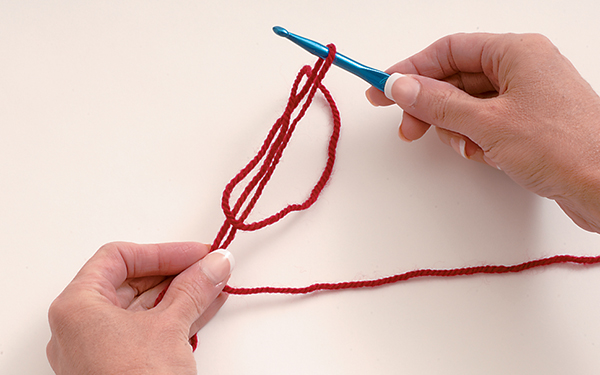
4. Begin to pull up, holding onto both ends of the yarn with your other hand. This starts to tighten the slip knot.
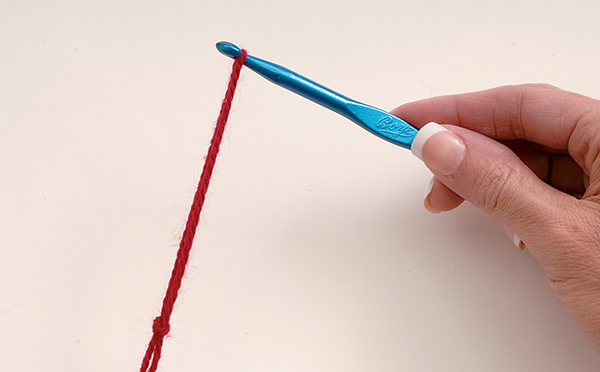
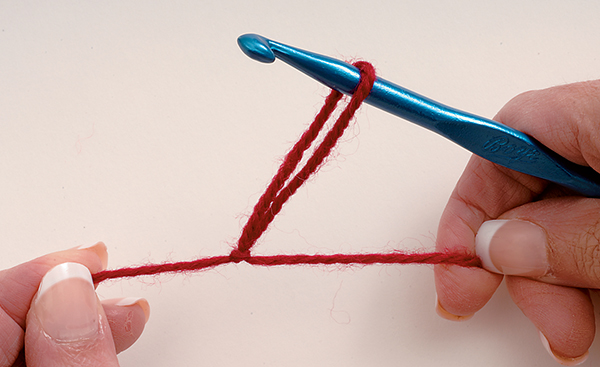
5. Once the knot tightens, pull the two ends apart to make the loop smaller and move the knot close to the hook.
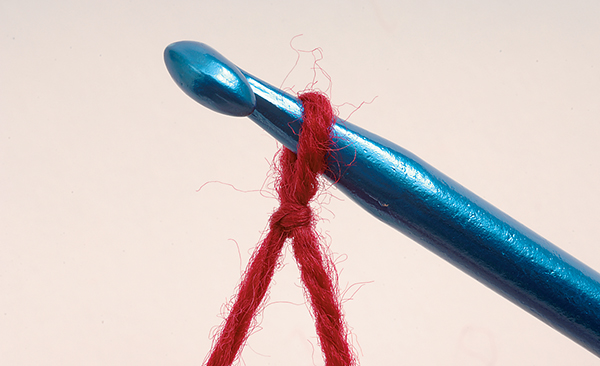
6. The slip knot is complete.
Successful crocheting depends on having the right tension on the yarn. This is achieved with the hand that is not holding the hook. The yarn has to flow over that hand and be controlled by it at the same time.
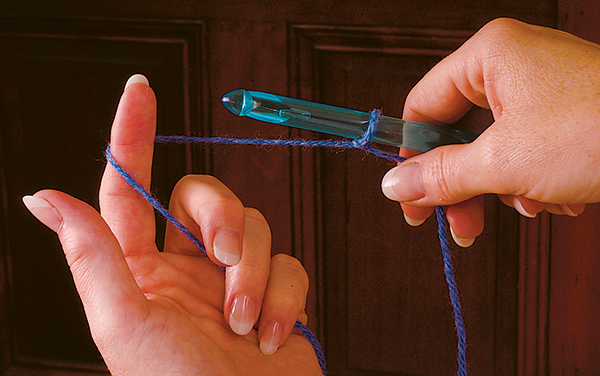
Here is one way to hold the yarn. The third, fourth, and fifth fingers hold the yarn in place lightly. Do not grip the yarn tightly with those fingers, or you will feel like you are tugging the yarn and your stitches will be too tight to use.
This is only one suggestion for how to hold yarn. If another position is more comfortable for you, use it. The important thing is to maintain even tension as you work.
The photo shows the left hand palm up to indicate the position of the yarn. Hold your palm down with the fingers closed when you crochet.
Chain stitches (abbreviated ch) serve as the first row, or foundation row, for the rest of the work.
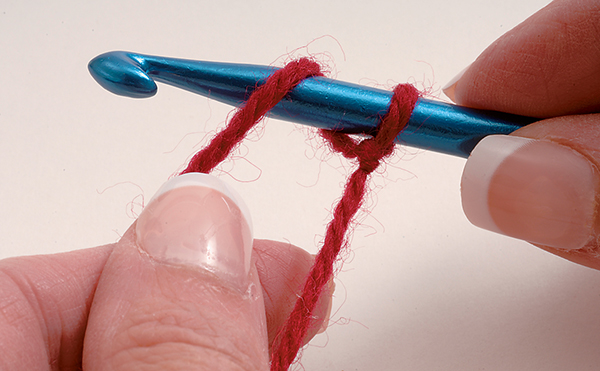
1. Wrap the yarn over the hook (abbreviated yo) from back to front, between the loop that’s already on there and the hook end. Hold the tail of the yarn in your palm (but not too tightly). If you do not hold it, the loop will spin around and you will not be able to make the stitch. At the same time, don’t pull the loop that’s on the hook too tight. This is the tricky part! Be patient and you will get the hang of it.
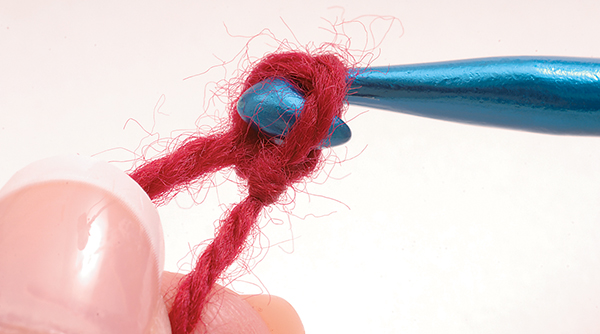
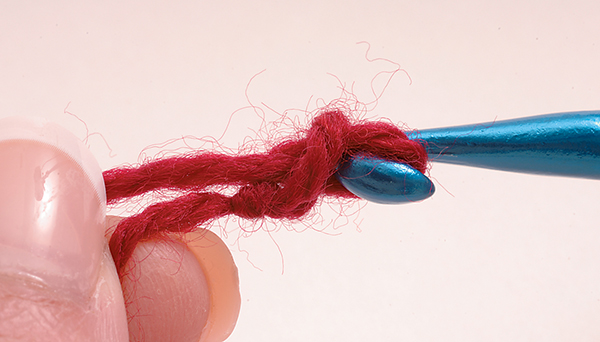
2. Use the hook to pull the yarn you just wrapped around the hook through the loop. This completes one chain stitch. Remember, do not pull with your hook hand too tightly, or you will make the loop too small.
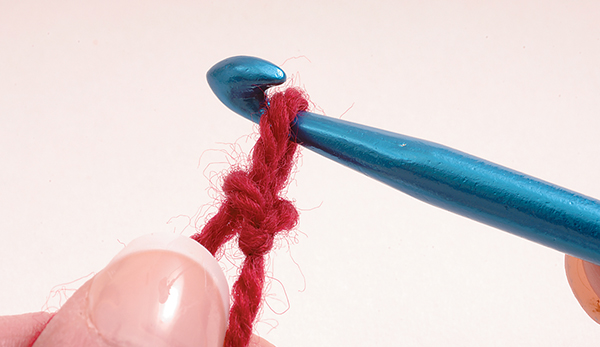
3. As you add to the chain, pinch the finished part lightly between your thumb and third finger of the non-hook hand. Move your thumb and third finger closer to the hook after completing three to four stitches. This helps keep the proper tension on your work and prevents the chain from curling.
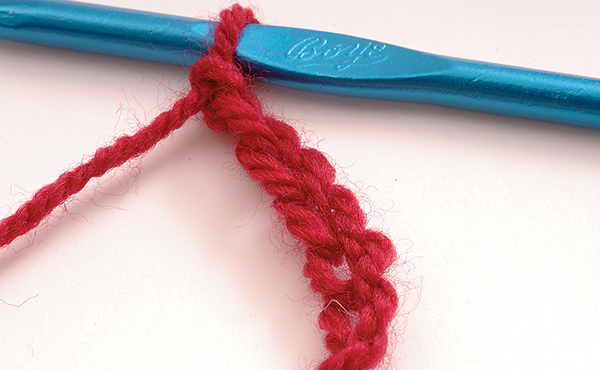
Here are some completed chain stitches. Practice your technique until you can make chains evenly. Your stitches should all be the same size and have the same tension. Keep your hands relaxed as you work.
TIP» If you find that your chains are usually tighter than the rest of your work, use a hook one size larger for the foundation chains. Switch back to the smaller hook for the next row.
It’s frustrating to make a long chain foundation only to discover at the end of the next row that you didn’t make enough chain stitches. For this reason, some of the patterns recommend that you make a few extra chains just in case. They are easy to take out later.
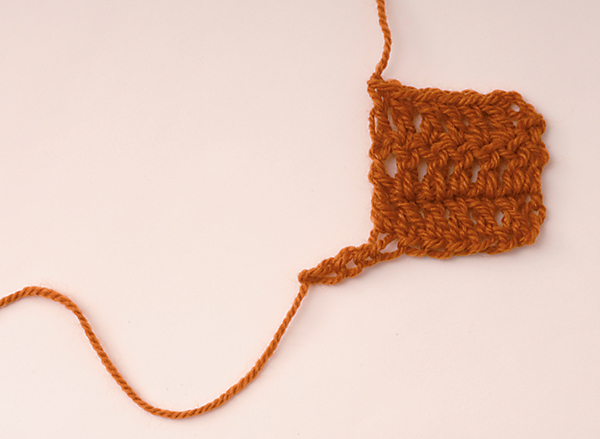
Here is an example of an item that has too many chains in the foundation row.
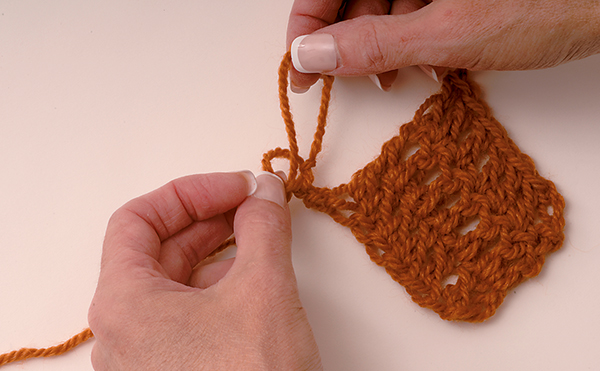
1. Begin to unknot the extra chains by hand.
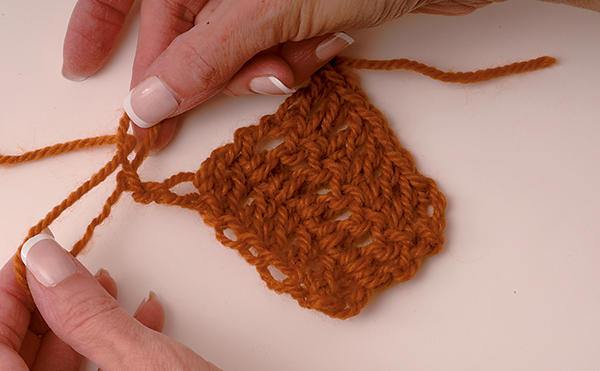
2. Continue to undo the extra chains until you get rid of all the unwanted stitches.
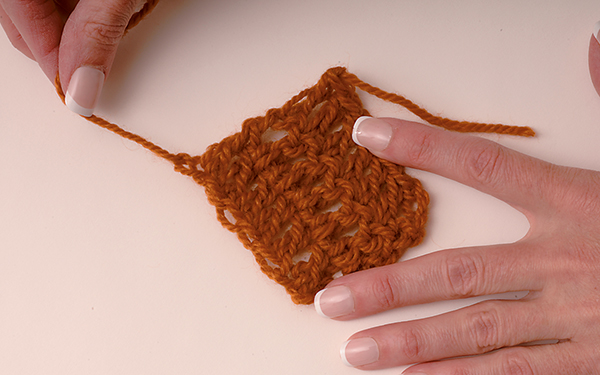
3. When you have taken out the extra stitches, give the tail a light tug. The rest of the stitches will not unravel.
The low-profile slip stitch (abbreviated Sl st) is often used to join a new yarn to a piece, or to form a length of chain stitches into a ring.
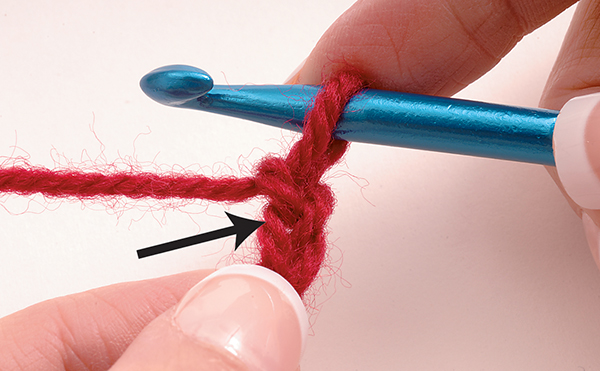
1. Find the stitch where you will insert the hook. Each pattern will tell you how many stitches away from the hook you should insert it. In this photo, it is the second one from the hook, right above the thumbnail. Because you are working into chain stitches, notice that you push the hook through only the top loop of the chain. (On subsequent rows when you are working into other types of stitches, you will work through both loops of those stitches.)
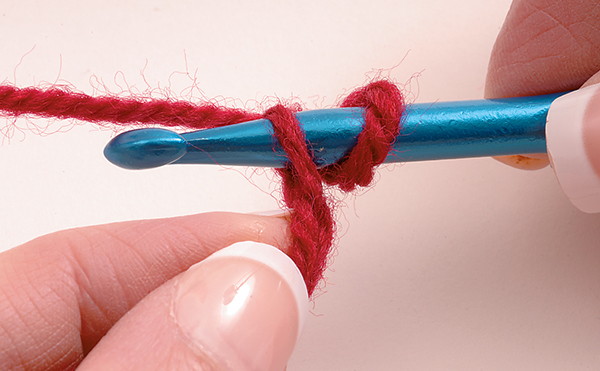
2. Push the hook through that stitch from front to back. Hold onto the foundation chain with your other hand to keep it from spinning and making it impossible to make the stitch.
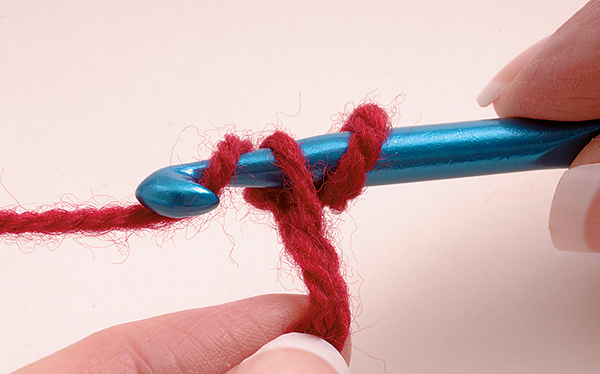
3. Wrap the yarn over the hook (yo) from back to front.
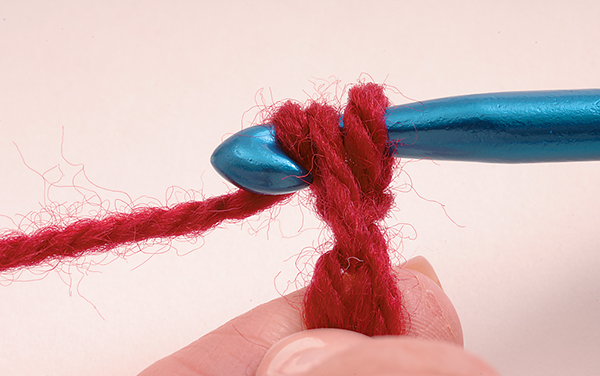
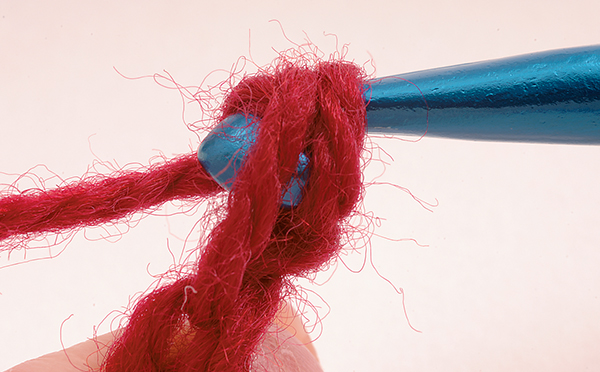
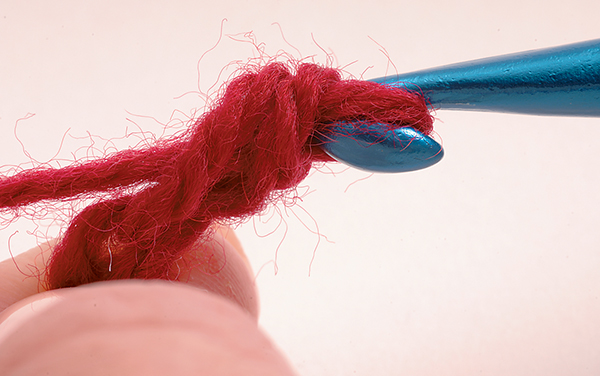
4. Pull the yarn through both of the loops on the hook.
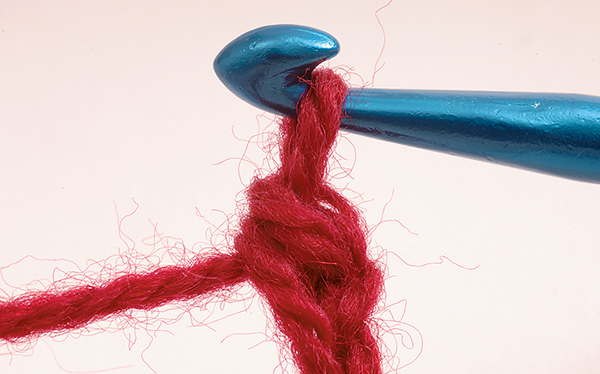
5. This completes the slip stitch.
To summarize: Insert hook, wrap yarn around hook, pull through both loops.
The single crochet stitch (abbreviated sc) is used in many of the projects in this book. Since it is not as “leggy” as double crochet and other tall stitches, single crochet is ideal when you want a tighter, more dense look. When working with other stitches in combination, it gives a nice texture.
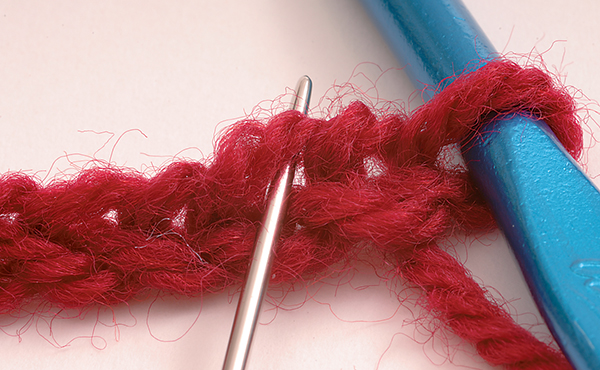
1. Find the stitch where you will insert the hook. In this photo, it is the second one from the hook, as indicated by the needle. If you are working into chain stitches, push the hook through only the top loop of the chain. If you are working into stitches other than chains, insert the hook through both loops of the stitches.
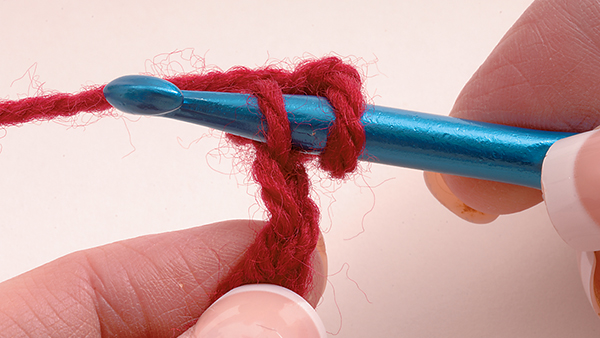
2. Push the hook through that stitch from front to back. Hold onto the finished work with your other hand to keep it from spinning and making it impossible to make the stitch.
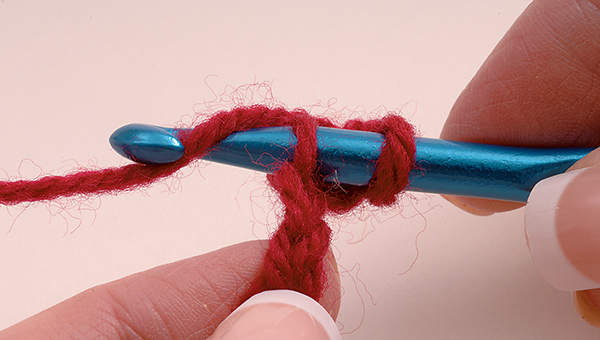
3. Wrap the yarn over the hook (yo) from back to front.
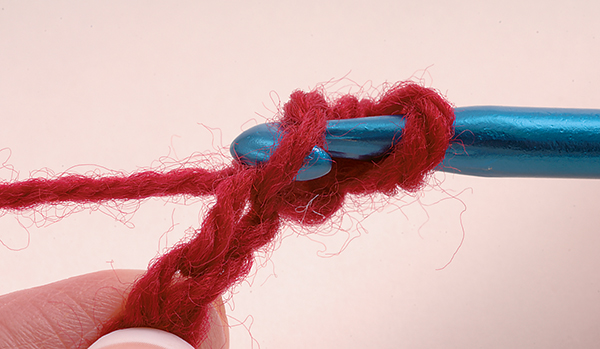
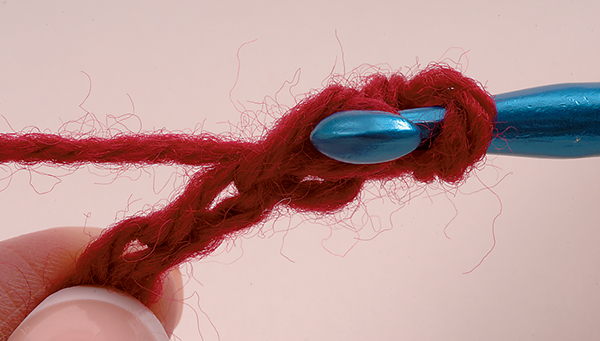
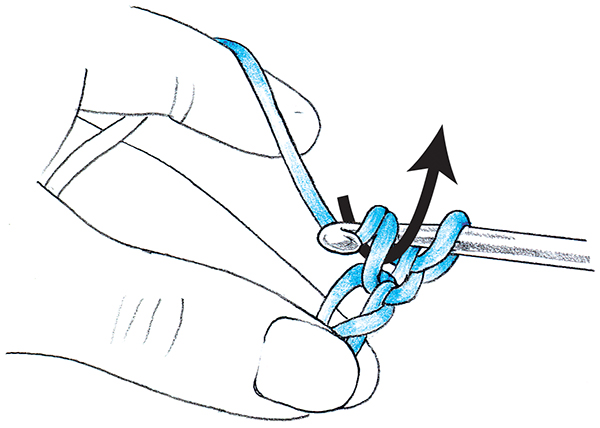
4. So far the stitch has been just like a slip stitch. But now, instead of pulling the yarn through both loops like in a slip stitch, you will pull the yarn through just one of the loops on the hook. This leaves two loops remaining on the hook.
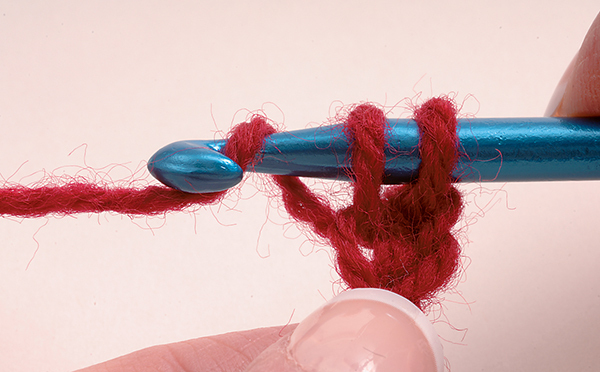
5. Wrap the yarn over the hook from back to front.
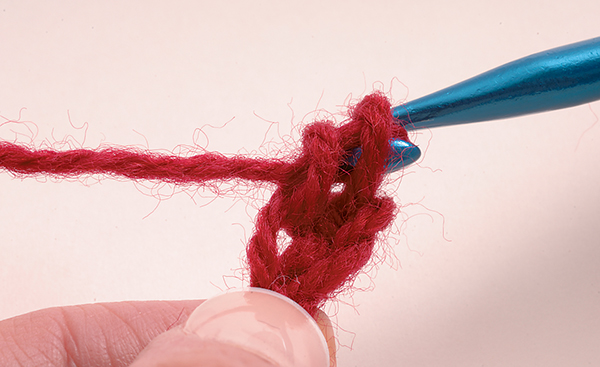
6. Pull through both of the loops on the hook.
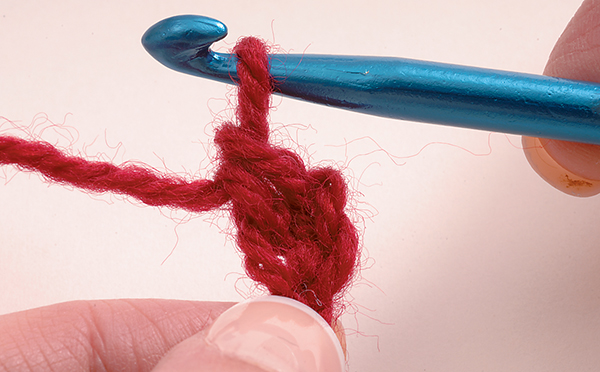
7. This completes the single crochet stitch.
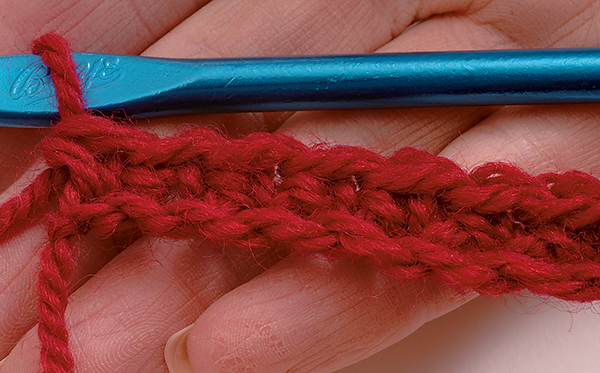
8. Here is a row of completed single crochet stitches.
To summarize: Insert hook, wrap yarn around hook, pull through to front, wrap yarn around hook, pull through two remaining loops.
The half double crochet stitch (hdc) is taller than a single crochet but not as tall as a double crochet. It works up fast and easy and is a versatile and attractive stitch. Unlike in the single crochet, the yarn is wrapped around the hook before the hook is inserted into a stitch.
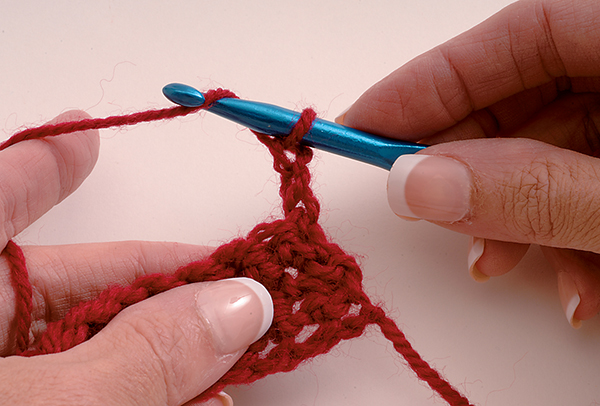
1. Wrap the yarn over the hook from back to front. Find the stitch where you will insert the hook. In the photo, it is the empty stitch next to the two (turning) chains. If you are working into already-made stitches like in this example, insert the hook through both loops of the stitch. If you are working into the foundation chain, use only the top loop.
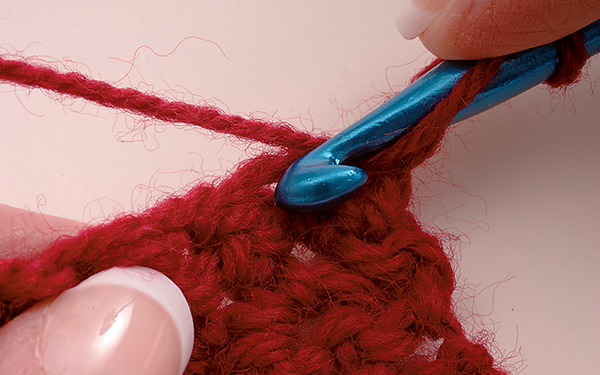
2. Push the hook through the stitch from front to back. Hold onto the finished work with your other hand to keep it from spinning and making it impossible to make the stitch. Use your hook hand to keep the loops on the hook from turning.
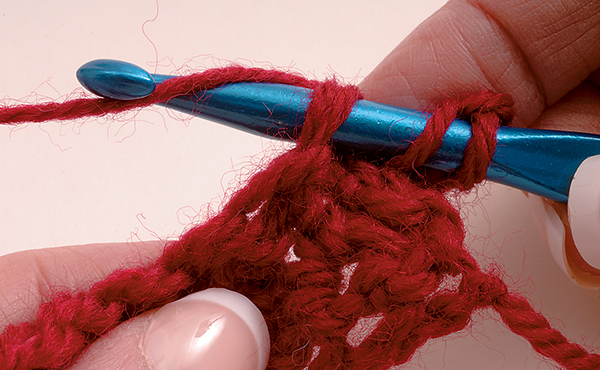
3. Wrap the yarn over the hook (yo) again from back to front.
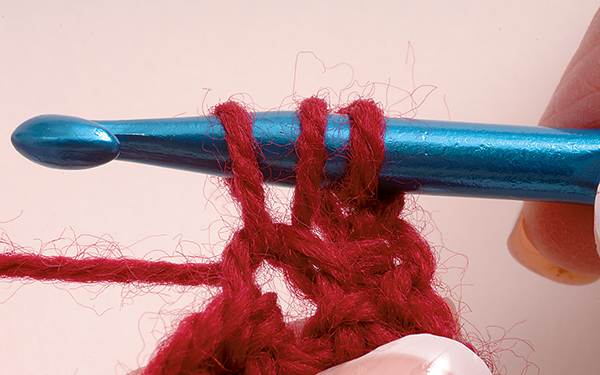
4. Pull the yarn through to the front. This leaves three loops remaining on the hook.
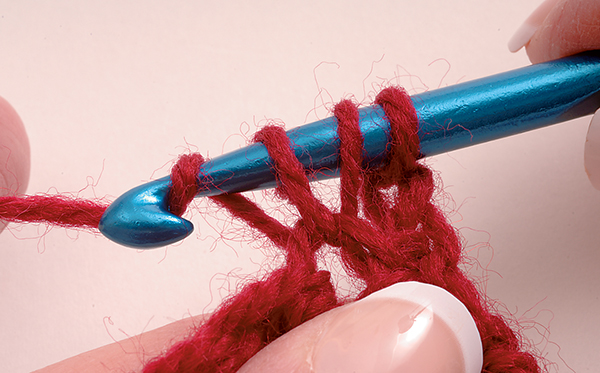
5. Wrap the yarn over the hook again from back to front.
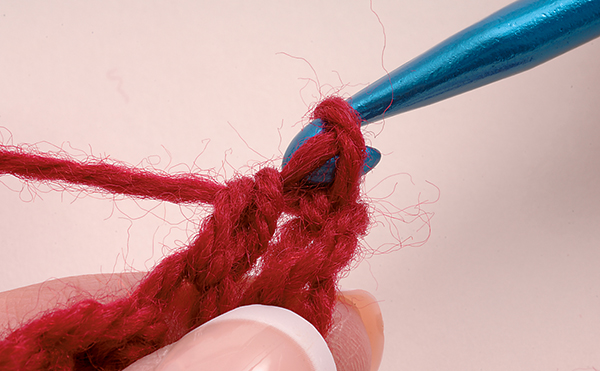
6. Pull through all three loops.
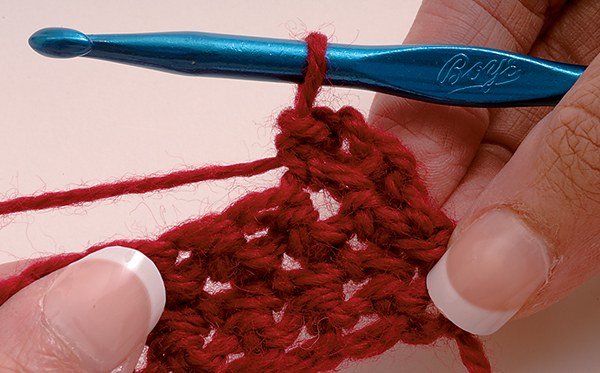
7. This completes the half double crochet.
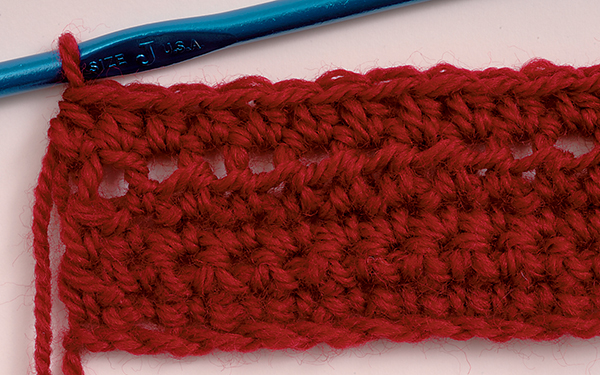
8. The top row in this swatch is a row of completed half double crochet stitches.
To summarize: Wrap the yarn around hook. Insert hook into stitch. Wrap yarn around hook. Pull to front. Wrap again. Pull through all three loops.
The double crochet (dc) is a very versatile stitch, and you will use it often. Like in the half double crochet, the yarn is wrapped around the hook before the hook is inserted into the stitch.
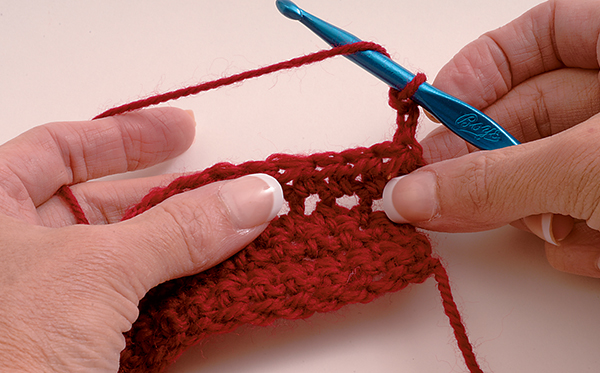
1. Wrap the yarn over the hook from back to front. Find the stitch where you will insert the hook. In the photo, it is the empty stitch next to the three (turning) chains. If you are working into already-made stitches like in this example, insert the hook through both loops of the stitch. If you are working into the foundation chain, use only the top loop.
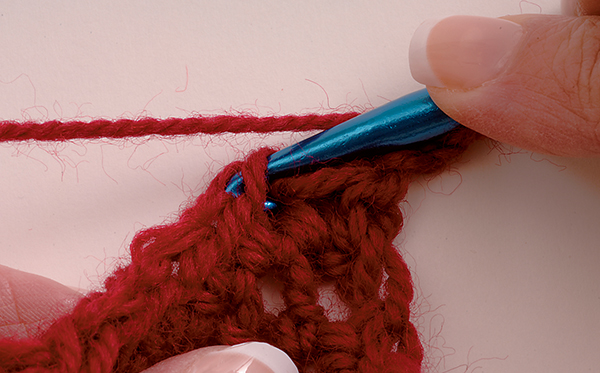
2. Insert the hook through the stitch from front to back. Hold onto the finished work with your other hand to keep it from spinning and making it impossible to make the stitch. Use your hook hand to keep the loops on the hook from turning.
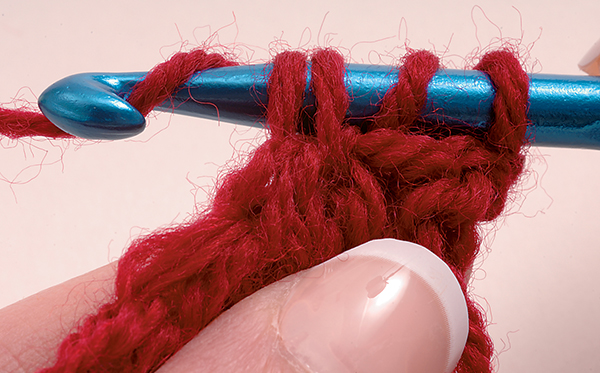
3. Wrap the yarn over the hook (yo) from back to front.
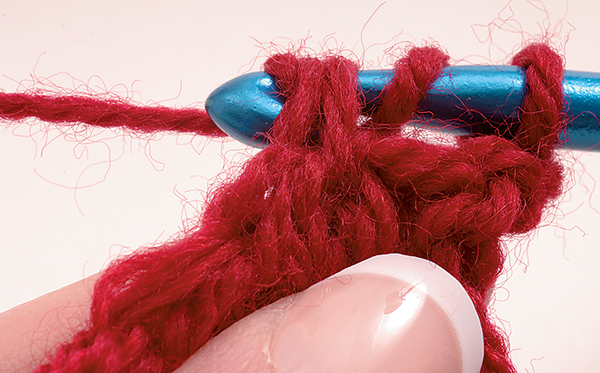
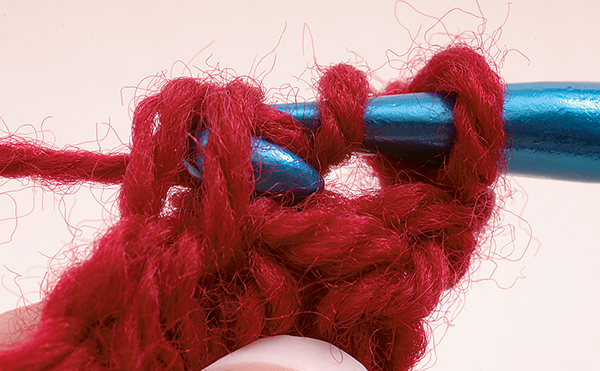
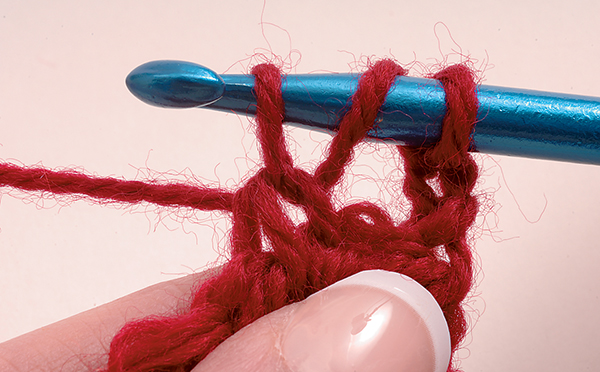
4. Pull the yarn through to the front. This leaves three loops remaining on the hook.
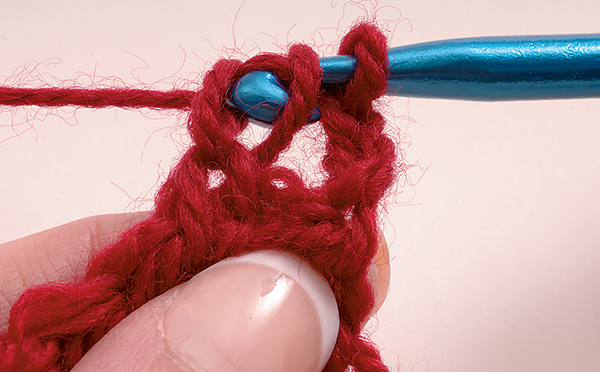
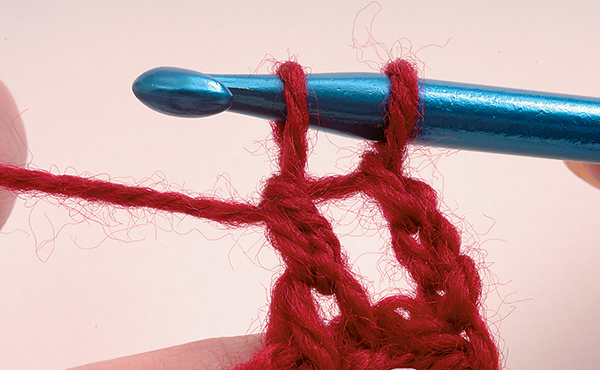
6. Pull through two loops. This leaves two loops remaining on the hook.
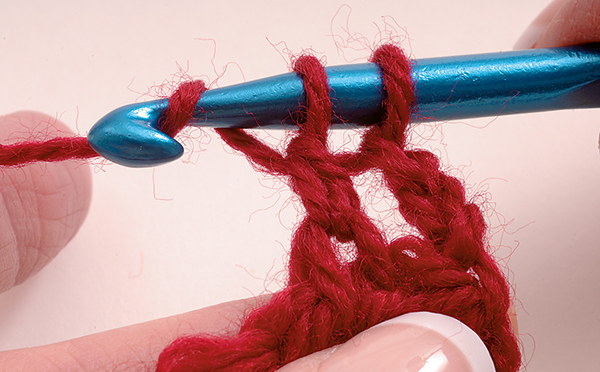
7. Wrap the yarn over the hook from back to front.
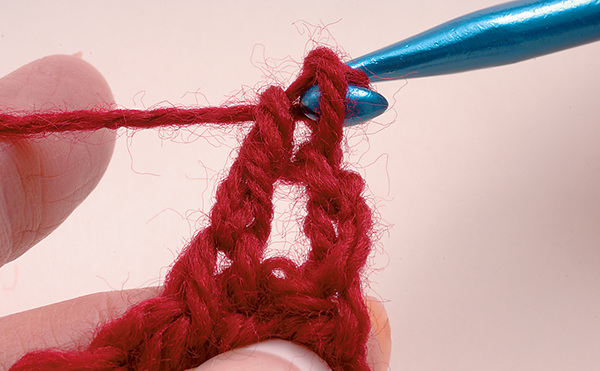
8. Pull through both loops.
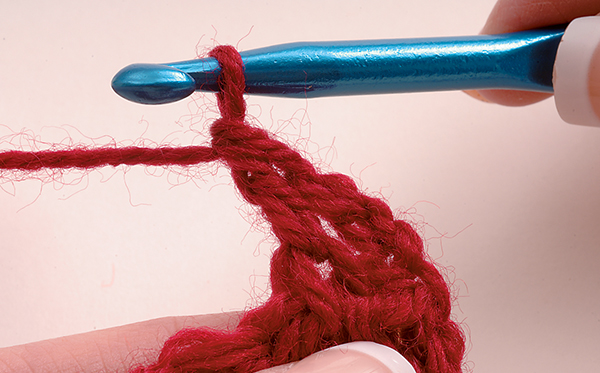
9. This completes the double crochet stitch.
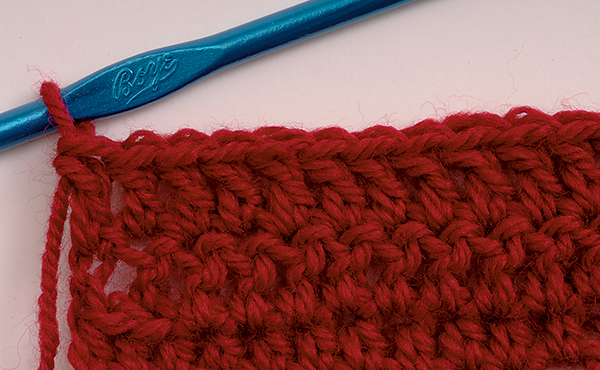
10. The top row of the swatch shows double crochet stitches.
To summarize: Wrap yarn around hook. Insert hook into stitch. Wrap yarn. Pull to front. Wrap and pull through two loops. Wrap and pull through two loops again.
Treble crochet is worked similarly to double crochet. The difference is that you wrap the yarn over the hook from back to front twice before you insert the hook into the stitch, as follows: Wrap the yarn twice around the hook from back to front. Insert hook into stitch. Wrap yarn. Pull to front. Wrap and pull through two loops. Repeat last step two more times, until one loop remains.
The important thing about working in rows is to keep them even. This can be tricky at the beginning and end of a row. Typically, you will make several chain stitches at the beginning of a row to equal the height of the stitches that will follow.
After you make your foundation chain, you will be instructed to work your first stitch a specified number of chains away from the loop on the hook. This allows the last few chains—the number varies per stitch—to stand up straight and act as the first stitch in the row.
The same principle holds on subsequent rows. Chain stitches serve as placeholders for the first stitch. Here are guidelines for how many turning chains to make for the stitches used in this book. If you find that your stitches are too short or too tall, adjust the number of chains so your stitches are the same height as the others in the row.
Single crochet 1
Half double crochet 2
Double crochet 3
1. For practice, work a double crochet row. After the foundation chains, work your first stitch into the fourth chain from the hook. At the end of the row, chain three.
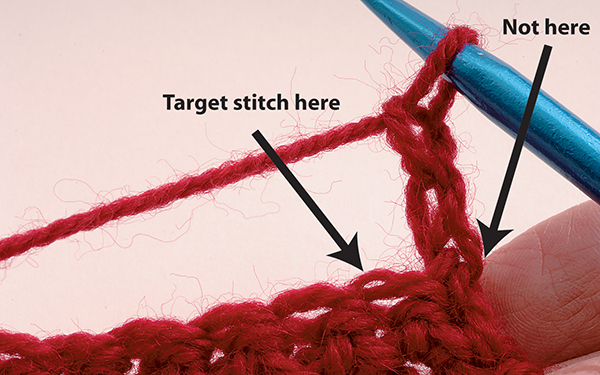
2. After you make the turning chains, do not insert the hook at their base. Because those chains count as a stitch, this would mean you would have created two stitches where you should only have one, inadvertently increasing the number of stitches. If you notice that your work is getting wider, check to make sure you are not working a stitch at the base of each set of turning chains. Skip the base of the turning chains unless you are instructed otherwise.
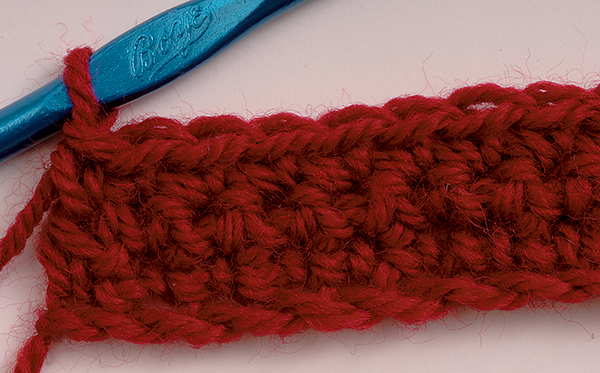
3. At the far end of the row, work your last stitch into the topmost turning chain from the previous row; otherwise you will inadvertently decrease the number of stitches. If your work starts getting narrower, check to make sure you are working a stitch in this spot.
It does not matter whether you turn your work clockwise or counterclockwise, but it will look neater if you are consistent.
Tip: Insert a stitch marker into the top of the turning chain at the beginning of every row. When you work the next row, it will be easy to see where to place the final stitch.
You will need to attach a new yarn when you run out of one skein or when you want to change colors. Here is the technique for attaching a new yarn without making any knots. It’s best to join a new yarn at the beginning of a row if you can, but when that is not possible it is acceptable to join yarn midrow.
Different colors are used in the photos for instructional purposes; ordinarily you would not switch from one color to another in the middle of a row.
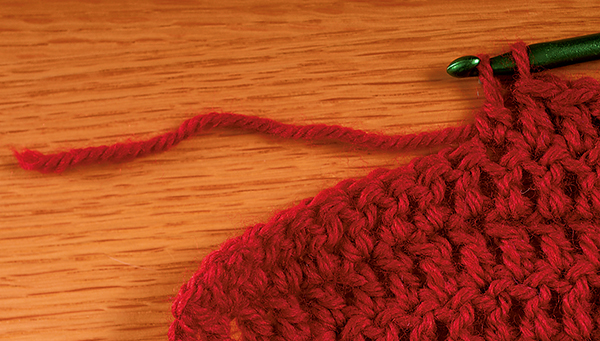
1. Work your last stitch in the old yarn up to the next-to-last step. In other words, do not wrap the yarn over and pull through to complete the stitch. Let the old yarn hang to the back of the work.
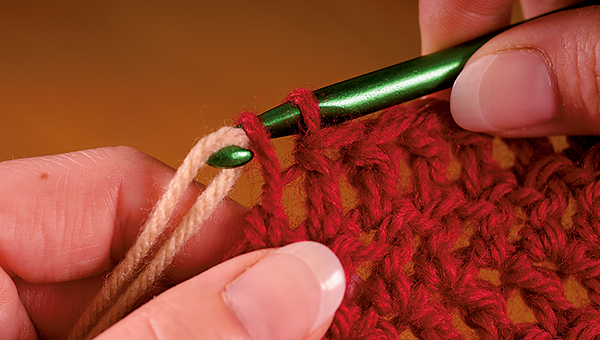
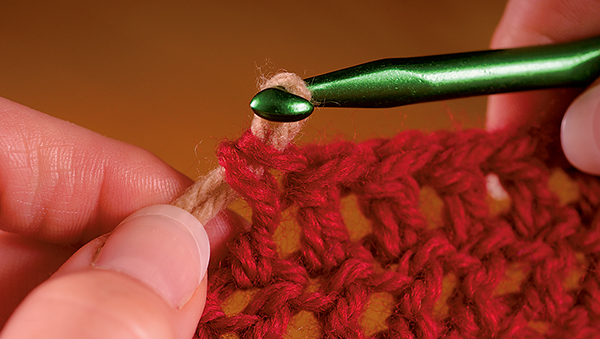
2. Put the new yarn over the hook and pull through to complete the stitch. Continue working with the new yarn, making sure you are using the working end of the yarn and not the short tail. Cut the first yarn if instructed to do so.
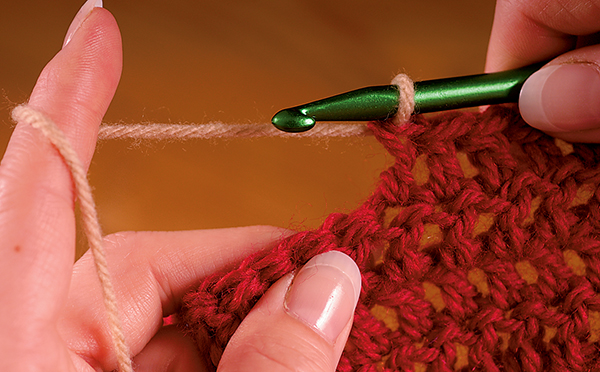
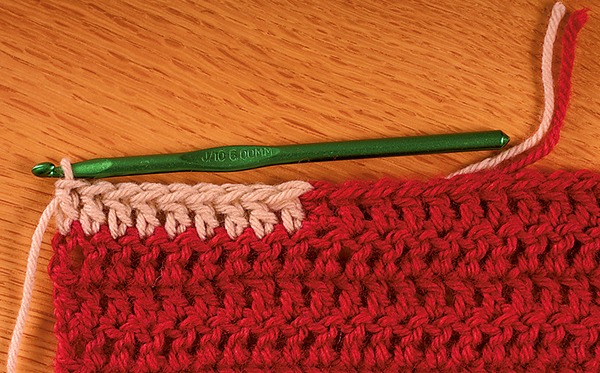
Notice that all parts of the first complete stitch with the new color are in that color, and no parts of the previous stitch are. Adding new yarn at the top of the previous stitch—as the last step in completing that stitch—has this happy result.
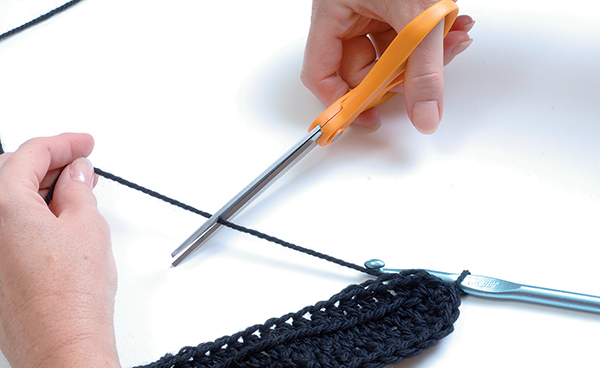
1. To end your work, cut the yarn at least 2 inches (5 cm) from the hook.
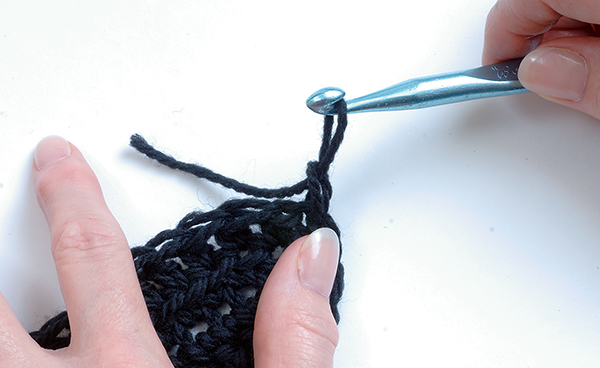
2. Wrap the yarn around the hook and pull all the way through the loop so the tail comes through, too. Pull to tighten.
Finishing your work with care adds to its quality. It is not a good idea to knot your ends because they can come undone or can poke through to the right side of your work. Instead, weave the ends in, using a small crochet hook or a tapestry needle. Weave the ends through stitches on the wrong side of your work, then clip the ends close. Check to make sure no ends are visible on the right side.
Gauge is the number of stitches (or pattern repeats) and rows to a given measurement. Everyone crochets differently, so even if two people are using the same yarn, stitches, and hook, their gauges can vary.
For your work to be the right size, match the recommended gauge as closely as possible.
1. Work a swatch about 6 inches (15 cm) square, using the hook, yarn, and stitches that the pattern specifies.
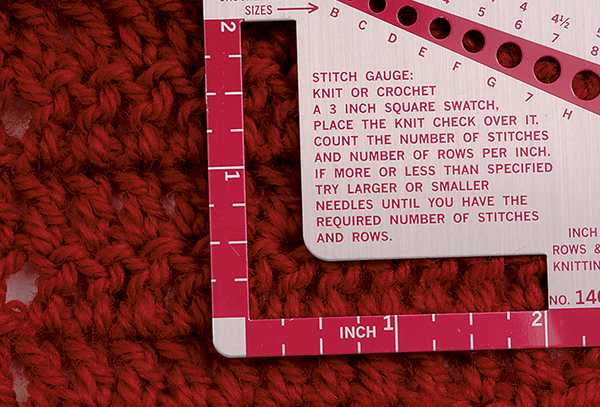
2. Using your gauge measurer, count the number of stitches and the number of rows you made, and compare this to the recommended gauge.
If you have more stitches than you are supposed to, your gauge is too tight. Try again with a larger hook. If you have fewer rows or stitches than you are supposed to, your gauge is too loose. Try a smaller hook.
Sometimes your gauge is not equal horizontally and vertically. If you match better in one direction, it is usually more important to match the number of stitches than the number of rows.
When gauge is critical, like in a sweater, check gauge frequently when you start to work the pattern to verify that the gauge you calculated on the swatch is holding true for the garment. It is better to find out that your gauge is off early in a project than when it is too late to start over.
Block your gauge swatch to make sure the process does not change your gauge. If it does, change your hook size accordingly.
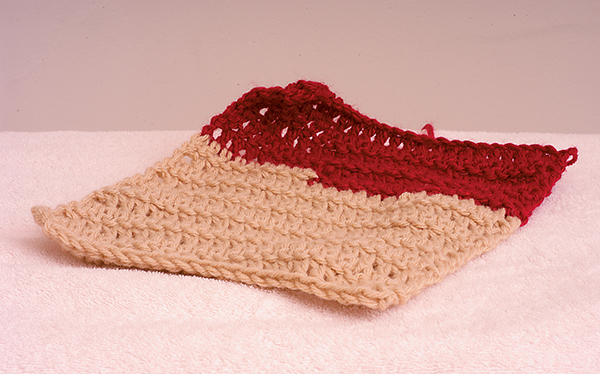
Pieces often need to be blocked to smooth the stitches, shape a garment, make the corners square, flatten ends that are curling up, or obtain a professional finish. Here is an unblocked square. Notice how it curls up.
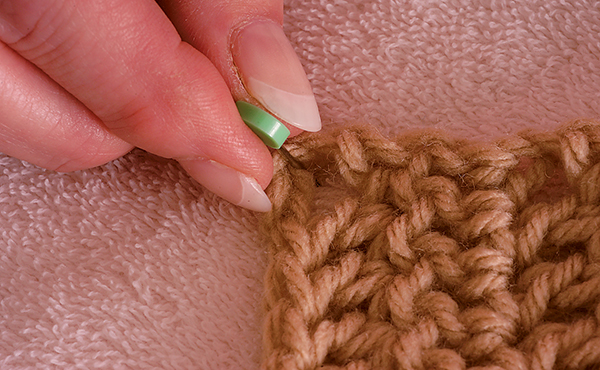
1. Lay each piece facedown on a padded surface like an ironing board cover. Using stainless-steel pins, pin pieces in place, coaxing them into the shape they should be.
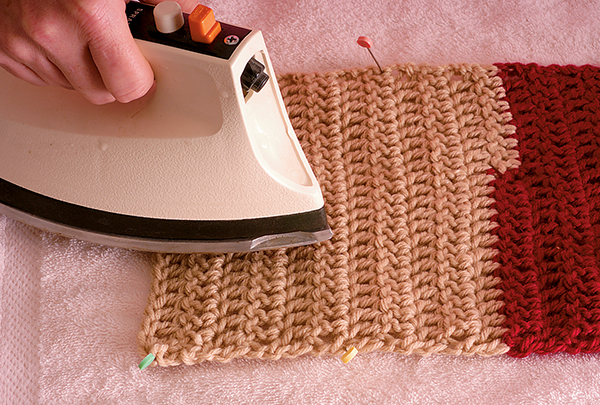
2. If you have a steam iron, hover it just above the crocheted pieces; the steam will set the stitches. Do not let the weight of the iron press the stitches, because it will flatten them. Another alternative is to place a damp cloth on top of the items. Gently place a warm iron down on the cloth, then lift it and move to another part of the item. Do not slide the iron around.
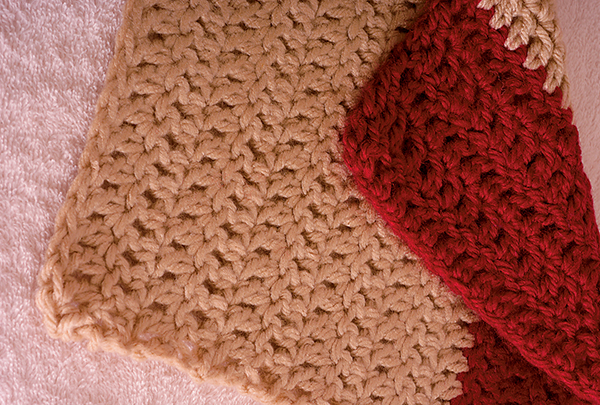
3. Let the pieces cool and dry before unpinning them. The fabric will be nice and soft.
Before you begin working from a pattern, read through it thoroughly, paying particular attention to the information at the beginning of the pattern, such as yarn, gauge, special stitches or stitch pattern, and notes. There is a wealth of information here that will aid you throughout the pattern. Note and practice any unfamiliar stitches, and crochet a gauge swatch using the stitches indicated in the gauge section. Adjust your hook size or yarn if necessary to meet the gauge; this will put you on your way toward a successful project in the size you intend.
Make sure that you are familiar with the abbreviations used in the pattern. Most crochet patterns use standard abbreviations, but there may be ones that are particular to that pattern and they will be noted. Read the master list in the back of this book (page 126) to familiarize yourself with the standard abbreviations and then refer to it as necessary when working the projects.
Patterns use parentheses ( ) or brackets [ ] to enclose a sequence of instructions meant to be repeated, either into a stitch or in a series of stitches. After the closing parenthesis or bracket, you’ll be told how many times to repeat the instructions. For example, “[2 dc in next dc, 1 ch] twice” means to work 2 double crochet stitches in the next double crochet (from the row below), the 1 chain stitch, then 2 double crochet stitches in the next double crochet, and 1 chain stitch. Sometimes parentheses are just for explanatory information. For example, “(the center of three double crochet stitches in the corner)” clarifies the position of the stitch the pattern is referring to.
An asterisk * means to work the instructions following it as many more times as indicated. Sometimes the instructions will say, for example, “*2 dc in next st, sc in next stitch. Repeat from * to end of row.” You would keep doing the (2 double crochet, 1 single crochet) pattern until you got to the end of the row.
Crochet instructions can be given in text or charts. A visual representation of a pattern can be very useful in understanding how the item is made.
Here are some guidelines when reading charts:
First, look at the key to see which symbols represent which stitches. Make sure you know how to make the specified stitches.
When you are crocheting in rows for regular or Tunisian crochet, the pattern is charted row by row from the bottom up, starting with the foundation chain. Read the pattern starting at bottom left for the chain.
For regular crochet, turn your work at the end of each row, following the chart. Read Row 1 right to left, Row 2 left to right, and so on.
For Tunisian crochet, each row is worked in two passes: the forward pass (indicated by moving right to left in the chart) and the return pass (indicated by moving left to right in the chart). Do not turn your work. The loop on the hook at the beginning of every forward pass, called the first vertical bar, counts as a stitch and is represented in charts by a Tunisian simple stitch symbol. Do not work an additional stitch in that spot.
For motifs, read the chart starting in the center. Only turn your work if instructed to do so. Rounds continue moving out from the center.
When part of the pattern is repeated, that portion of the chart may be printed just once to save space.
Sample chart depicting a simple chevron stitch pattern.
