As mentioned before, each model will be associated with a database table, which needs to be implemented via migrations:
- This task is also done using the manage.py panel; therefore, if it is not in your project window already, go ahead and open it up via Tools | Run manage.py Task or its corresponding keyboard shortcut.
- Next, type in the following command in the manage.py panel:
makemigrations library
(As you type in the command, notice the intelligent code-completion suggestions.) You should get the following output in the manage.py panel:
Tracking file by folder pattern: migrations
Migrations for 'library':
  library/migrations/0001_initial.py
    - Create model Author
    - Create model Book

Following files were affected
[...]/mysite/library/migrations/0001_initial.py
After this, data for the two models we implemented has been registered inside the library/migrations/0001_initial.py file. You can navigate to that file and examine its content; in general, that file is used by the Django backend to handle the implementing of the database tables, which we don't need to worry about.
- In the manage.py panel again, type in the following command:
sqlmigrate library 0001
This command will, in turn, run SQL-related functions to create the database tables with the specified fields. You will see the following output, which contains SQL commands:
Tracking file by folder pattern: migrations
BEGIN;
--
-- Create model Author
--
CREATE TABLE "library_author" ("id" integer NOT NULL PRIMARY KEY AUTOINCREMENT, "first_name" varchar(100) NOT NULL, "last_name" varchar(100) NOT NULL);
--
-- Create model Book
--
CREATE TABLE "library_book" ("id" integer NOT NULL PRIMARY KEY AUTOINCREMENT, "title" varchar(200) NOT NULL, "pub_date" datetime NOT NULL, "author_id" integer NOT NULL REFERENCES "library_author" ("id") DEFERRABLE INITIALLY DEFERRED);
CREATE INDEX "library_book_author_id_d9a3b67e" ON "library_book" ("author_id");
COMMIT;
With that, the specifications for the database tables in the backend have been registered.
- Finally, we apply all the changes and create the preceding tables by running migrate in the manage.py panel. At this point, you should see something similar to the following screenshot in your manage.py panel:
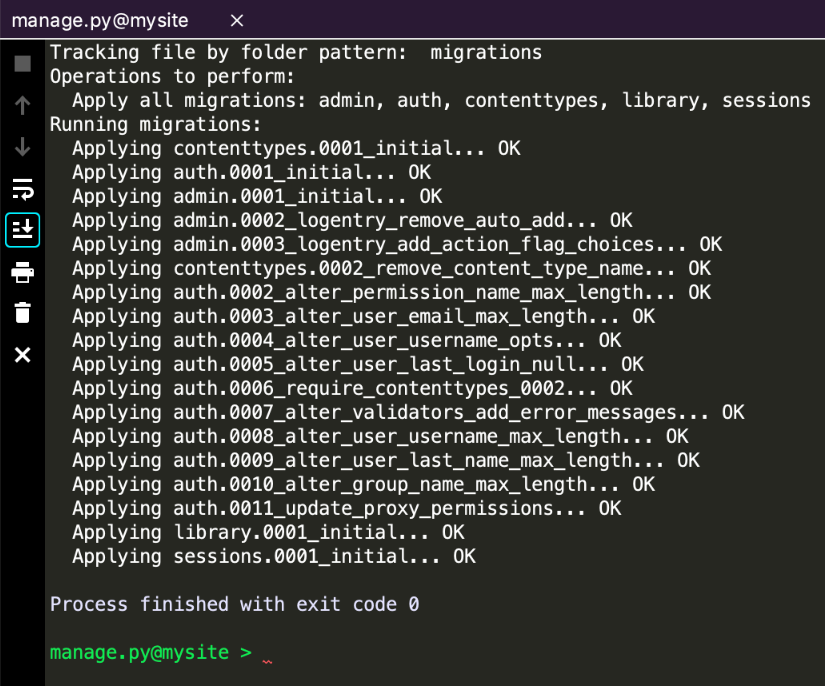
We have thus learned how to apply migrations within PyCharm. Again, we see the considerable convenience achieved via using the manage.py panel, which is also supported by the PyCharm intelligent code-completion engine.