Chapter 4: First Things First
Now it is time for us to discuss what you would require for getting the most out of your wine making plans. Let us start by looking at what you would require out of the process at the start.
The key point about these items is that they will provide you with a cheap solution for preparing wine. I am not asking you to blow loads of money in the process. After all, the title of this book does say that the process is all about working while on a budget.
I want to start by looking at how you will store your wine. You must keep your wine protected and in a secure series of containers. The problem is that you have to get everything sized properly while organizing individual items based on their overall functions. It is not always easy to do this, but you will spend your time wisely when you set up a quality container system.
Start by getting the correct containers ready for your wine. Various types of containers can be used in the process, including plastic options.
You could even get some wooden barrels if desired. These are often used by professional winemakers who want to add some woodsy tones to their wines. Barrels also ensure that the wine is kept in a dark place as it is being prepared.
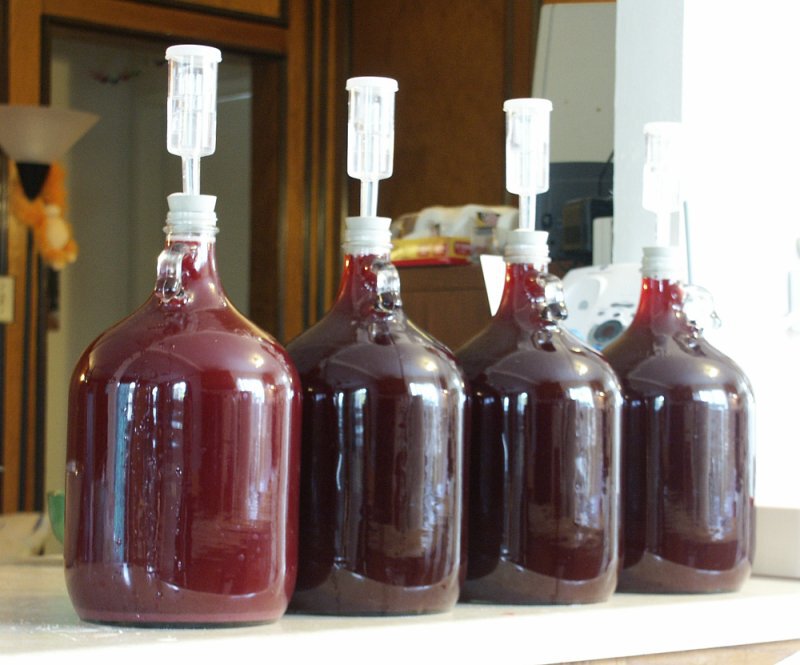
But for budget purposes, it is best to use glass containers. Glass jars are perfect for how they are easy to clean off and prepare.
You would require the following two types of jars:
- A separate container for mixing grapes with other ingredients.
- A carboy for securing the wine; this is what your wine will be stored in for weeks on end
You could have as many of these two types of jars as you want. The key is to have enough to where you can support the individual materials you wish to produce.
The cost associated with glass jars can vary. A one-gallon jar or jug may go for about $15 to $20. A five-gallon carboy bottle would go for $30 to $50.
A carboy is a great option for wine making. This glass container features a small neck. It keeps the air inside the container under control and supports a stopper to keep excess oxygen from getting in there. This allows the yeast to convert the grape sugar into alcohol, thus giving you the wine you want.
But when finding glass, you must look for the following points:
- The glass materials you get must be completely new. They should not have been used for preparing other foods as some bits from those items could run off into your wine and ruin it. This is especially important if anything salty or sour like pickles were inside the glass container.
- Each container must be perfectly intact. Anything with even the slightest chip or crack might be risky.
- Look for something with a darker body. A glass jar with a brownish or blue-tinted body is great as it keeps the light that might get into the jar from being too strong. Of course, you should keep the jar in a dark place; the tint of the glass just makes it a little easier for the wine to stay protected.
Just look at how well glass works for your needs. You might be surprised at how well glass works as it not only insulates the wine well but also offers a safe space for your needs.
Could a Plastic Fermenter Work?
A plastic fermenter could be appealing. Such a unit would cost around $30 for a five-gallon size. This should have a secure space with enough room for your wine.
But even with that, plastic is not necessarily perfect. The problem with plastic materials is that sometimes they have chemical compounds used to keep their bodies intact.
Check the bottom of any plastic container if you wish to go down that route. See that it has a #1 PET or #2 HDPE label on it. These two plastic forms are the only ones safe for wine making. Any other option might allow oxygen to sneak into the wine. A #7 plastic would be even worse as it is more likely to be made with chemical compounds.
Oak barrels and other wooden containers are staples in the massive cellars and brewing stations professional winemakers have today. Such large-scale wineries use wood because the material creates a fully insulated space for fermentation and storage. Wood also produces a more natural-feeling tone into the wine, thus creating a more detailed flavor.
However, a wooden barrel is not necessarily the most affordable thing for you to have. It would cost a few hundred dollars for you to get a single wooden barrel. This would entail a new barrel that has not been used for anything else and would be safe to handle.
Also, most wooden barrels tend to be relatively large in size. You would be hard-pressed to find a barrel that features less than ten gallons of room. Simply put, wooden barrels are better suited for more advanced operations when you have gotten used to the process of making wine.
Therefore, sticking with glass containers is the best thing to do. Wood is made for professionals and those who are highly successful and have large amounts of money to work with.
Now that we have an overview of the different container options available to you, let us dive deeper into more details about the right container to choose. Your fermentation container should be one of the most important decisions you will have to make during wine making, as well as your aging container.
There is a wide variety of sizes and materials you can choose from, whether you’re thinking about plastic buckets and bins or stainless steel tanks and kegs. The first factor you need to consider is how much wine you actually plan to make. Second, what kind of wine do you plan to ferment, and are they readily available in your particular location?
Made from food-grade plastic resins, these plastic tubs include large picking bins as well as food-grade plastic trashcans and buckets. You will likely find polyethylene or polypropylene as the primary component of these tubs.
Just make sure that these containers do not contain Bisphenol A (BPA), as you definitely wouldn’t want your wine to contain those harmful chemicals. To make sure you’re on the right track, check the bottom of the container. You should see the seal of the National Sanitation Foundation (NSF) to ensure that the certified food-grade status is indicated. You should also see a recycling code of 1, 4, or 5 along with the seal. Keep in mind that the recycling code 7 means that the container has BPA—you’d better steer clear of those.
Fermentation buckets will be easily available at most local homebrew supply shops, with sizes varying from 5 gallons (19 L) to 6.5 gallons (25 L). For food-grade trash cans, you will find them in commercial food production as they are being used as containers for various ingredients. You can pick sizes that include 10 gallons (38 L), 20 gallons (76 L), 32 gallons (121 L), or 44 gallons (167 L) depending on your usage.
Fruit-growing regions of the country will have half-ton bins or large picking bins readily available. If you don’t live anywhere near these regions, you will have to shell out a few bucks for shipping via motor freight. They will normally have a size of 1.2 m x 1.2 m x 61 cm.
Ideally, if you’re going to be fermenting red wine primarily, these open plastic fermenters can do the job nicely. You should have approximately 12 to 15 gallons of capacity to make room for the must and the cap for every 100 pounds of crushed grapes (1–1.3 L/kg). With this allowance in a 10-gallon (38-L)
bucket, you should be able to ferment approximately 65 lbs. (29 kg).
A 32-gallon (121-L)
trash can should give you a nice, hearty yield of over 200 pounds (91 kg), while a half-ton bin should give you about a ton (900 kg). Just make sure that your containers provide a pool for the red wine must. This should be shallow enough such that the cap is just a few inches thick (approximately 7 cm).
Here’s a handy tip: a lid or a sheet of plastic can be pretty useful if you want to cover your bin and keep fruit flies at bay. This can also help you contain the fermentation heat to a certain degree.
If you’re looking to ferment white wine or you want to perform a little wine aging, tubs probably aren’t your best bet. You will need a tightly fitted lid along with a fermentation lock for that—otherwise, the fermenting juice or the wine will be exposed to too much air due to the large surface area at the top. This further increases the risk of oxidation.
Finally, if you want to have a large scale wine production using fresh grapes, any container or tub that is smaller than 20 gallons (76 L)
won’t do you any good. This can only be practical for small trial batches. However, if you have huge bins, you might not be able to move them with ease, either. For instance, a 44-gallon (176-L)
sized tub won’t likely be moved after you fill it up until pressing day comes, as this weighs over 300 pounds (136 kg). You can use a forklift to move the half-ton (454-kg) bins, but do you honestly have the luxury of that kind of machinery in your start-up home business? I really don’t think so.
Bottle-shaped containers and glass containers with narrow mouths are included under this type. Be wary of having these shipped, as larger glass containers have a tendency to break. If you can source these containers locally, you will significantly reduce the risk of wasting your investments on broken containers mishandled during the shipping process.
You can choose from traditional glass 1-gallon (3.8-L)
jugs, 5-gallon (19-L), 6-gallon (23-L), and 6.5-gallon (25-L) jugs, as well as glass and plastic carboys in 3-gallon (11-L) sizes. There are also larger glass demijohns in 9-gallon (34-L) and 14-gallon (53-L)
variants available in some places.
Glass is easy to clean, sturdy, and a fantastic way of barring oxygen transfer. They are pretty durable, but they also shatter upon impact, so handling with care is a must. It also allows light to strike the wine, so cover it up if you must.
As for plastic jugs, these carboys are normally made from polyethylene terephthalate or PET for fermentation. While not as impervious as glass, they are free of BPA as well and can perform well as oxygen barriers.
Here’s a tip: don’t go for the blue-tinted water jugs that you can readily see at your local hardware store, as they normally contain BPA and aren’t safe for fermented beverages.
Whether you’re using plastic or glass, the narrow neck of these jugs makes it easy to install a fermentation lock that has a corresponding drilled rubber stopper. They work best for white wine fermentation and for wine aging. You may also use waterless silicone breather bungs.
When you’re performing primary fermentation, make sure that you fill the carboy up to no more than three-quarters. This will allow your container some room for any foaming. It’s also easy to place these jugs inside a fridge or a chest freezer for your wine cellar, making for easier temperature-controlled fermentation.
If you’re planning on aging your wine, you should top up the jug with any compatible wine to the bottom of the neck. You can fit the solid stoppers while you are aging, but if you really want to make room for thermal expansion without running the risk of losing the bung, you can use a breather bung or a fermentation lock during aging. This will also help reduce the risk of pressurizing and breaking the bottle.
Plastic carboys can set you back by $25 to $35, while a gallon jug can cost as little as $5. Be prepared to shell out approximately $70 for large glass demijohns.
Home winemakers usually use cylindrical stainless steel tanks. These are normally fitted with an internal lid that is held in place securely by an inflatable vinyl gasket. This allows the lid to be held properly in place regardless of the height in the tank.
Tanks will likely have a port low on one side for proper draining, with a flat bottom and a need to be placed on a shelf or a stand to let gravity do its work. Some will have welded legs, while some will have a cone-shaped bottom with a center drain. You can choose from 50 L (13 gallons) to 1,000 L (260 gallons) sizes.
If you choose one of the larger-sized tanks, you will probably notice that there may be a stainless steel jacket that is welded around the middle. This belt is used for cooling. You may also find a separate glycol chiller unit that is properly connected to ports on the jacket. These variants will inevitably cost you more than those types without cooling jackets, with prices ranging from $300 to $1,000 depending on the size.
Because these tanks are made from stainless steel, they are completely safe for beverages. They are also incredibly easy to clean when you remove the lid. The weight of an 800-L-sized tank is manageable by a single individual—of course, if they’re full, the tanks are not portable, either.
When you’re cleaning these stainless steel tanks, keep in mind that you shouldn’t use bleach in order to avoid any pitting. You can use these tanks as either open or closed fermenters because there is a port in the lid of a variable capacity tank. You can fit a fermentation lock in these ports for convenience.
Since we’re talking about stainless steel tanks, I might as well mention commercial draft beer kegs or half barrels. With a volume of 15.5 gallons (59 L), these have a mechanism at the top that helps to facilitate dispensing the draft beer. You can use it for white or rosé primary fermentation as well as for general wine aging.
You simply need a special silicone breather bung that is particularly made for a beer keg. This custom breather bung should accommodate the depth of the neck to help you ferment and seal properly during aging.
Expect to shell out about $50 to $100 for kegs—they’re definitely more affordable than variable capacity tanks. Cleaning is a bit of a challenge, though, as the narrow necks need a brush or a scrub for thorough cleaning. You also won’t be able to use them for conventional red wine primary fermentation, either.
Made from chestnut or oak, these wine barrels have been used for ages in wine storage, and for a good reason—they seal incredibly well and can retain wine just as superbly. Sizes range from 1 gallon (3.8 L) to 60 gallons (225 L). They also guard against any excessive oxidation because of the narrow bung opening.
Because these barrels have slightly porous material, oxygen is transported slowly and gently to the wine. They also have the ability to provide a wealth of flavors to the wine itself, along with a certain type of rich sweetness that comes from toasted oak wood.
You have the option of buying a brand new barrel, or you may also buy a reconditioned barrel, with a specified toasting level of light toast, medium, dark, or charred. The barrel can last from four to six years, and the oak contribution can get used up as well. When this happens, the price for used barrels drops.
You can expect to shell out about $1,000 for a new 60 gallon (225 L) barrel, or you may also find used barrels for as little as $50, all depending on size. Barrels are especially effective for wine aging, but this will also depend on size as well. Commercial barrels go for about 60-gallon (225-L) sizes, but if you go smaller than that, the ratio of oak surface area to wine volume increases. A smaller barrel will give you a faster oak flavor contribution compared to a larger barrel.
For new barrels, you should try to follow this rule of thumb: for every gallon of capacity that your barrel has, you should allow one week of aging.
You can also make good use of your barrels through fermentation and malolactic fermentation (MLF). Chardonnay and other white wines can ferment well in barrels. You can also convert your barrel to a red wine fermenter, but be careful not to use a red-wine fermenter as a white-wine barrel—this should help you prevent any kind of color carryover.
To convert a neutral barrel into a red wine fermenter, simply stand the barrel on end and cut out the top using a reciprocating saw. Make sure to leave approximately two inches or about 5cm of the top to make it stronger. Then, drive a bung into the bunghole for your red wine. The oak should provide a unique mouthfeel.
Always clean your containers no matter what they are made of. To clean a barrel, you can use a percarbonate or sodium carbonate solution and let it soak overnight. Afterward, rinse it out thoroughly using a citric acid solution. This should be able to neutralize the alkaline cleaning agent. You can add a sulfite solution inside if you’re going to store the barrel for a little while. You can burn disks or sulfur sticks inside the barrel for dry storage over a longer period of time, once every couple of weeks.
You will need much more than just a jug. Here are some more materials that you will need to invest in.
A siphoning tube must be applied in the next part. This tube transfers the wine from the main mixing jar into the carboy bottle.
The tube may come with a slight filter or strainer. Such a piece keeps the pulp or skins from your original mixing jar from getting into the carboy. Your final product will be smooth and crisp without any chunks or bits in the way provided you secure it well enough.
Such a tube requires a simple process for it to work:
- You would have to place the carboy at a spot lower than the mixing jar.
- As you insert the tube into the mixing jar, you must move it up and down. This draws out the wine.
- The pressure generated causes the wine to move into the carboy provided that the tube has been positioned there.
This is a simple process that keeps the wine moving between containers. It is simple and easy to follow.
A siphon tube can be acquired for around $10. Such a tube will go for about five to eight feet. Make sure that tube is thick and flexible.
See that you have a cap that allows you to stick a tube into the main bottle so it can move the wine into the carboy. It must be flexible enough to move through well while still allowing the wine to move through without having lots of excess air get in the way.
On a related note, you could find an automatic siphon tube that produces an up-and-down motion. The plastic material uses a small switch that triggers the function. The convenience of such a tool does cost you a little extra, though, as you would have to spend a few dollars more for such a model.
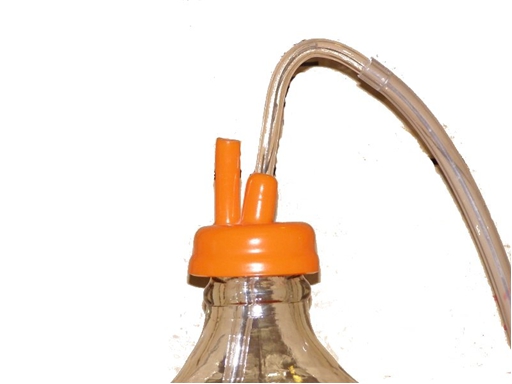
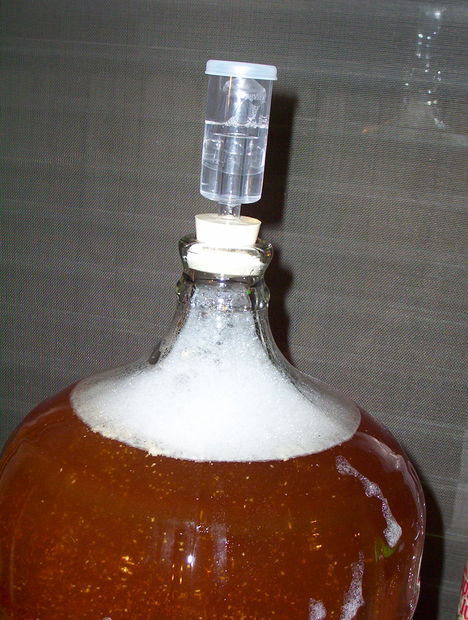
An airlock is the next part to go into the mix. An airlock is responsible for keeping air from getting in and out of your wine.
The airlock applies alongside a stopper that fits through the bottle’s neck. The airlock keeps the stopper in the neck and ensures there is enough pressure applied. A #8 or #9 stopper should be good enough.
The airlock and stopper are available through most retailers for less than $10. Each part should be flexible enough to fit into the bottle and force itself into the neck to keep air from being a threat.
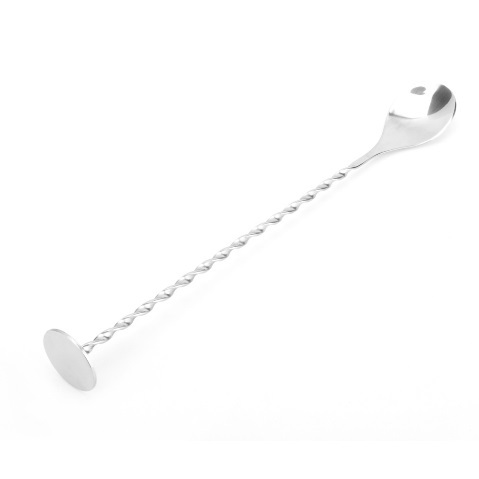
A stirrer is required to mix the wine. A plastic handle is often good enough, although a metal unit might work better. It does not have lots of pores in its body.
You should find a stirrer for just a few dollars. Get several stirrers on hand so that you won’t use the same one too many times. You do not want to use the same one several times over, as it might be hard to support after a while.
Some stirrers may be marketed as models designed for preparing fine cocktails. These might sound attractive and fancy, but just make sure the stirrer you get is long enough for your containers. The stirrer should reach deep into your wine, so it mixes everything up without your hands getting in direct contact with the wine.
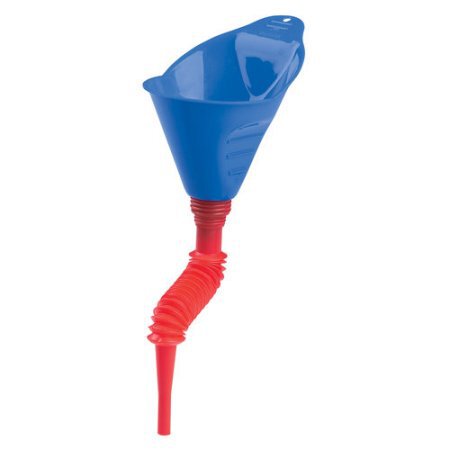
A funnel is to be added at the top of a bottle or carboy to pour the liquid into that vessel. This keeps the liquid in the vessel without it spilling all around. You should not spend more than just a few dollars on a funnel.
The funnel does not have to be overly large. Just make the funnel large enough to where the siphon tube gets into the middle space. Do not waste too much space with getting it secured.
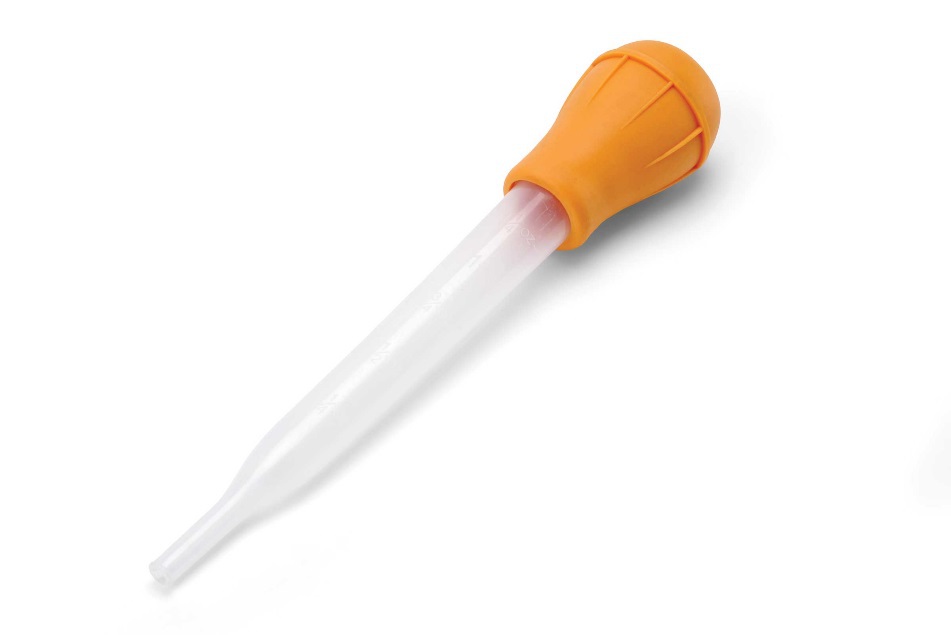
A basic turkey baster should be added for sampling purposes. With a turkey baster, you will gently take out some of your wine from the carboy for sampling. This is to be done after fermentation, so you get a clear idea of how well your wine is being made.
This is another tool that only costs a few dollars. It is indispensable for when you are checking on the individual wine samples you are producing.
Bottles for the Final Product
Two-liter bottles and jugs of wine are available through some retailers. These cost a few dollars each and feature dark tones to keep light from getting into your wine.
You have the option to take your old bottles from your home and use them for storage purposes. You would have to sterilize all your bottles to make them suitable for storage needs.
All of these items should be prepared properly for the wine making process. Get everything you need as soon as possible, so it will not be tough to prepare your wines.