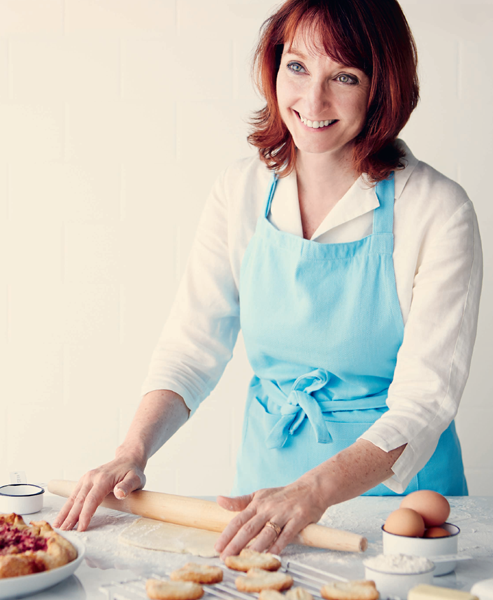
PASTRY
It seems you either find the phrase “easy as pie” fitting or throw your flour-dusted hands in the air and pull out the premade store brand. The recipes in this section were tested by people who weren’t confident in their pastry-making skills. They are now.
If you already have trusted pastry recipes in your repertoire, go ahead and use them. If you don’t, here are some recipes that work and tips on how to use them.

| Cheater’s Puff Pastry | 44 |
| No-Fail Pastry (lard or shortening version) | 45 |
| No-Fail Pastry (butter version) | 46 |
| Pâte Sucrée | 48 |
DEMYSTIFYING PASTRY
To hear some people talk, you’d think pastry was the prima donna of the baking world. I’ve heard it described as moody, difficult, and even a witch to work with. In reality, it’s more like a scared child. It likes things a certain way, and as long as you know its needs, you can coax it into playing nicely—almost every time.
Sometimes Heat Is the Enemy
Baking a pie on a hot day won’t just strain your air conditioner; it can actually cause issues with your pastry. Pie dough just doesn’t like a hot environment. If possible, schedule summer baking for early morning or later at night. And make sure the fat you use is cold. If your kitchen is warm and you must bake, chill the bowl to give your dough a fighting chance. If you’re lucky enough to have granite countertops or a marble board, cool the work surface with ice cubes placed in a resealable bag before rolling the dough.
Measure Twice, Blend Once
Professional chefs measure by weight for accuracy, but millions of home cooks have been making successful pastry for generations using nothing more than measuring cups and hard-earned experience. For accuracy, spoon flour into a dry measure and level it off with a knife. Scooping compacts the flour and can make your dough tough.
Cut the Fat—Literally
Whether you use a food processor, a pastry blender, or two knives, the key to flaky, tender pastry is to cut in cold fat until it is about the size of small peas—not coarse crumbs, as some recipes suggest. If your recipe uses butter, a box grater takes the guesswork out (see page 25).
Handle the Dough
Unlike the flour, the amount of moisture you add is not precise. You’ll have to rely on feel. The dough needs enough water so it holds together when pressed between your fingers but not so much that it forms a ball. Too much water makes pastry tough. If your recipe suggests a range of measurements, use the smallest amount and add more until you reach the right consistency. Use ice-cold water and sprinkle it over the flour-fat mixture so it distributes evenly. Don’t dump it in one spot.
Chill Out
It’s often hard to wait, but pie dough should be chilled for at least an hour before rolling. Not only does this relax the gluten in the wheat, making it more tender, it makes the dough easier to handle. Just form the dough into a disk, wrap it in plastic wrap, and pop it in the fridge. You can refrigerate premade dough for up to 3 days or freeze it for a couple of months.
Ready to Roll
Before rolling chilled dough, be sure to let it warm up; otherwise, it will crack. But don’t let it get too warm or it will stick. The dough is ready to roll when your finger can make an indentation without going all the way through. If your finger sinks to the counter, the dough is too warm. If it barely dents the surface, it’s too cold.
When your dough is ready to roll, roll it on a floured pastry board or pastry cloth. Roll from the center out, being careful not to work too much extra flour into the dough. Once your dough is transferred to the pie or tart tins, chill it again—this time just for 15 minutes. This will keep the pastry from shrinking.
Sometimes Heat Is Your Friend
Once you’re ready to bake, heat is crucial. Make sure your oven has been preheated for at least 20 minutes. This helps ensure a more stable heat when you open the oven door.
Nice but Not Necessary
Place your pie on a baking sheet. This catches drips and helps create a crisper bottom crust. Feeling confident, now? Here are some recipes.
CHEATER’S PUFF PASTRY
True puff pastry is a major commitment requiring several rollings with long waits in between. In some ways, it’s easier to raise children. They eventually grow up and ignore you. But genuine puff pastry is like a newborn, demanding your full attention every half hour.
This version is a bit of work but hardly more than standard pastry. Although it isn’t quite as flaky as traditional puff pastry, I use it for sweet palmiers (page 64) and savory tarts (pages 57 and 58). No one has ever noticed it’s not the real deal.
MAKES FOUR 10” × 10” SHEETS | COMMITMENT LEVEL: DONE IN STAGES
3½ cups all-purpose flour
1¾ teaspoons fine sea salt
1 pound (2 cups) cold unsalted butter
1 cup cold water
1. In the large bowl of a food processor fitted with a steel blade, combine the flour and salt with a few pulses.
2. Cut the butter into ½” cubes. Add ¼ cup of the cubed butter to the flour mixture and pulse until you can’t see pieces of butter. This takes about ten 2-second pulses. Add the rest of the butter and pulse a few times until the butter is the size of peas. You might have to remove the lid after a few pulses and stir the flour up from the bottom.
3. With the lid removed, pour the water evenly over the flour mixture. Don’t dump it in one spot. Pulse a few times until the dough looks rough. Stop before the mixture comes together.
4. Turn the crumbly dough onto a piece of floured waxed paper. Using floured hands, press the dough into a square. Dust the dough lightly with flour, top with waxed paper, and roll the dough, occasionally turning it 90 degrees, until you have an 18” square.
5. Cut the square in half down the length of the waxed paper. Roll 1 piece of dough into a 12” × 18” rectangle. Using the bottom sheet of waxed paper, fold the dough in thirds along the long edge, creating a 4” × 18” strip. From the short end, roll the dough up tightly. Press the roll with your palms to make a rough rectangle, about 6” × 4”. Repeat with the other piece of dough. You may need a clean sheet of waxed paper.
6. Cut each rectangle in half. You now have 4 pieces of dough. Wrap each in plastic wrap and refrigerate for at least 1 hour. Bake according to recipe directions.
NOTE: The dough can be refrigerated for up to 4 days or frozen in an airtight freezer bag for up to 2 weeks. Each of the four rectangles is approximately the quantity of a commercial package of puff pastry.
NO-FAIL PASTRY THREE WAYS
No-fail pastry delivers excellent results consistently. The egg, lemon juice or vinegar, and ice-cold water are key. But which fat to use? My mom loves the shattery, crisp-flaky crust only lard can deliver. My father is perfectly happy with a shorter, more crumbly shortening crust. Me? I love the rich butter version. Regardless of which fat you choose, I’ve got you covered.
NO-FAIL PASTRY (LARD OR SHORTENING VERSION)
The key is very cold fat and not overhandling. These pastries are perfect for pies, galettes, and tarts.
MAKES ENOUGH FOR 2 SINGLE PIE CRUSTS, 1 DOUBLE-CRUST PIE, OR LOTS OF TARTS | COMMITMENT LEVEL: DONE IN STAGES
2½ cups all-purpose flour
¾ teaspoon fine sea salt
1 cup very cold lard or shortening, cut into cubes
1 egg yolk
4 tablespoons ice water, plus up to 2 tablespoons more if needed
1 tablespoon white vinegar or fresh lemon juice
1. In a large bowl, mix the flour and salt. Using a pastry blender or 2 knives, cut in the lard or shortening until it is about the size of small peas. (A few regular pea-size pieces are fine.)
2. In a small bowl, beat together the egg yolk, 4 tablespoons of ice water, and the vinegar or lemon juice with a fork. Pour over the flour mixture and mix with the fork. If more water is needed, add up to 2 tablespoons, one at a time. The dough will be ragged but should hold together when squeezed between your fingers. Turn the dough onto a lightly floured surface and knead briefly until the dough holds together. Don’t overhandle.
3. Divide the dough in half and shape each piece into a disk. Wrap in plastic wrap or place in a resealable plastic bag. Refrigerate for 1 hour. If you chill the dough longer, you might have to let it sit on the counter for a few minutes to soften before rolling. Roll and bake according to recipe directions.
NOTE: The dough can be refrigerated for up to 3 days or frozen for up to 3 months.
NO-FAIL PASTRY (BUTTER VERSION)
Getting the fat cut into this pastry evenly is often the biggest challenge when making this recipe. Grating in frozen butter is an easy fix that delivers consistent results. Butter produces a lovely, tender pie crust that melts in your mouth. It won’t shatter like lard, but it has a delicate quality all its own.
MAKES ENOUGH FOR 2 SINGLE PIE CRUSTS, 1 DOUBLE-CRUST PIE, OR LOTS OF TARTS | COMMITMENT LEVEL: DONE IN STAGES
¾ cup very cold unsalted butter
2½ cups all-purpose flour
½ teaspoon fine sea salt
1 egg yolk
1 tablespoon fresh lemon juice or white vinegar
4–6 tablespoons ice water
1. About 15 minutes before you begin making the pastry, pop the cold butter into the freezer.
2. Into a large bowl, sift the flour and salt. Using the large holes of a box grater, grate the frozen butter over the flour mixture. Toss to combine.
3. In a small bowl, whisk the egg yolk, lemon juice or vinegar, and 4 tablespoons of the ice water. Pour over the flour mixture and stir, adding more ice water as needed. The dough should be a bit ragged but will hold together when squeezed in your fingers.
4. Turn the dough out onto a lightly floured surface and knead briefly. Divide the dough in half and shape each piece into a disk. Wrap each disk in plastic wrap or place in a resealable plastic bag. Refrigerate for at least 1 hour. Allow the dough to sit on the counter for a few minutes before rolling. Roll and bake according to recipe directions.
NOTE: The dough can be refrigerated for up to 3 days or frozen for up to 3 months.
TIP: If you’re baking a pie or tarts and want a slightly sweeter pastry, you can add 1 tablespoon of granulated sugar to the flour when you sift it with the salt.

PÂTE SUCRÉE
Don’t think of this as pastry. Think of it as shortbread in a pie pan. Notoriously messy, this recipe demands you get your fingers dirty.
MAKES ENOUGH FOR A 10” PIE | COMMITMENT LEVEL: DONE IN STAGES
1¼ cups all-purpose flour
⅔ cup sifted confectioners’ sugar
¼ teaspoon fine sea salt
½ cup cold unsalted butter, cut into small pieces
2 eggs, lightly beaten at room temperature
1 teaspoon pure vanilla extract
1. In the bowl of a food processor fitted with a steel blade, combine the flour, confectioners’ sugar, and salt with a few pulses. Add the butter and pulse in 2-second bursts until the pieces are the size of peas. Lightly whisk the eggs with the vanilla and pour evenly over the flour mixture. Pulse a few times. The dough will be crumbly but will hold together if you squeeze it.
2. Dust your hands in flour and press the dough into a 10” tart pan.
3. Chill for at least 30 minutes before baking according to recipe directions.
NOTE: The dough can be kept well wrapped in the refrigerator for several days or frozen for up to 3 months.
WORKING WITH PHYLLO PASTRY
Phyllo is the shattery pastry found wrapped around many Greek and Middle Eastern treats. Thin as tissue paper, it’s notoriously hard to make from scratch. While I occasionally make my own puff pastry (see page 44), I always buy phyllo. And I don’t care who knows it.
Phyllo usually comes in 1-pound packages and can be found in the freezer section of any major grocery store. Sheets come in different sizes, the most common being 14” × 9”, 18” × 12”, or 18” × 14”. I used 18” × 12” sheets for the baking in this book. All rolling instructions are based on these dimensions. Even if your phyllo sheets are off by an inch or so, don’t worry. These are general guidelines. If you look inside the phyllo box, you will see a wide range of rolling options printed on the inside. There is no one way. The best system is the one that works for you.
The following works for me.
BEFORE YOU BEGIN
While all that phyllo is a challenge to make by hand, it’s relatively easy to work with—as long as you don’t let the sheets dry out or work with it before it’s fully defrosted. A word of warning: You can’t rush the process by trying to defrost phyllo in the microwave. Believe me. I tried and ended up making an unscheduled trip back to the store. For phyllo success:
1. Defrost the phyllo according to the package directions.
2. Once the phyllo is ready to use, unwrap and place on a flat surface.
3. Place a clean, damp tea towel on the stack of phyllo sheets to prevent them from drying out and cracking. Damp is the operative word. Too wet and you’ll have a different problem on your hands.
4. Remove a sheet of phyllo. Return the tea towel to the stack. Be diligent. It takes only a few minutes for the dough to dry out. Once dry, phyllo shatters and is impossible to work with.
TIP: Most recipes instruct you to brush the phyllo with melted butter. I use a neutral oil instead. Why? Oil is less of a hassle. I never melt enough butter. Or I melt too much. If I’m folding a lot of pieces, the water in melted butter tends to separate, and the rapidly coagulating butter clogs my pastry brush. While butter does add flavor, the filling is usually tasty enough to make up for using oil. The instructions in the book call for oil, but you can always use melted butter if you prefer.
TRIANGLES: APPETIZER SIZE
1. Cut the stack of phyllo sheets in half across the long side. You want sheets approximately 9” × 12”. Stack the phyllo sheets on top of each other, remove one sheet, and place the damp towel on top of the phyllo stack.
2. Brush the sheet lightly with oil. Fold the sheet in thirds lengthwise so you have a long, thin strip (3” × 12” inches) three layers thick.
3. Place 1 tablespoon of filling at the bottom of the sheet toward the left side.
4. Fold the bottom right corner up over the filling to touch the left edge. This forms a triangle. Maintaining the triangle shape, continue rolling the phyllo up the strip.
5. Place the triangle seam side down on a baking sheet. Brush the top with more oil. Bake according to the recipe directions.
TRIANGLES: SINGLE-SERVING SIZE
1. Remove one sheet from under the damp towel and lightly brush with oil.
2. Fold the phyllo sheet in thirds by bringing the short sides toward the middle to make one long strip (6” × 12” inches) three layers thick.
3. Place ¼ cup filling at the bottom toward the left side, about ½” from the bottom edge.
4. Fold the bottom right corner up over the filling to touch the left edge. This forms a triangle. Maintaining the triangle shape, continue rolling the phyllo up the strip.
5. Place the triangle seam side down on a baking sheet. Brush with more oil and bake according to the recipe directions.
ROLLS: APPETIZER SIZE
1. Cut the stack of phyllo sheets in half across the long side. You want sheets approximately 9” × 12”. Stack the phyllo sheets on top of each other, remove one sheet, and place the damp towel on top of the phyllo stack.
2. Place the phyllo sheet on the counter with the short side toward you. Brush the sheet with oil.
3. Place 1 tablespoon of filling in the center, about ½” from the bottom edge. Roll the phyllo over the filling toward the top of the sheet, until you are about halfway up the sheet.
4. Fold the side edges over the filling, toward the center. You’ll have a roll about 3” wide. Finish rolling the bundle.
5. Place seam side down on a baking sheet. Brush the top with more oil. Bake according to the recipe directions.
ROLLS: SINGLE-SERVING SIZE
1. Remove one sheet from under the damp towel and lightly brush with oil.
2. Fold the phyllo sheet in thirds by bringing the short sides toward the middle to make one long strip (about 6” × 12”) three layers thick.
3. Place ¼ cup filling at the bottom in the center, about ½” from the bottom edge. Roll the phyllo over the filling toward the top of the sheet, until you are about halfway up the sheet.
4. Fold the side edges over the filling, toward the center. Finish rolling the bundle.
5. Place seam side down on the baking sheet. Brush with more oil and bake according to the recipe directions.
MUFFIN CUP BUNDLES
These are the ultimate cheat. No rolling, wrapping, or fiddling.
1. Brush a sheet of phyllo with oil. Place a second sheet on top of the first and brush it again. Repeat until you have three oiled sheets stacked on top of each other.
2. Using a sharp knife, cut the phyllo into six 6” squares (3” across and 2” down).
3. Place a square over the cup of a 12-cup muffin pan. Gently press it into the cup, being careful not to tear the pastry. You can use your knuckles, the back of an ice cream scoop, or a small ladle.
4. Place ¼ cup of filling into the cup; fold the corners over the filling. Brush with more oil. Bake according to the recipe directions.