CRUMBLY
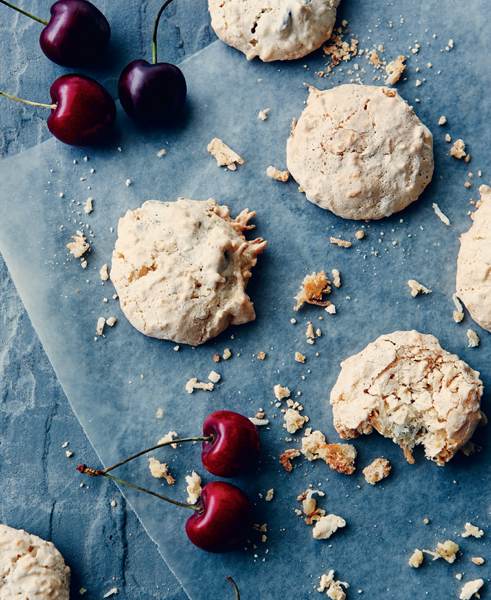
delicious treats that crumble when you eat them
My mother always knew when I had been sneaking goodies. Although the evidence had been washed away with greedy gulps of milk, there was no fooling her. She’d point to the crumbs—on the counter, on my clothes, on the corners of my mouth, on the palms of my hand. Busted. Stupid crumbs. Tattletales.
Today I view them as a barometer of a dish’s success. In a glance, I can tell which muffins were taken into a quiet corner to be eaten undisturbed and which were devoured right at the serving plate. I’m most proud of crumbs by the front door, eaten by friends taking “one for the road,” biting the last brownie before giving a hug and crumb-studded kiss good-bye.
CRUMBLY
SAVORY
| Basil and Aged Cheddar Scones | 74 |
| Rosemary and Caramelized Onion Focaccia | 76 |
| Stuffed Tomato, Arugula, and Cilantro Focaccia | 78 |
| Piglet Muffins with Caramelized Bacon | 81 |
| Savory Pecan and Cheddar Bites | 83 |
SWEET
| Blueberry-Lime Cornmeal Muffins | 85 |
| Lemony Strawberry-Peach Muffins | 86 |
| Ginger and Vanilla Scones | 87 |
| Welsh Griddle Cakes | 88 |
| Deep Dark Cherry and Chipotle Brownies | 91 |
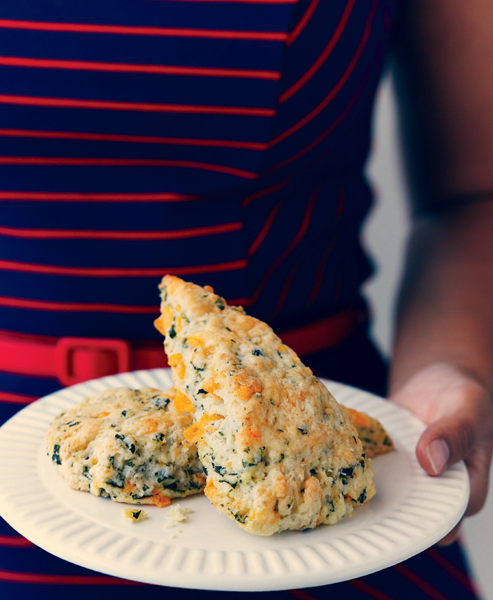
BASIL AND AGED CHEDDAR SCONES
At the Wild Flour Bakery in Banff, Alberta, an artisanal café with a spectacular view of the Rocky Mountains, I had a scone so good, I stopped my mountain gazing, pulled out my notepad, and jotted down flavor notes. Like the view-stopping Rocky Mountain scones, these are full of fresh basil, have a kiss of sugar, and provide a burst of sharp Cheddar. The only thing missing? Fresh mountain air and a bowl of tomato soup.
MAKES 12 | COMMITMENT LEVEL: READY IN AN HOUR OR LESS
2¼ cups all-purpose flour
¼ cup sugar
1 tablespoon baking powder
½ teaspoon baking soda
½ teaspoon fine sea salt
½ cup cold butter, cubed
1 cup roughly chopped fresh basil
4 ounces grated aged Cheddar cheese (about 1 cup)
1 cup buttermilk
1. Preheat the oven to 425°F.
2. Hand method: In a large bowl, combine the flour, sugar, baking powder, baking soda, and salt. Using a pastry blender or 2 knives, cut the butter in until it’s the size of peas. Chop the basil finely and stir into the flour mixture to evenly distribute.
Food processor method: In the bowl of a food processor fitted with a steel blade, combine the flour, sugar, baking powder, baking soda, and salt with a few pulses. Add the basil. Pulse in 2-second bursts until the basil is chopped and evenly distributed. Add the butter and pulse until it’s about the size of peas. Transfer the flour mixture to a large bowl.
3. Add the cheese and toss to evenly distribute. Add the buttermilk and stir until the dough forms a ball. Knead the dough on a floured surface until it just comes together. Roll into a round about 10” wide and ¾” thick. Cut into 12 wedges. Place on an ungreased baking sheet about 2” apart and bake for 12 to 15 minutes, or until golden. Serve immediately.
NOTE: Scones can be stored in an airtight container for up to 3 days but are really best within a few hours of baking. To reheat, split in half and pop under the broiler. Serve with butter.
TIP: If you don’t have buttermilk on hand, sour your own. Place 1 tablespoon of lemon juice or white vinegar in a measuring cup. Fill to the 1-cup mark with milk and let sit for 10 minutes. Stir and use immediately.
ROSEMARY AND CARAMELIZED ONION FOCACCIA
I can buy freshly baked focaccia just down the street. It’s delicious, and the smell is so tempting, it’s hard to resist—until I see the $8-per-loaf price tag. I figured this meant the bread is hard to make. It isn’t. All you need is a bit of patience with the onions. Not only does homemade focaccia cost a fraction of the bakery version, it’s easy to customize. My half has rosemary and onions. My husband has no rosemary and extra onions. Everybody wins.
MAKES 1, SERVES 8 | COMMITMENT LEVEL: DONE IN STAGES
FOCACCIA DOUGH
1 package (2¼ teaspoons) instant dry yeast
3 cups all-purpose flour, divided
¾ teaspoon fine sea salt
¾ cup water
½ cup milk
2 tablespoons olive oil
TOPPINGS
2 tablespoons olive oil, plus more for drizzling
3 large onions, thinly sliced
2 tablespoons minced fresh rosemary
Coarse kosher salt
Fresh cracked black pepper
1. To make the focaccia dough: In a stand mixer fitted with a paddle or in a large bowl using a wooden spoon, combine the yeast, 1 cup of the flour, and the salt. In a small pan over medium-low heat, combine the water and milk and gently heat until they are just warmer than your finger (about 110°F). Add the oil to the milk mixture and whisk to combine. Add to the flour mixture and beat on medium speed for 2 minutes. Add the remaining 2 cups flour, ½ cup at a time, until the dough pulls away from the side of the bowl. When it becomes too hard to mix by hand, turn onto a floured surface and knead in the flour. For either method, knead the dough until it is smooth and elastic.
2. Oil a large bowl, place the dough in the bowl, and turn the dough to coat it with the oil. Cover with plastic wrap and leave to double at room temperature, about 90 minutes. Line a 10” × 15” rimmed baking sheet with parchment paper.
3. To make the toppings: While the dough is rising, caramelize the onions. In a large skillet over medium heat, heat the oil. Cook the onions slowly, stirring occasionally. This takes time—a good 30 to 40 minutes. Do not try to rush the process. You might have to lower the heat to ensure the onions don’t brown too quickly. Continue cooking and stirring the onions until they are a golden brown. You want to slightly under-caramelize them, as they will continue to crisp when the focaccia bakes.
4. Turn the dough onto a floured surface and knead a few times. Place on the baking sheet and stretch to fit the pan. Cover with a tea towel and let rise for 30 to 45 minutes. While the dough is rising, preheat the oven to 400°F.
5. When the dough has risen, use your fingers to poke dimples in it, no more than ¼” deep. Drizzle the surface with oil. Sprinkle with the onions, rosemary, some kosher salt, and a good grinding of black pepper. Press the toppings gently into the dough with the palm of your hand to secure them.
6. Bake for 20 to 25 minutes, or until golden brown. Allow to cool on the baking sheet for 5 minutes before transferring to a rack. The focaccia may be eaten slightly warm.
NOTE: Focaccia is best eaten the day it’s baked. If you have leftover focaccia, split it in half lengthwise, brush it with a bit of olive oil, and pop under the broiler for new life.
TIP: If you adore caramelized onions, make a big batch and store leftovers in the refrigerator for up to 5 days or freeze them for up to 3 months. Sprinkle them on Crispy-Crust Pizza (page 156), or add a few atop a serving of Bacon, Cheddar, and Thyme Waffles (page 148).
STUFFED TOMATO, ARUGULA, AND CILANTRO FOCACCIA
Whether the sun, the oven, or a dehydrator does the work, dried tomatoes deliver a concentrated hit of flavor to dishes without adding moisture. For this stuffed focaccia, use any form of dried tomatoes you can find, but resist the urge to simply chop up cherry or grape tomatoes. They will make the bread soggy and won’t provide the sweetness needed to balance the bite of the arugula.
MAKES 1 FOCACCIA, SERVES 8 | COMMITMENT LEVEL: DONE IN STAGES
FOCACCIA DOUGH
1 package (2¼ teaspoons) instant dry yeast
3 cups all-purpose flour, divided
¾ teaspoon fine sea salt
¾ cup water
½ cup milk
2 tablespoons olive oil
TOPPINGS
Cornmeal, for sprinkling
2 cups baby arugula (or baby spinach)
½ cup chopped fresh cilantro
½ cup dried tomatoes, slivered
½ cup grated Parmesan cheese
Olive oil, for topping
Coarse sea or kosher salt
Fresh cracked black pepper
1. To make the focaccia dough: In a stand mixer fitted with a paddle or in a large bowl using a wooden spoon, combine the yeast, 1 cup of the flour, and the salt. In a small saucepan over medium-low heat, combine the water and milk and gently heat until just warm (about 110°F). Add the oil and whisk to combine. Pour evenly over the flour mixture and beat on medium speed for 2 minutes. Add the remaining 2 cups flour, ½ cup at a time, until the dough pulls away from the side of the bowl. If mixing by hand, when it becomes too hard to mix, turn onto a floured surface and knead in the flour. Knead until the dough is smooth and elastic.
2. Oil a large bowl, place the dough in the bowl, and turn the dough to coat it with the oil. Cover with plastic wrap and leave to double at room temperature, about 90 minutes.
3. To prepare the toppings: While the dough rises, line a 10” × 15” rimmed baking sheet with parchment paper and sprinkle lightly with cornmeal. If using oil-packed sun-dried tomatoes, drain them.
4. Turn the dough onto a large, lightly floured cutting board and divide the dough in half. Roll 1 piece into a 10” × 15” rectangle. Slide the dough off the board onto the baking sheet; press the dough so it covers the bottom and sides. Sprinkle half each of the arugula, cilantro, tomatoes, and cheese over the surface. Drizzle with a bit of oil. Roll the second piece of dough into a 10” x 15” rectangle and slide it on top of the first, pinching the sides to seal. Sprinkle with oil and top with the remaining arugula, cilantro, tomatoes, and cheese. Add a sprinkle of coarse salt and fresh cracked pepper. Let rise, uncovered, for 40 minutes. While the dough is rising, preheat the oven to 400°F.
5. Bake for 20 to 25 minutes, or until golden brown. Allow to cool on the baking sheet for 5 minutes before transferring to a rack to continue cooling. Eat while still warm.
NOTE: Focaccia is best eaten the day it’s baked. If you have leftover focaccia, pop it under the broiler for new life.
TIP: If you find sun-dried tomatoes hard to cut, snip them with kitchen scissors.


PIGLET MUFFINS WITH CARAMELIZED BACON
When I was a kid, I was crazy for all things Winnie the Pooh. When lunchtime got fussy, my ever-so-wise mom served up Piglets. These were just open-faced grilled cheese sandwiches with a slice of cut-up bacon on top. Telling me “This is what Piglet eats for lunch” put an end to all the fussing. Wanting to do something Pigletty for this book, I kept the basic flavors but gave them an adult twist via a savory muffin studded with smoked Cheddar and crunchy bits of caramelized bacon. Piglets—just like Mom used to make, only smokier, crunchier, and waaaay more crumbly.
MAKES 12 | COMMITMENT LEVEL: READY IN AN HOUR OR LESS (IF YOU HAVE CARAMELIZED BACON ON HAND) | DONE IN STAGES (IF YOU DON’T)
2 cups all-purpose flour
1 tablespoon sugar
1 tablespoon baking powder
½ teaspoon baking soda
½ teaspoon fine sea salt
⅛ teaspoon fresh cracked black pepper
6 ounces grated smoked Cheddar cheese (about 1½ cups)
6 slices caramelized bacon, broken into
¼” pieces (page 82, but extra-crispy regular bacon will do in a pinch)
1 cup buttermilk
2 eggs, at room temperature
¼ cup melted unsalted butter
1. Preheat the oven to 350°F. Line a 12-cup muffin pan with paper liners.
2. In a large bowl, combine the flour, sugar, baking powder, baking soda, salt, and pepper. Add the cheese and bacon and toss to coat evenly.
3. In a medium bowl, whisk together the buttermilk, eggs, and butter. Pour over the flour mixture and stir until just blended. The batter will be thick, almost sconelike.
4. Spoon evenly into the lined muffin cups. Bake for 18 to 20 minutes, or until a wooden pick inserted in the center comes out clean. Cool in the muffin pan on a rack for 5 minutes. When cool enough to handle, remove the muffins from the pan. Eat while still warm, with or without butter.
NOTE: Store in an airtight container in the refrigerator for up to 5 days. To rewarm, split and pop under the broiler until golden. Microwaving will make them soggy.
TIP: Fill the muffin cups using a ¼-cup cookie scoop. Being the same size, they will cook evenly. Plus, they’ll have a lovely rounded top.
CARAMELIZED BACON
Make a bunch of this ahead of time and keep on hand for when the urge to make Piglet Muffins (page 81) strikes.
MAKES 4–6 SERVINGS | COMMITMENT LEVEL: DONE IN STAGES
1 pound sliced bacon (thick cut is best but regular will do)
1 cup packed dark brown sugar
Generous amount of fresh ground black pepper (optional)
1. Place oven racks in the upper and lower thirds of the oven. Preheat the oven to 400°F, using the convection setting if you have that option. Line 2 heavy, rimmed baking pans with foil or parchment paper.
2. Separate the bacon strips and place in a single layer on the pans. They can touch but shouldn’t overlap. Sprinkle each pan with half the sugar. Give each pan a generous grinding of black pepper, if using. Gently pat the sugar onto the bacon so it’s evenly coated.
3. Bake for 20 to 25 minutes, or until the bacon is crisp. The sugar will melt and spread, so you don’t have to turn the bacon over during baking. However, if you don’t have a convection oven, you will want to rotate the pans halfway through cooking to ensure even baking. The bacon is done when the sugar is melted and bubbly and the bacon looks dark brown but not burned.
4. Remove the pans from the oven. Transfer individual slices to a rack set over paper towels to absorb any drips. When the bacon cools, the sugar will harden to a thin, hard-candy coating. Eat, use in a recipe immediately, or store in the refrigerator in a resealable plastic bag between layers of parchment paper for no longer than 3 days.
SAVORY PECAN AND CHEDDAR BITES
This recipe changed the way I bake—or at least the way I label baking. You’d think nearly 3 dozen biscuits tucked in the freezer behind containers of homemade soup stock and sliced peaches would be safe for a few days. Nope. My husband quietly finished off an entire batch on his own, sneaking a handful here and there. These rich, savory biscuits are like one of those decadent, irresistible, nut-coated cheese balls, only in a crisp cookie-shaped form. Think of them as a cracker and cheese replacement and enjoy them with a glass of sherry or scotch in front of the fire. Now, if I have future plans for any food item, above the dish’s name and date, I add the not-so-subtle note “Hands off!” Sometimes even that doesn’t work.
MAKES ABOUT 2½ DOZEN | COMMITMENT LEVEL: DONE IN STAGES
1 cup all-purpose flour
Generous pinch of ground red pepper
½ teaspoon dry mustard
½ cup salted butter, at room temperature
6 ounces shredded aged Cheddar cheese (about 1½ cups)
½ cup chopped pecans
1. In a small bowl, whisk together the flour, red pepper, and mustard to thoroughly combine.
2. In a large bowl, cream the butter with a wooden spoon until soft. Gradually blend in the cheese and pecans. Alternatively, you can do this in a stand mixer fitted with a paddle.
3. Add the flour mixture ¼ cup at a time, working it in well after each addition. You might have to blend the mixture with your hands to form a doughy ball.
4. Place the dough on a sheet of waxed paper or plastic wrap. Shape the dough with your hands to form a log about 2” in diameter. Wrap in the paper or plastic and gently roll with your palms to smooth the outside of the dough. Chill for 1 hour, or until firm. This can be done the day before if you like.
5. Preheat the oven to 400°F. Cut the dough into rounds ¼” thick. Arrange slightly apart on a baking sheet. Bake for 8 to 10 minutes, or until they begin to turn golden around the edges. Remove from the baking sheet at once and cool on a rack.
NOTE: Store in an airtight container for up to 3 days at room temperature or a week in the refrigerator. Allow to come to room temperature before eating.
TIP: The unbaked dough can be frozen for up to a month before being defrosted and baked. The finished biscuits can be frozen for up to 2 months.
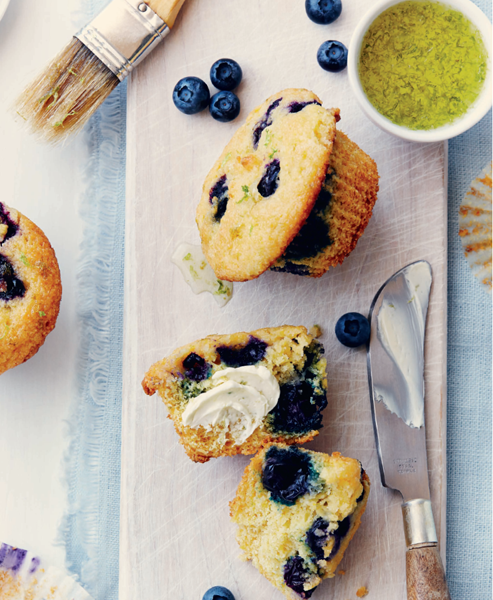
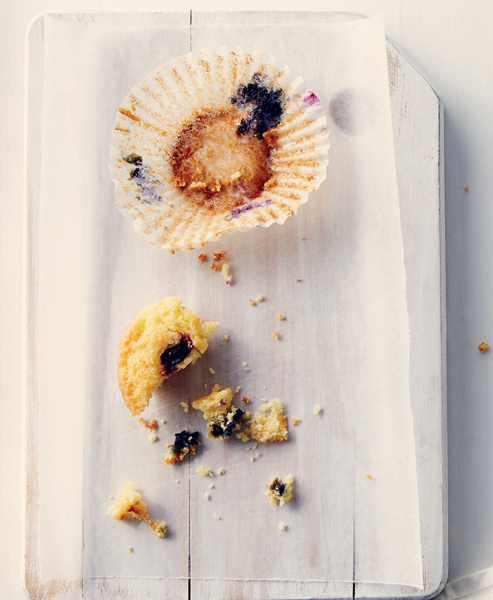
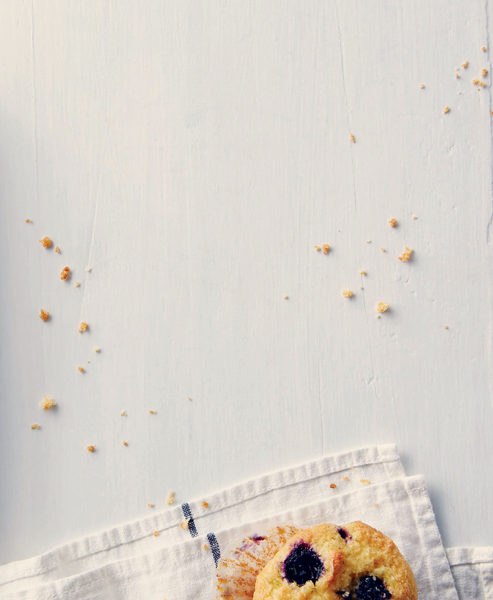
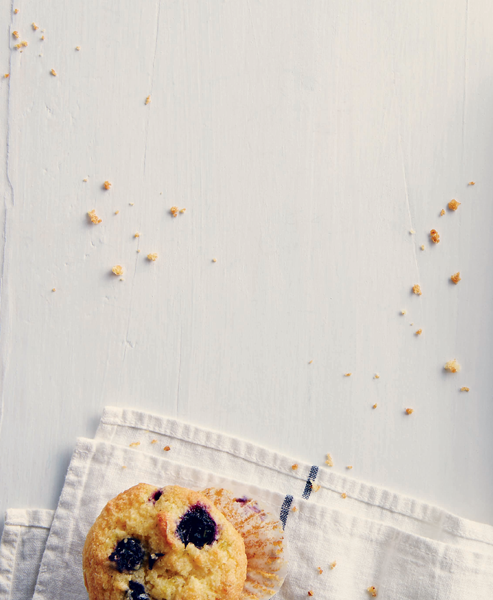
BLUEBERRY-LIME CORNMEAL MUFFINS
Talk about messy: These are not pack-in-your-lunch-bag muffins. They’re more have-a-cup-of-tea-and-a-nice-chat muffins. Although the cornmeal base is studded with blueberries, lime is the anchor. It balances the sweetness of the cornmeal, brightens the freshness of the blueberries, and smooths the edges of the honey. With its own glaze and butter, lime works its way into every layer of this deliciously messy muffin.
MAKES 18 | COMMITMENT LEVEL: DONE IN STAGES
2 cups all-purpose flour
1 cup fine ground cornmeal
2 teaspoons baking powder
1 teaspoon baking soda
½ teaspoon fine sea salt
¾ cup granulated sugar
¼ cup brown sugar
1 egg, at room temperature
1 cup buttermilk
¾ cup melted butter
1 teaspoon pure vanilla extract
Peel of 1 lime, finely grated
1½ cups fresh or frozen unthawed
blueberries (wild, if you can get them)
LIME GLAZE
½ cup granulated sugar
¼ cup fresh lime juice
Peel of 1 lime, finely grated
WHIPPED HONEY-LIME BUTTER
(OPTIONAL)
½ cup butter, at room temperature
1 tablespoon honey
Peel of 1 lime, finely grated
1 tablespoon fresh limejuice
Generous pinch of fine sea salt
1. To make the muffins: Preheat the oven to 400°F. Line 18 muffin cups with paper or parchment liners.
2. In a large bowl, sift together the flour, cornmeal, baking powder, baking soda, and salt.
3. In a medium bowl, mix together the granulated sugar, brown sugar, egg, buttermilk, butter, vanilla, and lime peel.
4. Add the blueberries to the flour mixture and toss to coat. Pour the buttermilk mixture over the flour mixture and, using a spatula, mix until the batter is just combined. Don’t overmix.
5. Using a ¼-cup scoop, fill the muffin cups. Bake for 17 to 20 minutes, or until the muffins are golden brown and a wooden pick inserted in the center comes out clean. While the muffins are baking, make the glaze and whipped butter (if using).
6. To make the glaze: In a small bowl, mix the sugar, lime juice, and lime peel until the sugar is dissolved. Set aside. Stir well just before using.
7. To make the whipped butter: In a small bowl, using an electric mixer on low speed, blend the butter, honey, lime peel, and lime juice. With the electric mixer on high speed, whip for 3 minutes, or until light and fluffy. Add salt to taste.
8. Allow the muffins to cool for a few minutes in the pans before transferring to a rack. While still warm, dip the tops of the muffins into the glaze. Turn upright, poke a few holes in the tops with a skewer, and spoon the remaining glaze evenly over the muffins. Allow to cool. Serve with regular butter or whipped honey-lime butter.
NOTE: These muffins will keep in an airtight container in the refrigerator for a couple of days. If they last that long.
LEMONY STRAWBERRY-PEACH MUFFINS
Whoever developed the ever-bearing strawberry should be given Lemony Strawberry-Peach Muffins for life and be named Matchmaker of the Year. Thanks to the breakthrough that extended berry season, local strawberries can finally meet their soul mate—peaches. In a classic case of “opposites attract,” diminutive seed-speckled berries unite with voluptuous stone fruit. A bit of lemon acts as chaperone to keep things from getting out of hand. The result is a sweet, tender muffin dotted with color and capped with a crunchy sugar top. Based on extended observation, I think these crazy kids just might make it.
MAKES 12 | COMMITMENT LEVEL: READY IN AN HOUR OR LESS
1 small peach
½ cup sliced strawberries
½ cup granulated sugar
½ cup butter, at room temperature
Peel of 1 lemon, finely grated
2 eggs, at room temperature
1 teaspoon pure vanilla extract
1½ cups all-purpose flour
1 teaspoon baking powder
½ teaspoon baking soda
¼ teaspoon fine sea salt
½ cup buttermilk
2 tablespoons turbinado sugar
1. Preheat the oven to 375°F. Line a 12-cup muffin pan with paper liners.
2. Peel and chop the peach into a strainer placed over a bowl to catch the juices (you should have ½ cup chopped peach). Too much juice will make the batter soggy. Don’t discard the juice. Put it in a smoothie or drink it as is. Add the strawberries to the peaches and toss to evenly distribute.
3. In a large bowl, either by hand or using an electric mixer on high speed, beat the granulated sugar, butter, and lemon peel until light and fluffy. Add the eggs and vanilla and beat until well combined.
4. In a medium bowl, combine the flour, baking powder, baking soda, and salt. With a spoon or spatula, stir the flour mixture into the butter mixture, alternating with the buttermilk, beginning and ending with the flour. With each addition, stir only until the ingredients are combined. Gently fold in the fruit. Do not overmix.
5. Using a ¼-cup scoop, fill the muffin cups. Top with a generous sprinkle of turbinado sugar. Bake for 25 minutes, or until a wooden pick inserted in the center comes out clean. Cool in the pan for 5 minutes before transferring to a rack to cool completely.
NOTE: Store muffins in an airtight container in the refrigerator for up to 3 days.
TIP: If possible, slice the fruit chilled. It will reduce the amount of juice you lose.
GINGER AND VANILLA SCONES
Many scones are merely a delivery system for jam and clotted cream. But these? They need little more than a kiss of butter and a thank-you. Sweet and tender, these scones maintain their clear vanilla base even though they’re packed with chewy bits of candied ginger. If you must top them with something beyond butter, try a dab of gentle pear-and-ginger conserve or a smear of local flower honey.
MAKES 12 | COMMITMENT LEVEL: READY IN AN HOUR OR LESS
2¼ cups all-purpose flour
¼ cup sugar (vanilla sugar if you have it, page 39)
1 tablespoon baking powder
½ teaspoon baking soda
½ teaspoon fine sea salt
½ cup cold butter, cubed
1 cup minced crystallized ginger
1 tablespoon pure vanilla extract
1 cup buttermilk
1. Preheat the oven to 425°F.
2. Hand method: In a large bowl, mix the flour, sugar, baking powder, baking soda, and salt. Using a pastry blender or 2 knives, cut the butter in until it’s the size of peas.
Food processor method: In the bowl of a food processor fitted with a steel blade, combine the flour, sugar, baking powder, baking soda, and salt with a few pulses. Add the butter and pulse until it’s the size of peas. Transfer the flour mixture to a large bowl.
3. By hand, stir the ginger into the flour mixture, tossing well to distribute evenly.
4. Stir the vanilla into the buttermilk. Pour over the flour mixture and stir until the dough forms a ball. On a floured surface, knead the dough until it just comes together. Roll until it’s ¾” thick. Using a biscuit cutter or glass, cut into 3” circles. Gather the leftover dough, roll it again quickly, and cut more circles. Don’t roll a third time or the scones will be tough. Don’t throw out the leftover dough, though. Instead, use your fingers to squish the scattered bits into one final lumpy scone. Our family calls this the ugly scone, but for all its lumps, we fight for who gets the privilege to eat it.
5. Place the scones on an ungreased baking sheet and bake for 12 to 15 minutes, or until golden. Serve immediately.
NOTE: Scones are best eaten right away. Leftovers can be stored in an airtight container for up to 5 days. To reheat, split the scone open and pop it under the broiler. Serve with butter and jam.
TIP: For a quick breakfast, mix together the dry ingredients and cut in the butter the night before. Store the butter-and-flour mixture in the fridge overnight. In the morning, add the wet ingredients and cut the scones while the oven heats.
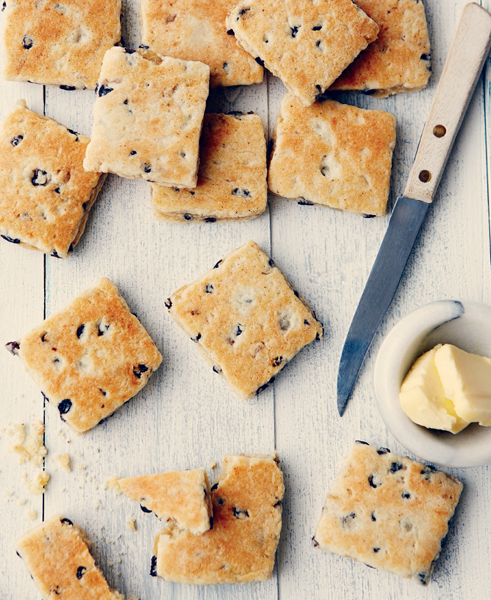
WELSH GRIDDLE CAKES
This recipe emerged from hibernation when I temporarily moved in with my parents during a kitchen renovation that took over our small house. Taking advantage of our time together, Mom pulled out old, nearly forgotten family recipes. While we chatted, she diligently rolled out the dough, cut it into squares, and cooked the griddle cakes. We ate them with tea. When the tea was gone, we ate them with a smear of butter and a scrape of ginger marmalade. The sweet currants, bits of ginger, and gentle spices combine in an old-fashioned treat that is nearly impossible to resist. Comforting and approachable, this is one of my most requested recipes. Although we never have enough when people drop by for tea, you can halve this recipe.
MAKES 4 TO 5 DOZEN | COMMITMENT LEVEL: READY IN AN HOUR OR LESS
3 cups all-purpose flour
1 cup sugar
1½ teaspoons baking powder
1 teaspoon fine sea salt
½ teaspoon baking soda
1 teaspoon freshly ground nutmeg
¼ teaspoon ground mace
1 cup cold unsalted butter, cubed
1 cup currants
¾ cup finely chopped crystallized ginger
2 eggs, at room temperature
6 tablespoons milk
1. In a large bowl, whisk together the flour, sugar, baking powder, salt, baking soda, nutmeg, and mace.
2. Using a pastry blender or 2 knives, cut in the butter until it resembles coarse crumbs. Add the currants and ginger and toss lightly to coat thoroughly with the flour mixture.
3. In a small bowl, whisk the eggs and milk together until well combined. Pour over the dry ingredients. Mix to make a stiff dough. Divide the dough in half.
4. Heat an ungreased griddle or a large nonstick frying pan (or 2) over medium-low heat. Alternatively, you can set an electric frying pan to 250°F. You might have to fiddle with the heat to find the “sweet spot” for your griddle or pans. This is a make-again recipe.
5. On a floured surface, roll the first half of dough to a square approximately 10” × 10” and ¼” thick. Cut into 2”-wide squares.
6. Cook the cakes for 8 to 10 minutes, turning once, or until golden brown and cooked all the way through. While the griddle cakes are cooking, roll and cut the second half of the dough. Serve hot or cold.
NOTE: Griddle cakes will keep in an airtight container for up to a week.
Variation: Swap chopped dried cranberries for the currants.
TIP: Mace is the outer skin of nutmeg. It’s a bit spunkier than nutmeg, with hints of clove and pepper. If you can’t find it, substitute the same amount of nutmeg, allspice, or apple pie spice.

DEEP DARK CHERRY AND CHIPOTLE BROWNIES
I first learned about the chocolate-chile combination when I saw the movie Chocolat. I was so intrigued that I raced home to make a cup of chile-laced hot chocolate just to test the theory. No matter that I’d attended the late show. Curiosity won out over sleep. I’ve been playing with variations of this duo ever since. A rich, chewy brownie seemed the perfect platform. The tartness of the cherries plays against the smoky warmth of the chile, and it’s all wrapped up in a rich, deep dark chocolate brownie.
MAKES 20 | COMMITMENT LEVEL: READY IN AN HOUR OR LESS
2 ounces bittersweet chocolate, coarsely chopped
⅓ cup milk
6 tablespoons unsalted butter
¾ cup all-purpose flour
¾ cup unsweetened cocoa powder
½ teaspoon baking powder
1 teaspoon ground chipotle chile pepper
(½ teaspoon if you want only a hint of heat)
¼ teaspoon fine sea salt
1 cup granulated sugar
½ cup packed brown sugar
1 cup chopped dried tart cherries
1 teaspoon pure vanilla extract
2 eggs, at room temperature
1. Preheat the oven to 350°F. Line a 9” × 9” baking pan with an extra-long piece of foil that hangs over opposite edges. Coat with cooking spray.
2. In a medium bowl, melt the chocolate, milk, and butter together gently. You can do this in the microwave on medium power in 60-second bursts, stirring in between. Alternatively, you can place the chocolate, milk, and butter in a heatproof bowl over a pot of simmering water and stir gently until all the ingredients are dissolved.
3. Into a large bowl, sift the flour, cocoa, and baking powder. Add the chile pepper, salt, granulated sugar, and brown sugar and stir until well blended. Add the cherries and toss to coat with the flour mixture. This way they won’t sink to the bottom while baking.
4. Whisk the vanilla into the eggs. Add to the melted chocolate mixture and stir to combine. Pour into the flour mixture and stir to combine. Pour the batter into the pan, pushing the batter to the edges.
5. Bake for 35 minutes, or until a wooden pick inserted halfway between the side and the center comes out clean. Allow the brownies to cool on a rack before removing from the pan using the foil overhang. Do not turn the brownies out upside down. They will not survive being uprighted. Instead, leave the brownies in the foil and cut them into squares as needed. Leaving the pan of brownies intact as long as you can helps keep them moist. Serve with vanilla bean ice cream or a dollop of crème fraîche (page 224) or with nothing else at all.
NOTE: To store, just wrap the foil around the brownies and store in an airtight container or a resealable plastic bag with the air squeezed out.
TIP: You can vary the flavors.
♦ Try cinnamon or ground ancho chile pepper instead of the chipotle.
♦ Substitute walnuts for half of the dried cherries.